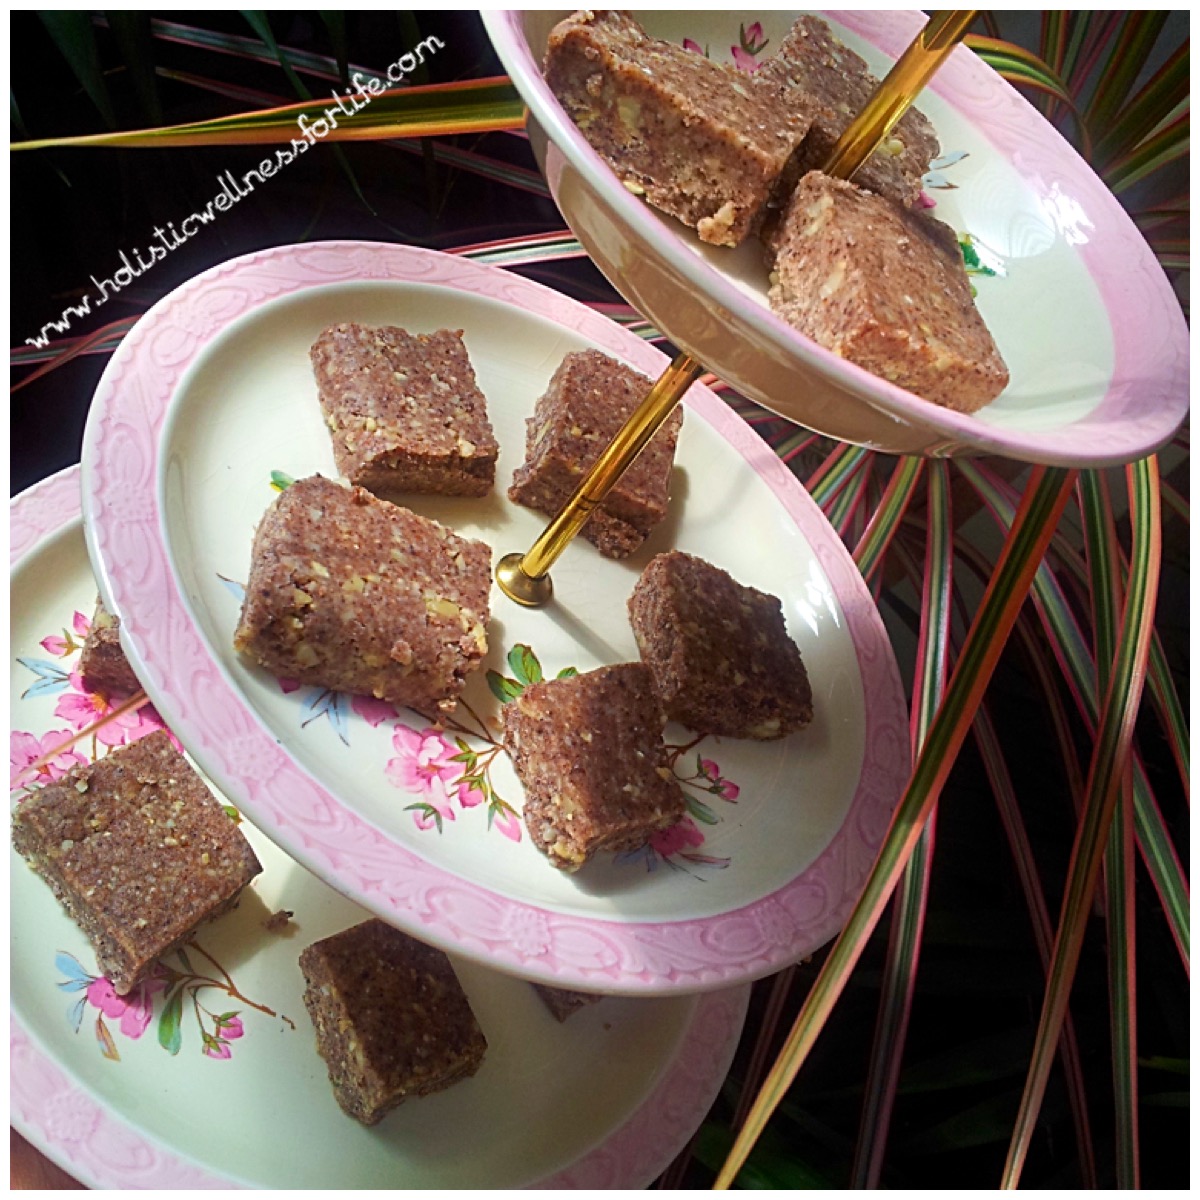
A creamy and satisfying raw and frozen slice which has a very high healthy fat content and is flavoured with the amazing Acai Berry Powder which is an excellent source of anti-oxidants.
Extremely delicious and easy to make.
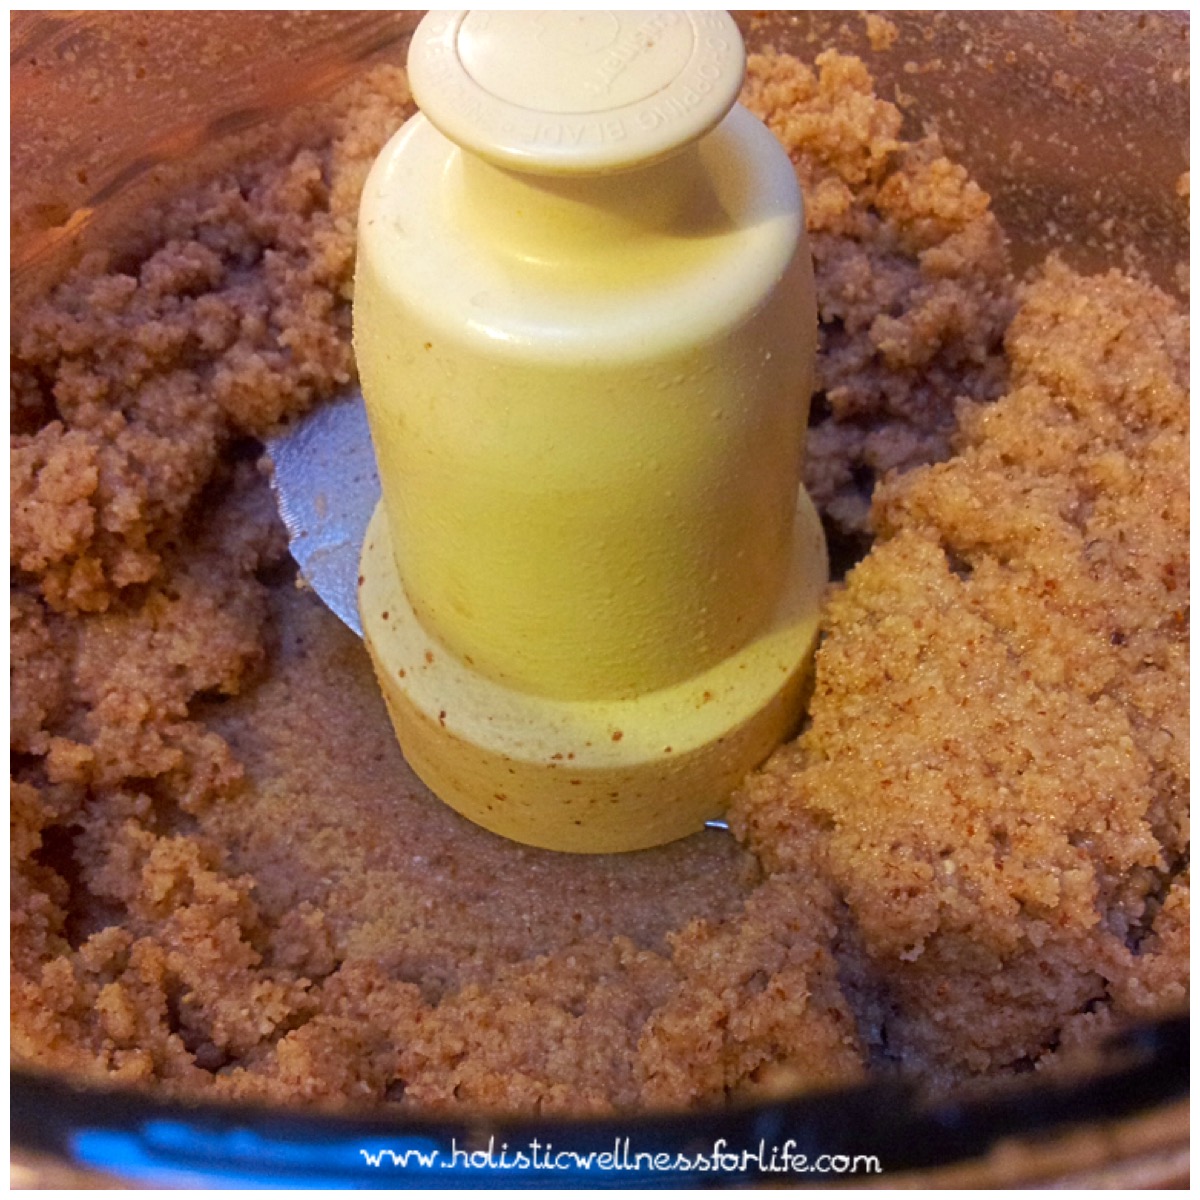
I have used a home made almond nut butter in this recipe but you could use one that has been commercially made. I like to activate my nuts to remove the anti-nutrients and by making the nut butter myself l can be assured of the ingredient content.
Making the Nut Butter:
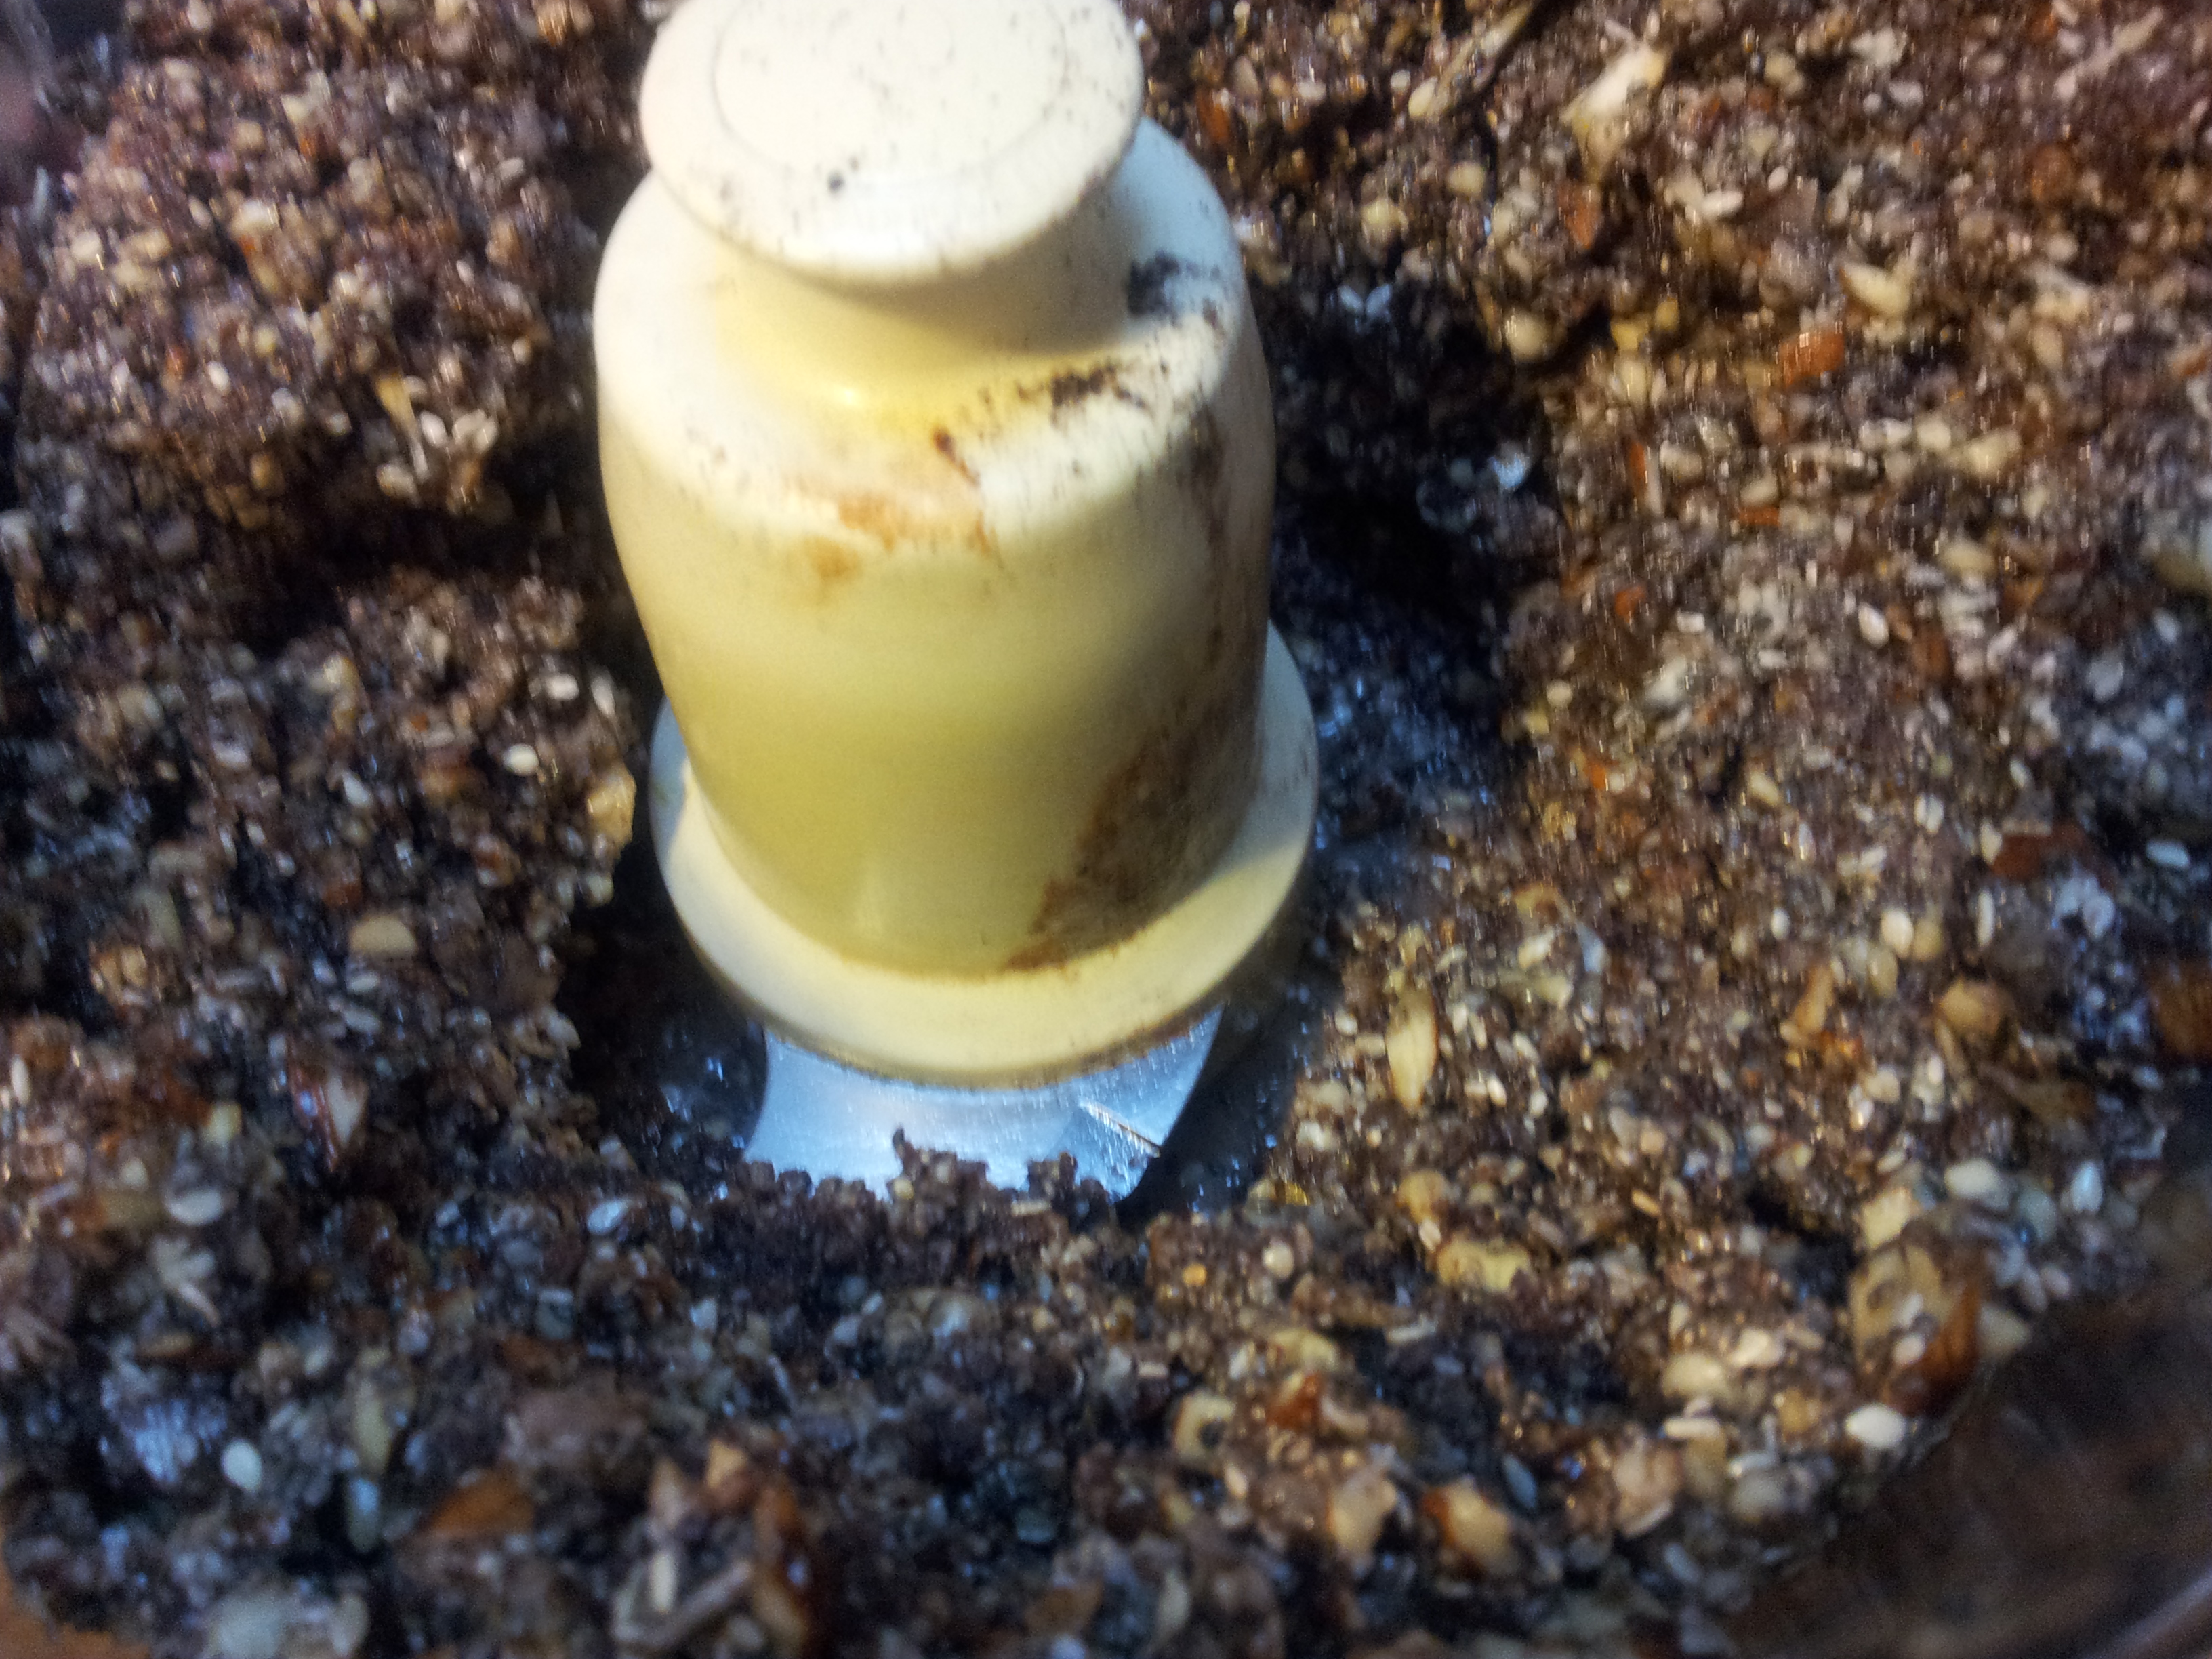
You require 2 cups of raw nuts which have been soaked in filtered water and 1 tablespoon of sea salt for up to 24 hours for hard nuts such as almonds and around 6 hours for softer nuts such as cashews. They then need to be dehydrated as otherwise the nut butter will be too moist. Rinse well then add to the food processor with the chopping blade attachment and 1 cup of organic coconut oil, 2 pinches of pink Himalayan Rock Salt and 1 teaspoon of raw organic honey. Process until creamy. This can take up to ten minutes and it is a good idea to stop the food processor and wipe down the edges with a spatula so everything is evenly processed. You can keep this nut butter in the fridge for several days or use some of it as a spread and the rest in this lovely slice recipe.
Keep processing until it is smooth and creamy
Making the Slice:
Ingredients:
1 1/2 cups of home made nut butter (I used almond)
1 1/2 cups raw activated cashews
3 level tablespoons raw organic honey
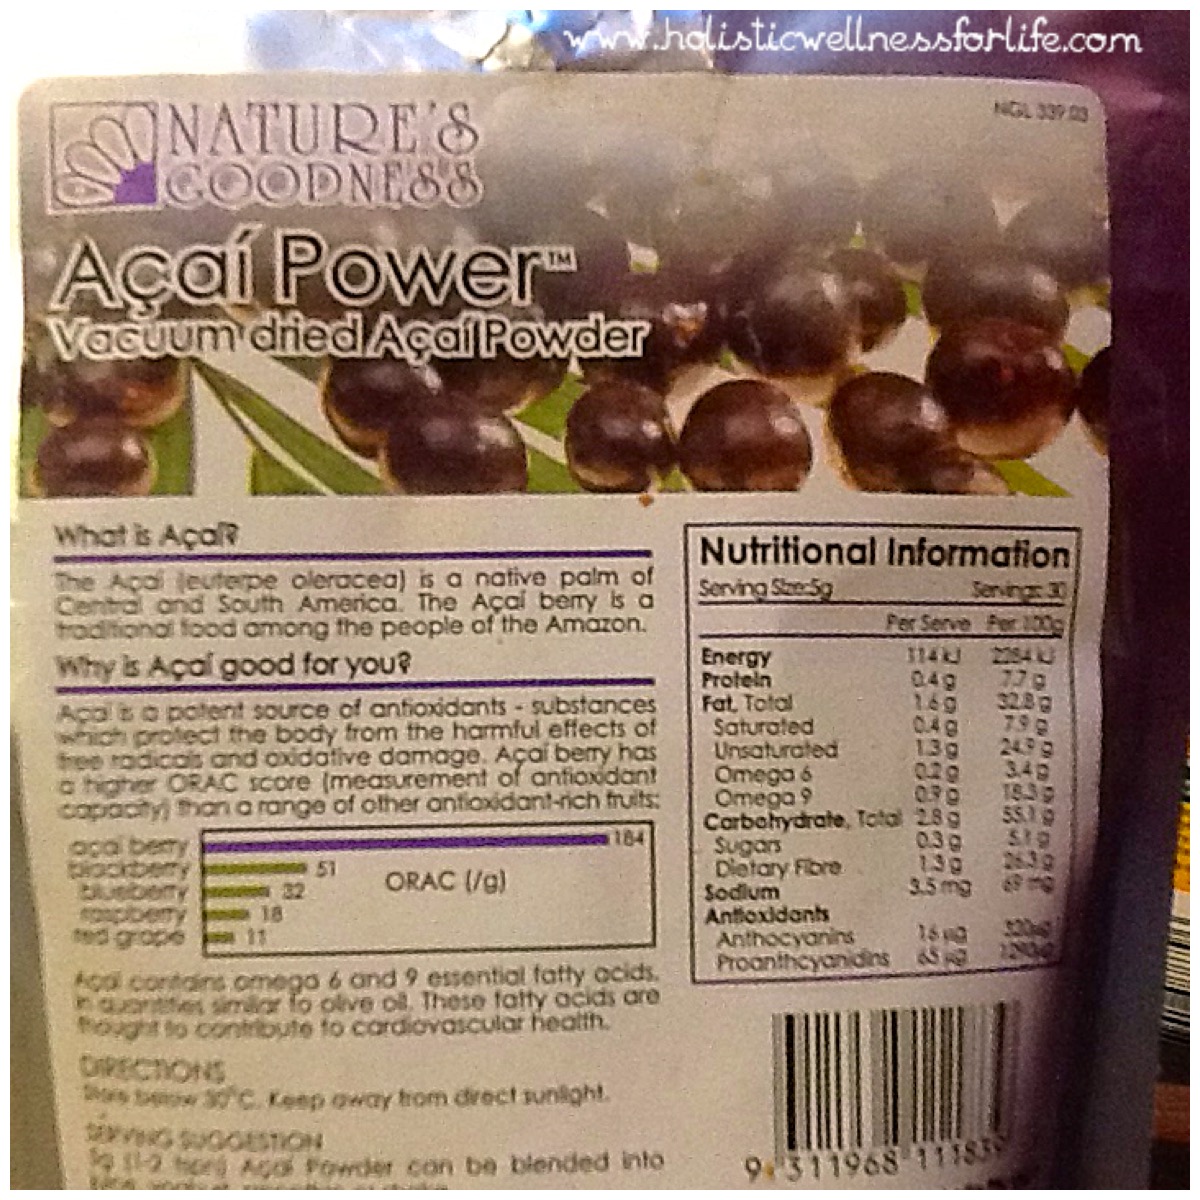
2 generous tablespoons Acai Berry Powder (This can be substituted for another Superfood powder or raw cacao).
This powder is great in smoothies as well.
Method:
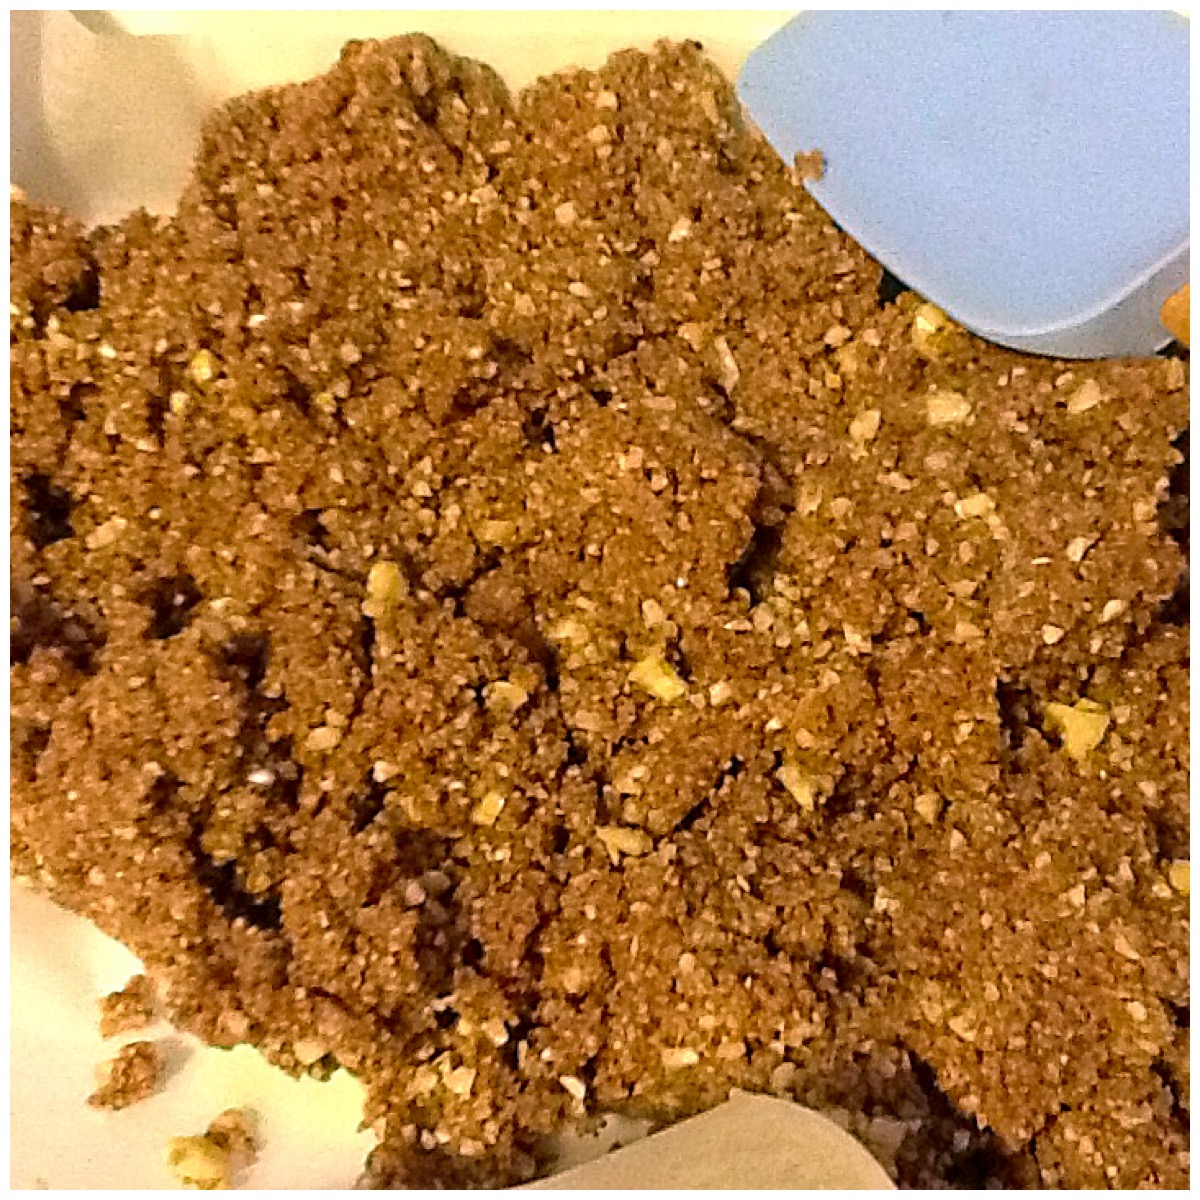
Add the ingredients to the food processor using the chopping blade. Process until well combined. Place the ingredients in a dish generously lined with baking paper and smooth out with a spatula.
A quick taste test now is a good idea.All smoothed out and ready for the freezer
Place in the freezer to set for a couple of hours then slice into portions and return to the freezer.
Smaller slices are better.Have a piece or two and enjoy.
As this slice has a high healthy fat content it does soften quite quickly when at room temperature and l prefer to eat it straight from the freezer.
You can follow me daily on Instagram at holistic_paleo and Facebook at Primal Living Melbourne and Holistic Wellness For Life.
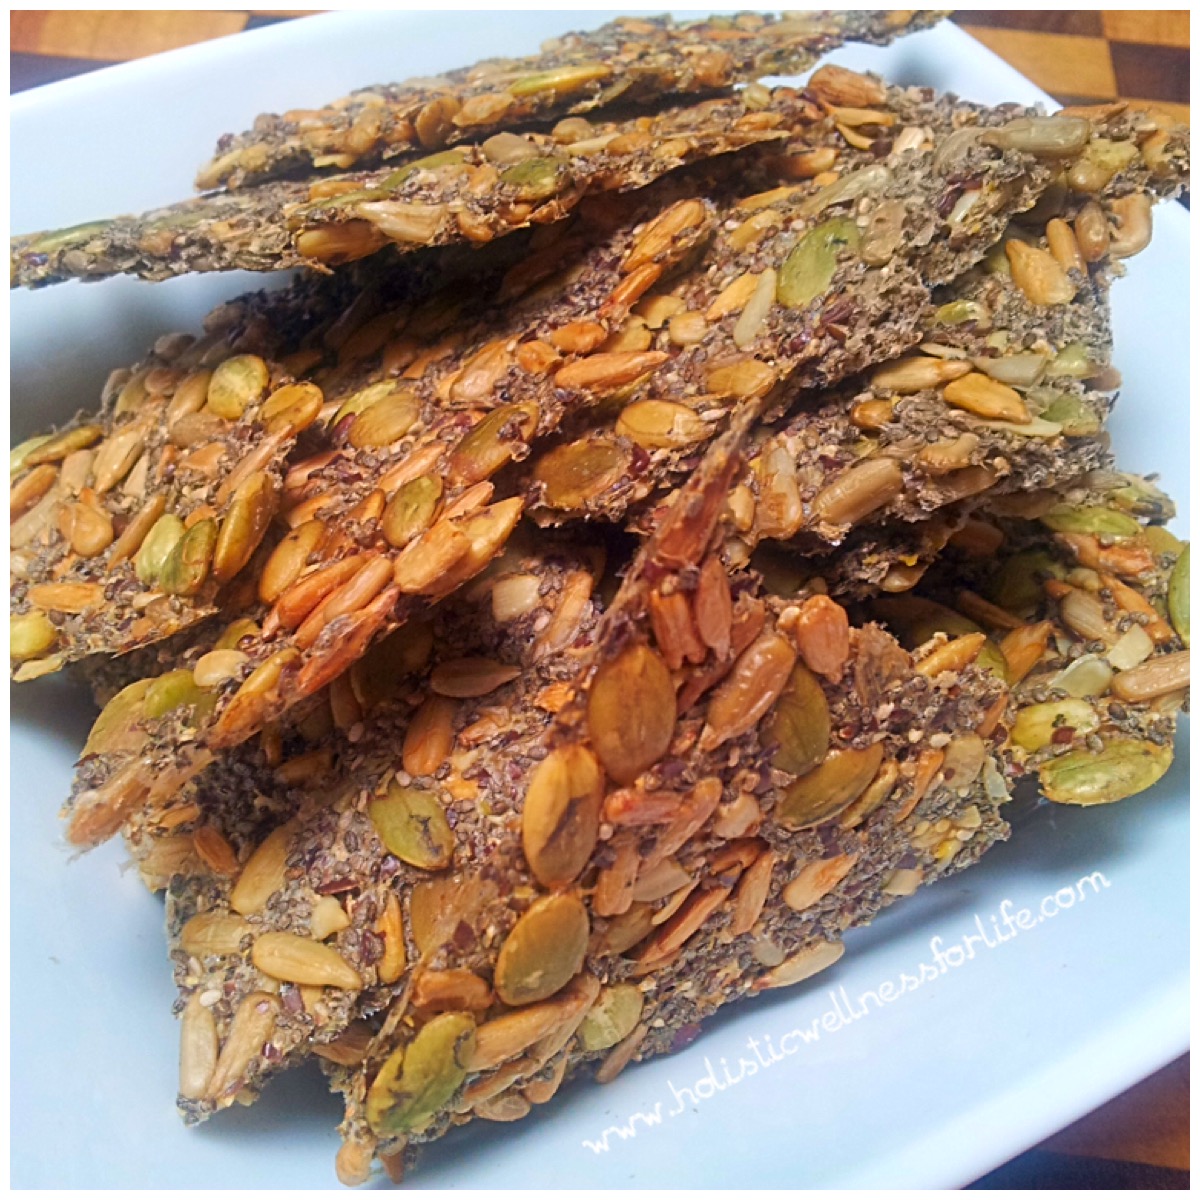
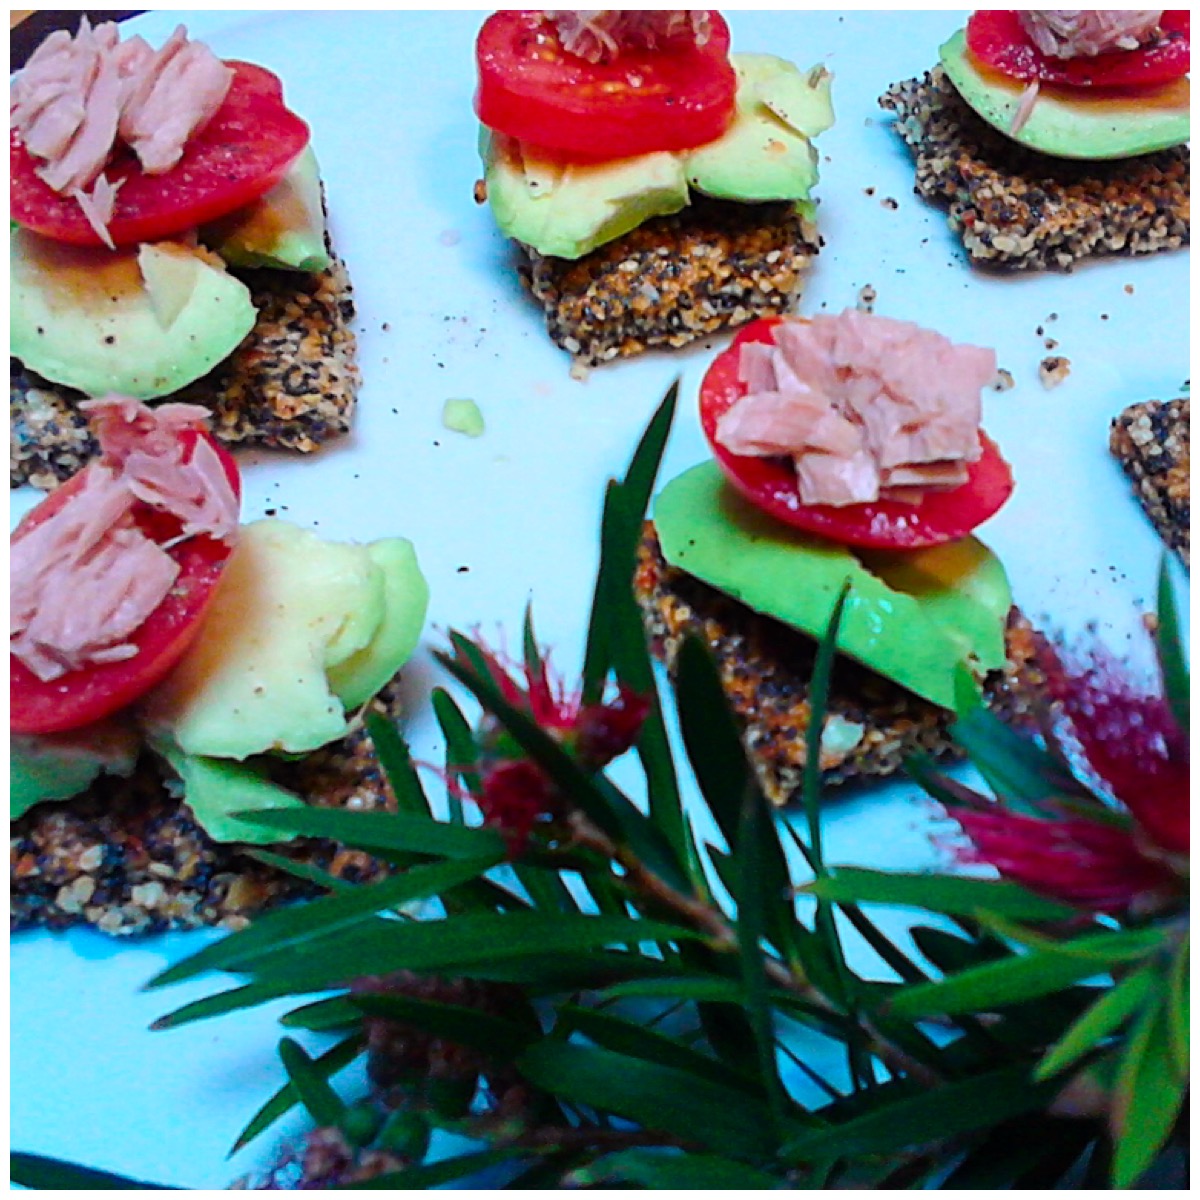
A crispy seed cracker with a hint of sea salt and a delicious tangy guacamole is a taste sensation and completely satisfying. Make a big batch of the crackers and have them on hand in the freezer to go with your favourite toppings.
A most delicious meal.
Making the Seed Crackers:
The seed crackers are really easy to make and just require a few ingredients plus some patience. Place one cup of water in a bowl and add to it one cup of mixed seeds (just under 1/2 cup each of raw activated pumpkin seeds and sunflower seeds. The cup will be almost full. Add on top one tablespoon of LSA mix and 2 tablespoons of black chia seeds. It’s o.k if it is overflowing a bit).
Pour the seeds into the water and give a stir.A double batch in the making
Add 1/2 a teaspoon of sea salt to the mixture and mix well. Let this sit for at least 15 minutes so it becomes a bit gluggly looking. Pre-heat the oven to 150 degrees celcius.
Pour the mixture onto a baking tray covered with a generous piece of baking paper. Smooth out with the back of a spoon until it is even and most of the tray is covered.
Place the mix into the oven for up to 1.5 hours or until the sunflower seeds are turning golden. It may require less time depending on your oven. Turn the oven off at this point and leave for one hour.
One huge cracker. Now break it into usable pieces.
The cracker mix should be able to be broken easily into pieces and used with your favourite meal, as a snack or frozen.
A delicious and versatile cracker.
Making the Guacamole:
Guacamole is very easy to make and a quick meal to create. You can use any volume of the ingredients you wish to make a dish that suits your tastes. I used two fresh avocado’s slightly mashed, 2 spring onion green tops chopped, some small orange tomatoes diced, the juice of half a lemon, pink rock salt and black pepper. Once you mix it all together you have guacamole and it is best eaten straight away. The colour of the tomatoes you use will alter the appearance of the guacamole and bright red ones look really excellent.
This is a very healthy meal or snack and one that can be enjoyed by many people. You can make a large batch of guacamole and serve as a dip with the crackers and this is sure to be popular with your family or guests.
You can follow me daily on Instagram or on Facebook at Holistic Wellness For Life or Primal Living Melbourne
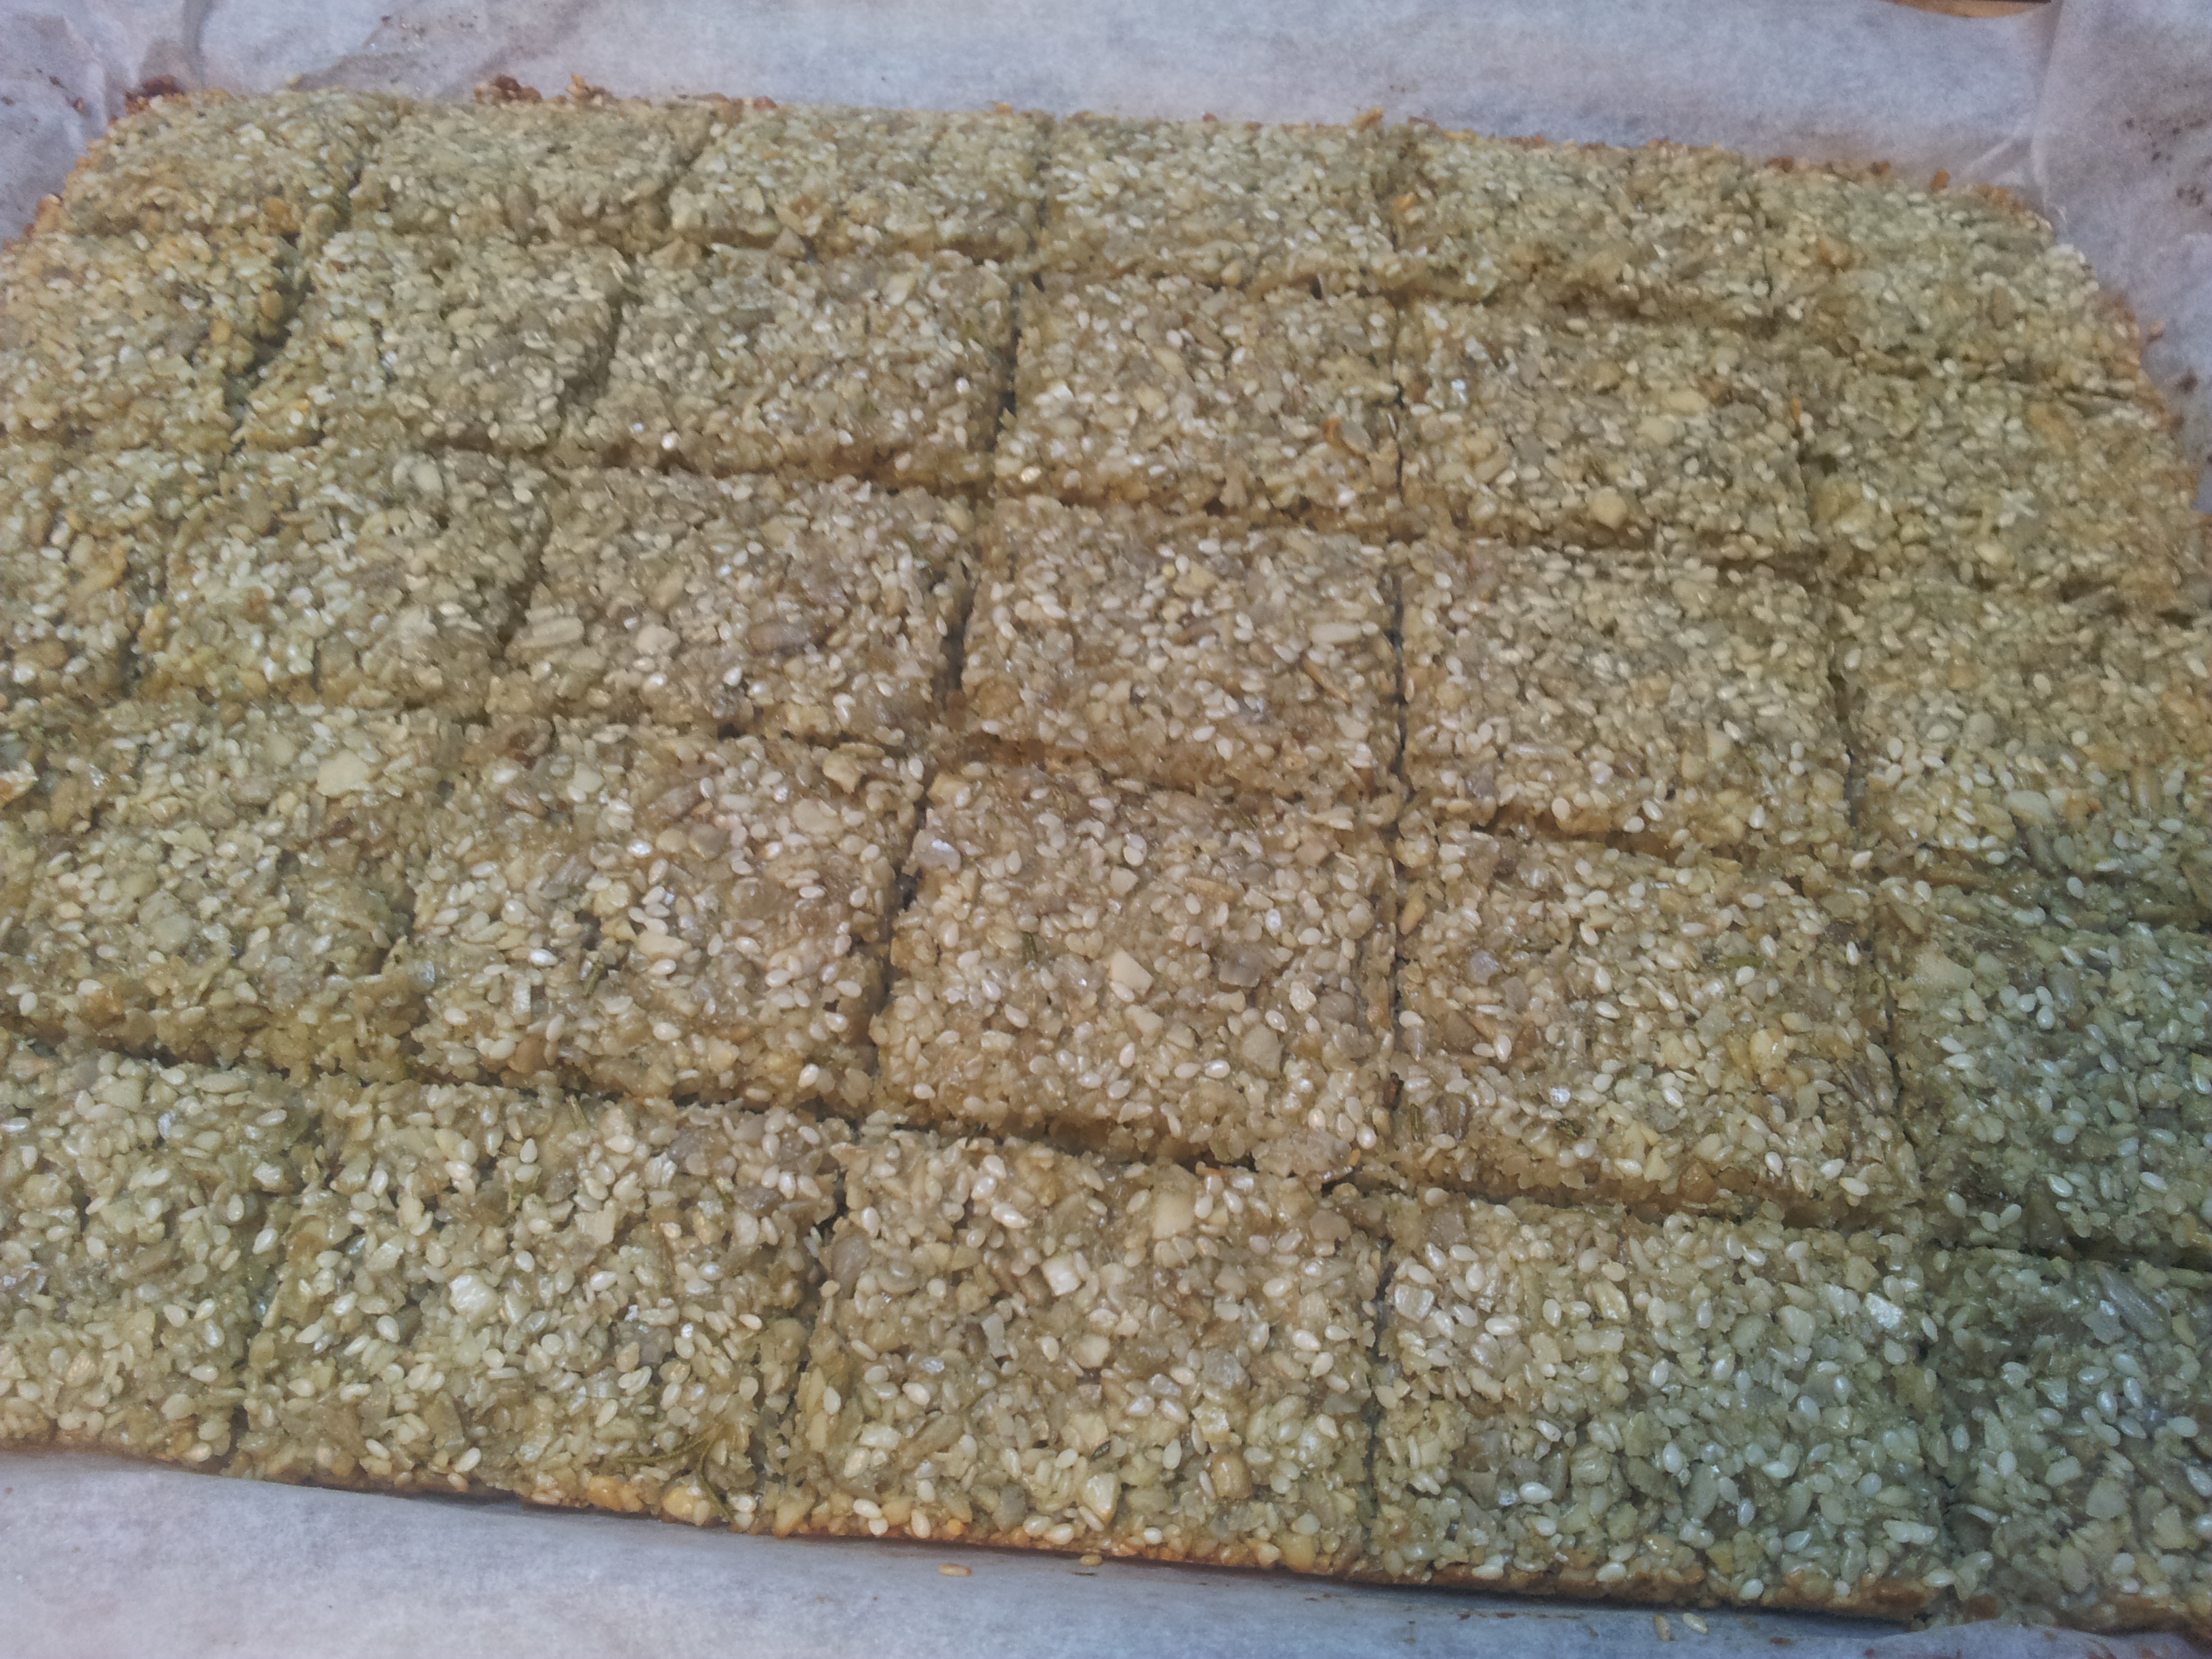
This is a handy gluten and dairy free cracker with a lovely flavour of rosemary and sea salt. They are softer than a regular cracker but are a good base for your favourite toppings and can be kept in the freezer and used as required.
Place your favourite toppings on or serve them plain.
Ingredients:
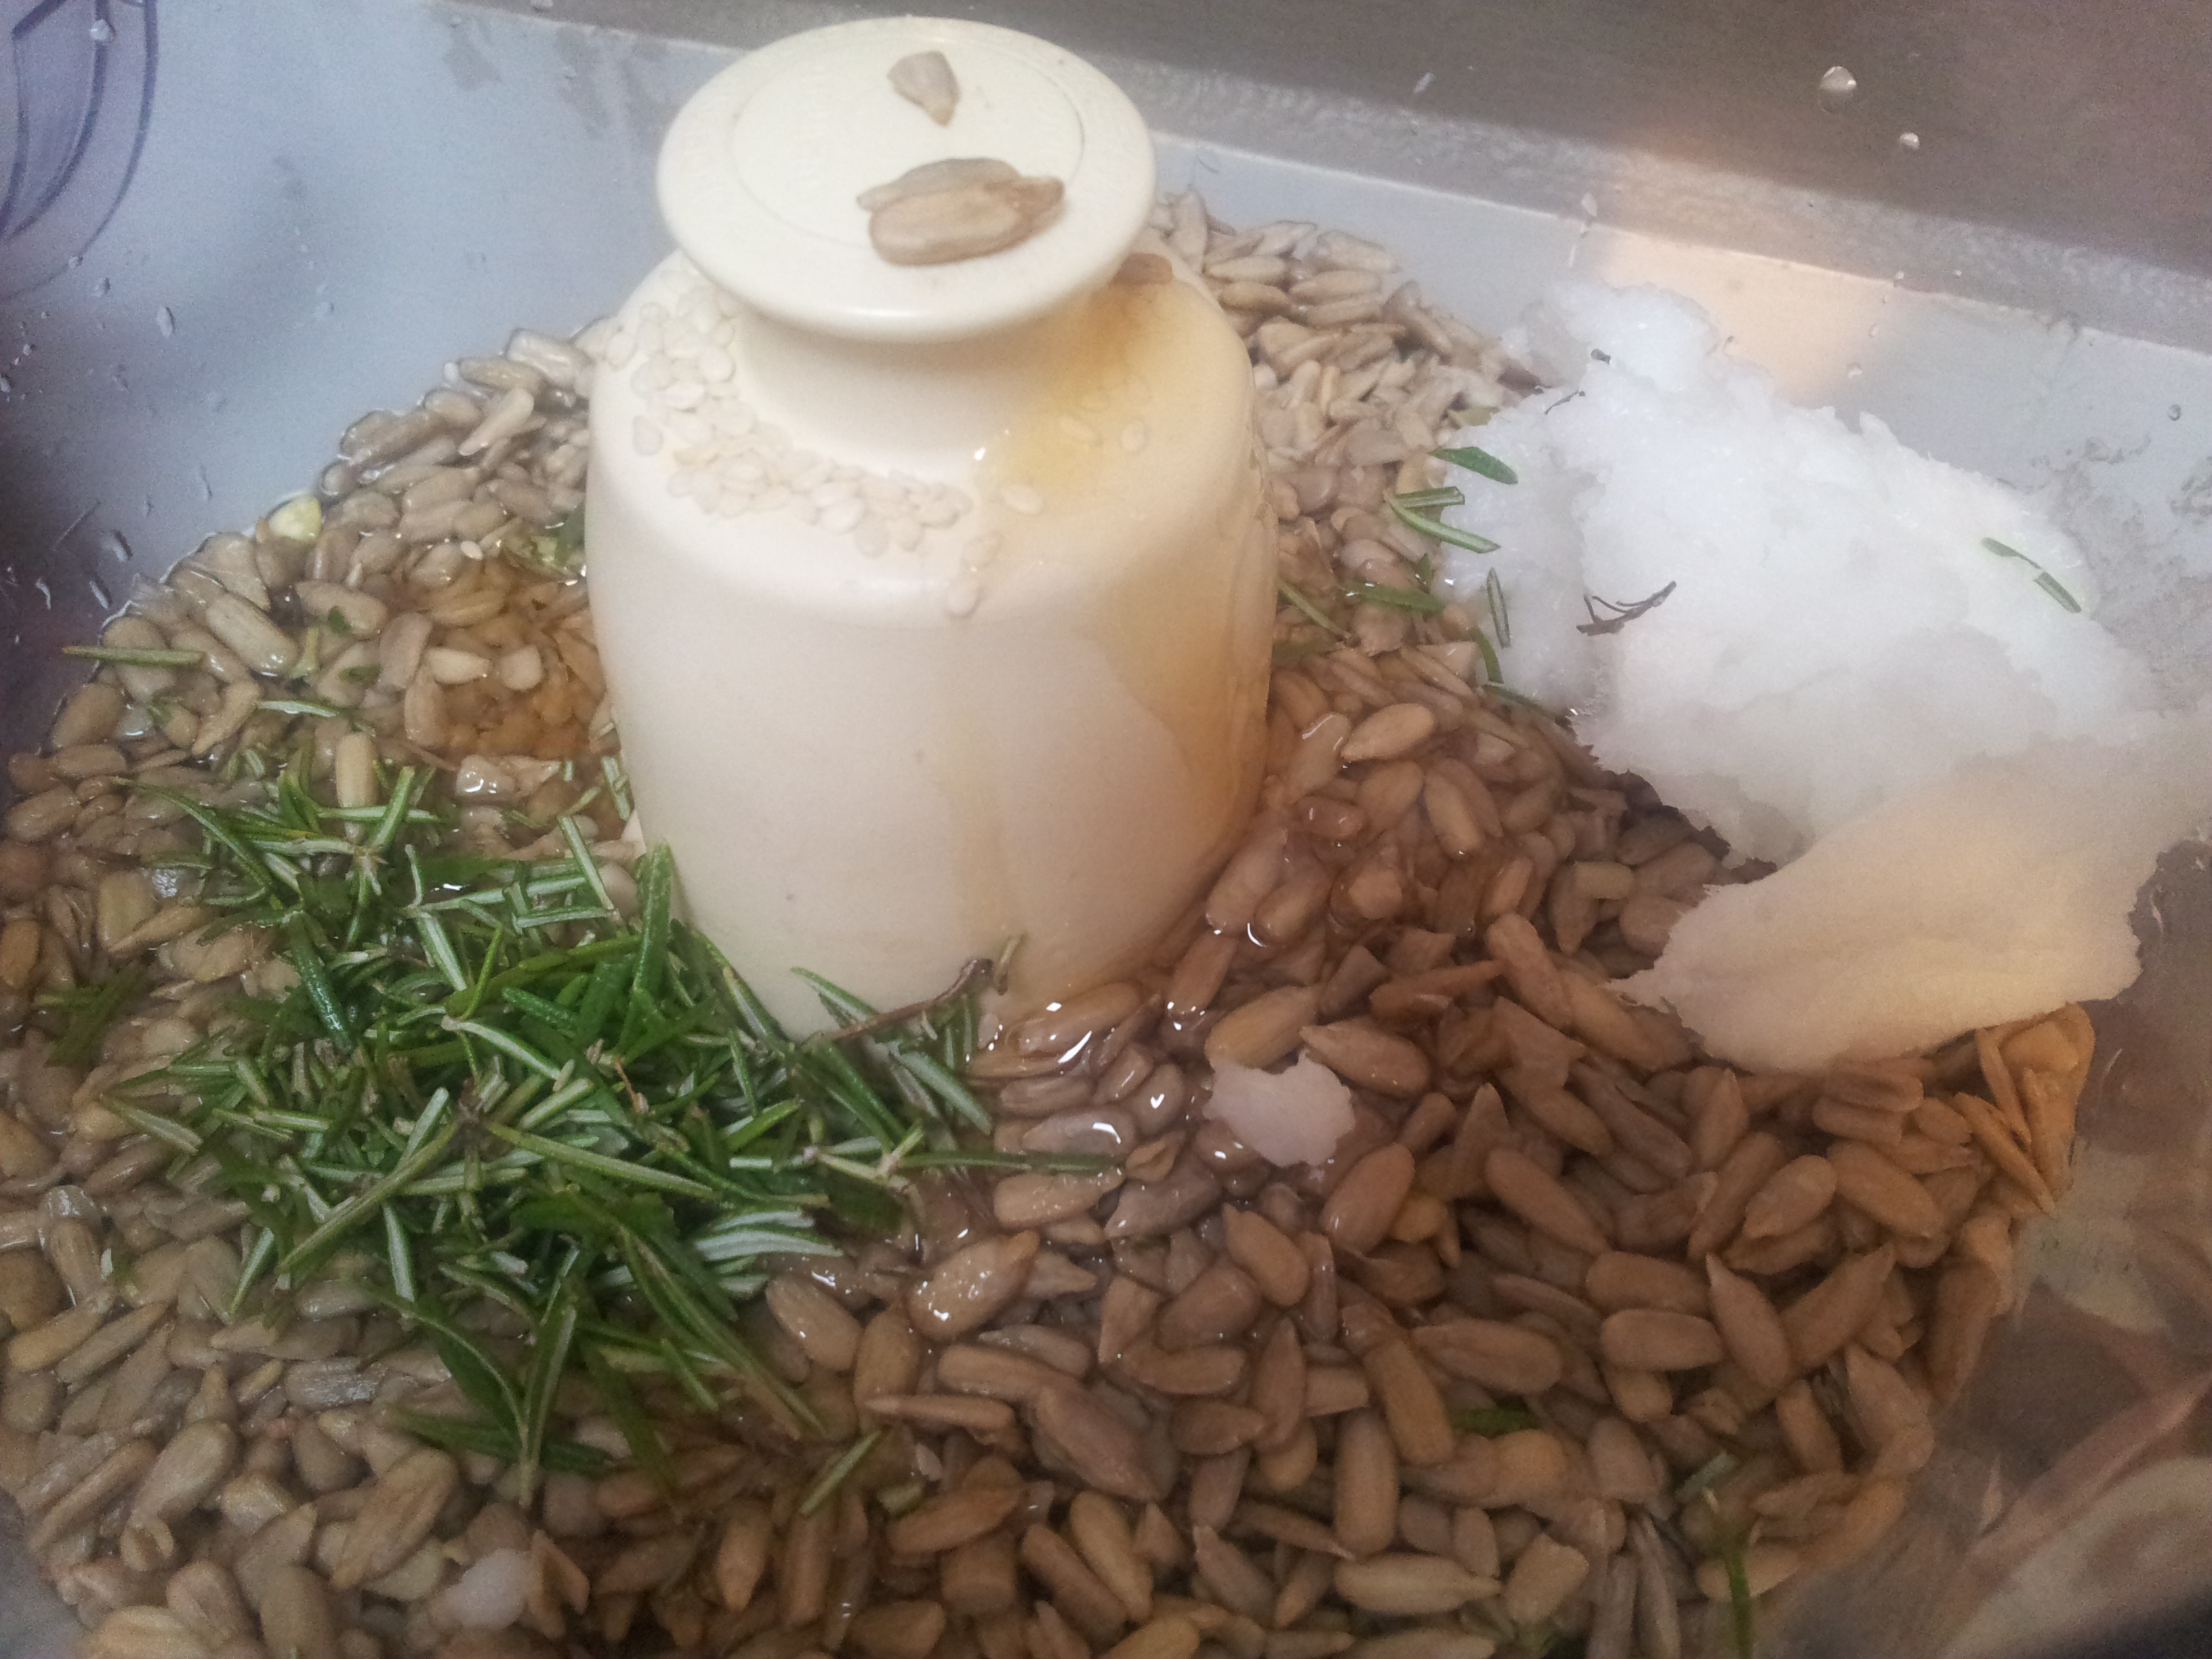
1 cup of organic sesame seeds
1 cup of organic pumpkin seeds
1 cup of organic sunflower seeds
1 generous tablespoon organic coconut oil
1 generous tablespoon raw organic honey
1 heaped tablespoon fresh rosemary
1/2 teaspoon sea salt
1 cup filtered water
Place all of the ingredients into the food processor and blend until smooth.
Ready to be mixed A smooth paste like mixture
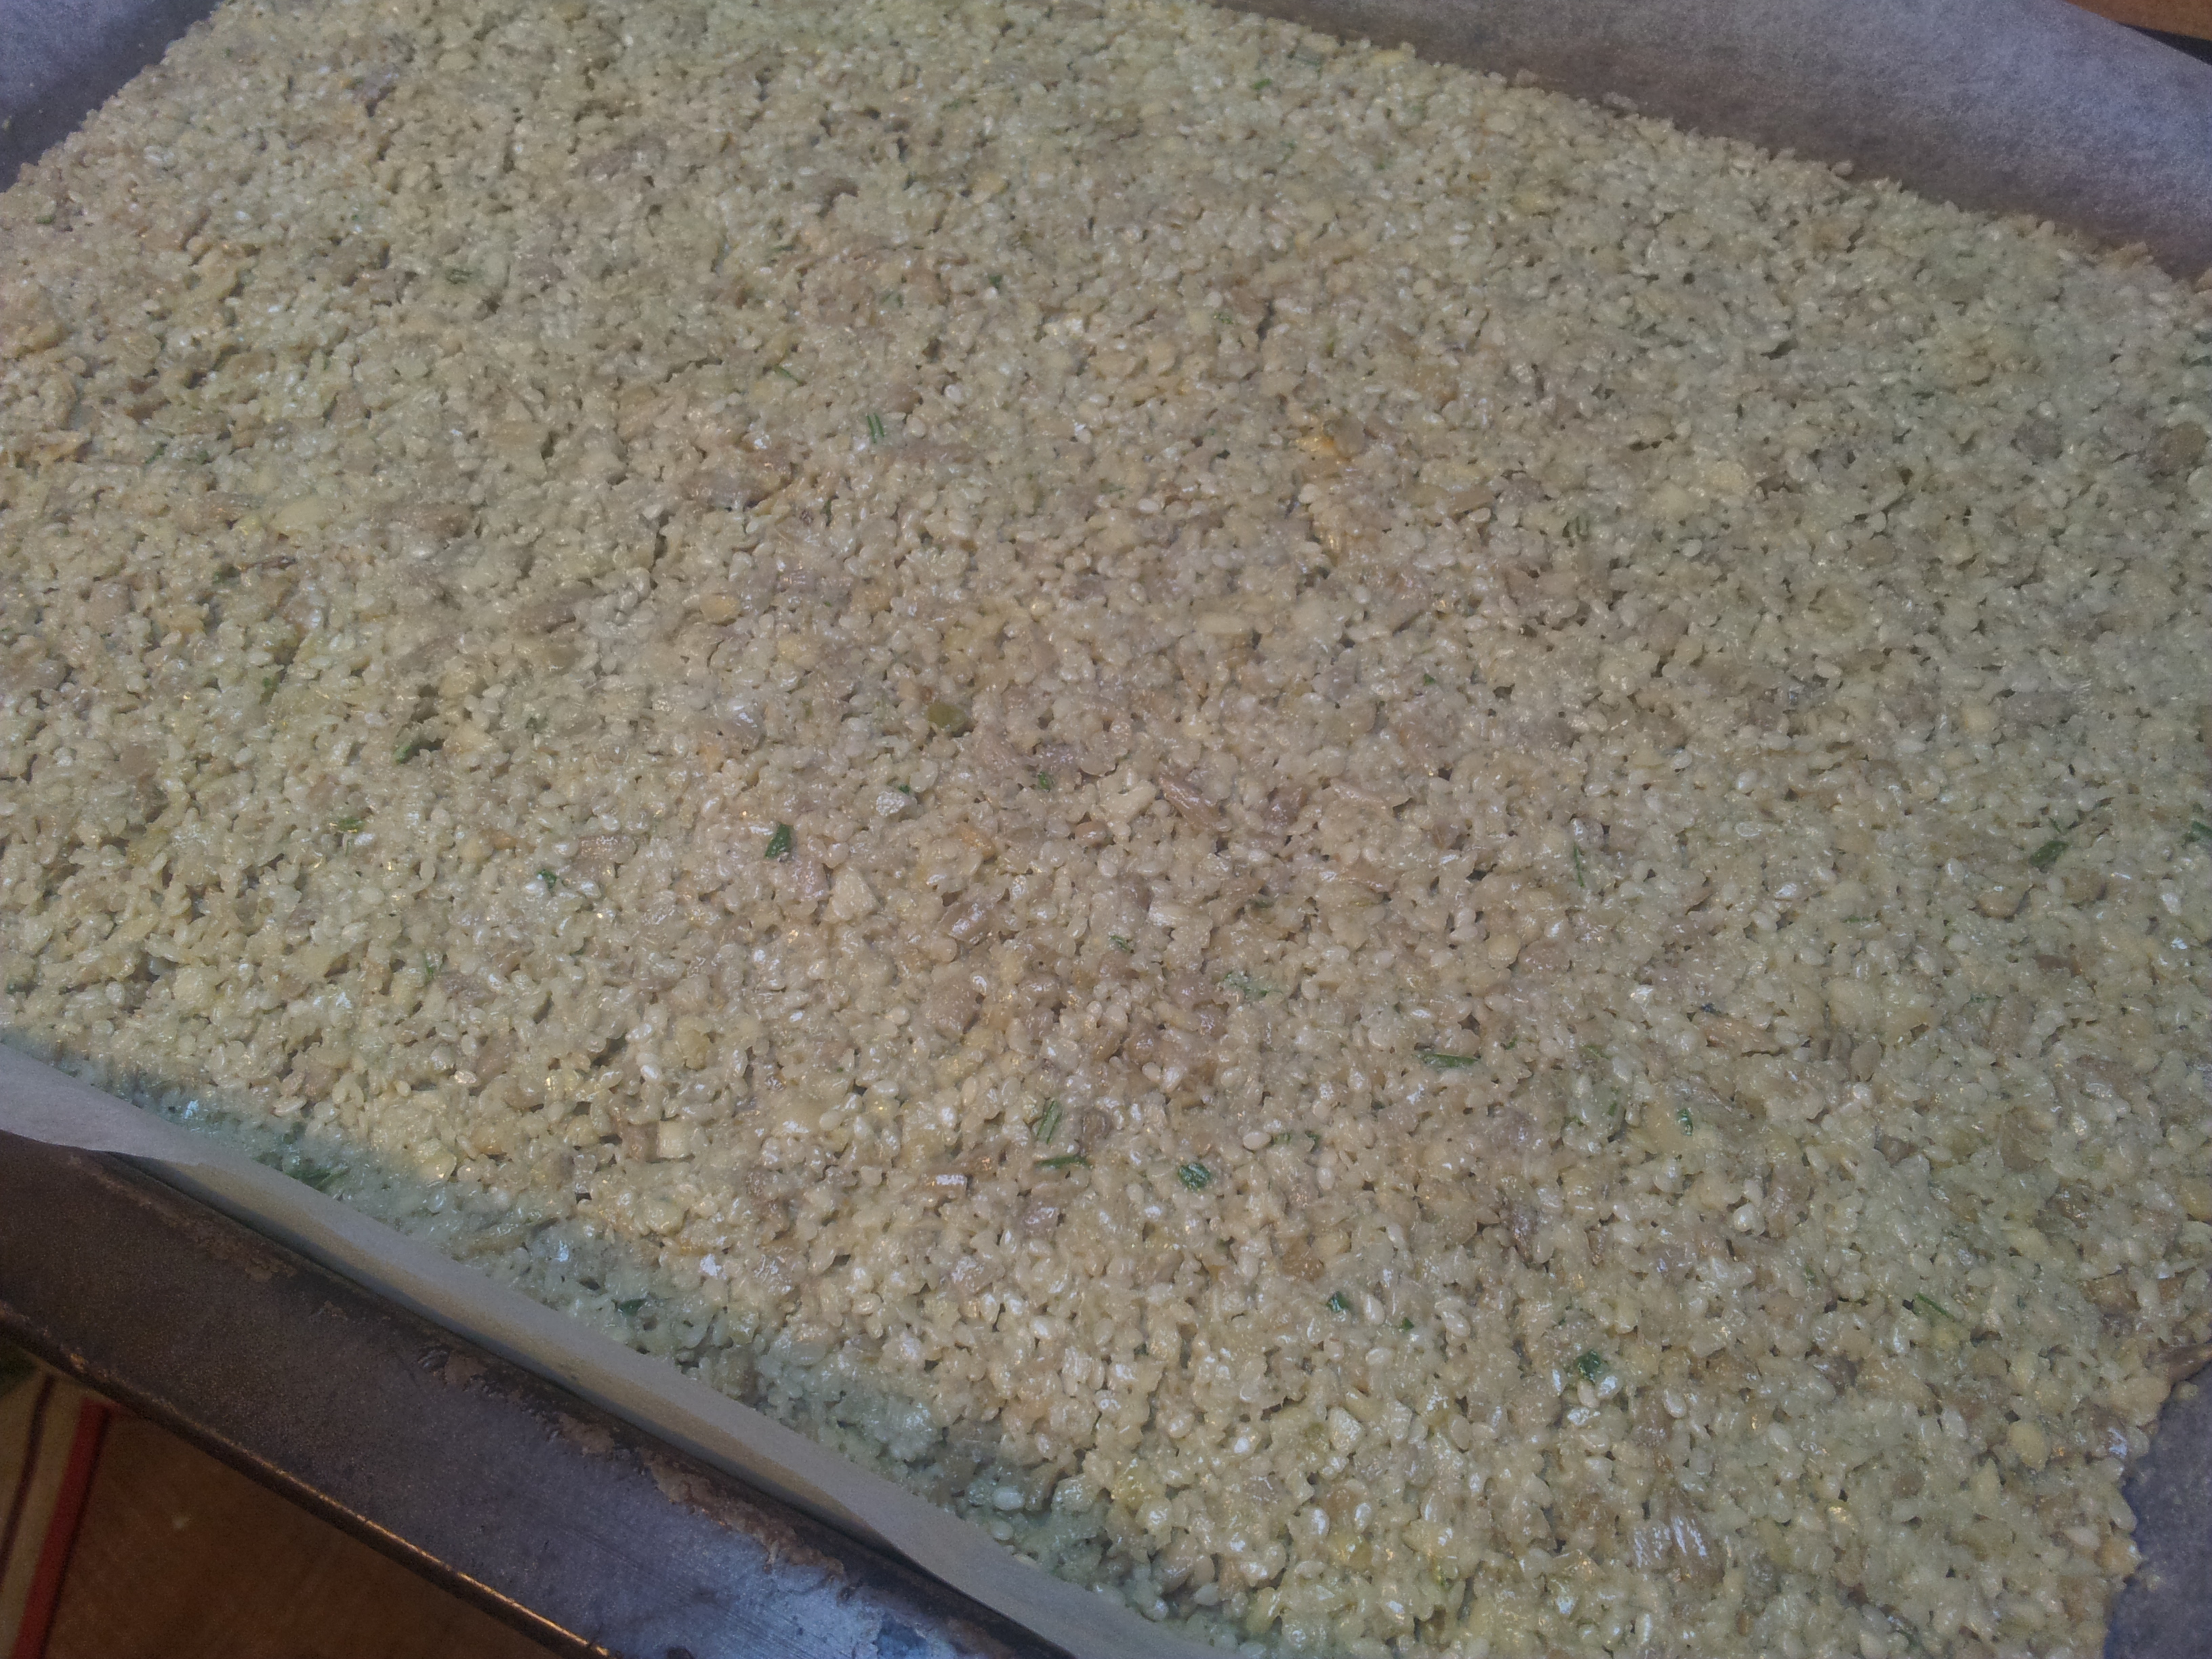
Spoon the mix into a tray (mine was 24cm x 34cm) generously lined with baking paper so it hangs over the edges and spread out smoothly with a spatula until even across the pan.
Make sure the mix is even and there isn’t a glut of mix in the middle.
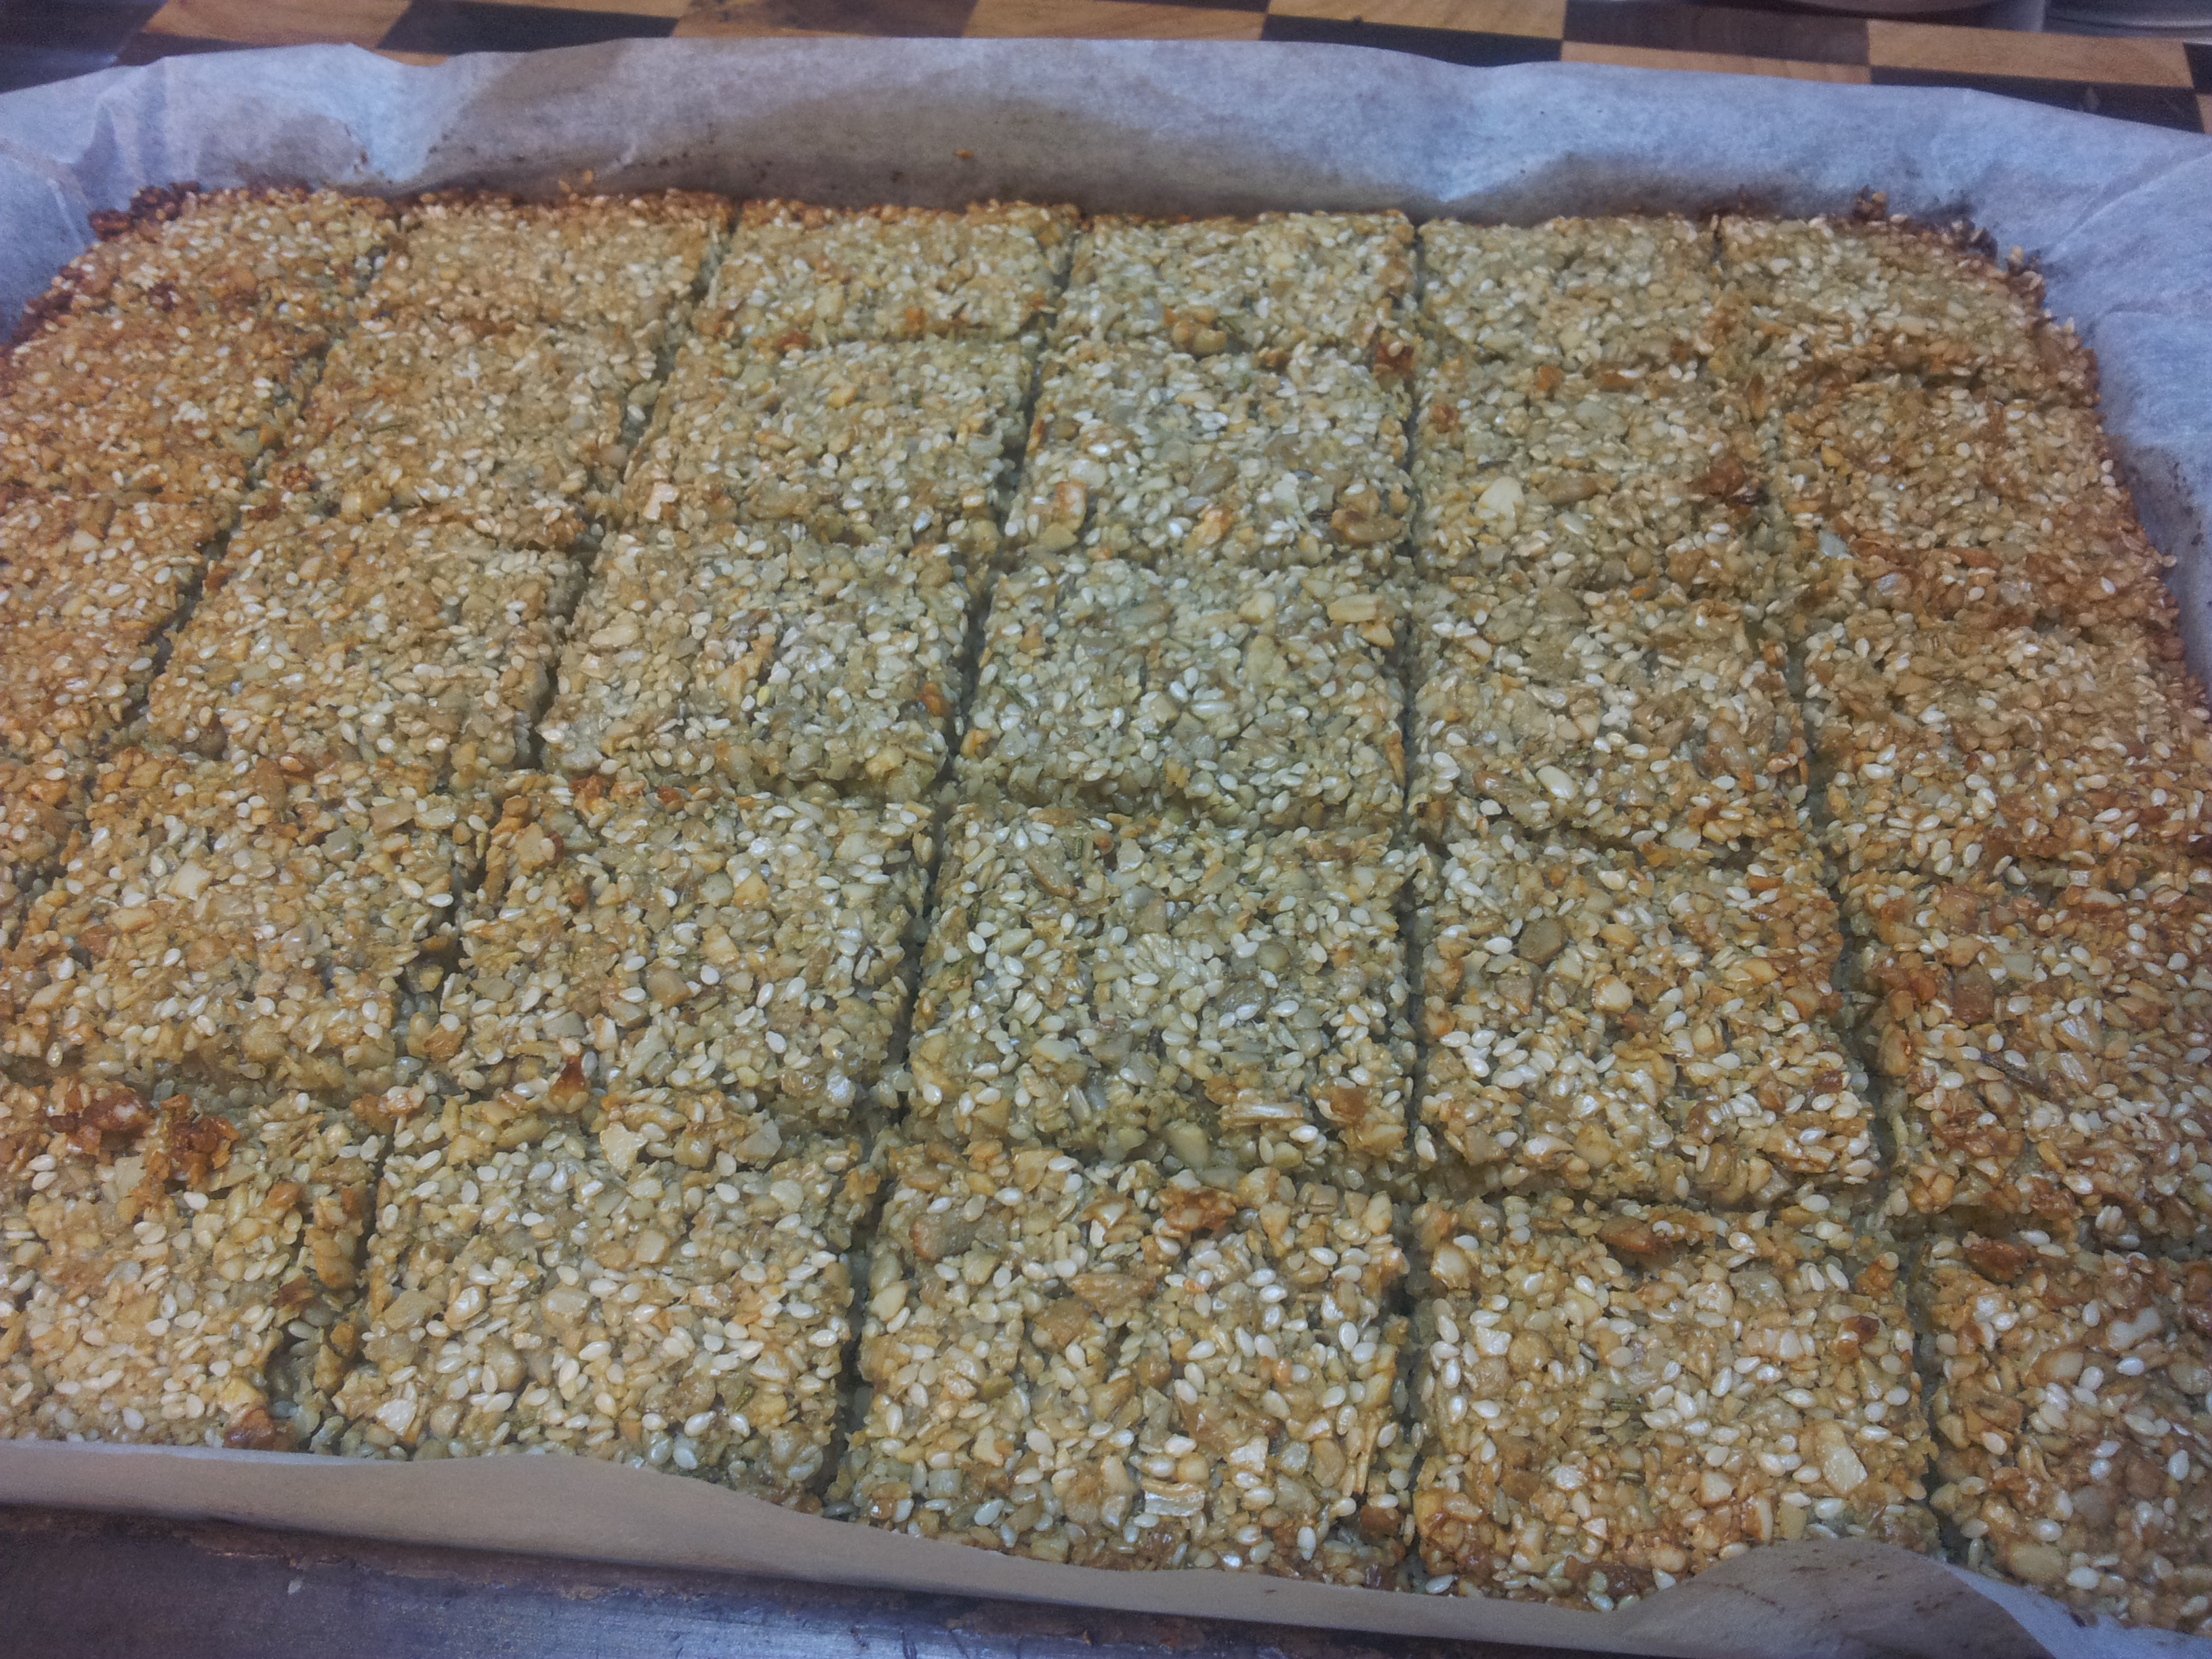
The mixture should be about 1/2 cm thick across the tray. Bake in a 180 degree celsius oven until turning golden around the edges.
Just golden around the edges
Remove from the oven and carefully lift the mix onto a flat surface by grabbing the edges of the baking paper. Cut into slices using a pizza cutter or something similar.
Small even sized squares are best.
Lift back onto the tray and return to the oven and bake until golden.
The ones in the middle will not be as golden as the outer ones. You can cook them a bit more separately if you want them all a similar colour.
Let cool in the tray and then carefully remove with a spatula and place on the cooling rack.
Tasting one at this point is a good idea.
You can eat these bars fresh or place in the freezer to use later on.
Freezing them to use later on.Top with your favourite ingredients for a meal or snack.
When l use these crackers from the freezer l quickly place them under the grill and they are ready to be used. You can eat them plain but l prefer to use them as a base for toppings which will increase the nutritional content.
You can also follow me on Instagram at holistic_paleo or Facebook on Primal Living Melbourne or Holistic Wellness For Life
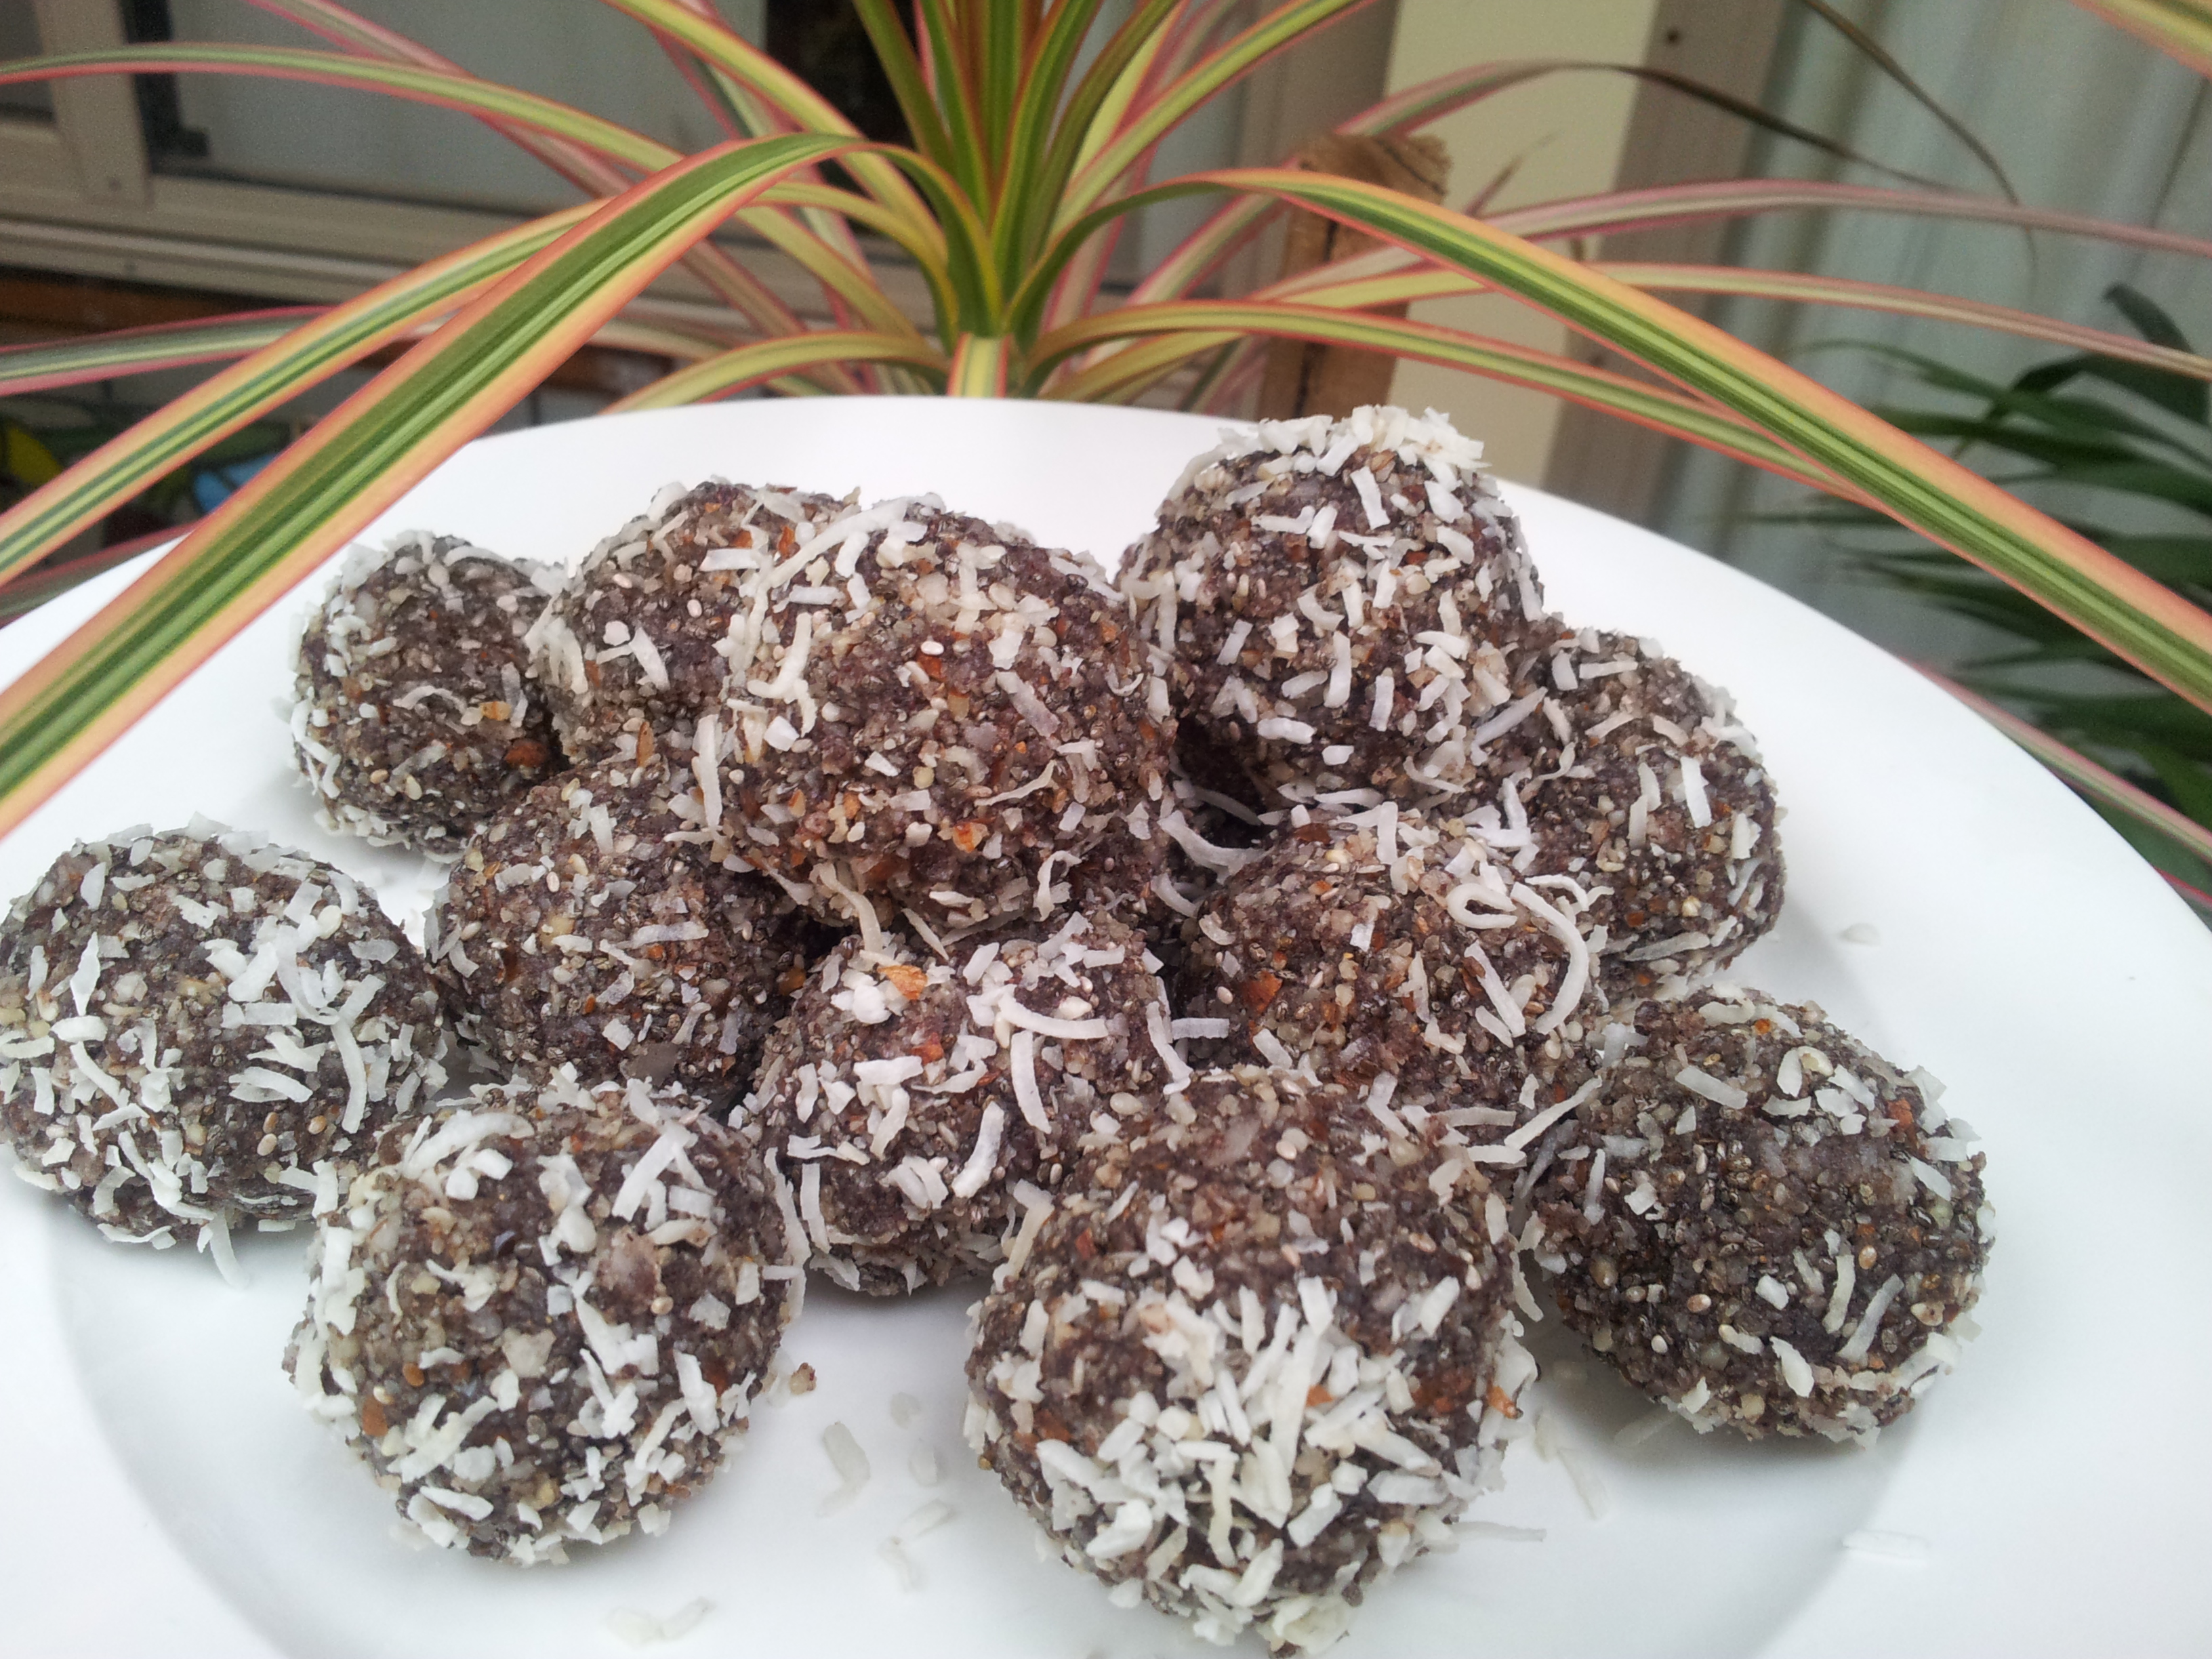
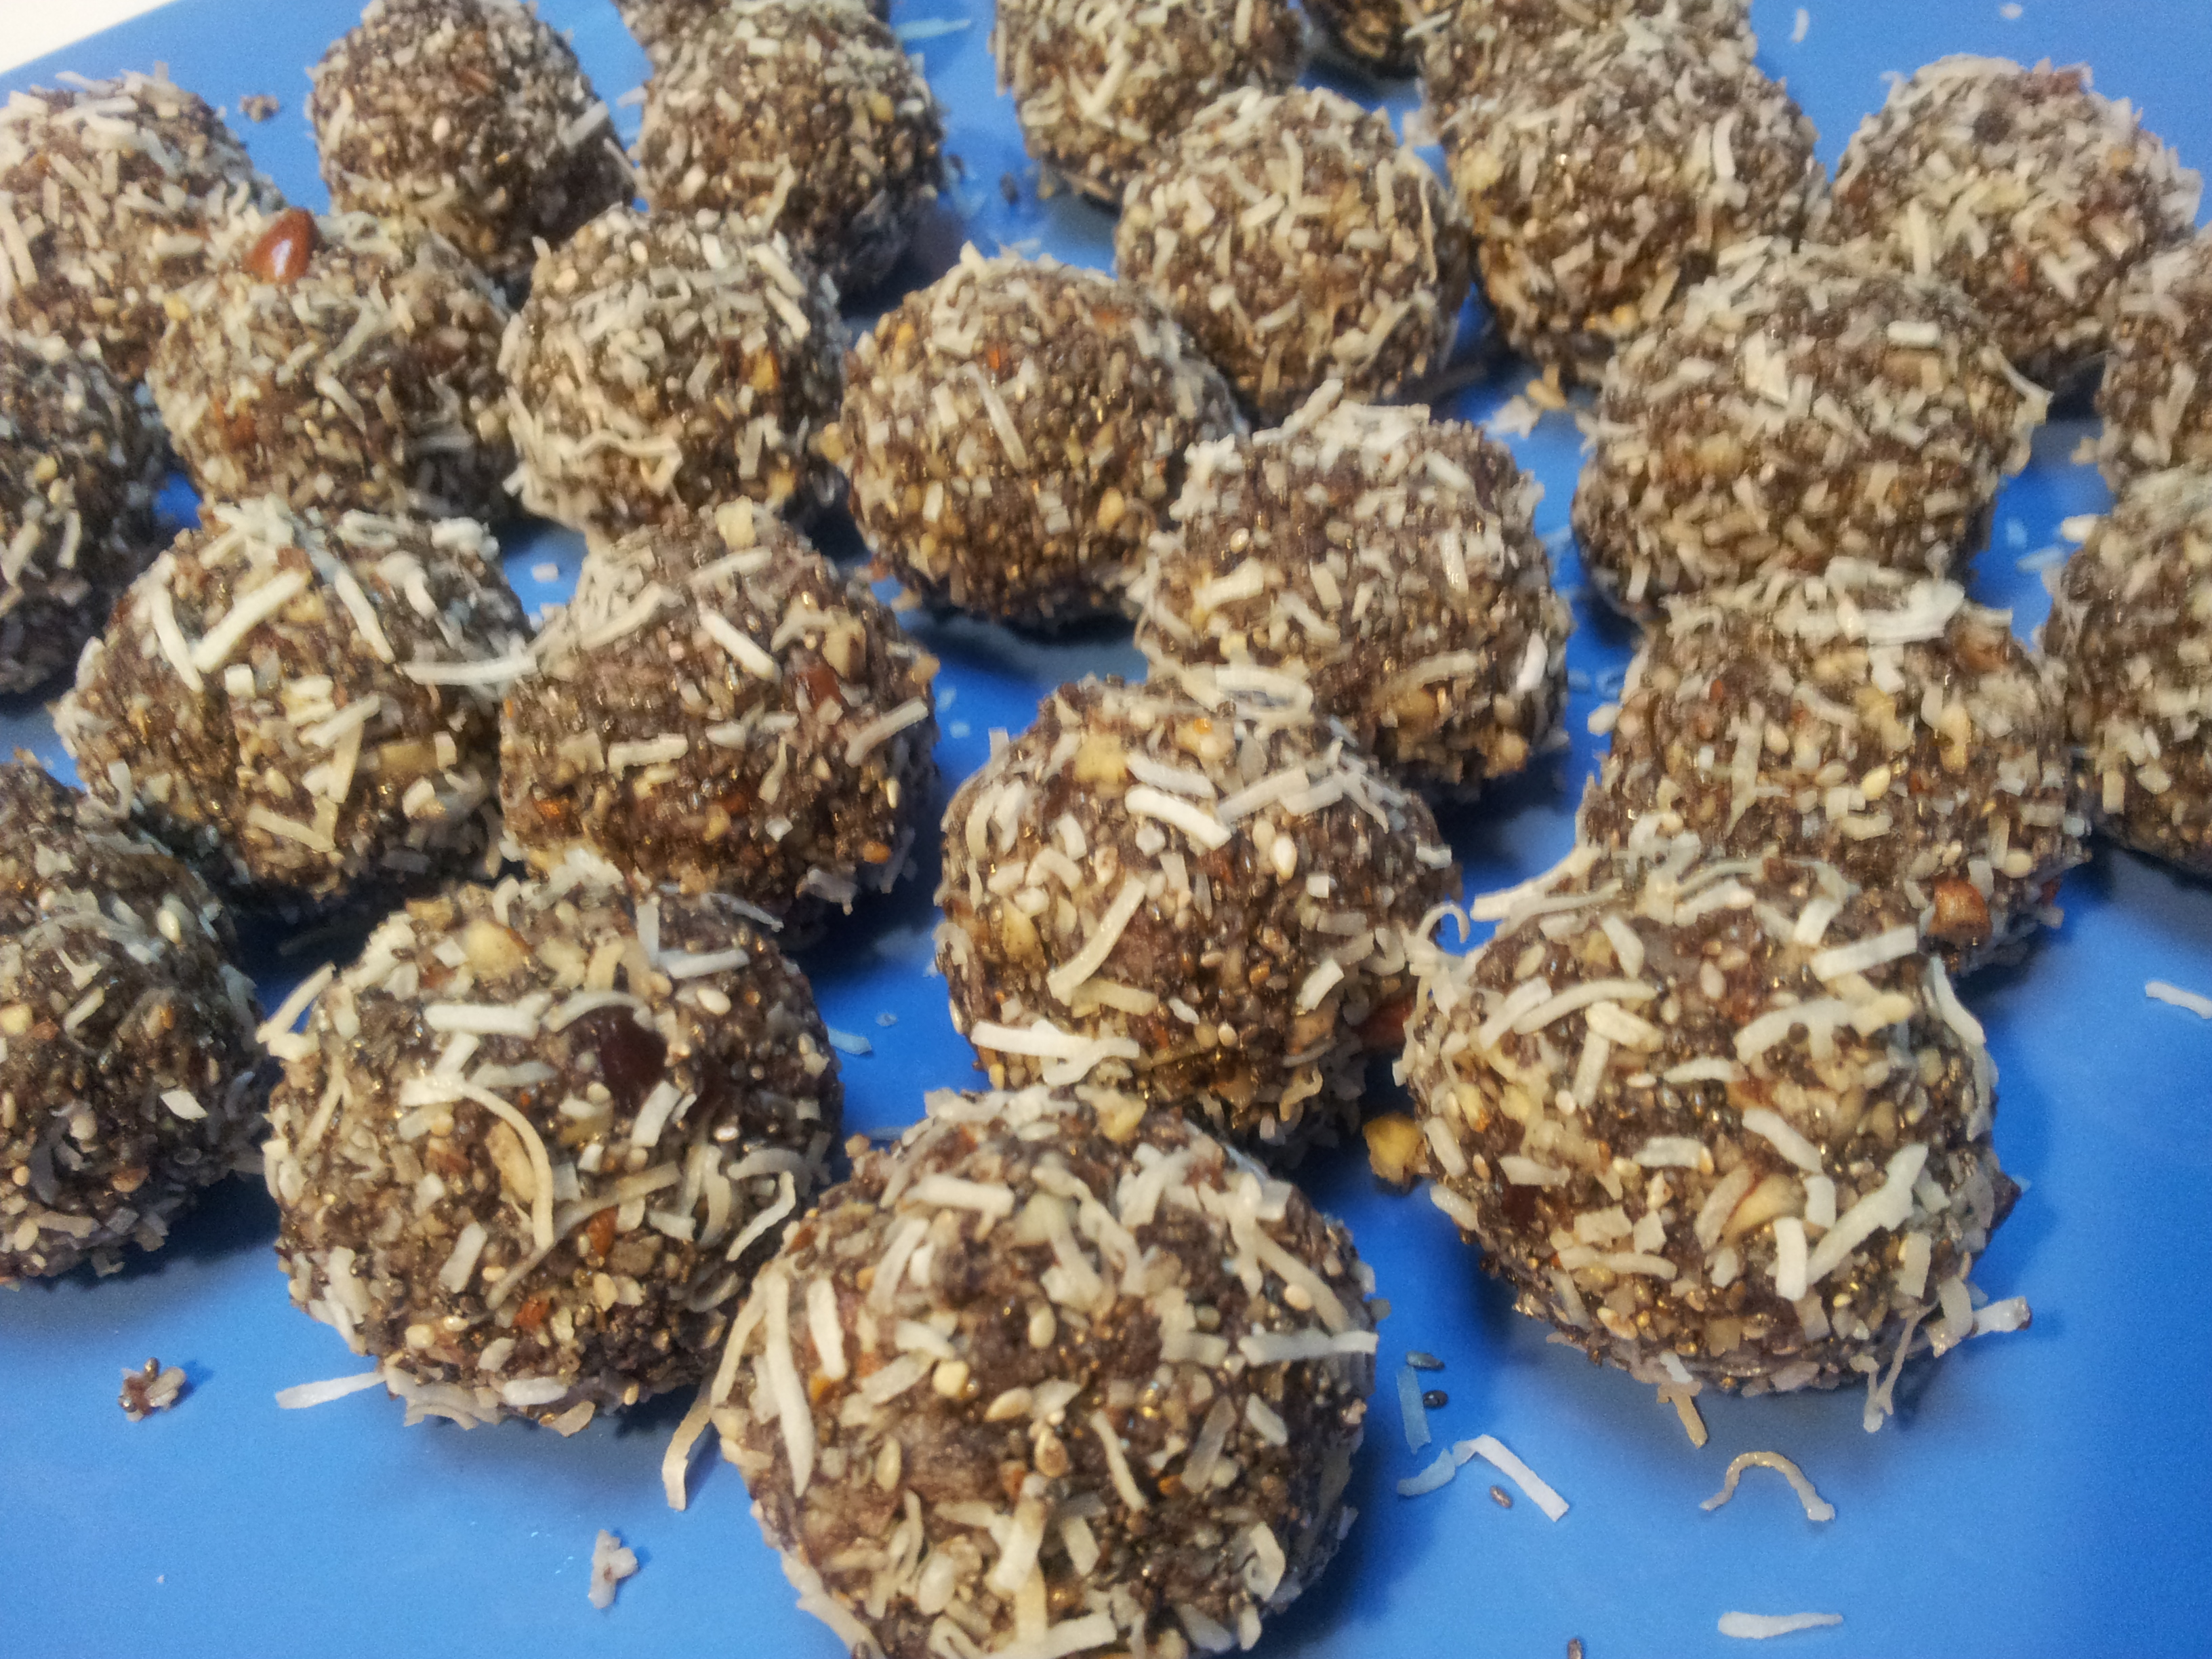
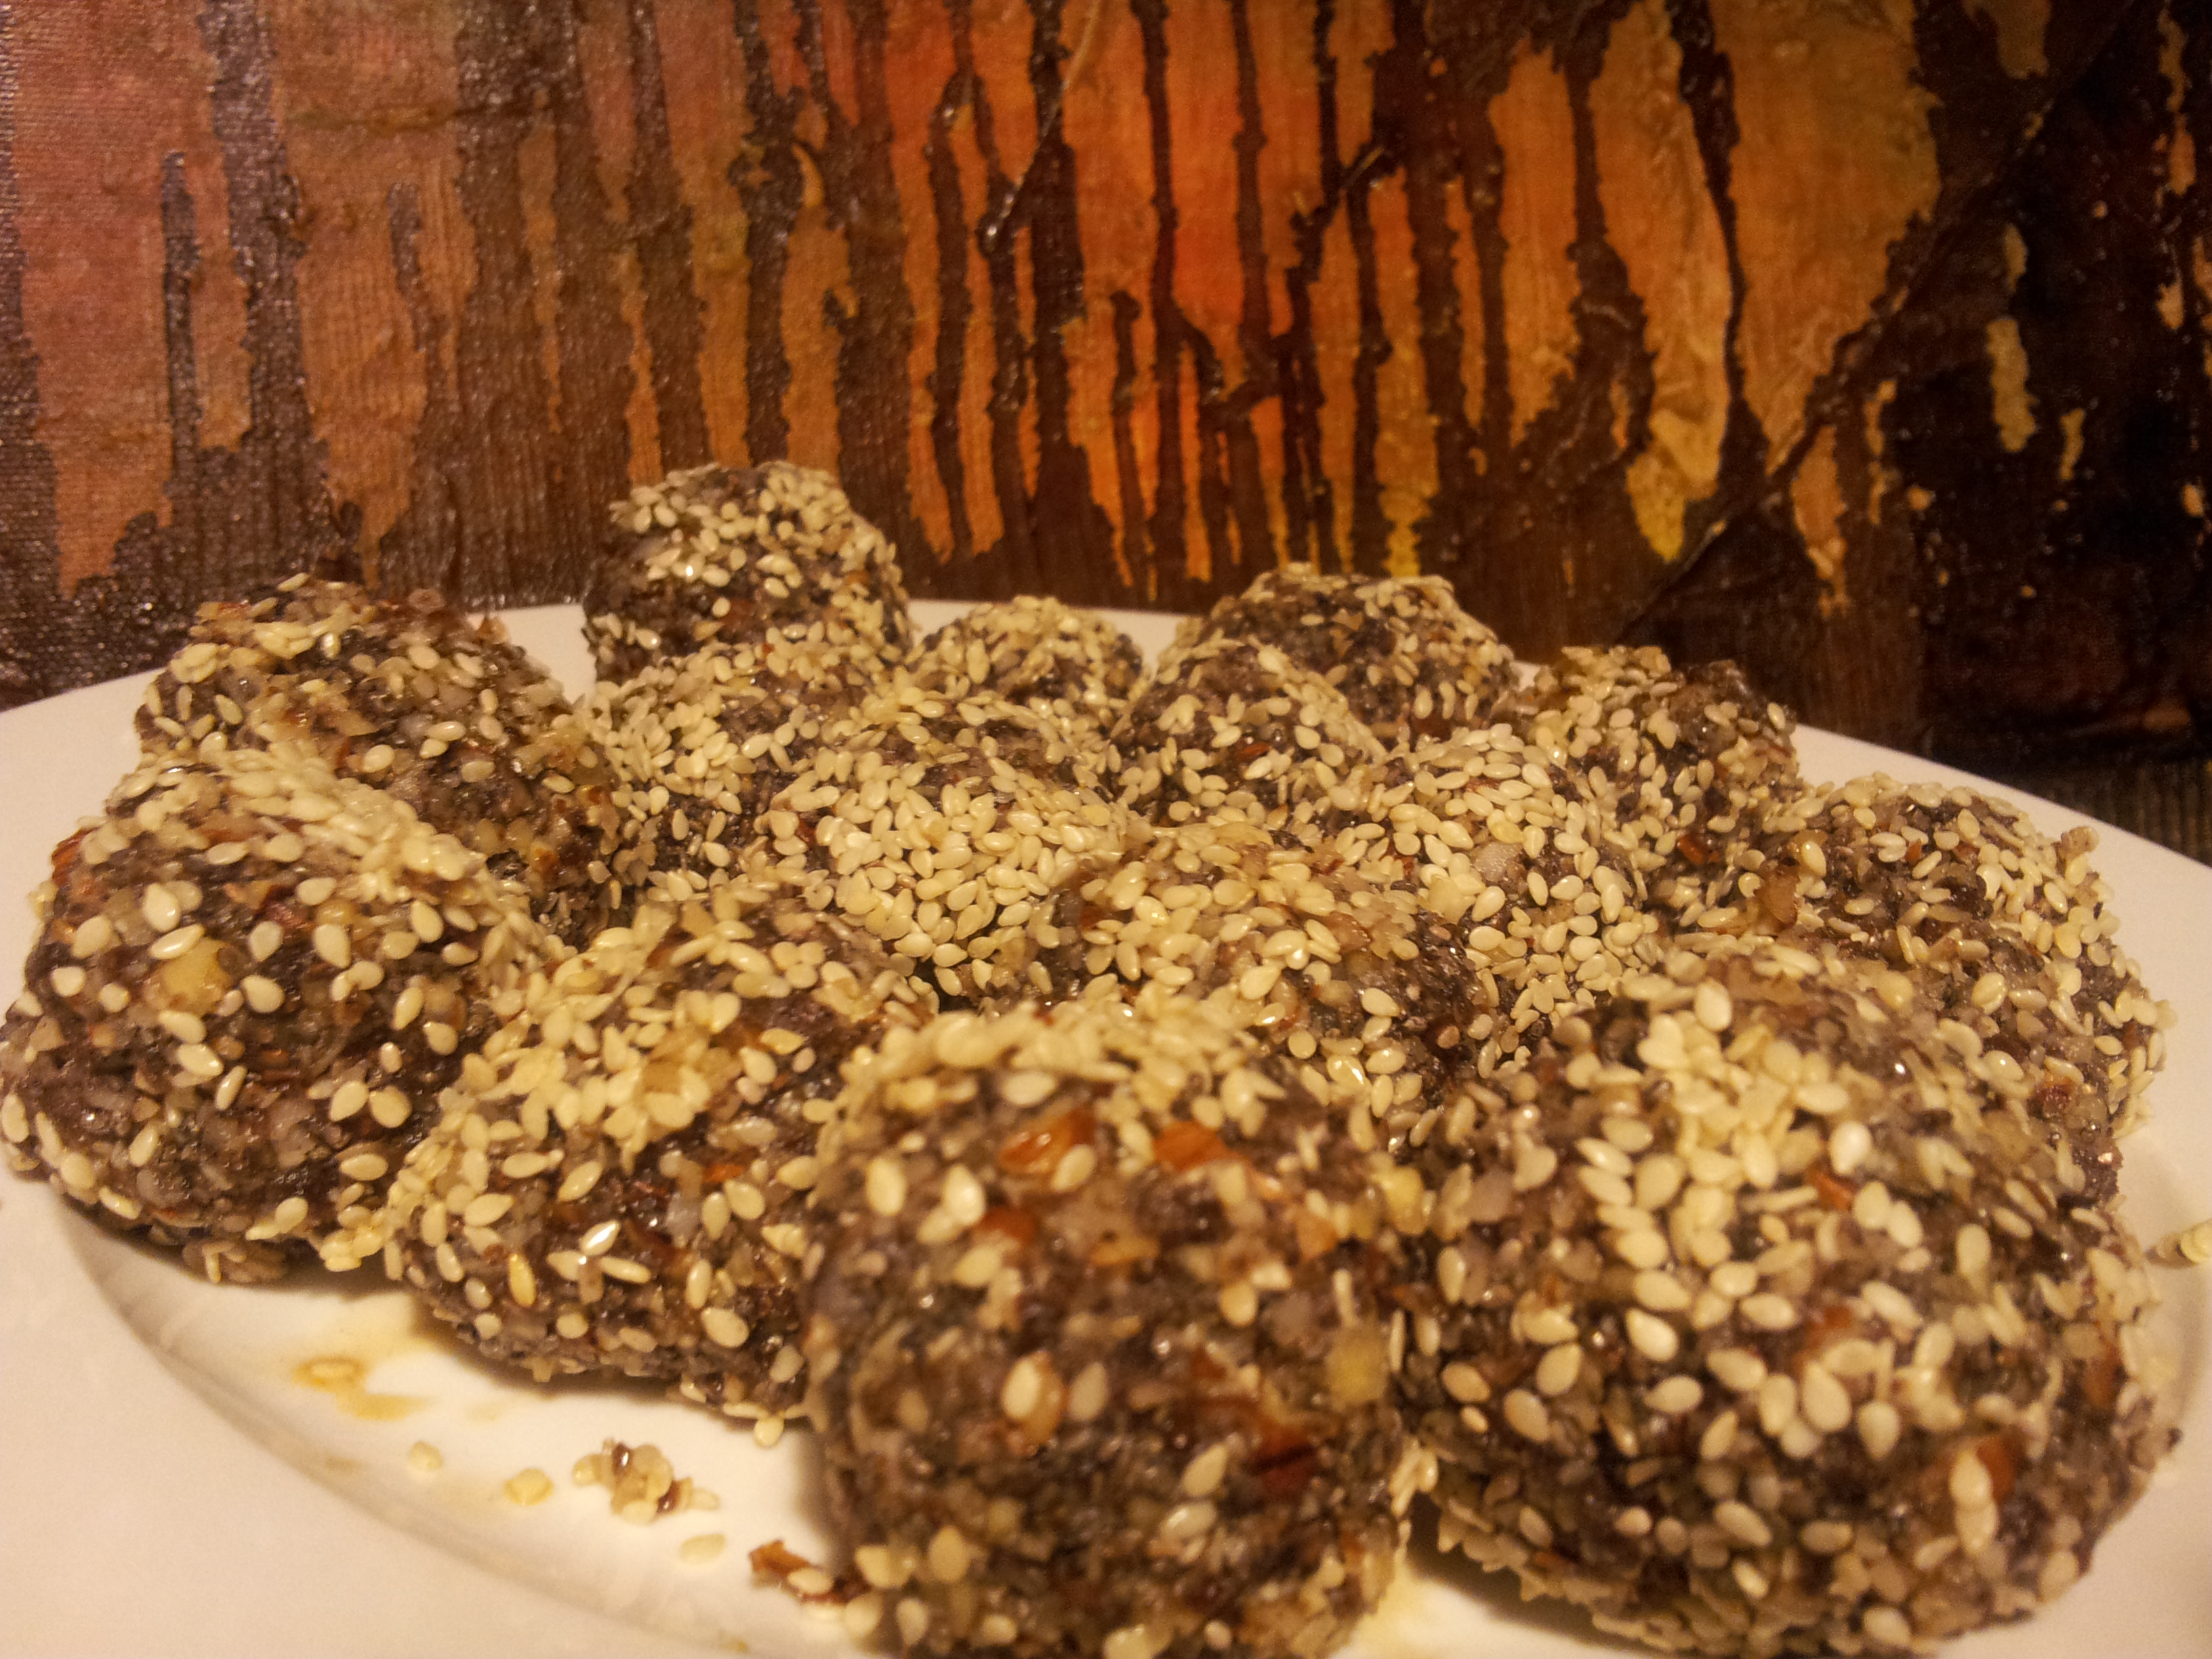
These are the most delicious snack and are made from the highest quality ingredients which provide a beautiful flavour combination. A delicious raw and frozen treat which you can grab from the freezer as required. They are super quick to make and are a very dense source of energy and good fats to keep you feeling great. Add your favourite SuperFood powder to increase the nutritional content and vary the flavour.
Nutrient and flavour dense. These delights are rolled in shredded coconut.
You can coat these delights in shredded coconut or sesame seeds. This offers a different taste and texture. but the sesame seeds are messier than the coconut as the picture below shows.
The sesame seeds love to stick to hands.
Ingredients:
1 cup of activated almonds-chopped (other nuts would also work well)
2 tablespoons coconut flour
1 level tablespoon rice malt syrup
1 teaspoon cinnamon
3/4 cup Coconut flakes
3 tablespoons black chia seeds
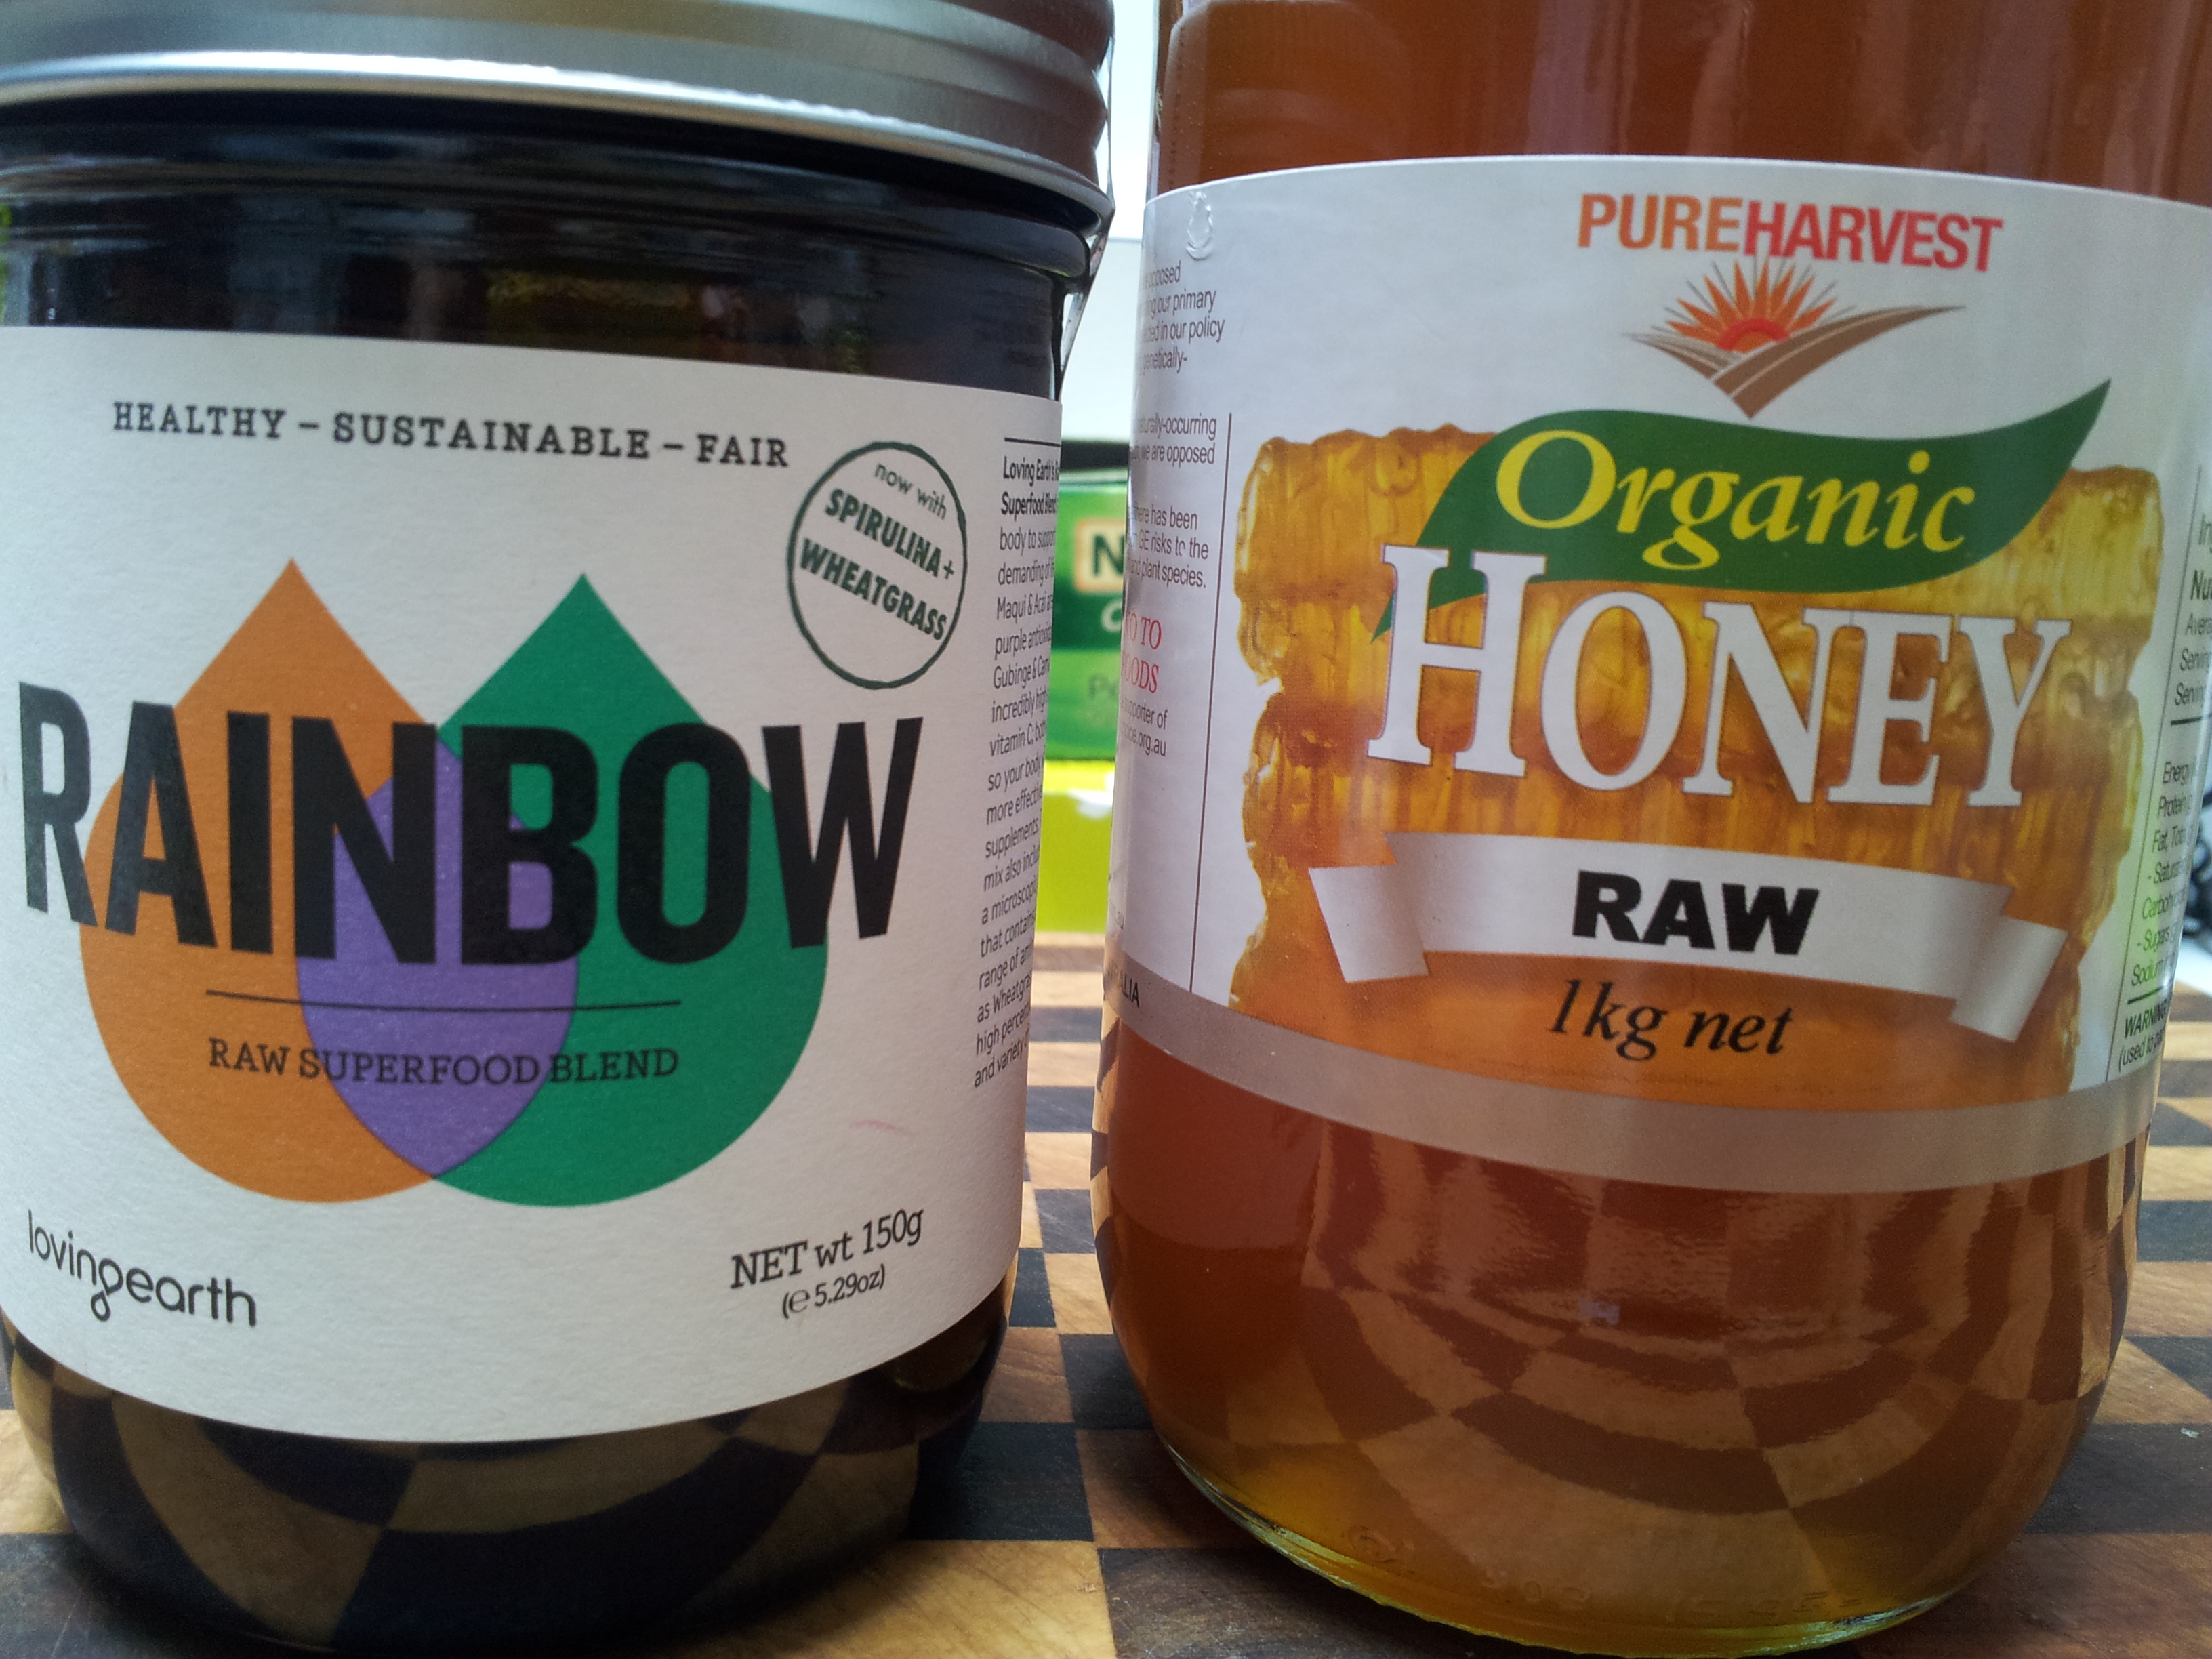
1 generous tablespoon of a superfood powder. I used Loving Earth Rainbow Superfood Blend (You could use other powders such as Acai or Spirulina)
2 tablespoons sesame seeds
3 tablespoons melted coconut oil
6 medjool dates-seeds removed (Dates are different sizes so put 4 in to start with and add the extra 1 or 2 if needed as they are high in fructose).
My favourite Super Food powder
Extra sesame seeds or shredded coconut for coating.
Nicely processed.
Place all of the ingredients in the food processor and blend well. Take a spoonfulls of mix and shape into small balls. You need to squeeze with your hands to form a ball shape and it should feel quite moist. Roll each ball into your desired coating and quickly refrigerate or freeze. They are firm in the fridge and hard in the freezer so you can experiment with the level of firmness that you desire.
Place in the fridge to firm up before freezing.
They keep well in a sealed container in the freezer and are an excellent snack.
The balls can also be rolled in sesame seeds for a different effect.
If you have enjoyed this post please share it with a friend. You can follow me daily on Instagram at holistic_paleo or Facebook at Primal Living Melbourne and Holistic Wellness For Life.
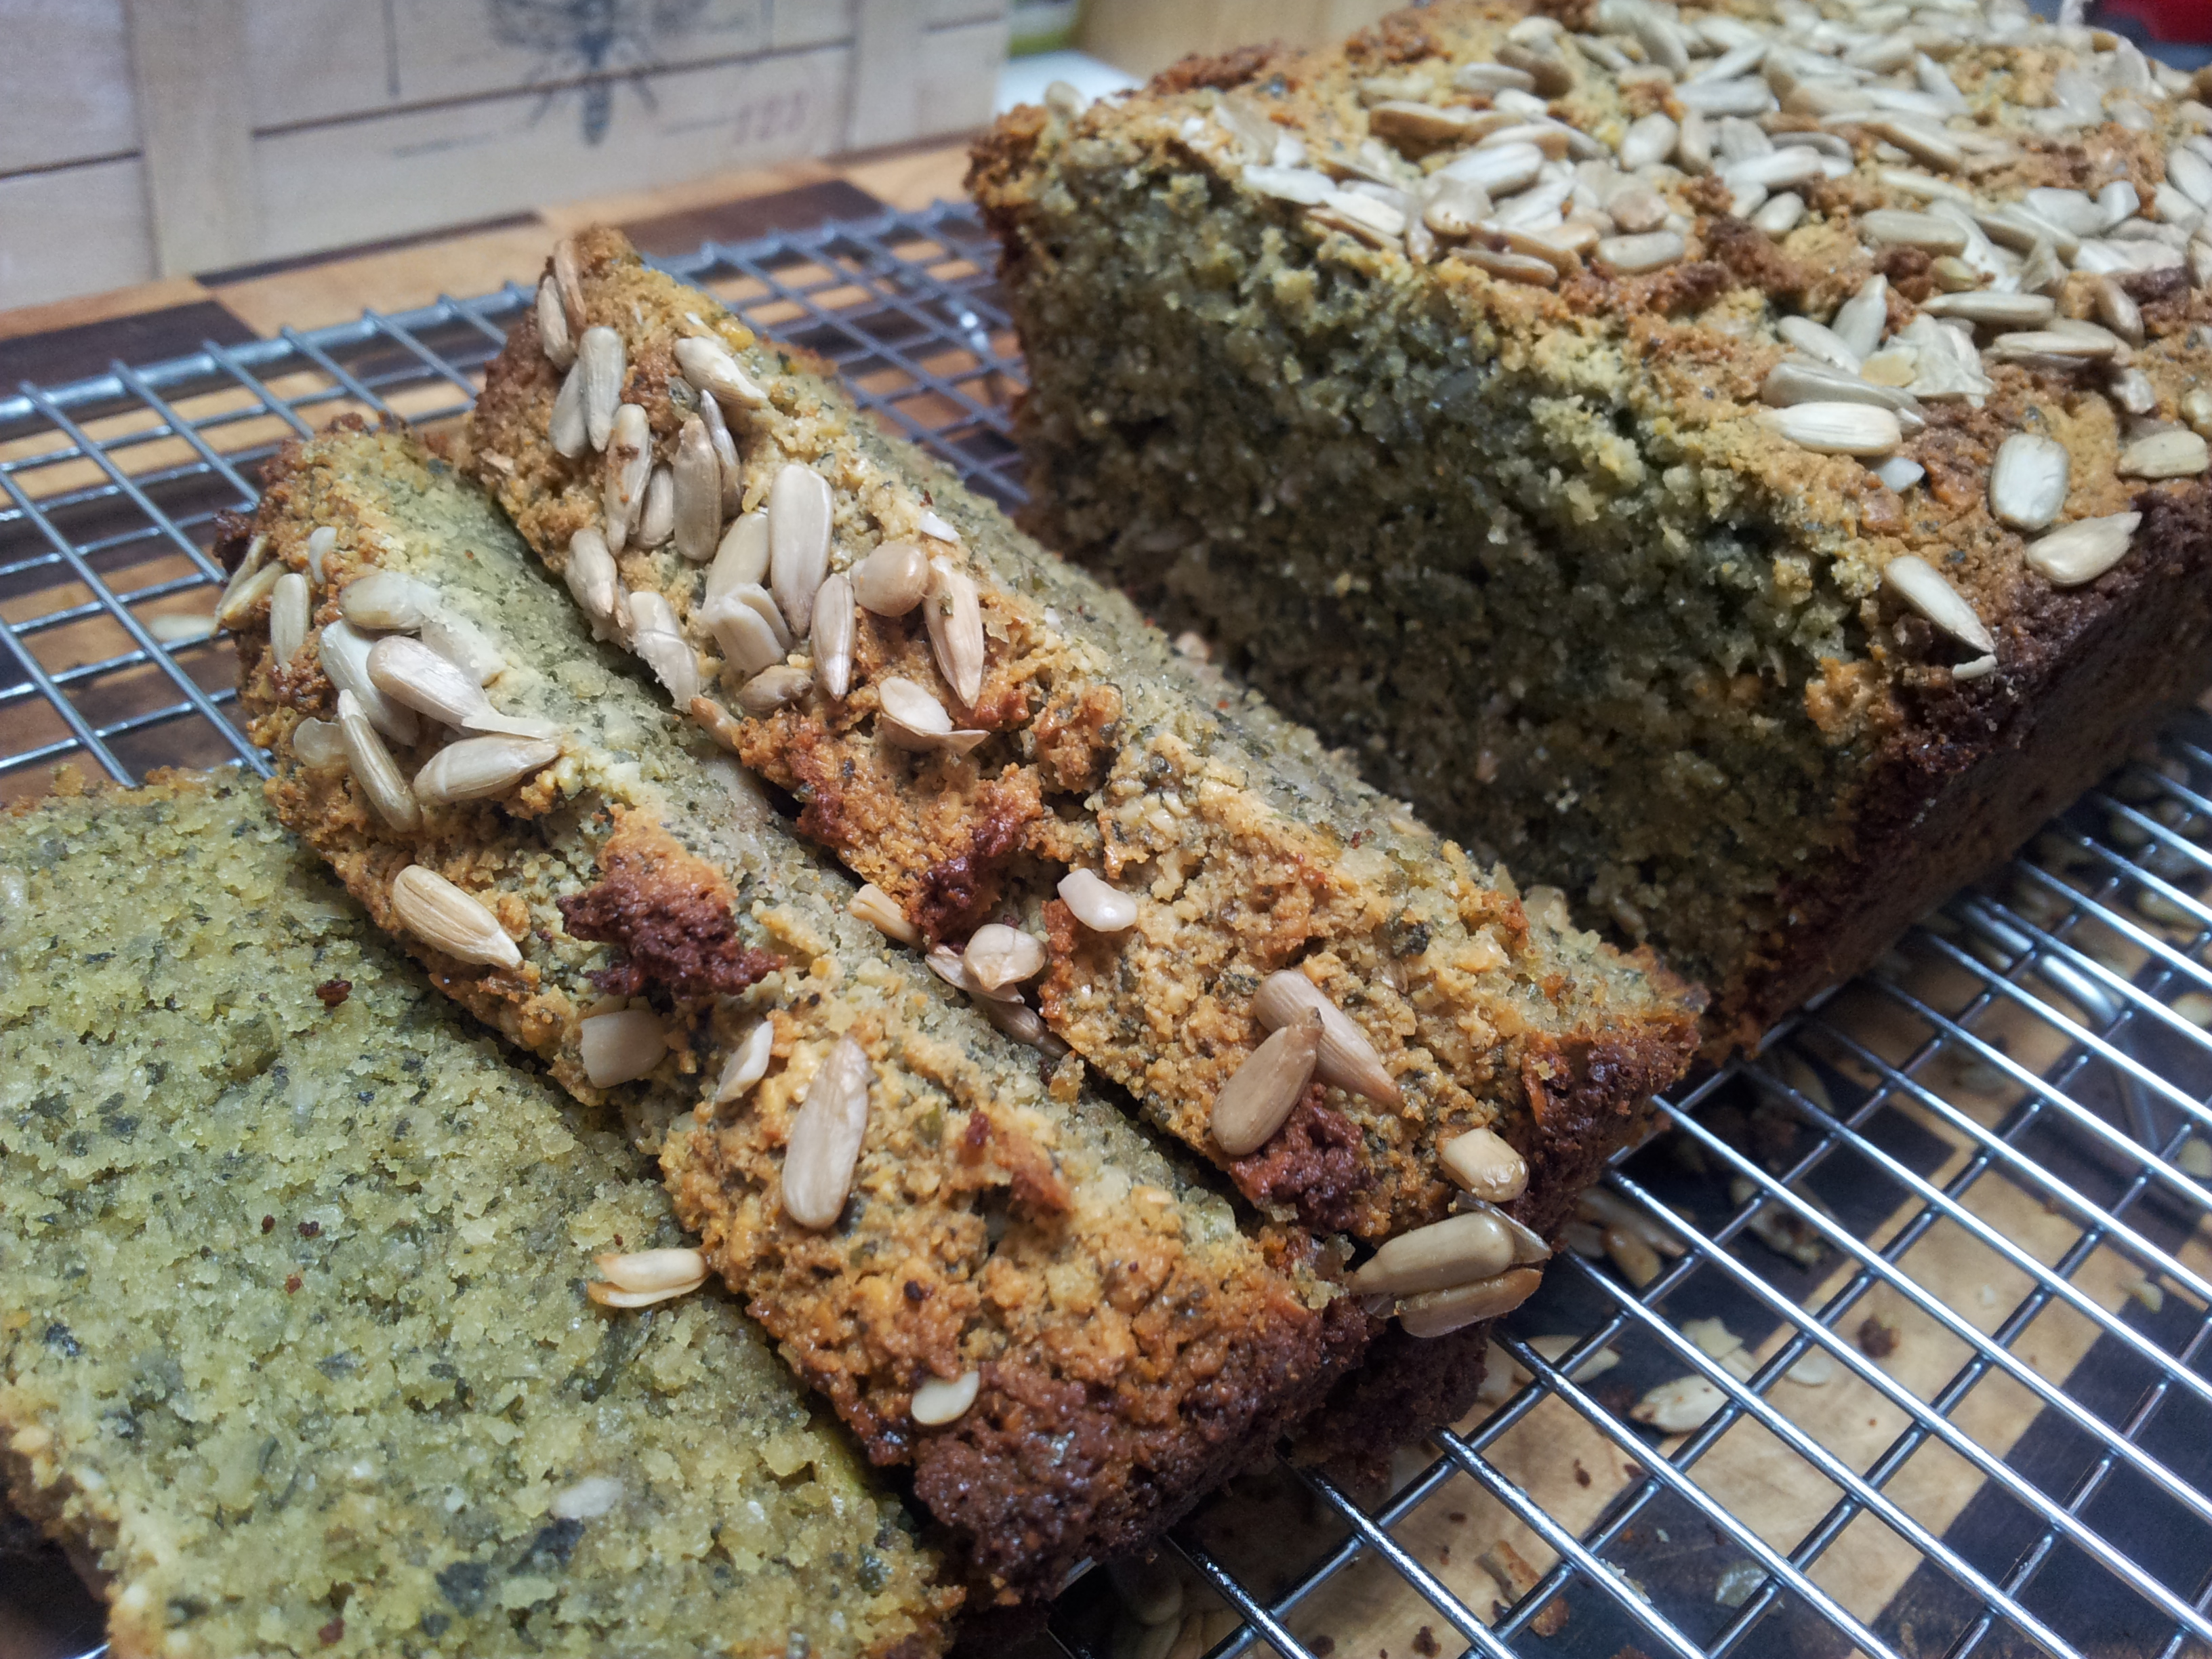
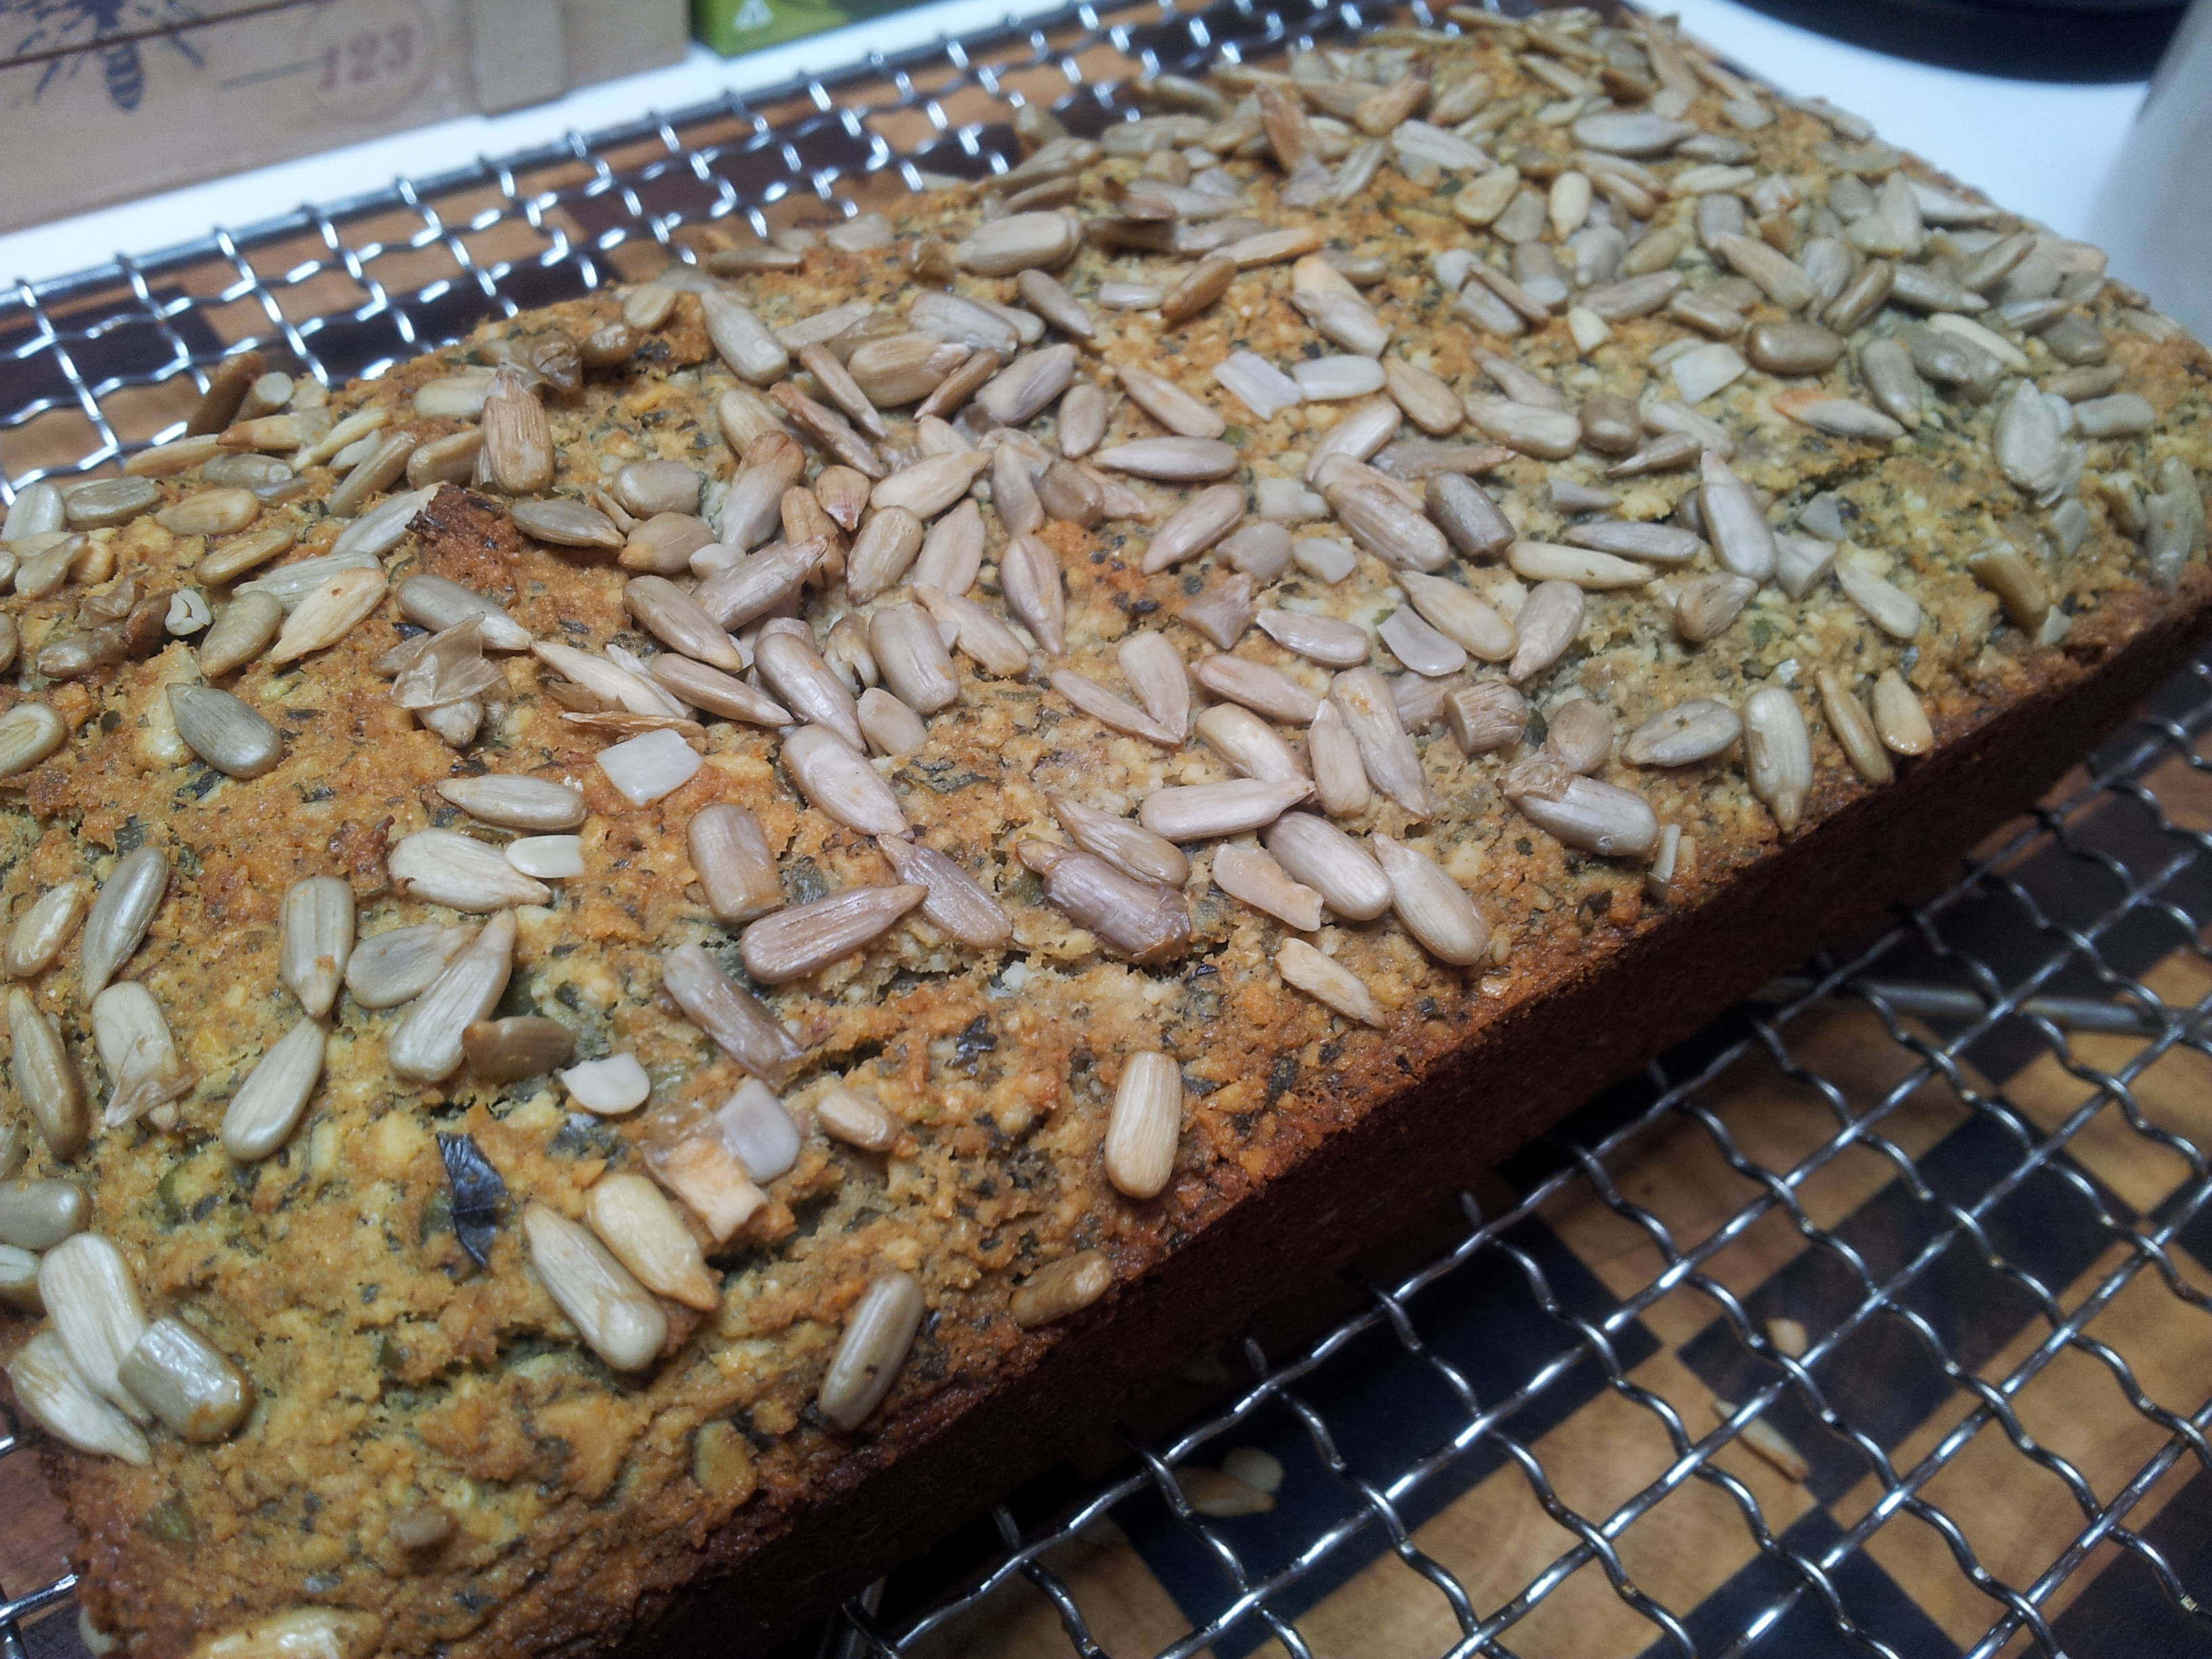
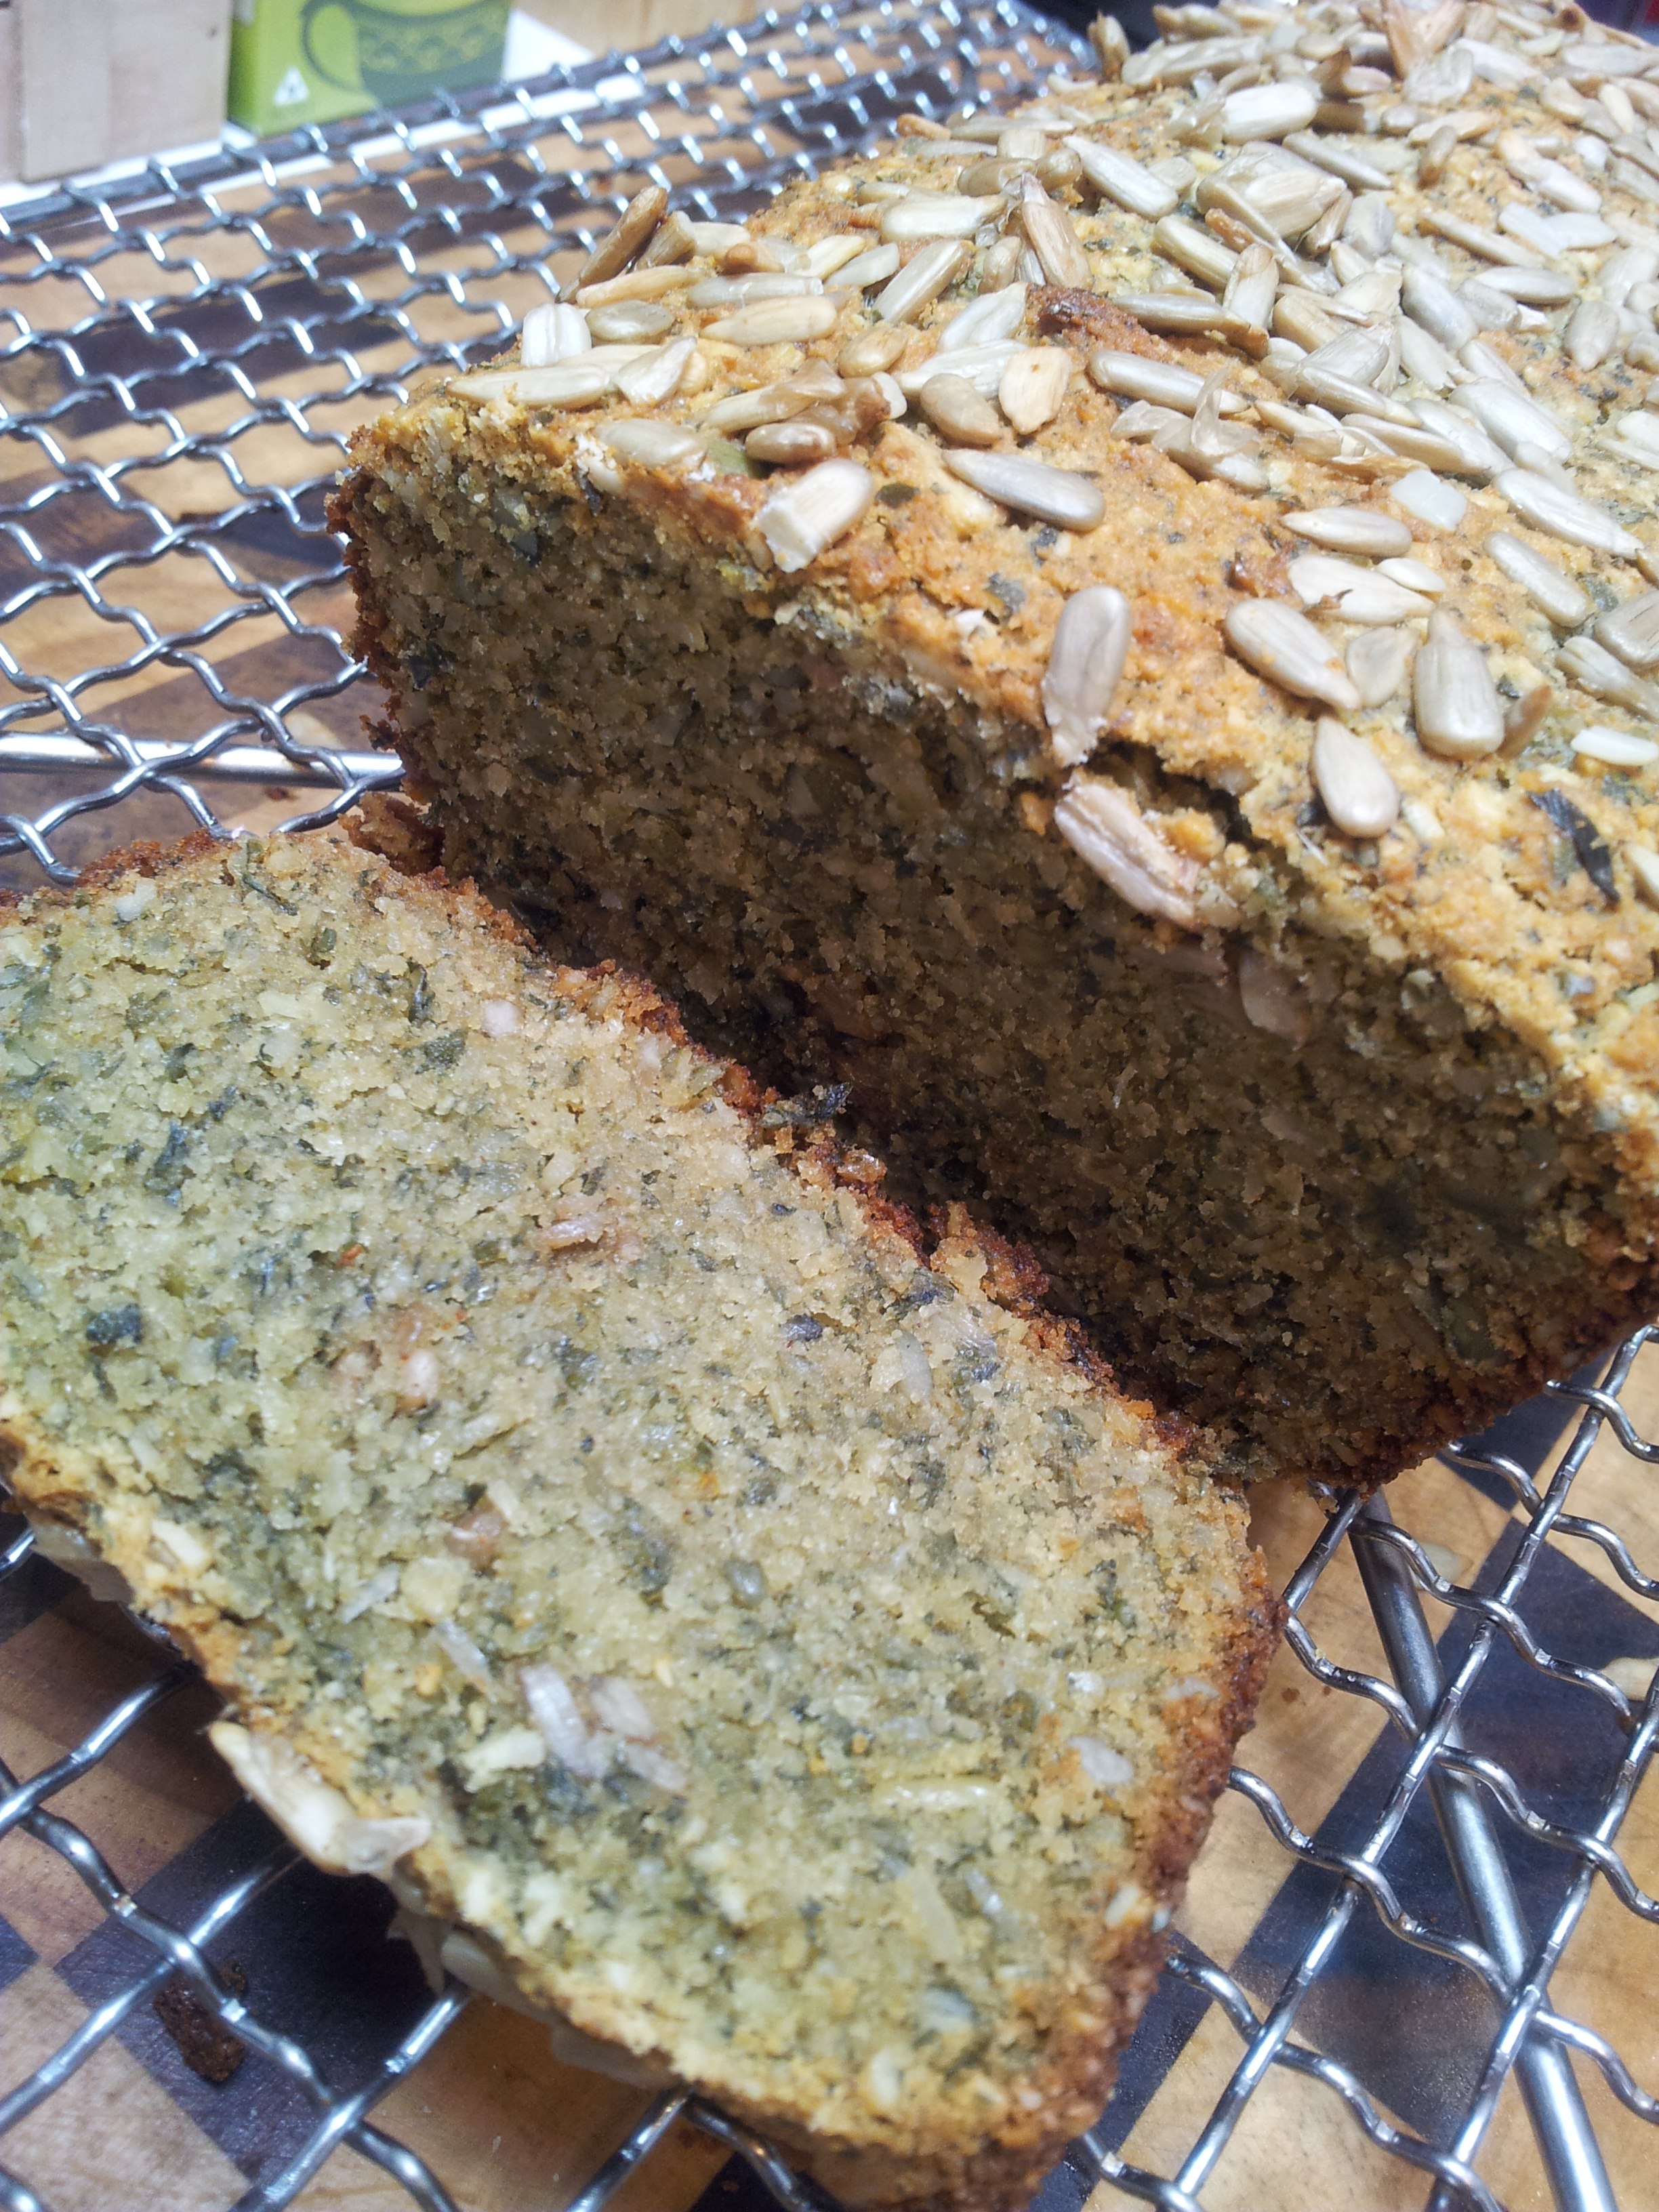
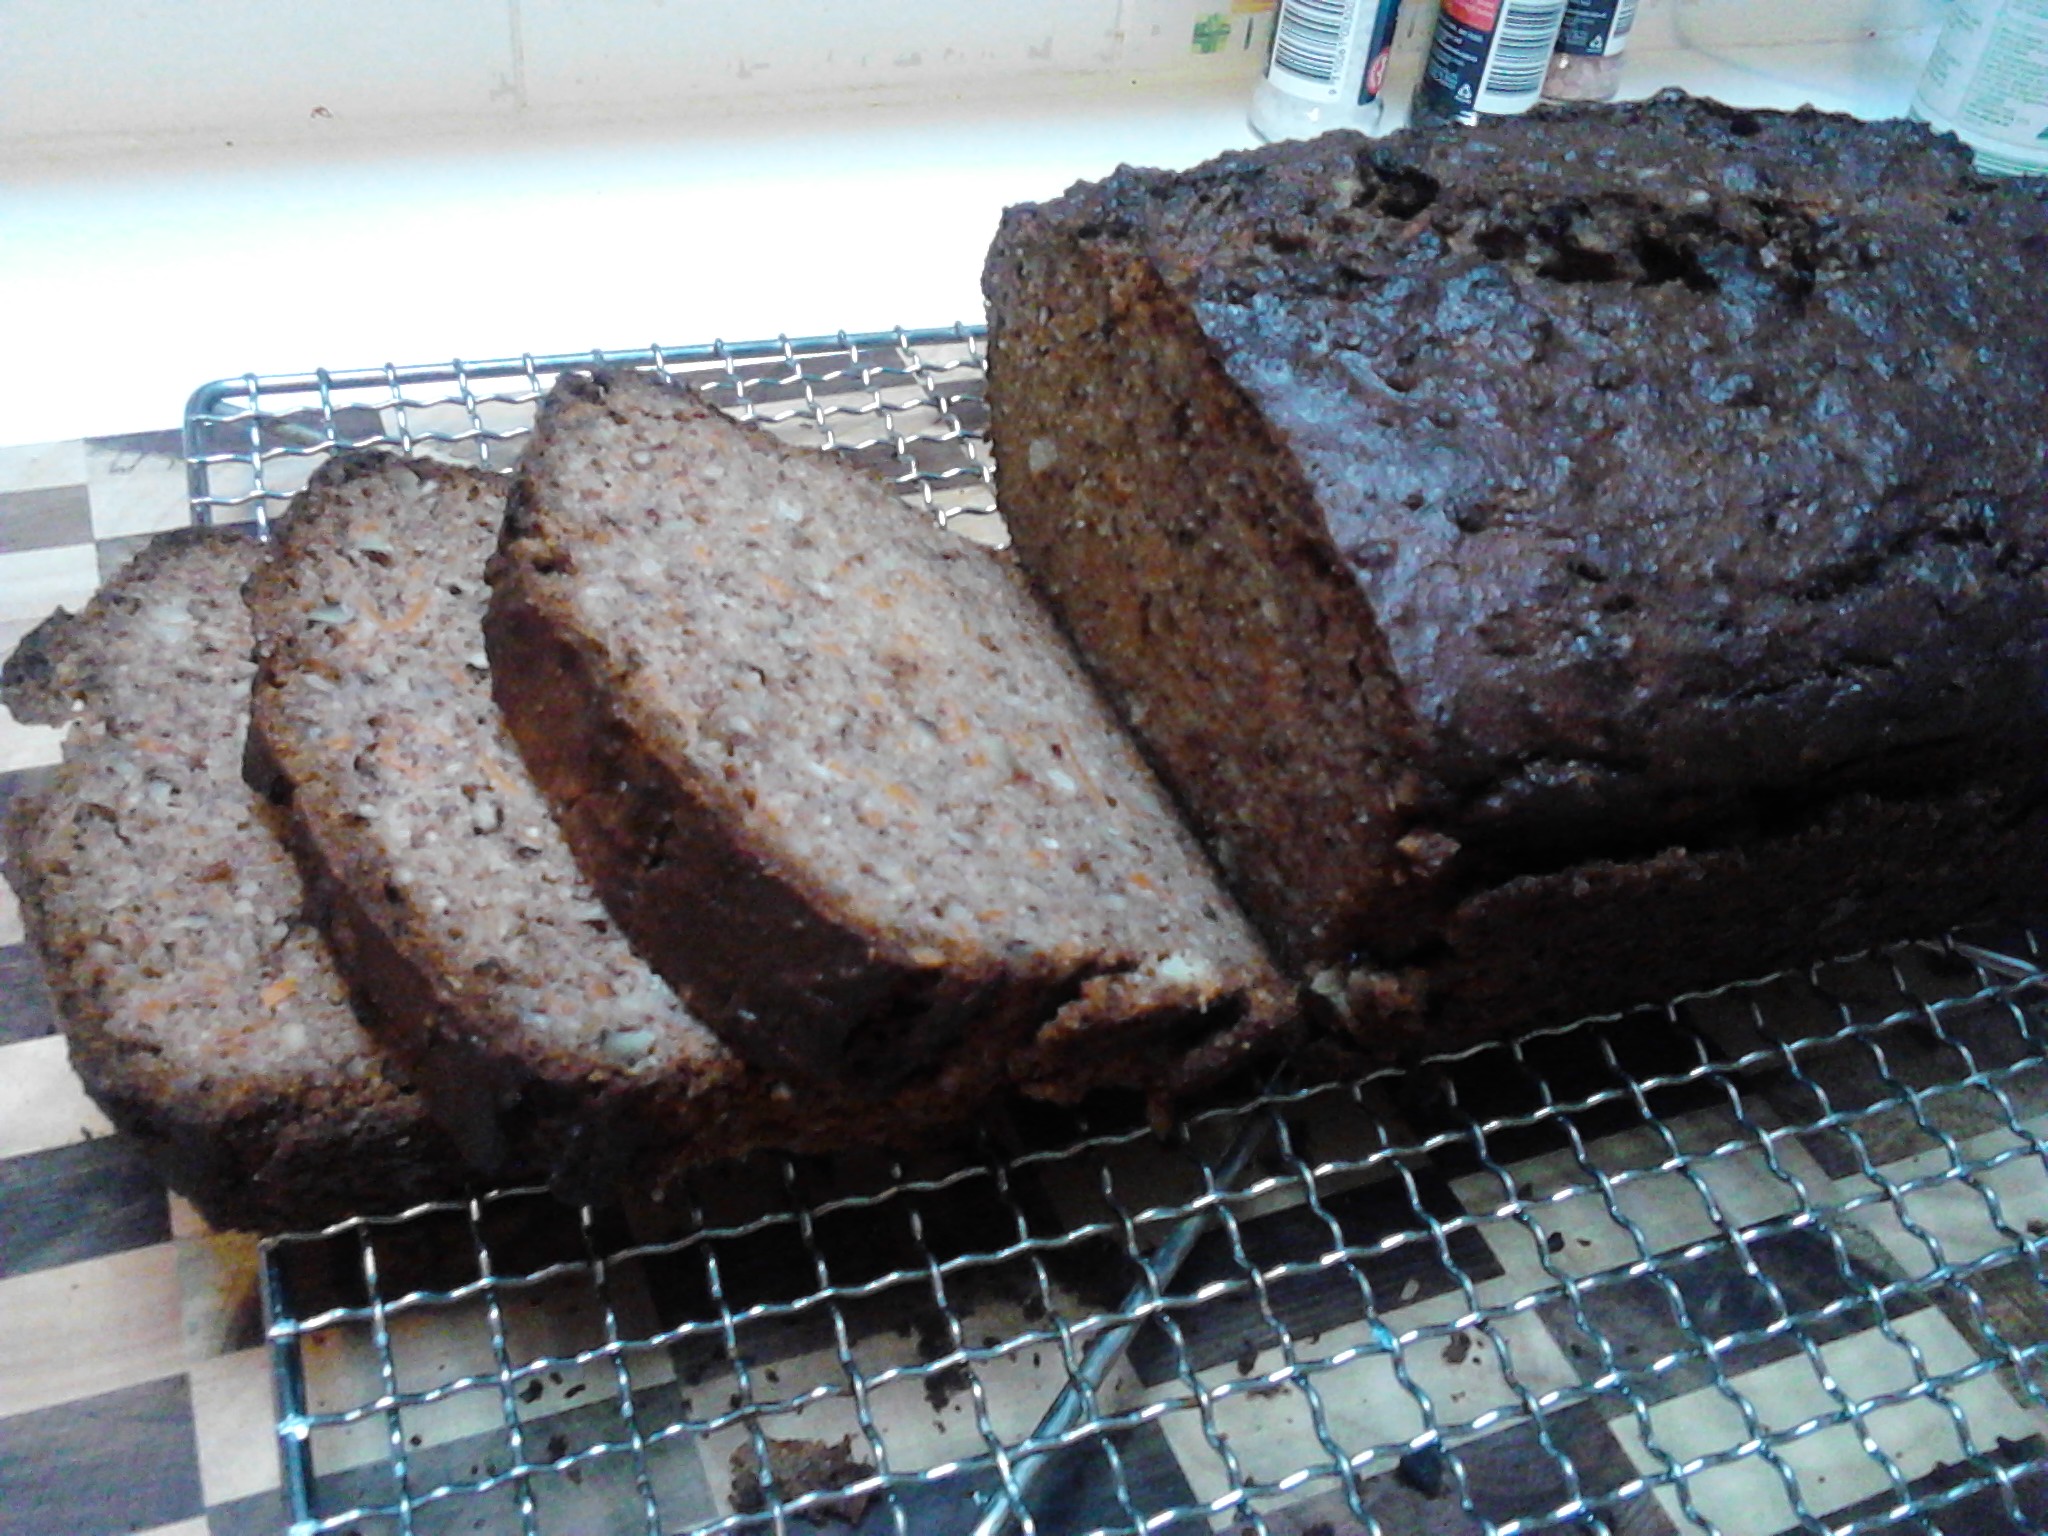
The Perfect Paleo bread seems to be on everyone’s to do list these days. This is a delicious gluten and dairy free bread where pumpkin seeds form the bulk of the loaf. The green colour is enticing and it holds together well when sliced. I have tested the recipe several times and am very happy with the result. I hope you enjoy it!
A delightful gluten and dairy free bread.
I can imagine myself topping this with something delicious like avocado and tomato, or if you eat dairy some good quality grass fed butter. Following a Primal lifestyle l eat Wholefoods such as meat, vegetables, eggs, fruit, nuts, seeds and healthy oils. This bread is actually composed of some of those wholefoods or products made from wholefoods such as coconut flour. It is extremely easy to make with the most important part being to let the loaf cool in the pan.
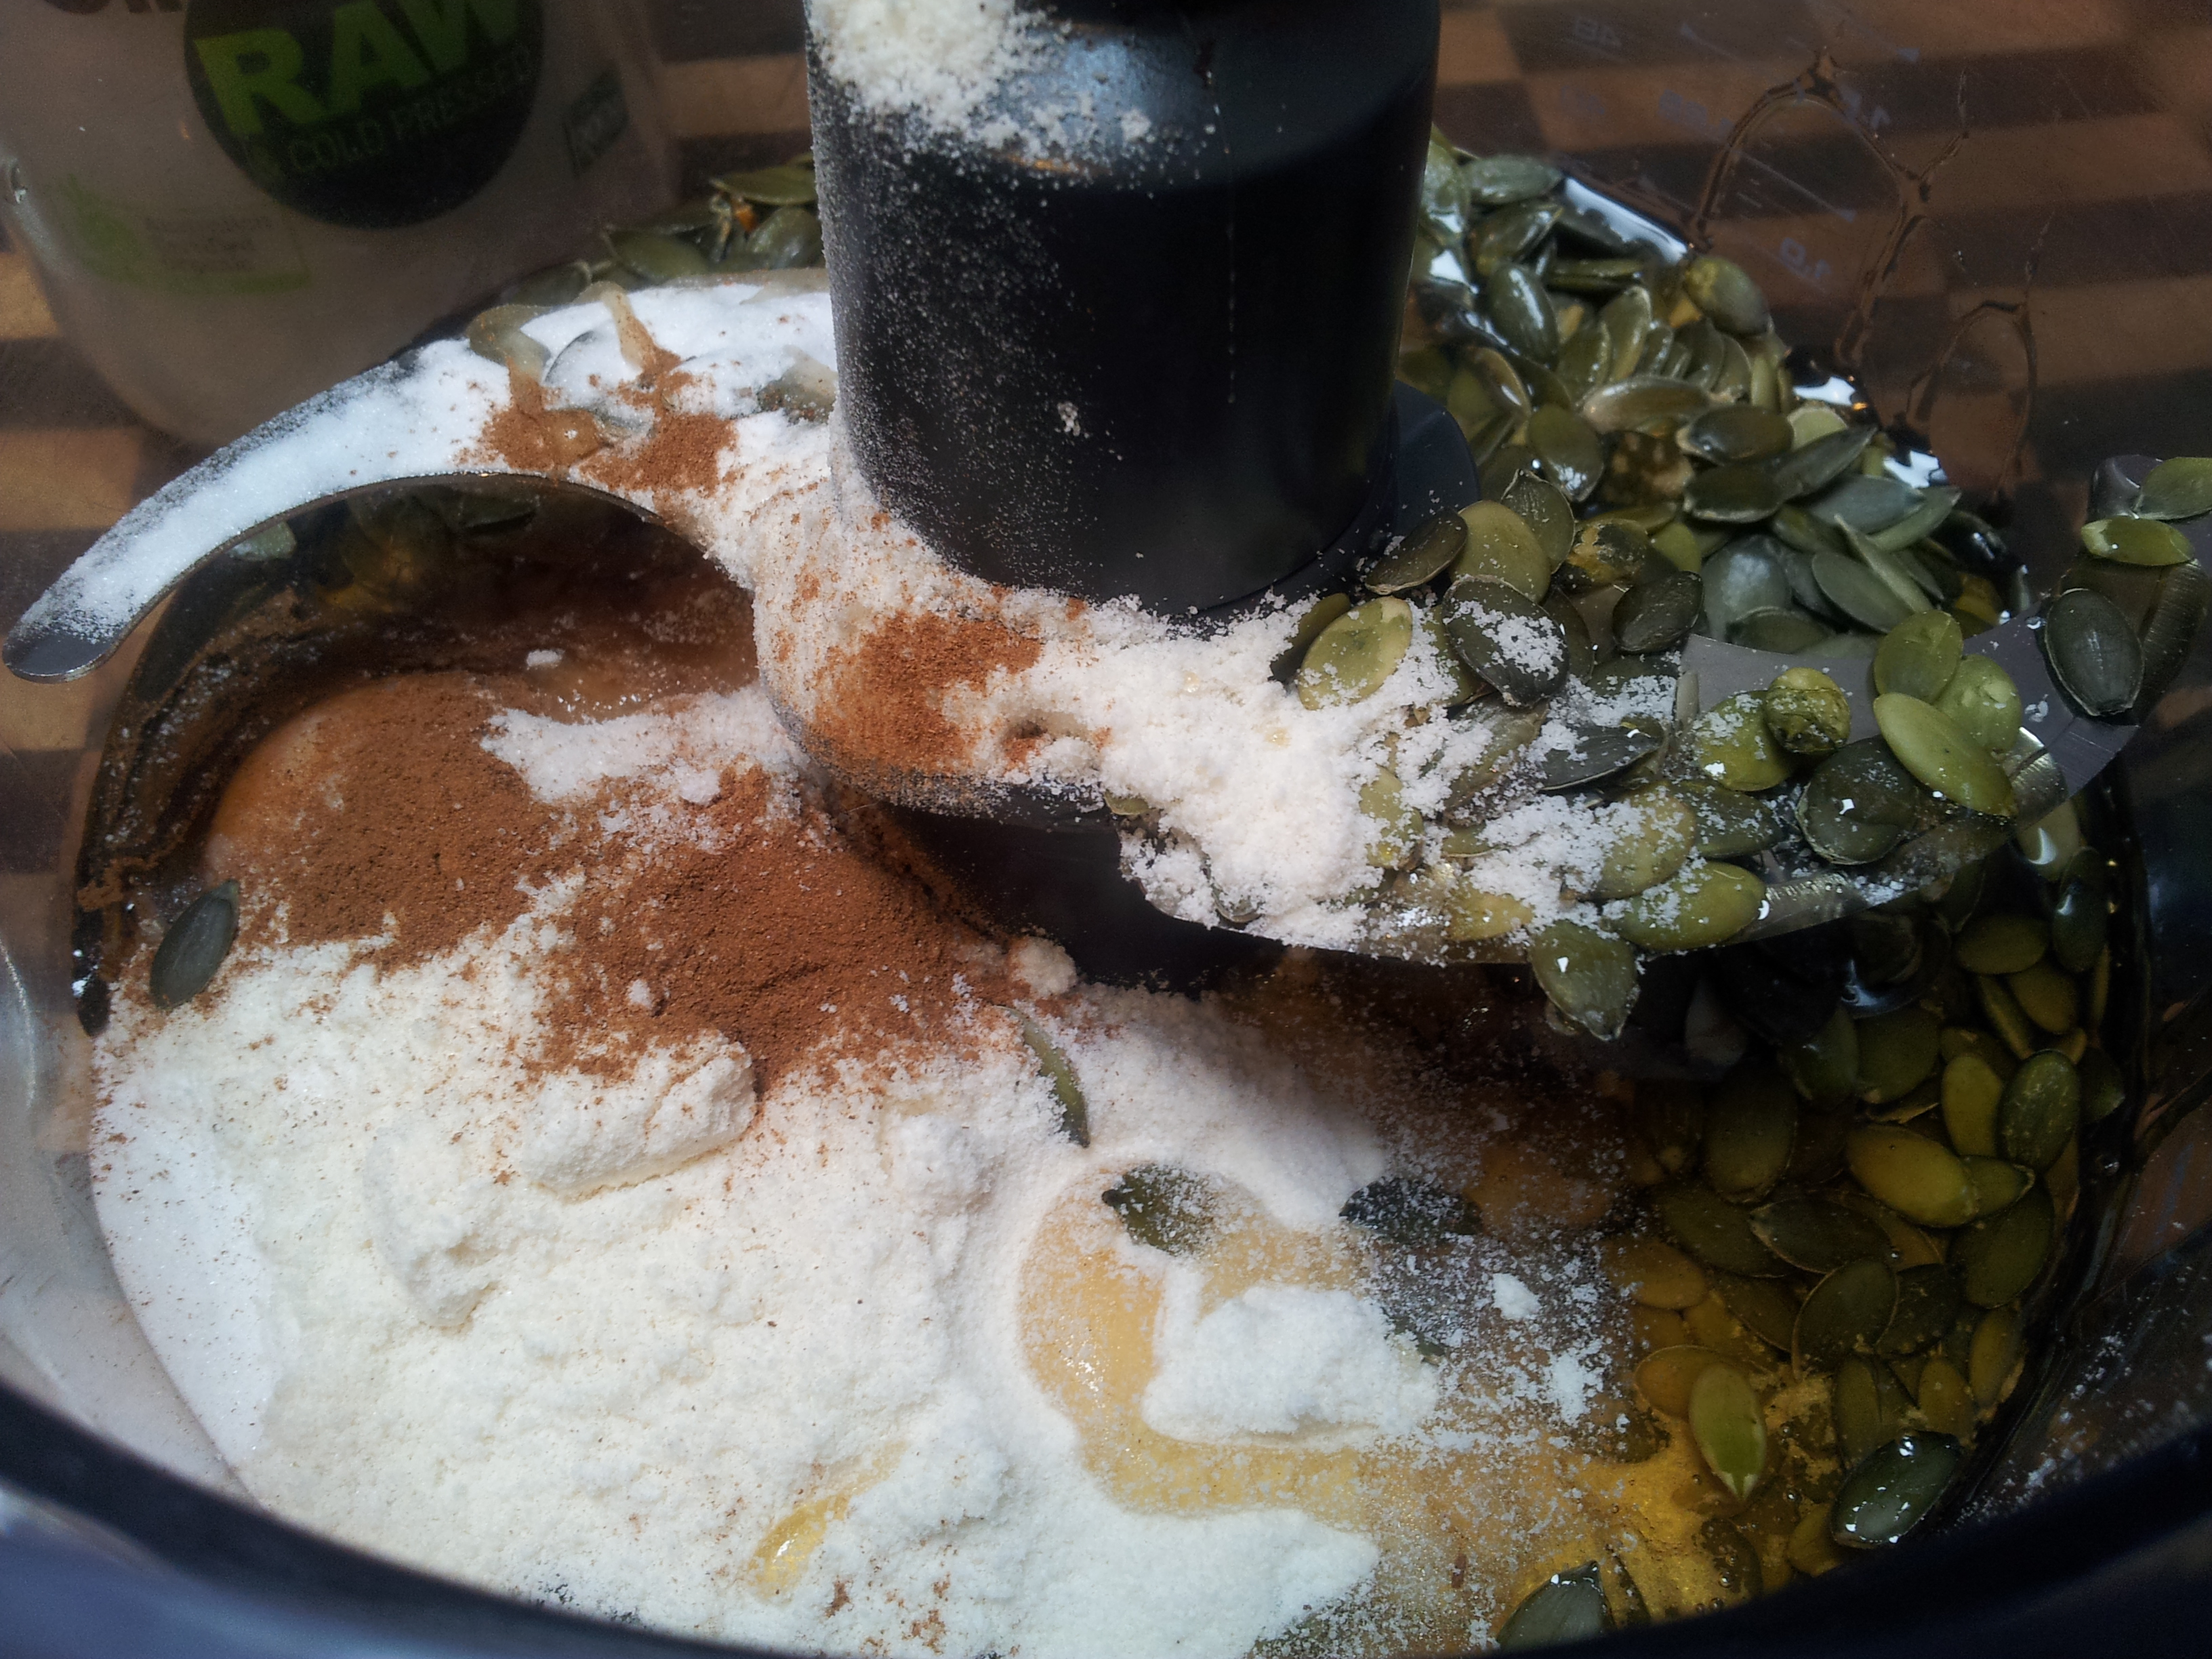
A food processor is required for this recipe as the Pumpkin seeds need to be processed and this is difficult to do any other way. I have used activated seeds and l would advise you to use them to decrease the anti-nutrient content of the loaf.
Ingredients:
2 1/2 cups of Pumpkin seeds (activated)
1/3 cup melted coconut oil
4 eggs (Free range, Organic or local pasture raised)
1/3 cup Coconut Flour
1/4 Cup Rice Malt Syrup
1/2 teaspoon Bicarb Soda (Bobs Red Mill)
1/2 teaspoon Cinnamon
1/2 teaspoon Pink Rock Salt (or Sea Salt)
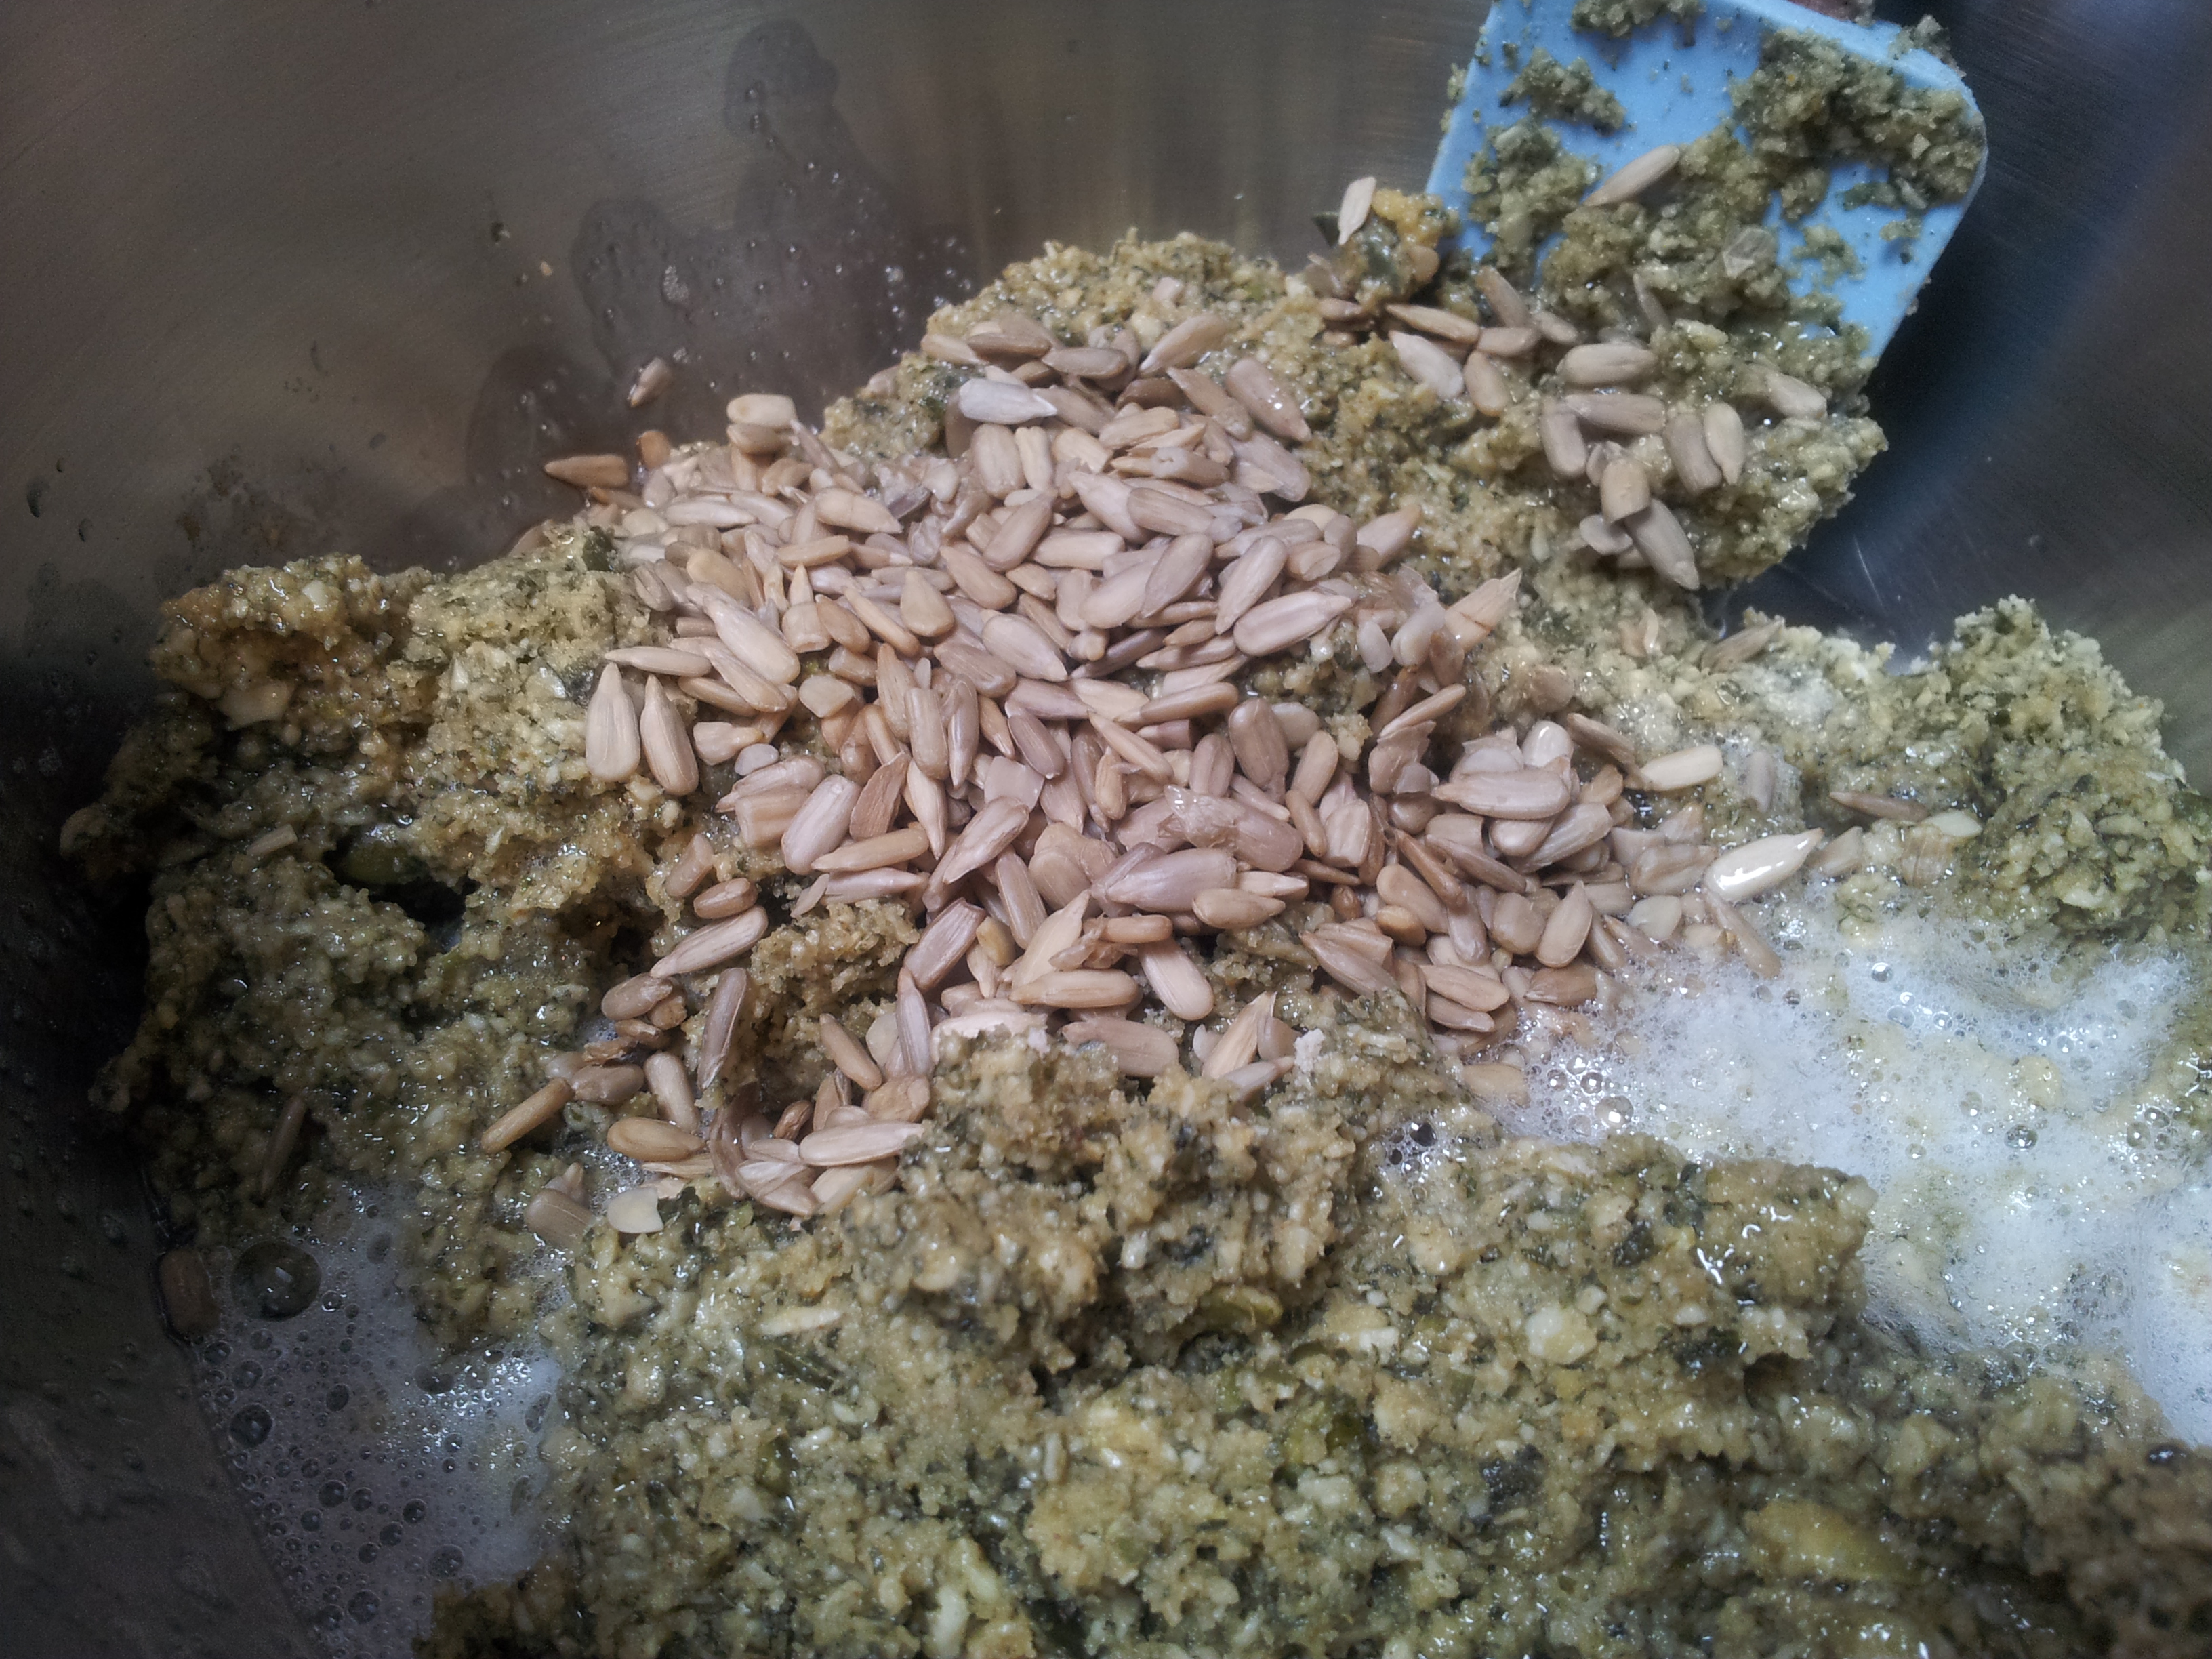
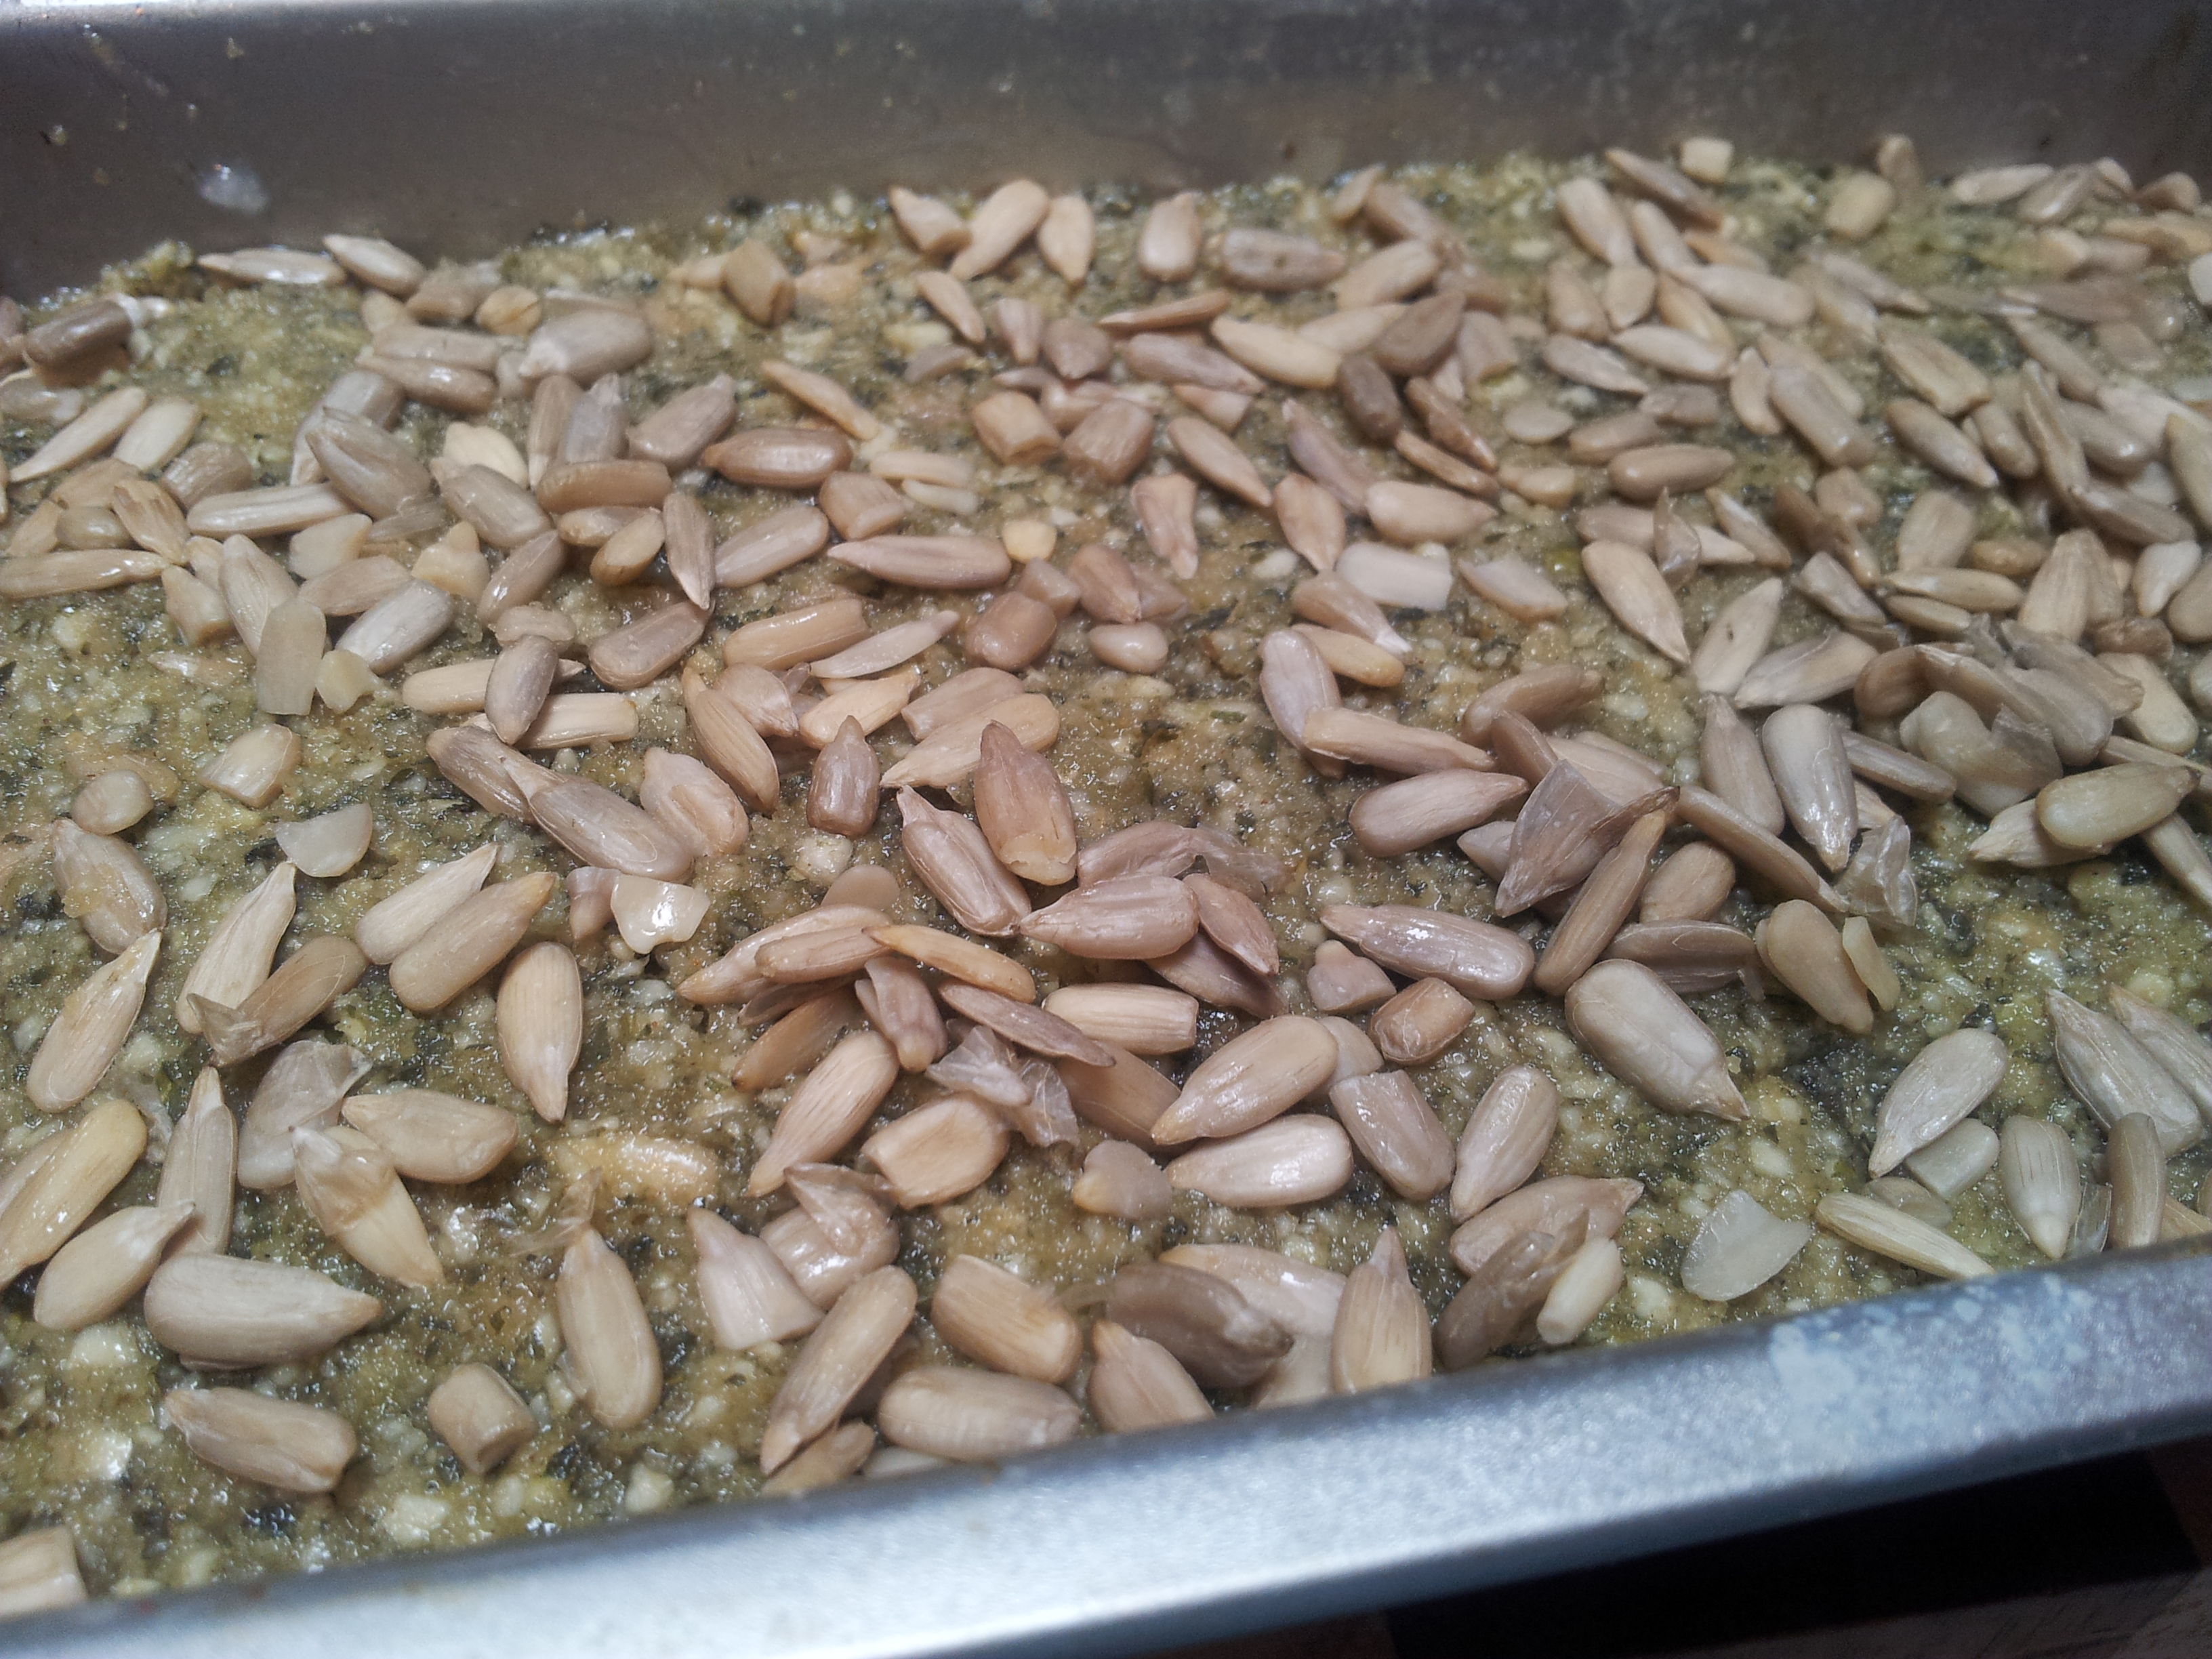
1/4 Cup Sunflower Seeds (activated) plus extra for the top.
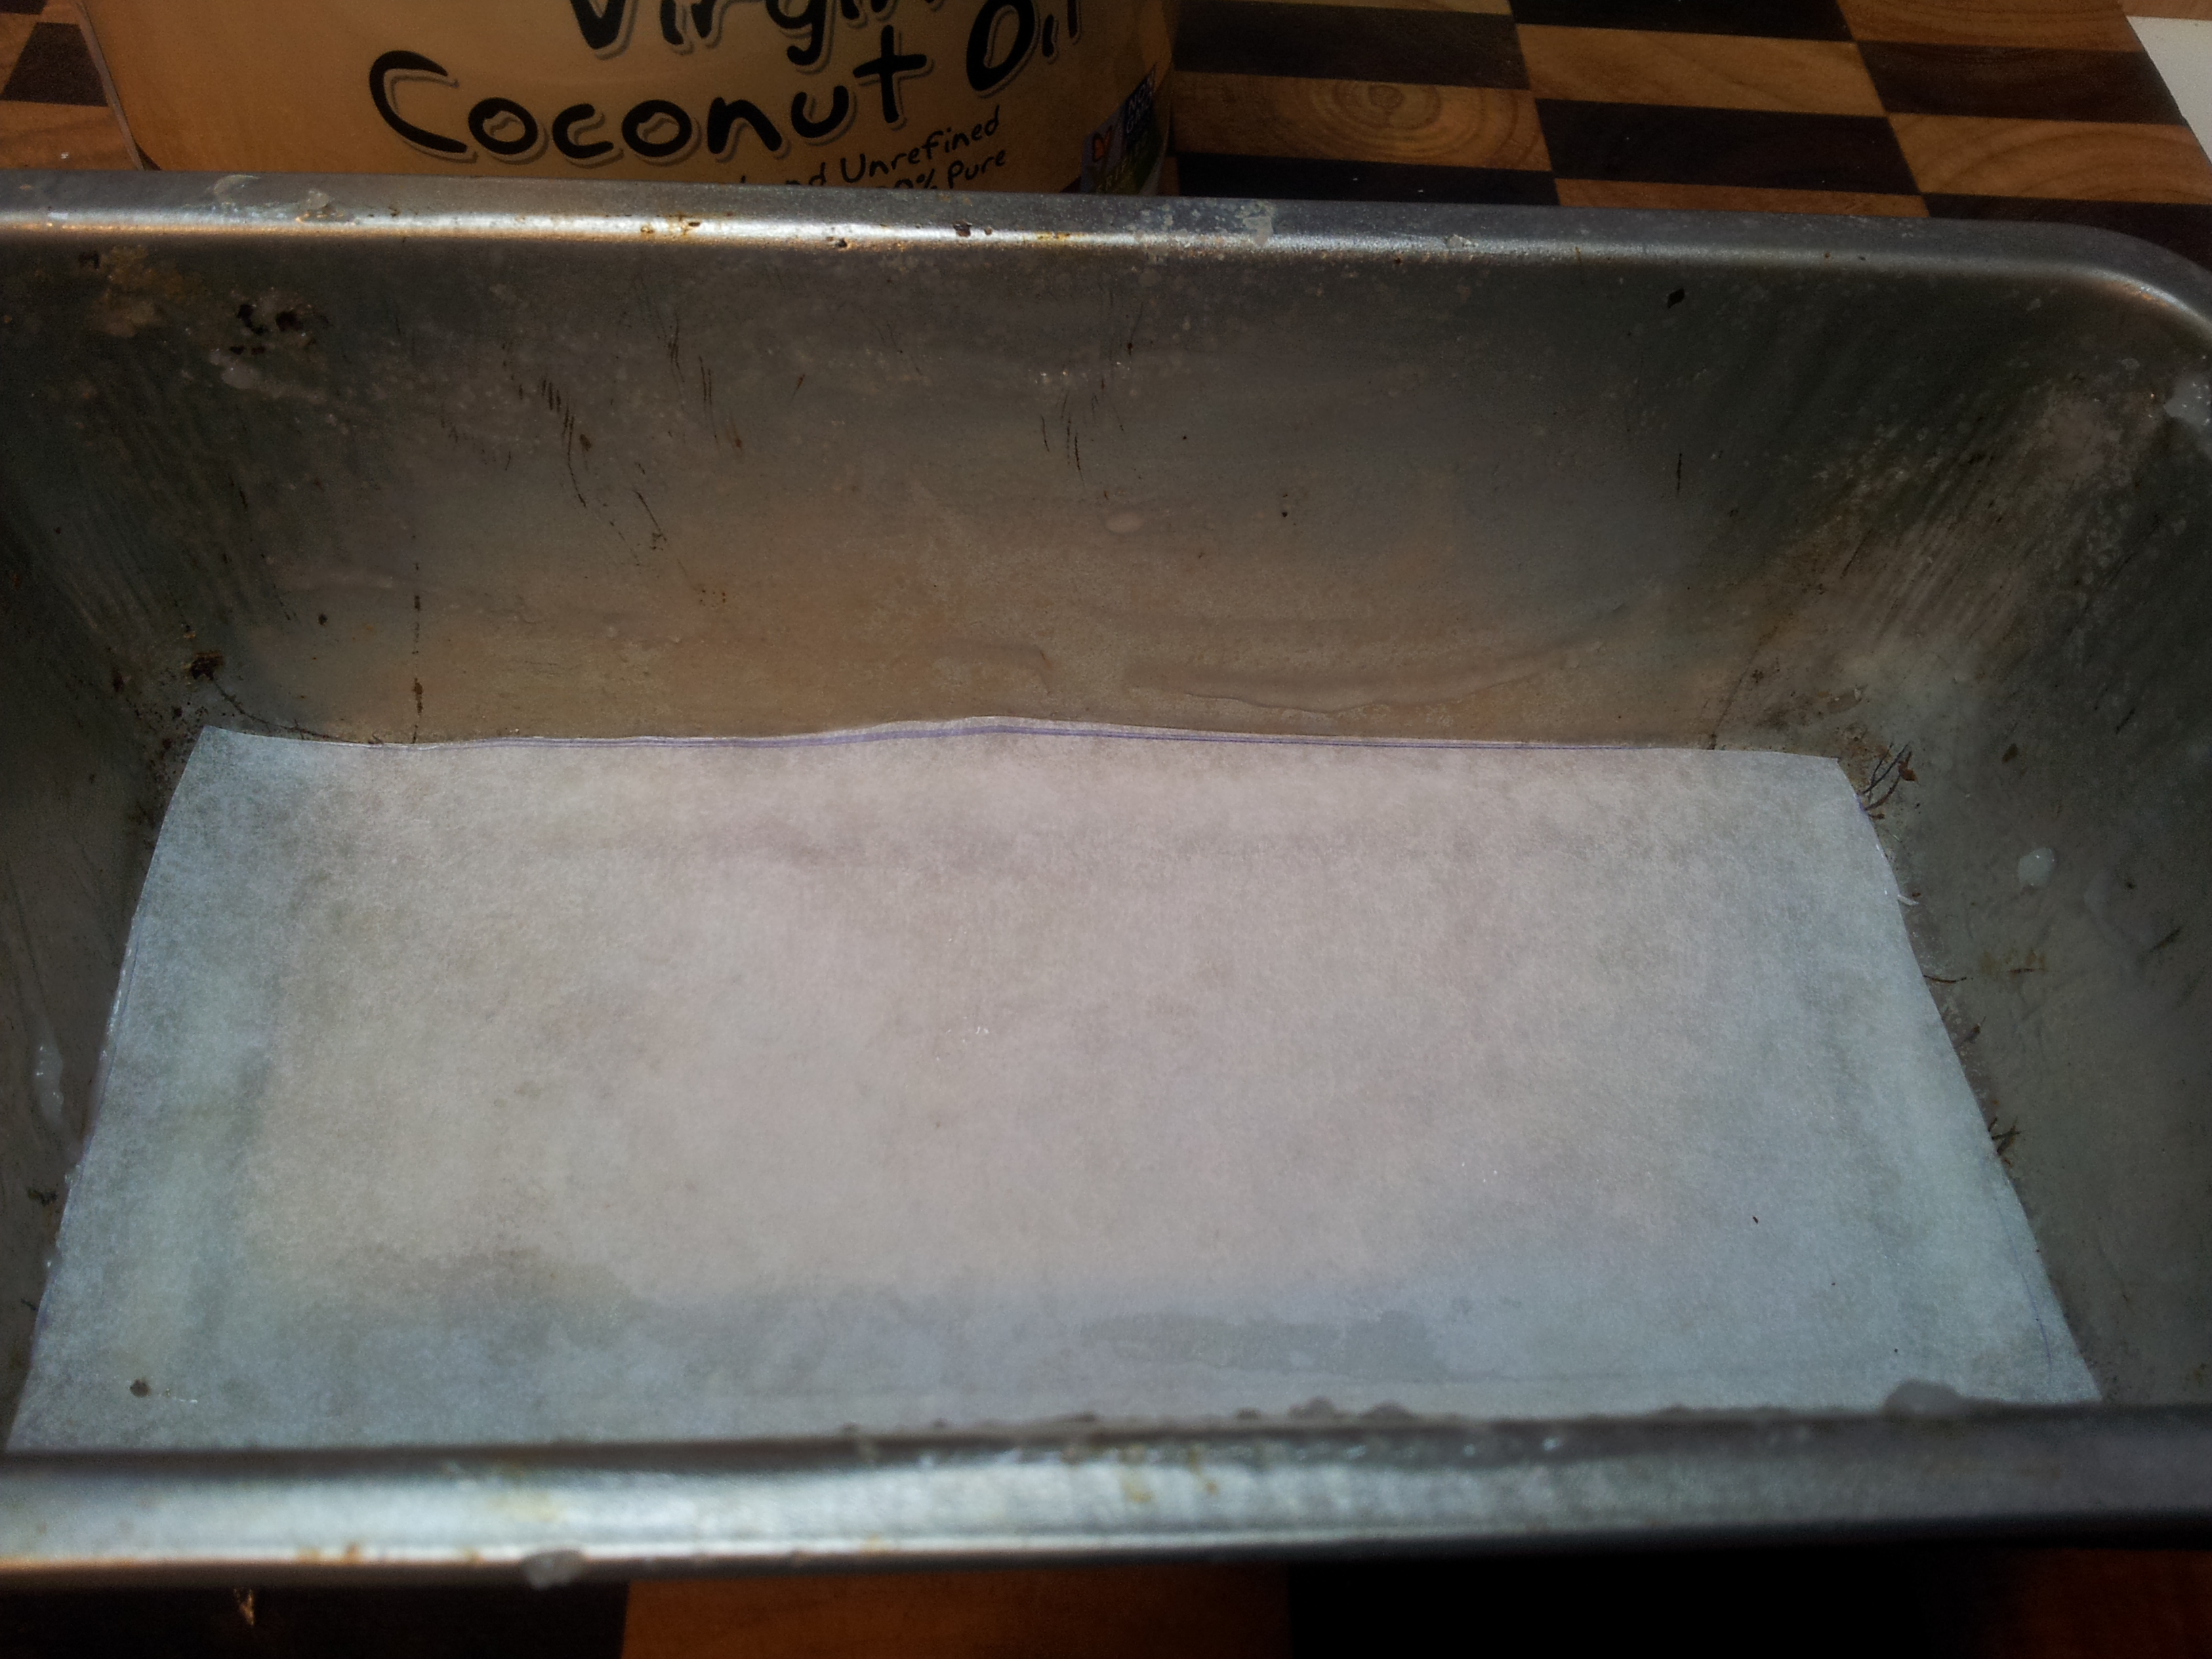
Grease your loaf tin with coconut oil and line the base with baking paper. This tin is smaller than a regular loaf baking dish so the loaf is quite compact.
Method:
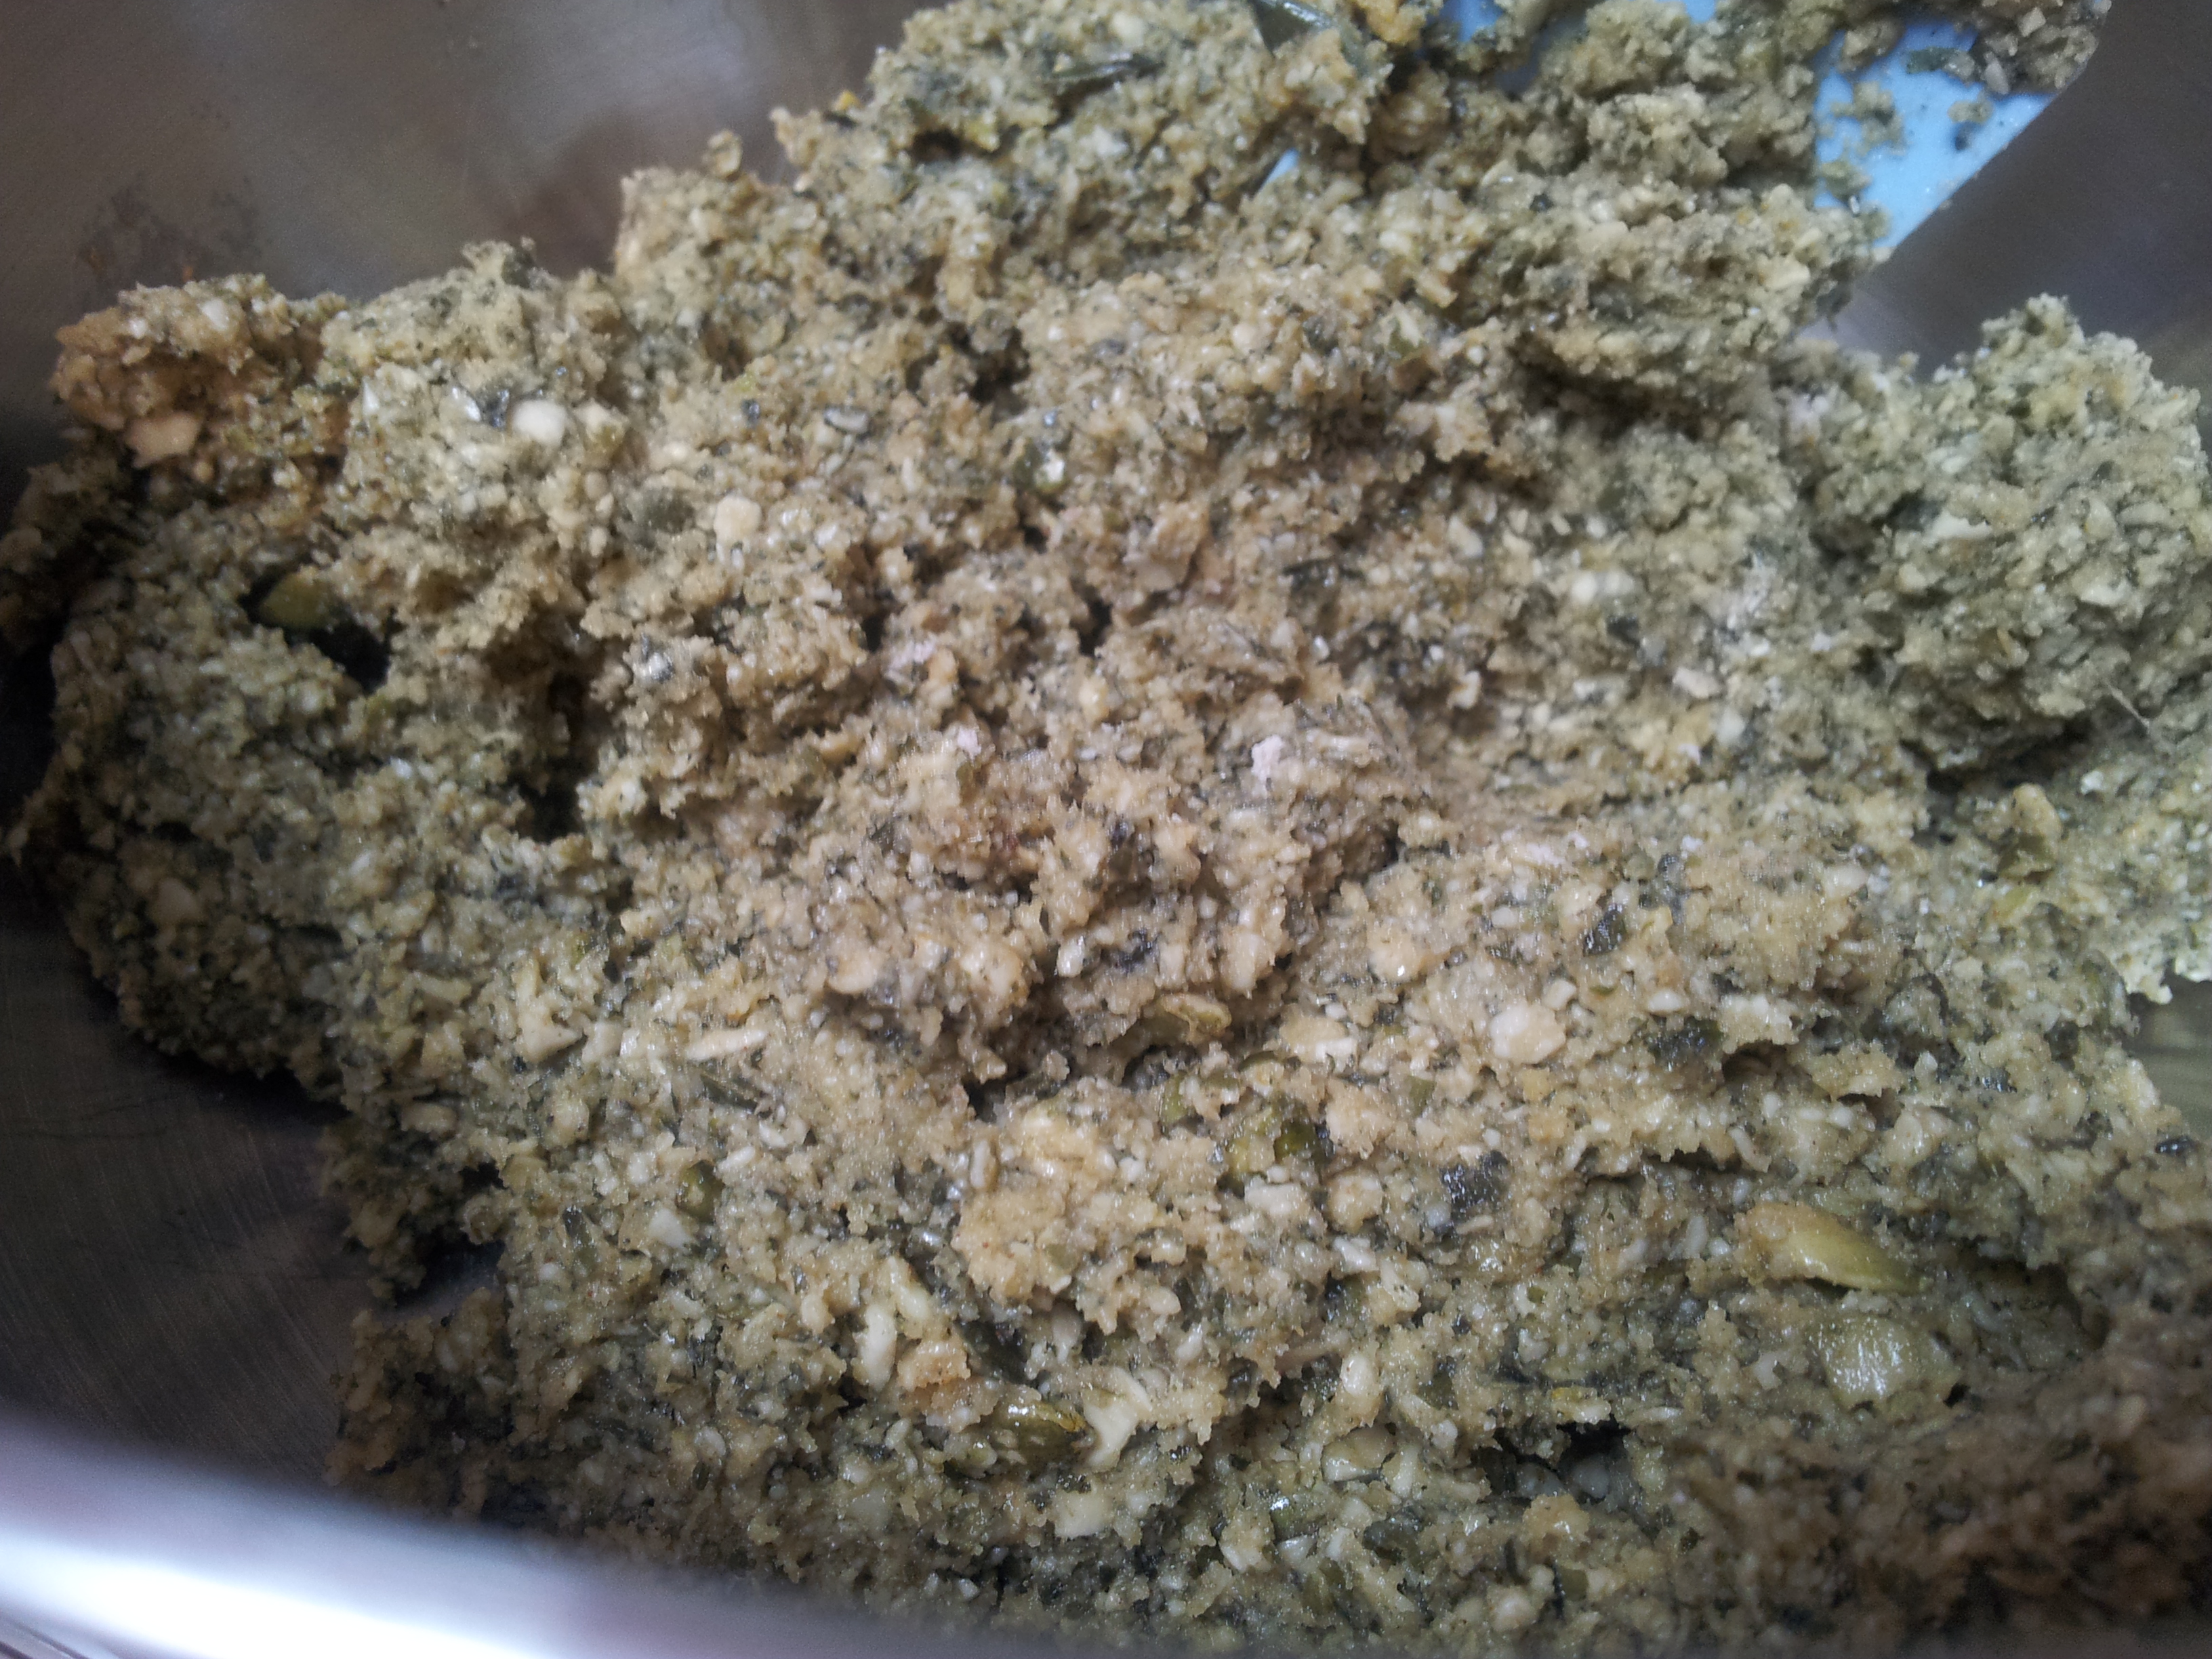
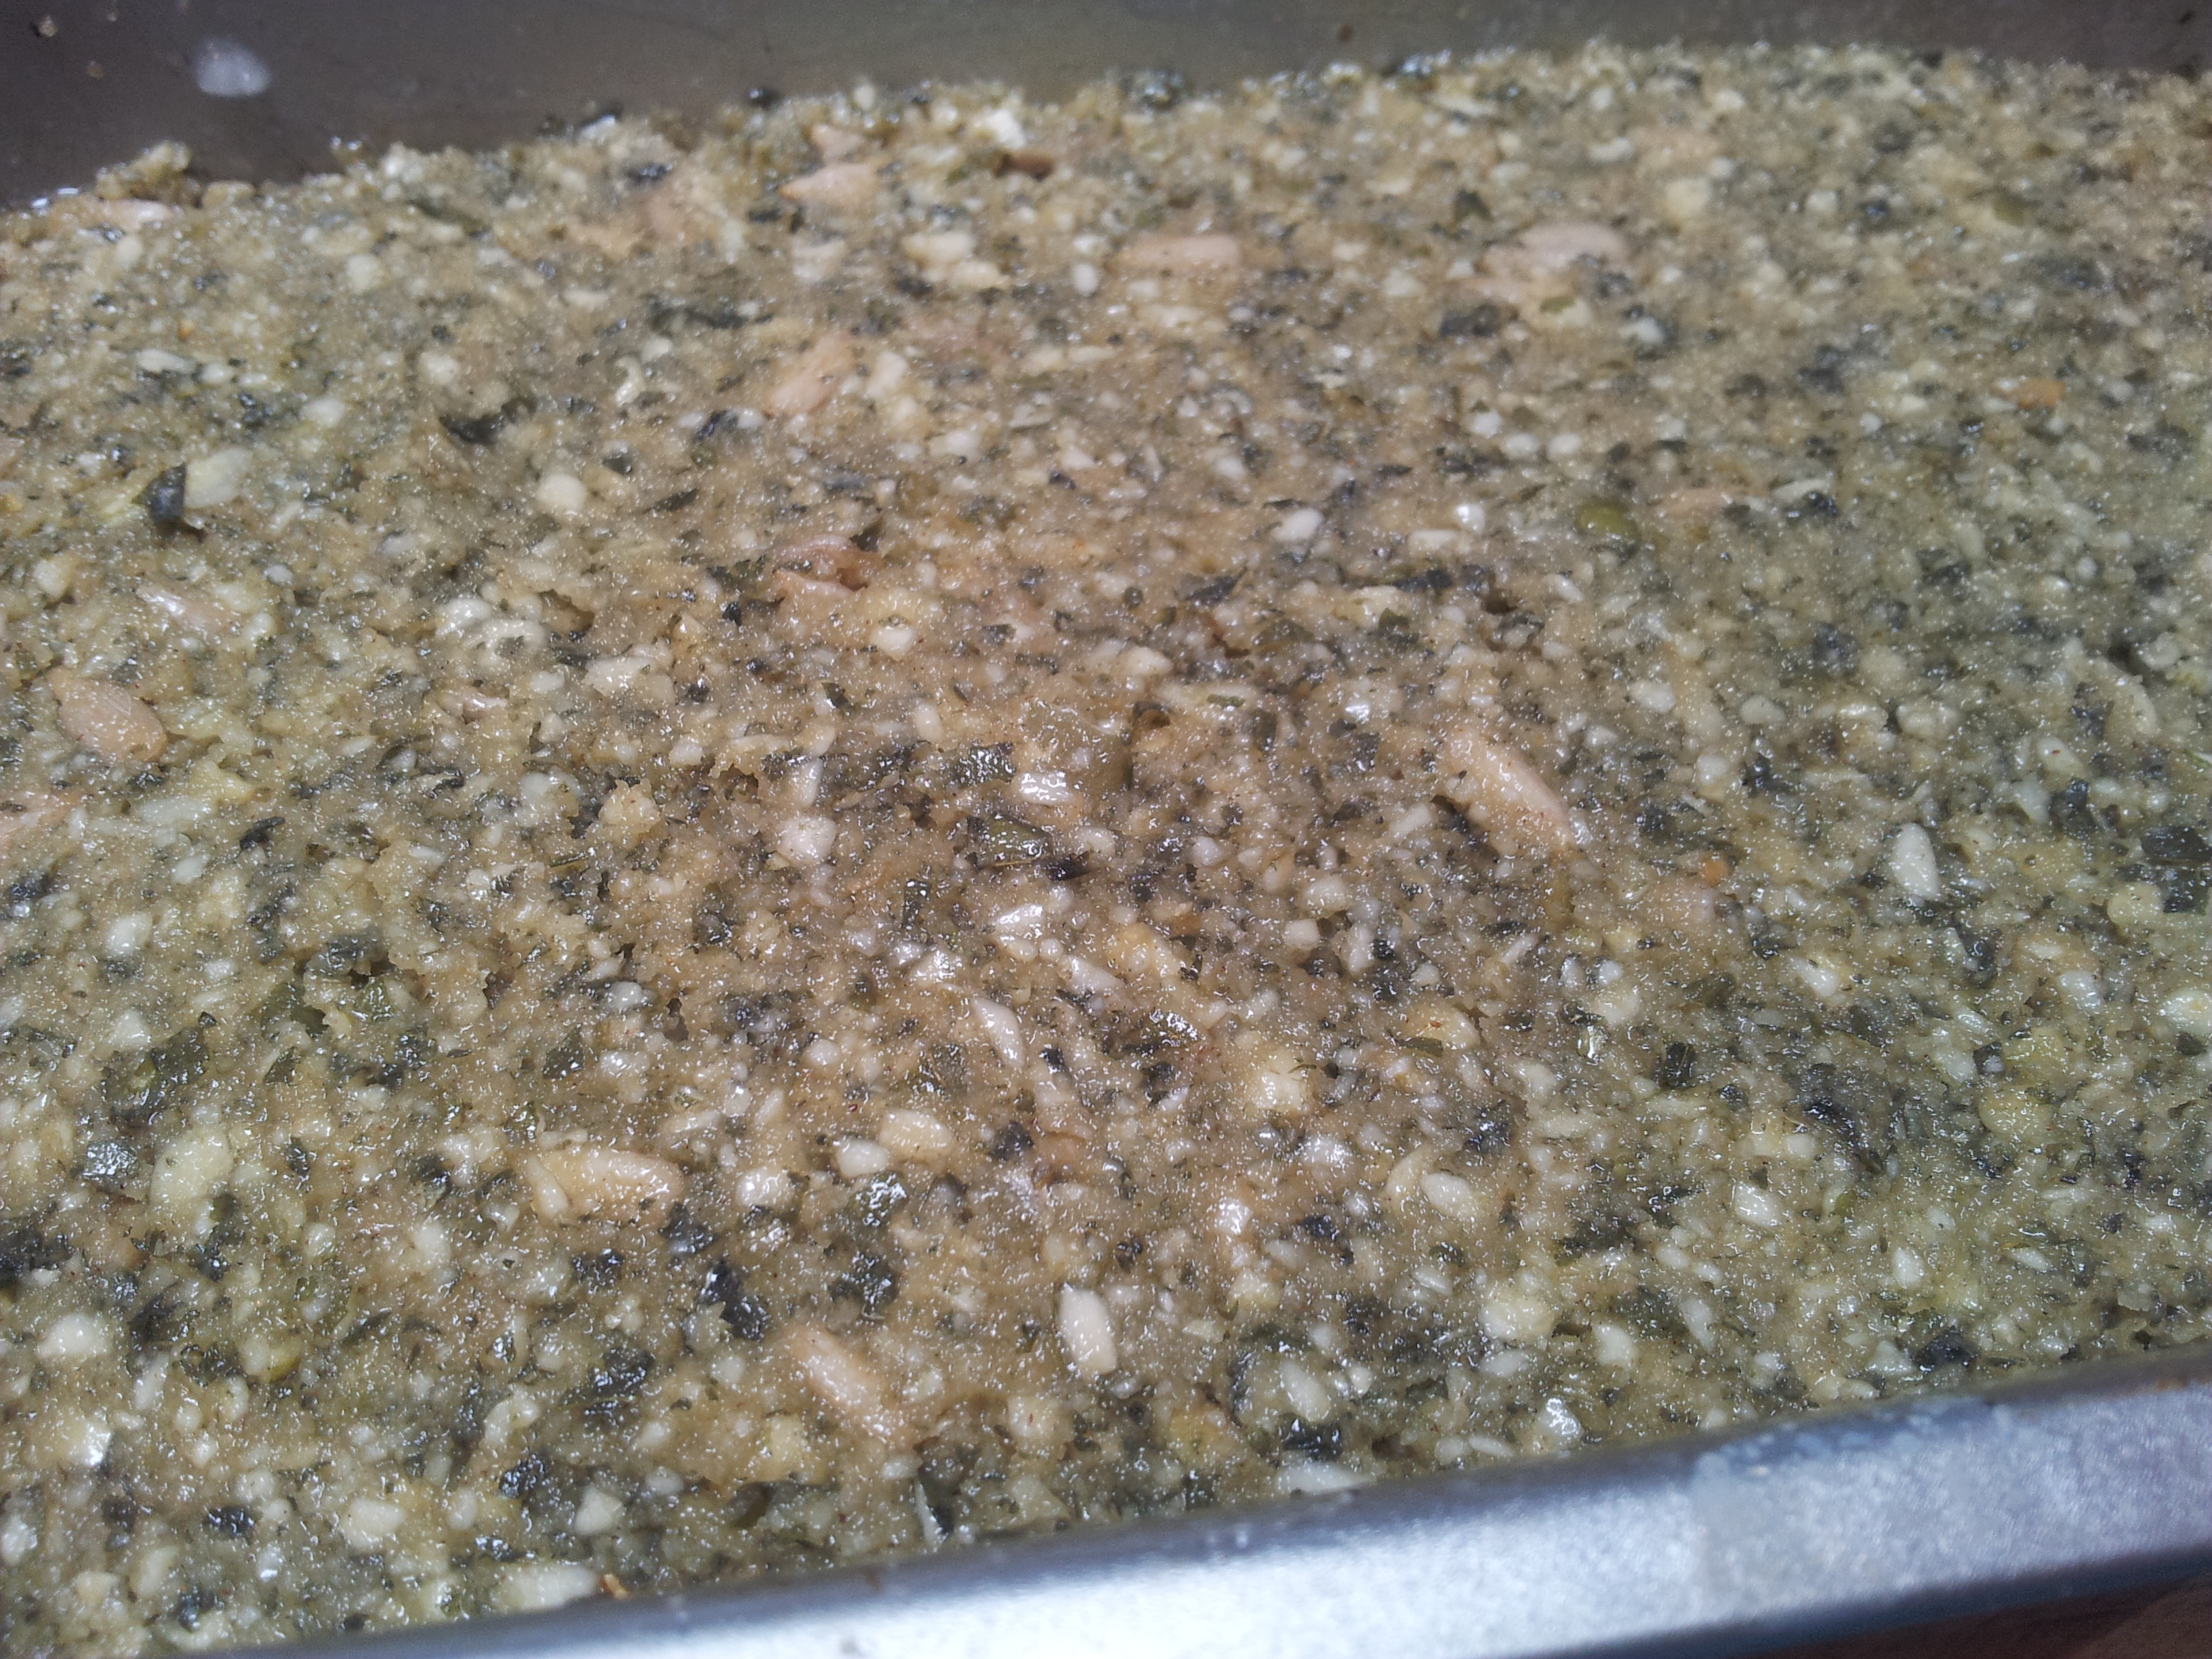
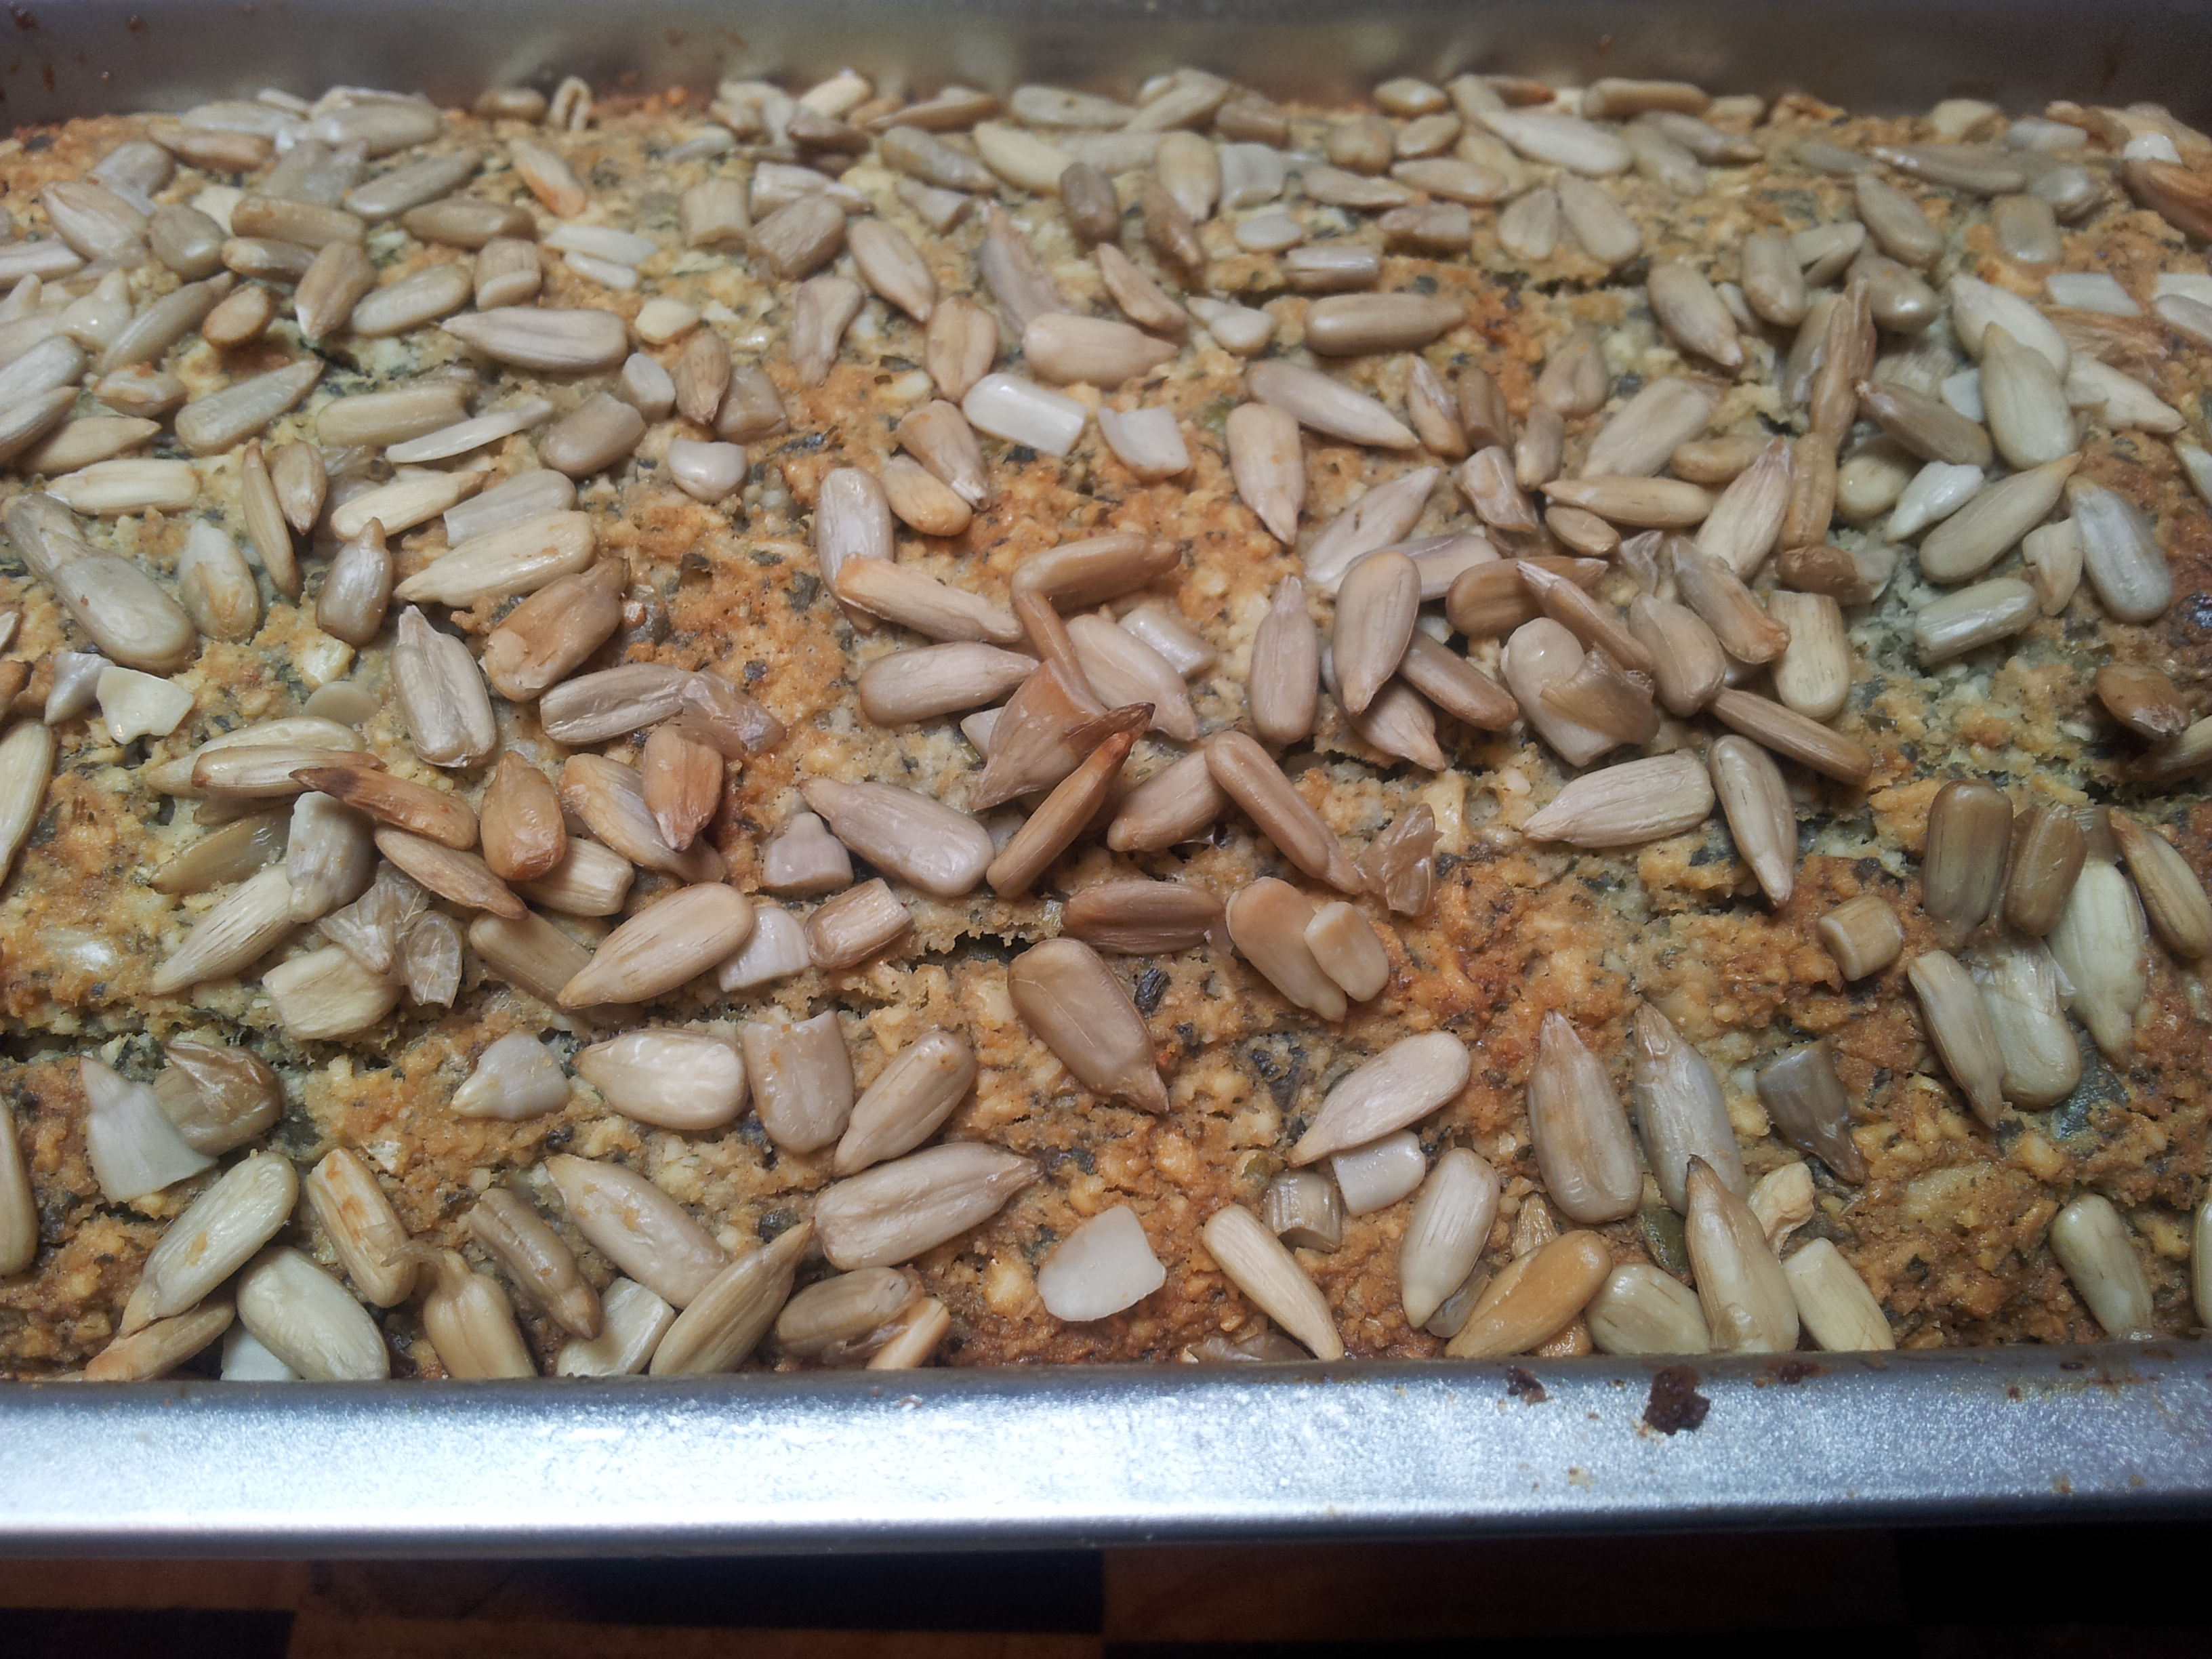
Place all ingredients into the food processor except the coconut oil and sunflower seeds. Process until well combined and the pumpkin seeds are quite small and broken.The mix is quite thick. Place into a bowl and add the melted coconut oil and sunflower seeds.Mix gently until well combined. The mix will look nice and moist.Spoon the mixture into the baking dish and smooth the top with the spatula.Sprinkle extra sunflower seeds over the top and ensure good coverage. You could use pumpkin seeds as an alternative or a mix of both would be fun.Bake in a pre-heated 180 Degree Celsius oven until golden and firm. Each oven will be different and if your oven is hot then lower the temperature. My bread split slightly on the top and this was a good sign it was done.
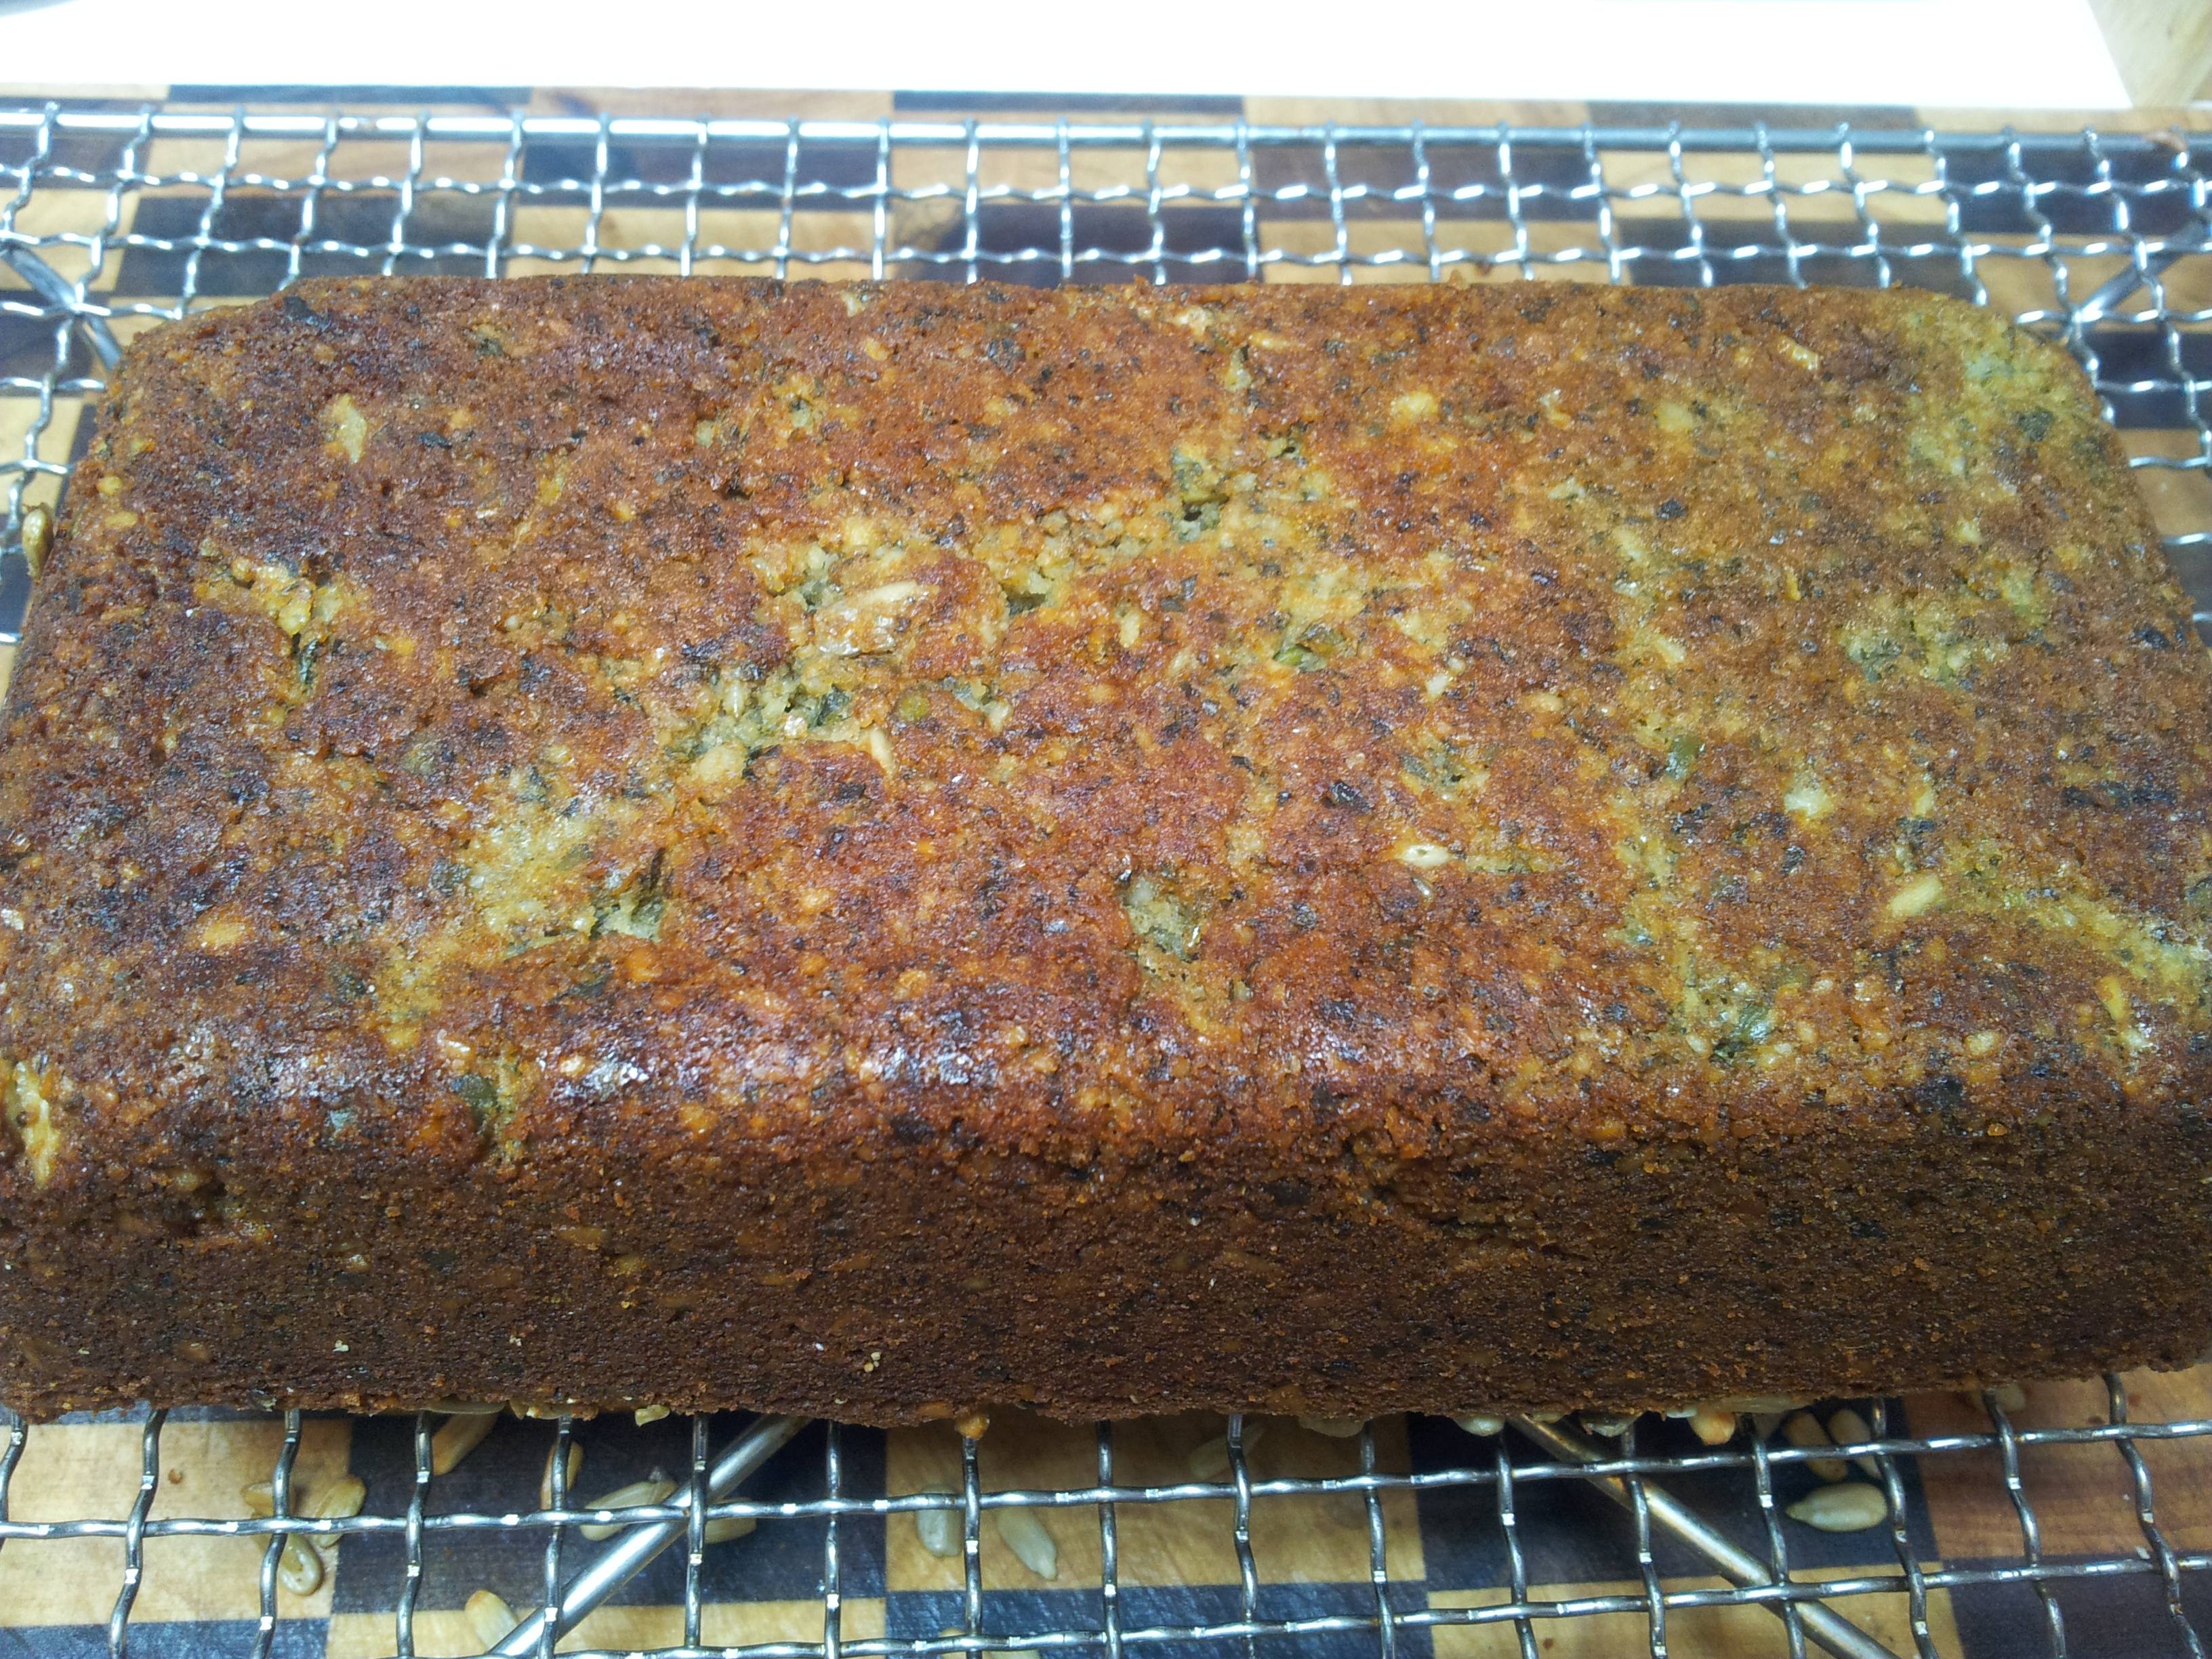
Remove the bread from the oven and let cool in the pan until almost cool. With a knife cut around the edge of the bread to loosen it.
Carefully turn the bread onto a cooling rack.Flip the bread over and cut a slice off. The end pieces are the best!I hope you enjoy this bread. You could add some different spices to the mixture to change the flavour.
I advise slicing the bread into single serves and storing them in the freezer to use as required, although it would keep several days out of the freezer. This bread could also be taken to work as a snack on its own or you could take the toppings with you. It could be placed under the grill and heated also.
You can follow me daily on Instagram at holistic_paleo or Facebook at Holistic Wellness For Life or Primal Living Melbourne.
These tasty raw snacks have the most delicious sweet flavour and are packed with goodness. They are Paleo, gluten, dairy and processed sugar free and filled with nutritious ingredients.
Power packed snack.
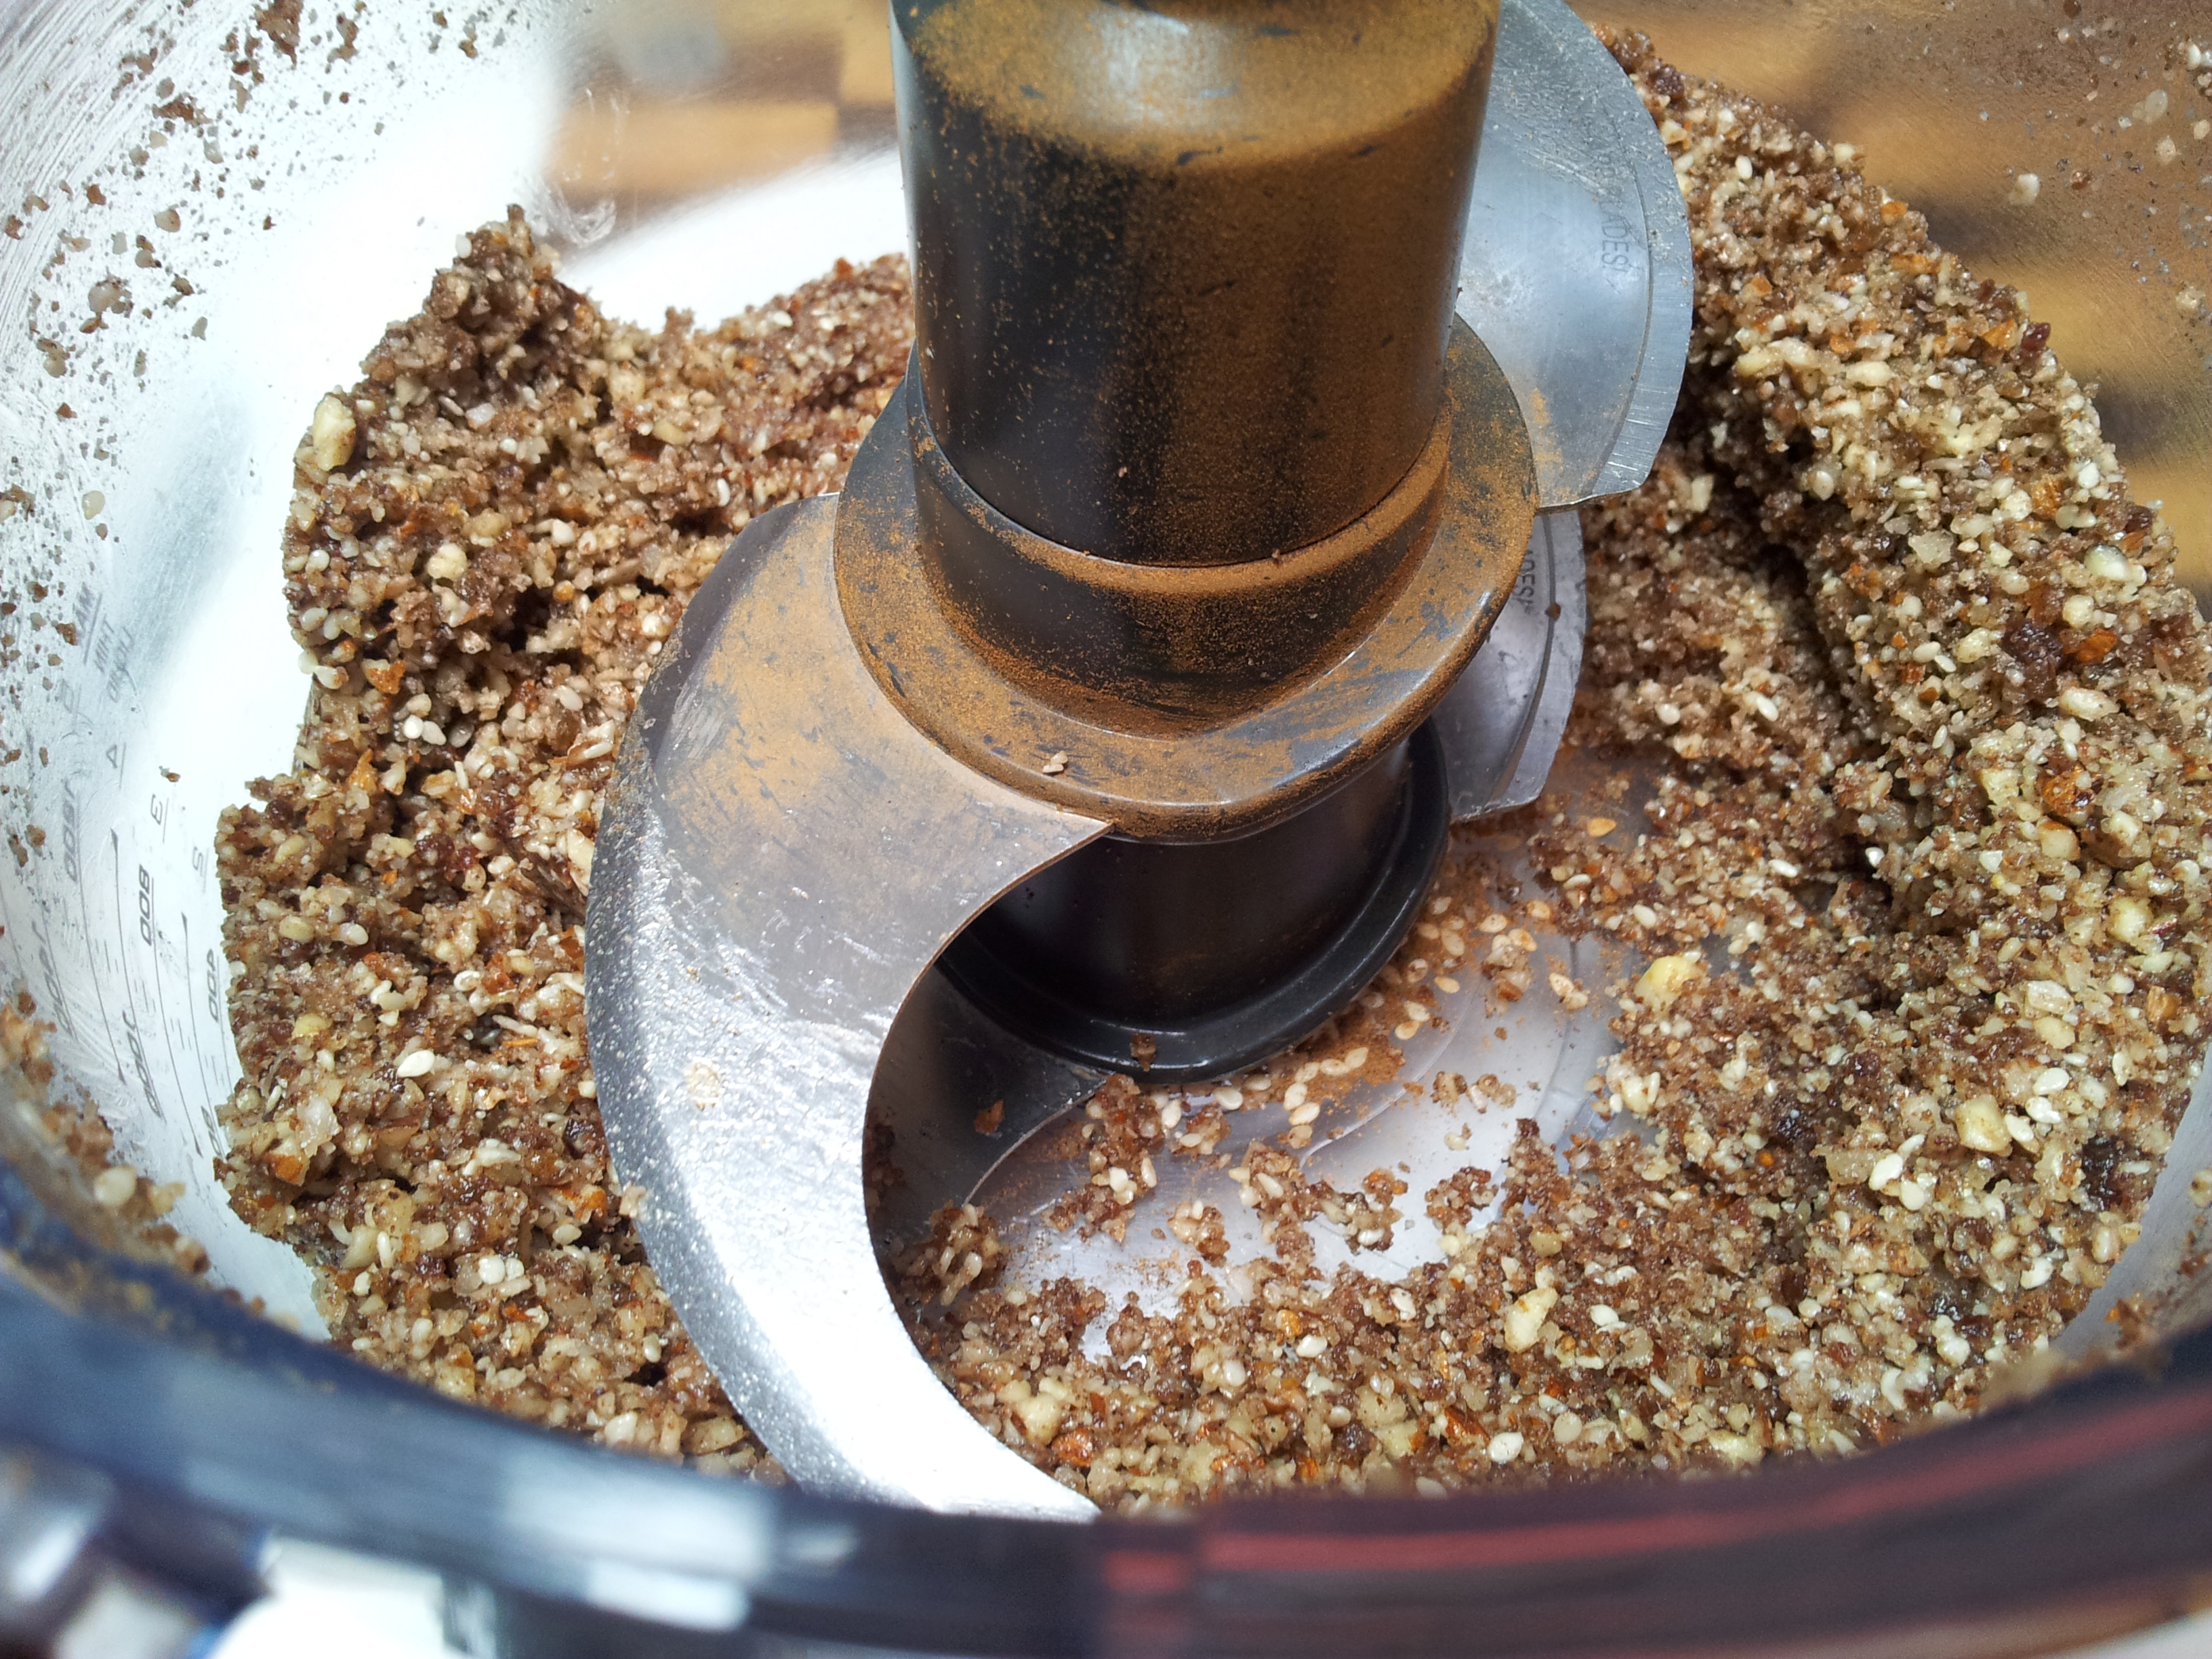
These are the simplest balls to make and taste testing the mixture is part of the fun. You need a food processor to make these as there is quite a lot of blending required. The method is so simple with all ingredients placed into the food processor and blended until an even consistency.
Just minutes to make with a food processor.
Ingredients:(everything organic if possible). This recipe makes approximately 12 balls.
1 cup of raw activated nuts (l used almonds and brazil nuts)
3 tablespoons sesame seeds
2 tablespoons coconut flakes
1 teaspoon cinnamon
4 large medjool dates (seeds removed)
3 generous tablespoons coconut oil
1 level tablespoon of a superfood powder (I used Loving Earth Rainbow SuperFood blend)
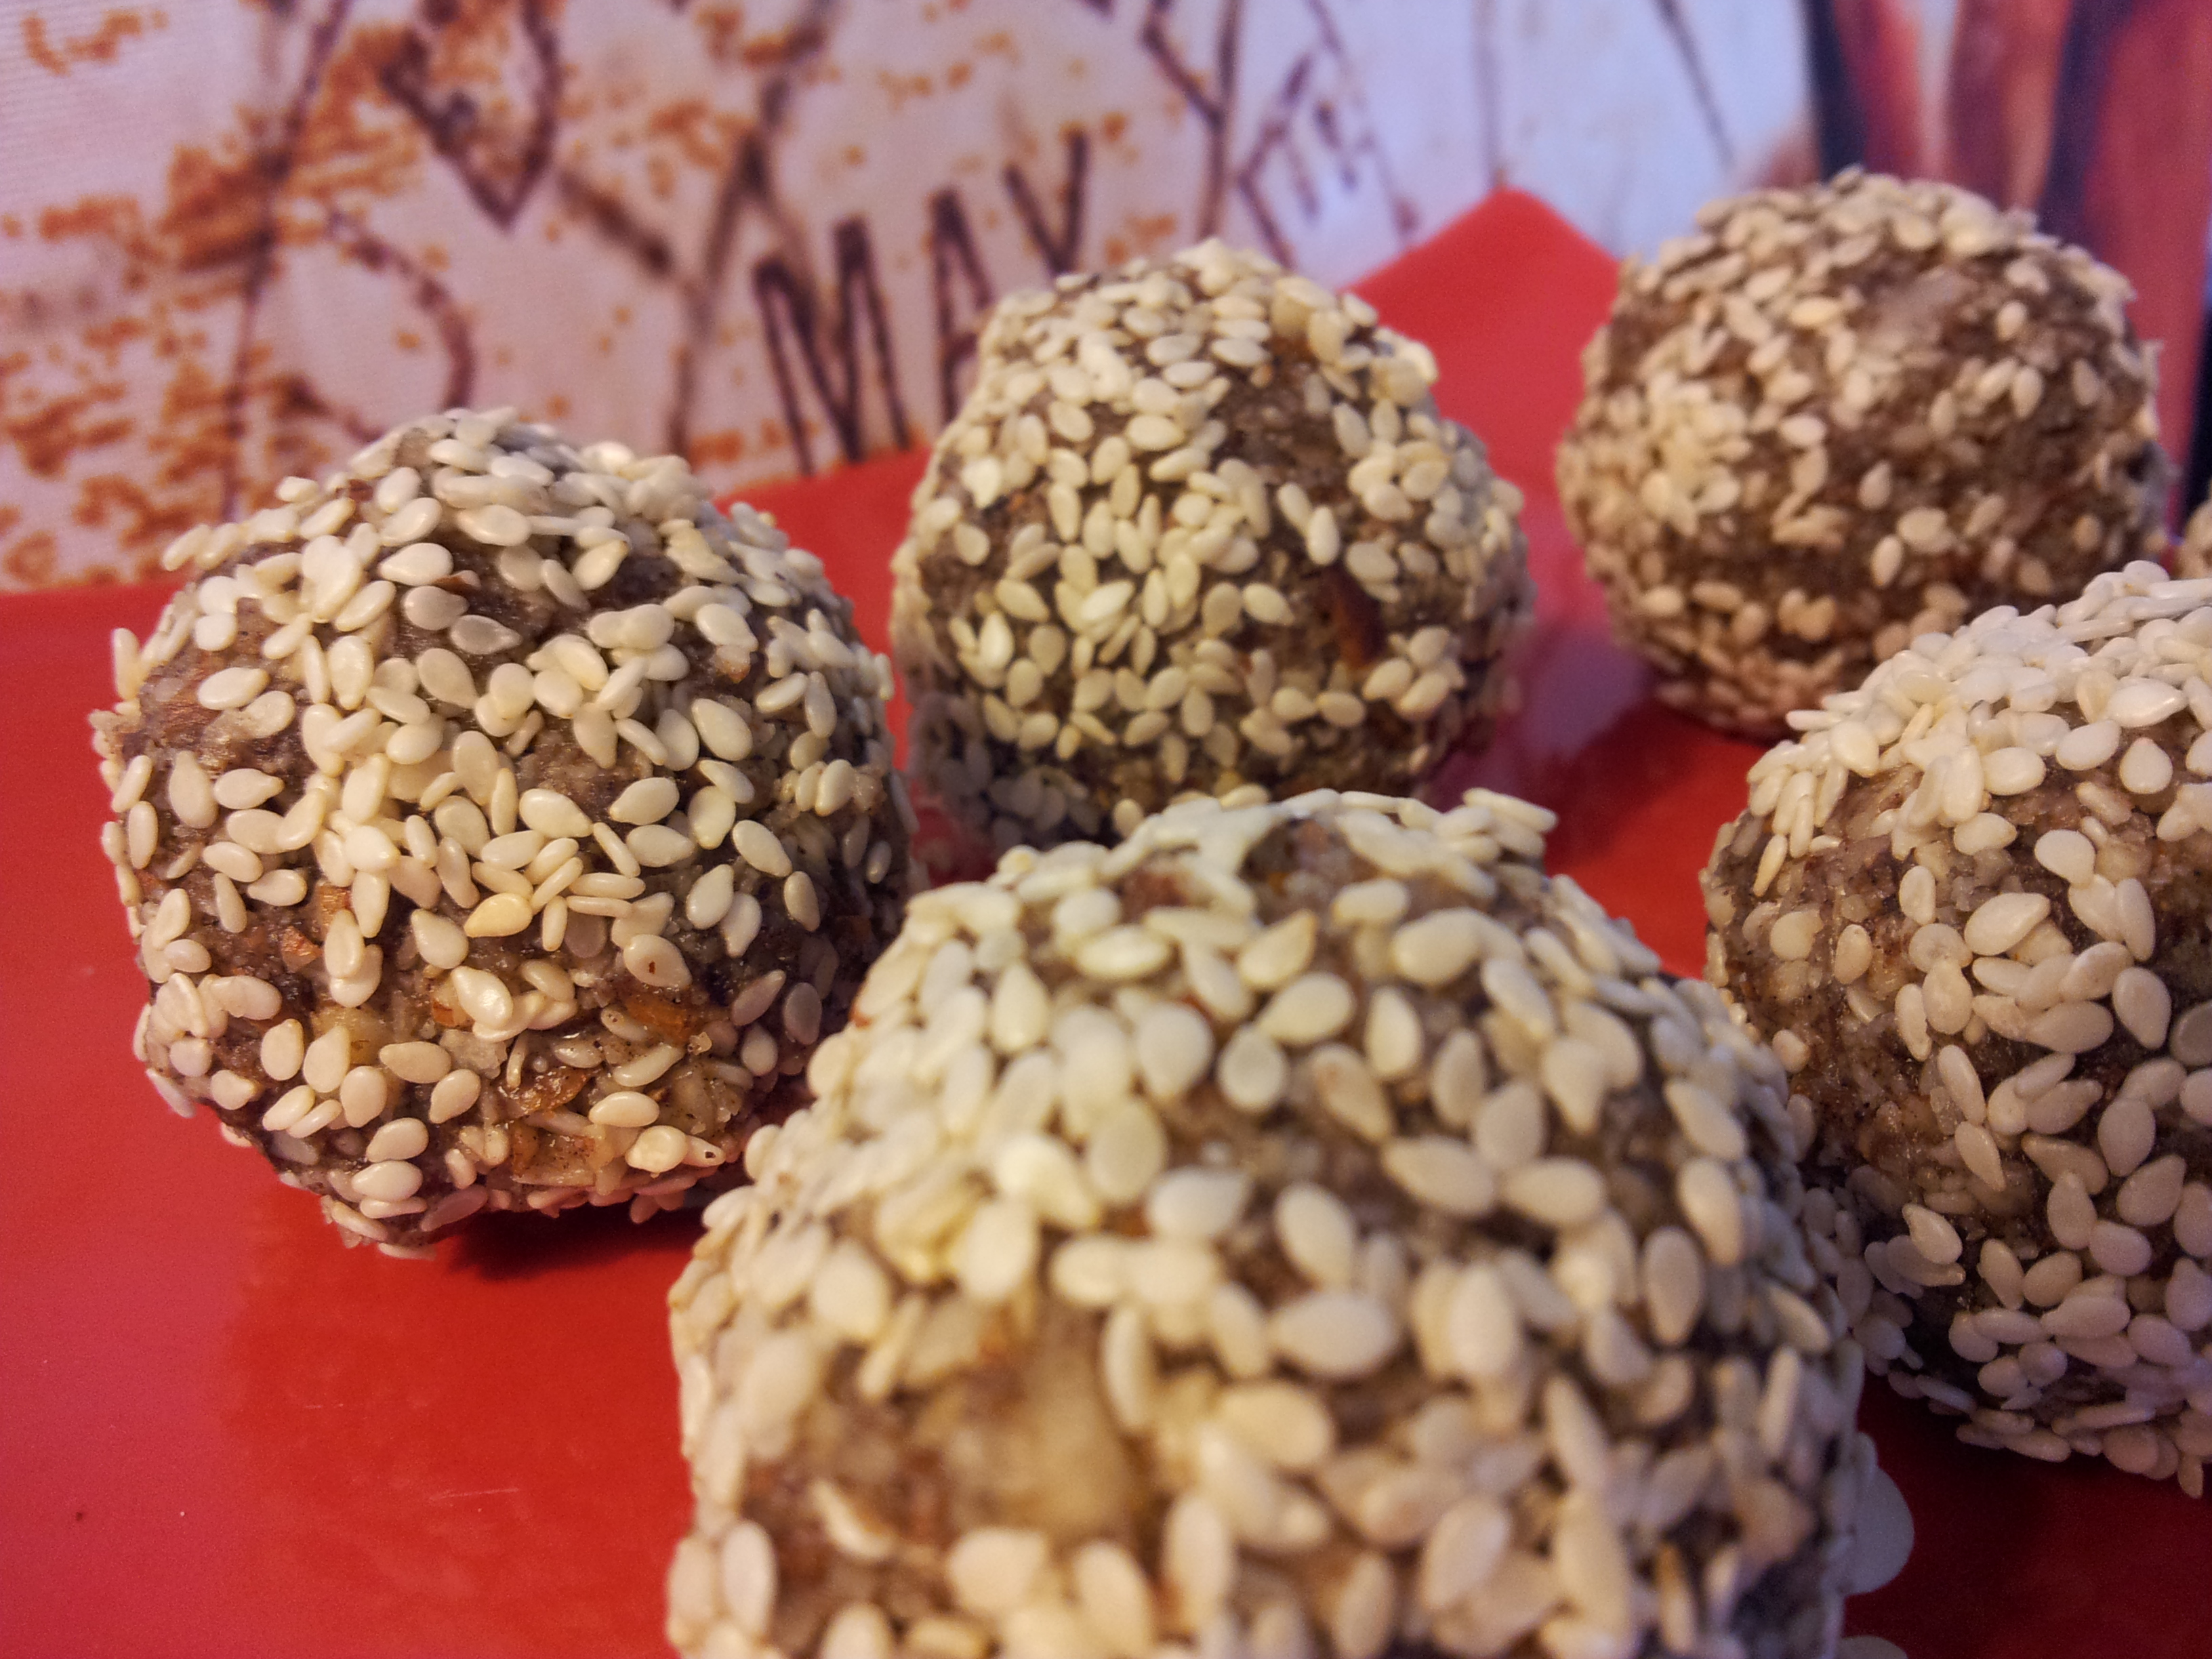
Use a spoon to scoop a small amount of mixture out of the food processor and using your hands shape into a small ball. Cover in extra sesame seeds.
Ready to be covered in sesame seeds.Looking good at this stage. A taste test here is highly appropriate.
Place the finished balls on a plate and place in the fridge for a couple of hours to firm up.
A delightful Paleo snack.
As this mix makes a small quantity of balls you could keep them in the fridge for a few days and eat as desired. Alternatively you can freeze them especially if you are doubling the recipe. You can experiment with different types of superfood powders such as spirulina or acai berry or add some raw cacao for a chocolate flavour.
The Loving Earth Rainbow SuperFood Blend is in a 150g jar and cost me $45 from the health food shop. The ingredients are raw organic macqui, raw organic acai, wildcrafted gubinge, raw organic camu camu, organic spirulina and organic wheatgrass. I like adding it to raw recipes as heating it too much can impact the nutrient content.
For Australian followers, your pantry needs delivered directly to your door.For everything coconut
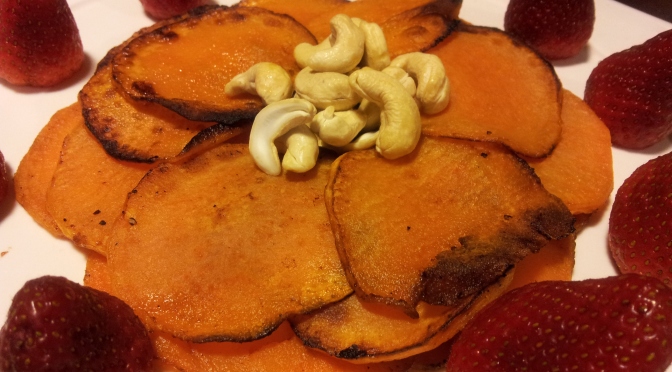
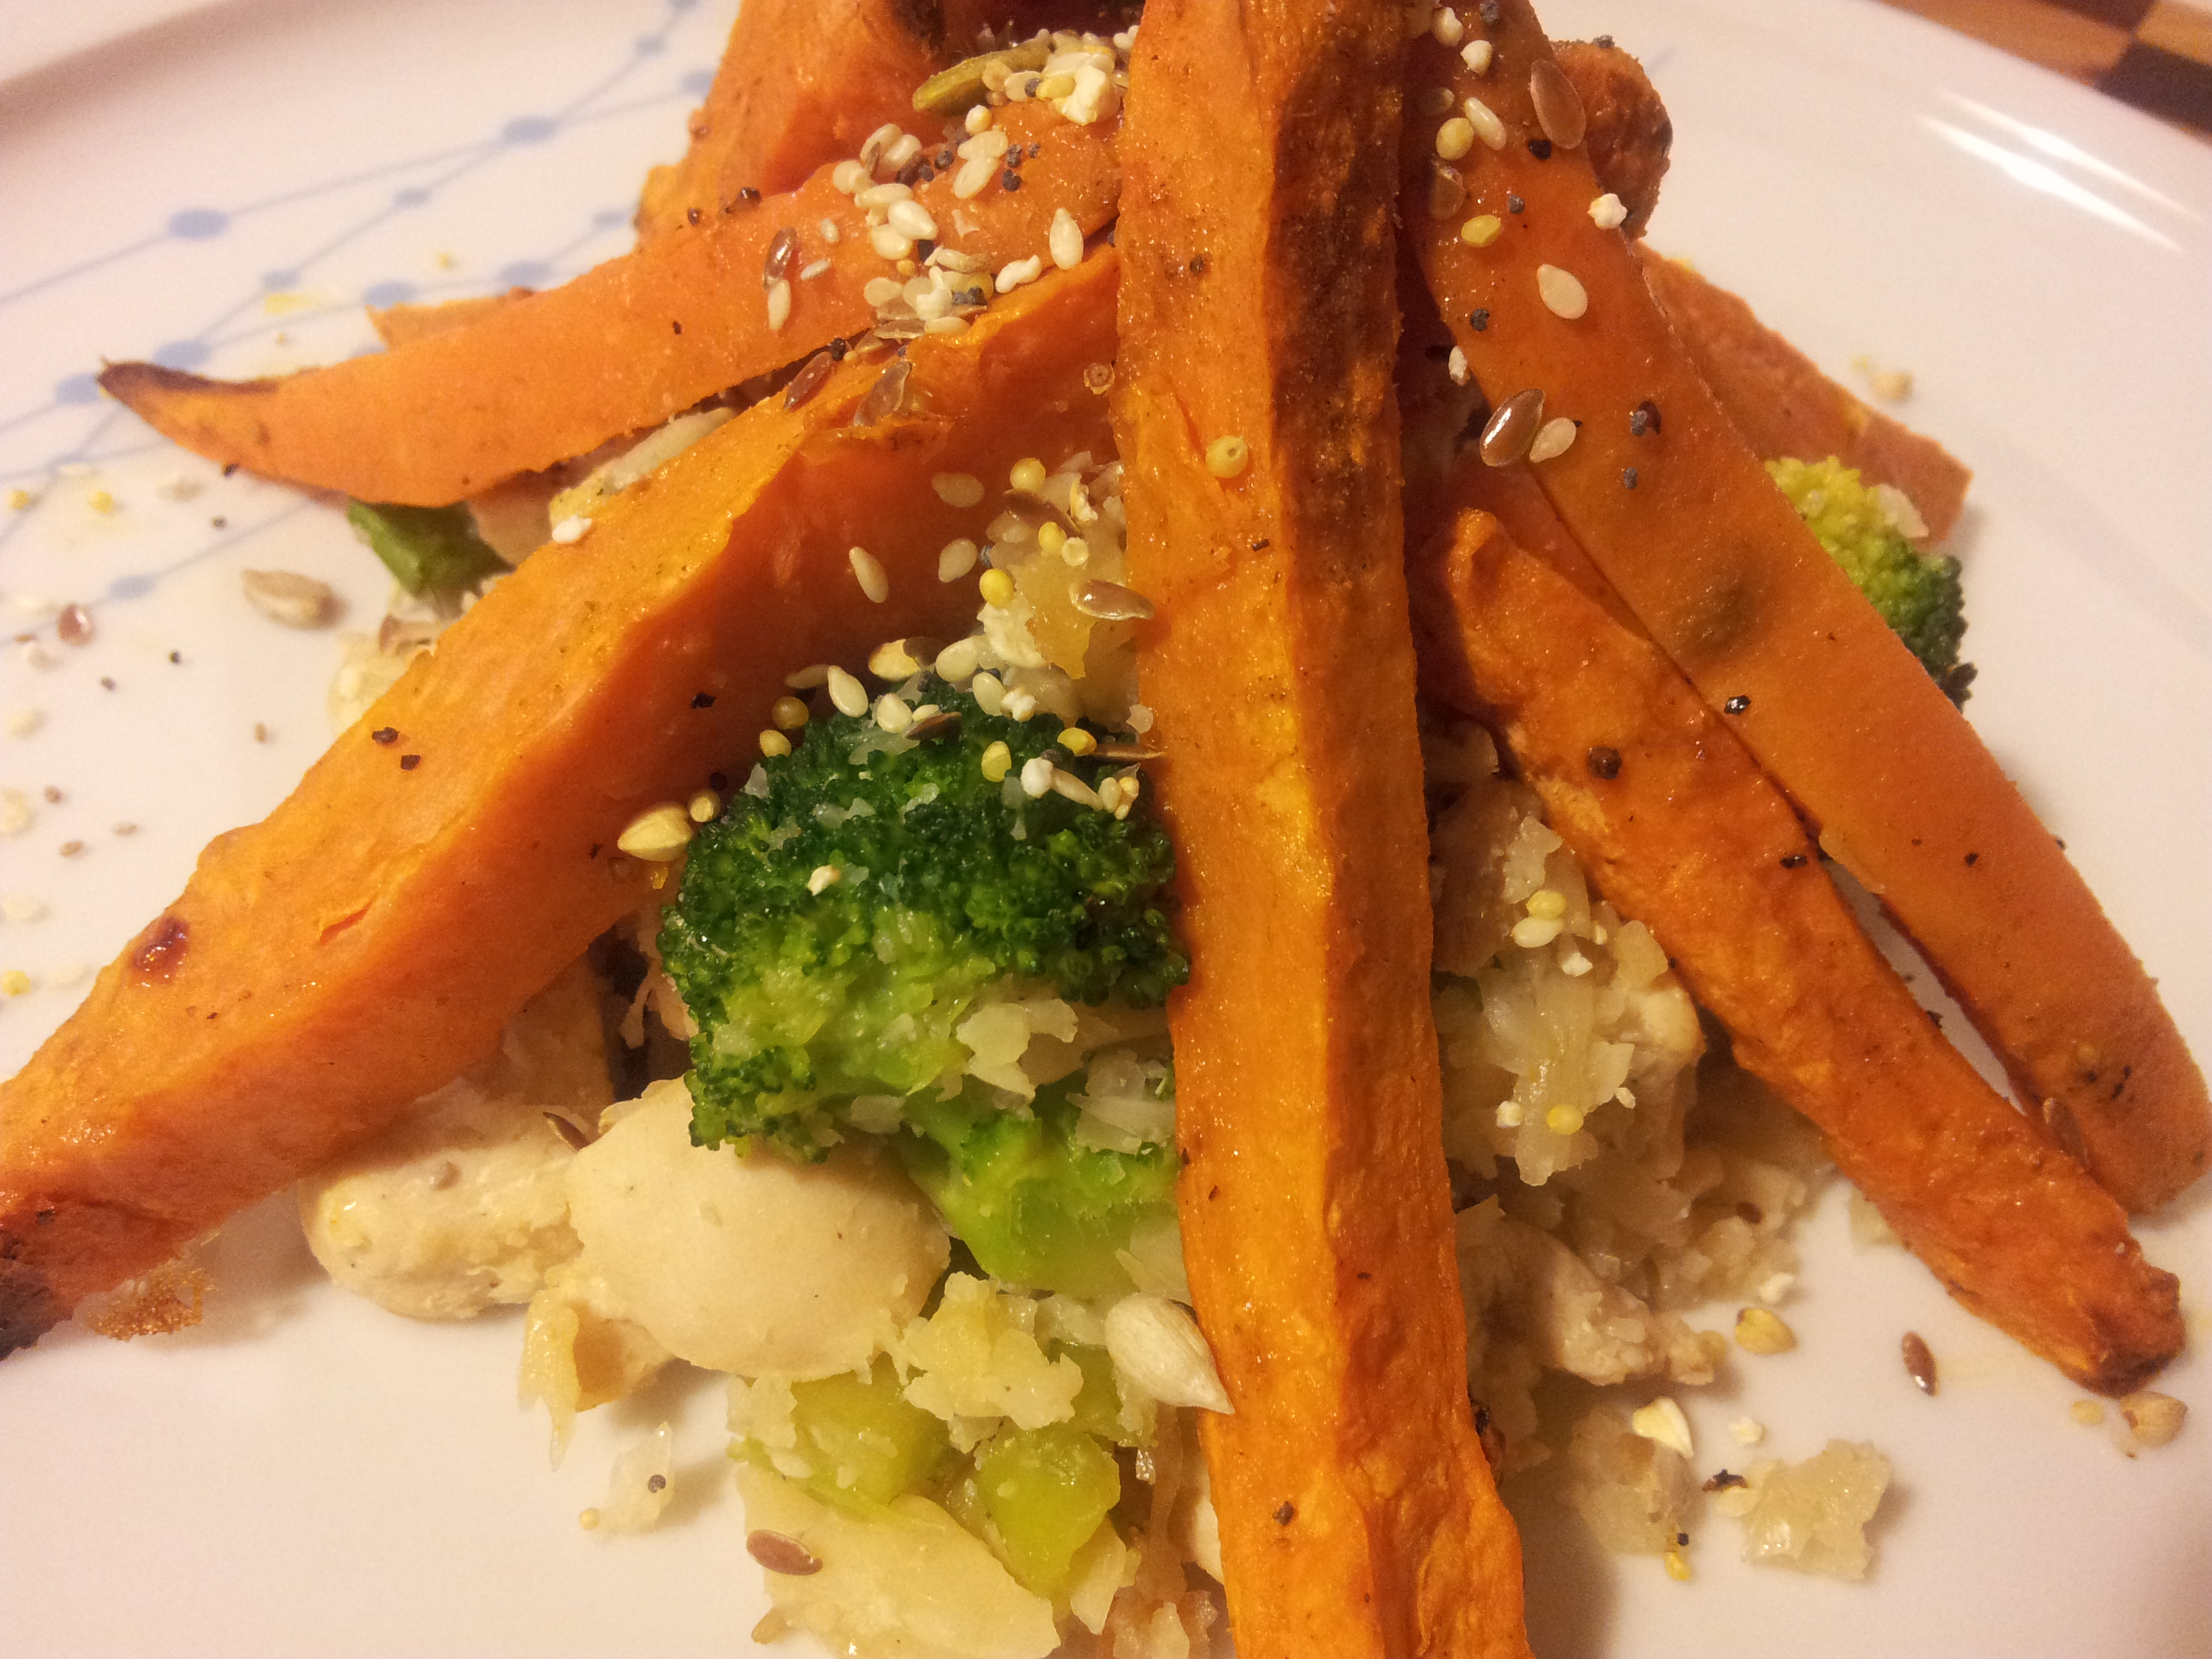
Sweet potatoes are versatile, sweet, nutritious and affordable!
A simple dinner with sweet potato as the centre piece.
Oh, how l love the sweet potato which is also known as kumara or yam. Not much to look at in the shops, but once cooked the flavour is enticing.
The orange sweet potato is always in my fridge.
Sweet Potato is a good source of complex carbohydrates, dietary fibre and beta carotene, and this root vegetable also has modest amounts of Vitamin C, Iron, Calcium, Vitamin B6 and Magnesium.
A sweet potato mash with silverbeet, parsley and spring onion adds some colour to this meal.
Since l stopped eating processed sugar l like to include foods which are naturally sweet as part of my everyday diet. The sweet potato is a lovely addition to a meal because of its beautiful sweet taste, soft texture and bright colour. It is extremely easy to cook with and difficult to ruin. I am amazed at the lovely flavour it adds to baked goods such as cakes and pancakes and although l prefer it cooked it can be a good addition raw to a smoothie.
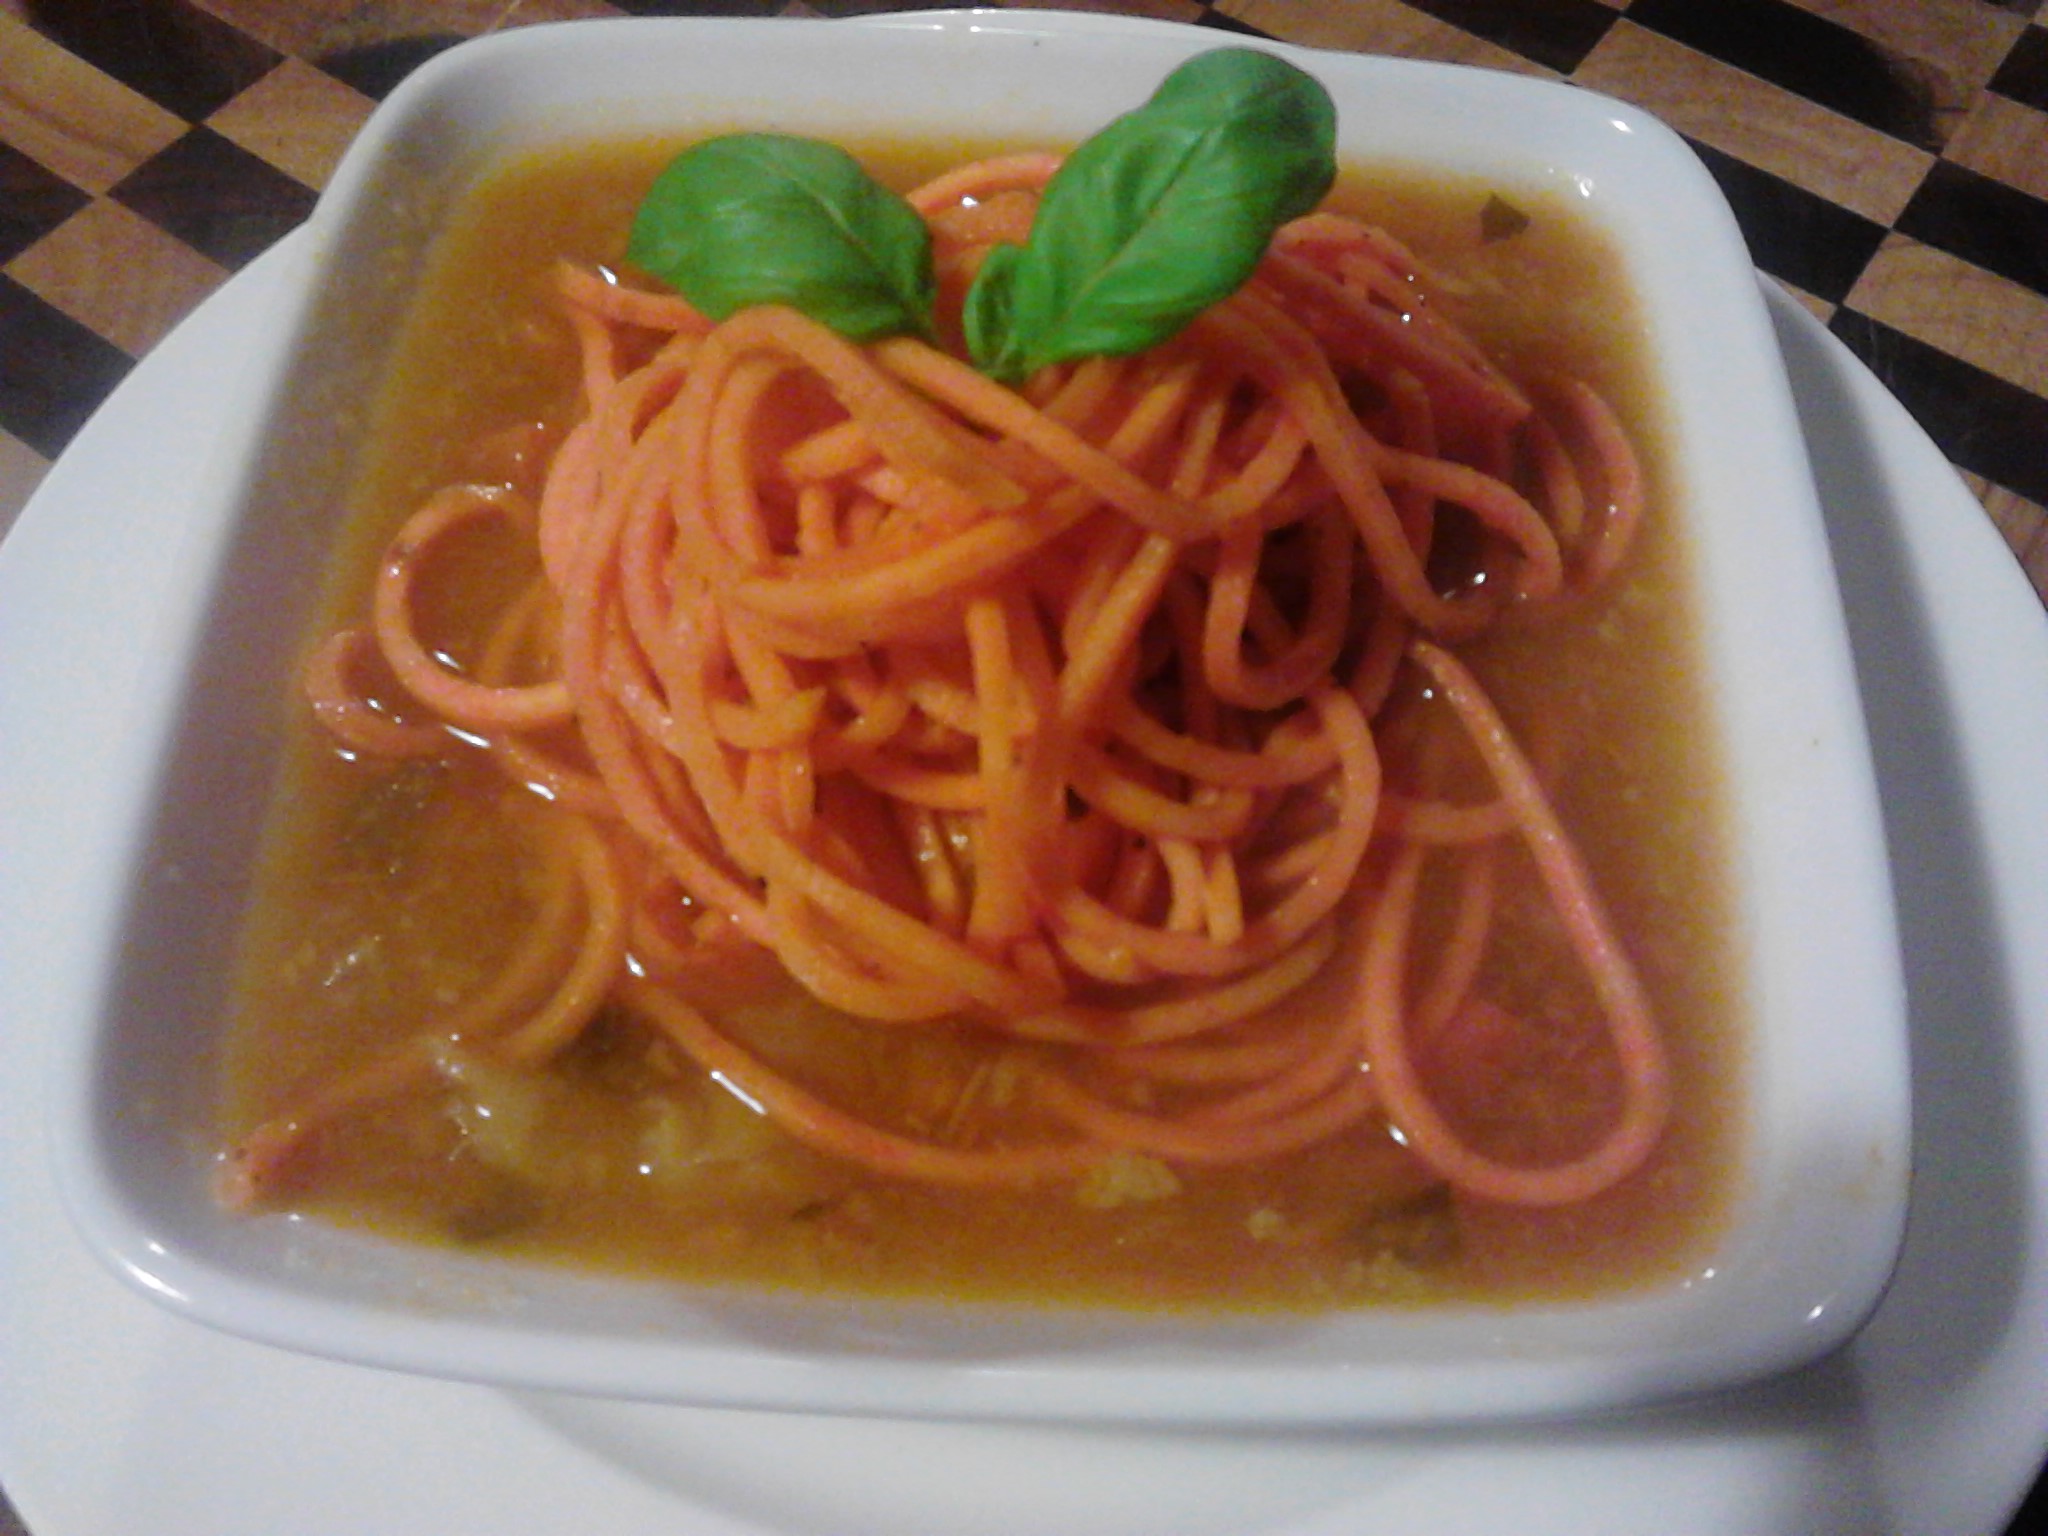
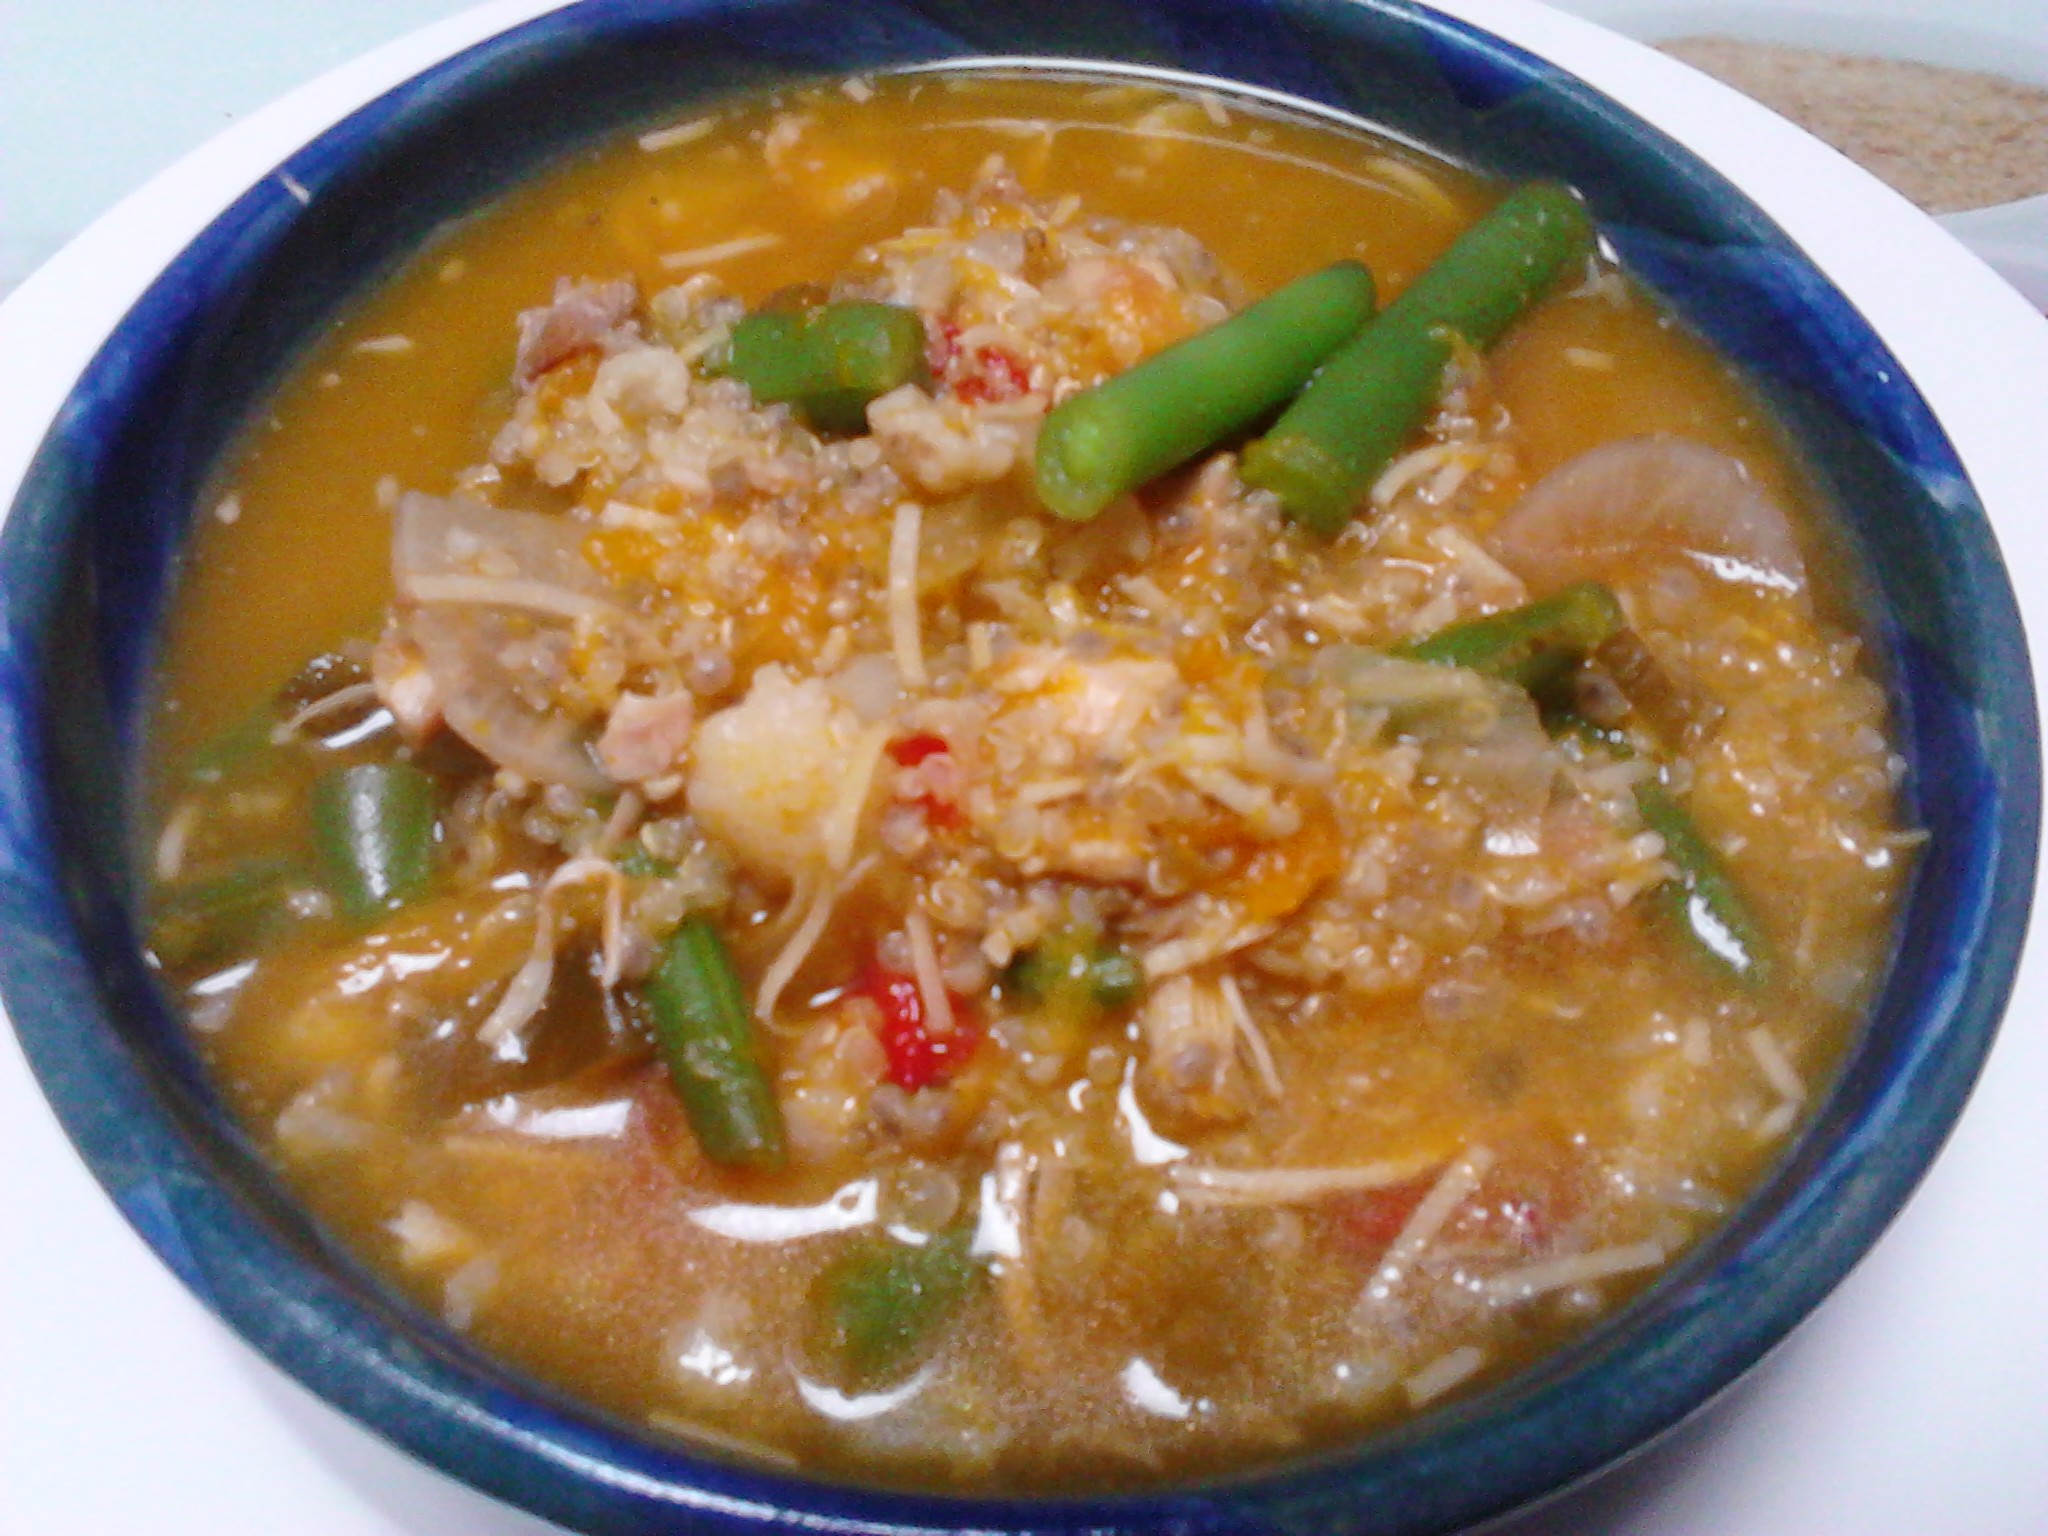
Sweet Potato noodles with soupSweet Potato and Walnut cake.A Paleo, gluten, dairy sugar free pancake with grated sweet potato mixed through the batter.Raw sweet potato in a juice tastes a lot like carrot and makes it creamy.
I can’t remember when l first ate a sweet potato but it certainly wasn’t until l was an adult. It has some similarities in flavour and colour to the pumpkin but holds together better when cooked and is especially delicious cut into chips. Sweet Potatoes can be bought quite small or enormously large, and the surprising thing is that in my experience the flavour is the same whatever size you buy. They are also available with a red skin and a white flesh and this is one of those times when your taste buds can get very confused as the taste is the same as the orange version. I have to admit here that l have on occasion tricked my children into thinking they were eating normal potato when in fact it was the red sweet potato just to get them to try a new vegetable.
How many ways can one vegetable be used in recipes?
Here are a few more pictures of how l have used the sweet potato in my cooking:
Sweet Potato Chips as a snack. Coat them in olive or coconut oil and season before cooking.Sweet Potato and vegetable soup. See the main meals section for a soup recipe.Sweet potato chips are my favourite.Sweet Potato casserole. This has chicken, vegetables, coconut and spices. It cooks in the slow cooker all day and is lovely. The recipe is in the main meals section.A gluten free pizza with sweet potato.
I hope you can enjoy the sweet potato as much as l do and make it a regular part of your meals.
Roasted sweet potato with salmon is delicious here. I roasted it with the skin on and then sliced it before serving.Vegetarian lasagna with sweet potato layers.
If you have enjoyed this post please share with a friend. You can follow me daily on Instagram at holistic_paleo.
Here is a link to a great online book store where you can purchase some Paleo and wellness books.
Mental and practical roadblocks people use to not have a green smoothie in their life.
It it scary to drink a green smoothie
I don’t want to drink vegetables, especially green ones
There are things in there l won’t like
I’ve never had a chia seed
I don’t have a blender
The ingredients are expensive
It will taste awful
I’d rather have a normal fruit smoothie
Do any of these sound familiar? They can all be overcome if you can think out side of your comfort zone. If you don’t have a blender they can be purchased very cheaply or you can borrow one, and if you grow your own green leafy vegetables that is another one crossed off the list.
Take the plunge and try a simple recipe for your first smoothie that is guaranteed to be delicious. You can even leave the chia seeds out.
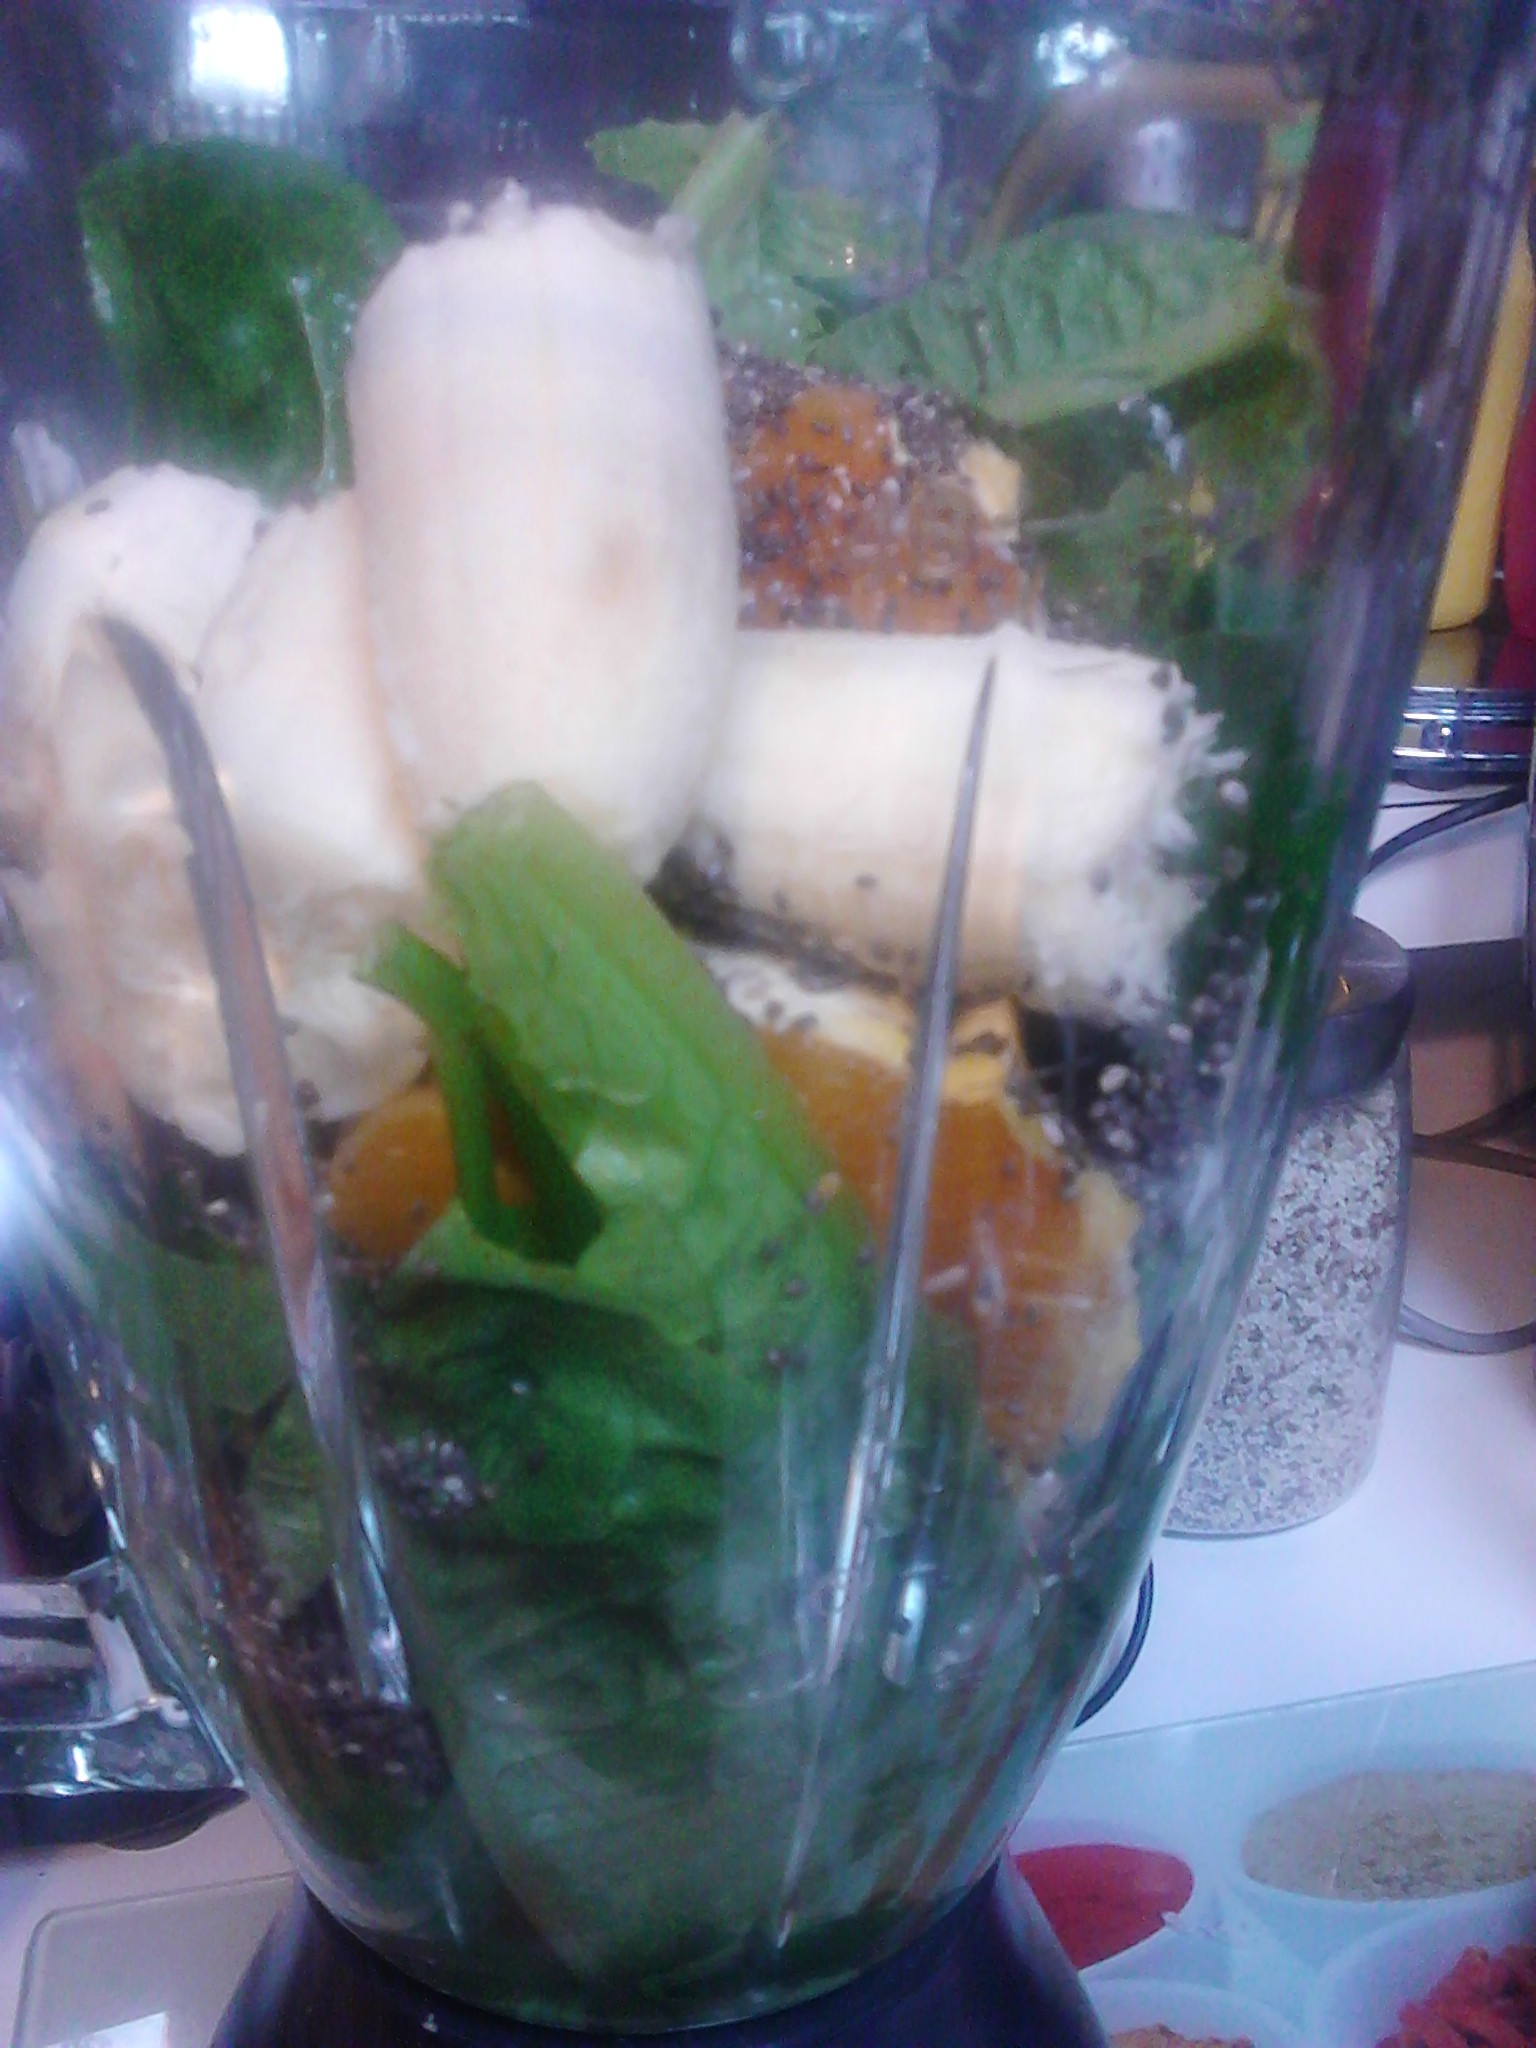
Cos lettuce (fill up half the blender with this, but make sure it is well washed), one small banana, one navel orange, 1 tablespoon chia seeds (optional), some fresh mint and enough plain coconut water to give a good consistency to drink or you can eat it with a spoon.
Just pile all of the ingredients into the blender and process. Pour it into a glass and enjoy!
An amazing colour with a wonderful sweet flavour.
A green smoothie is different to a green juice. A juice has most of the fibre removed and is much lighter to drink and digest. When l was very unwell last year l loved having a green juice as the nutrients were quickly and easily broken down and absorbed for use in the body, whereas a smoothie was too heavy for me and l just couldn’t digest them.
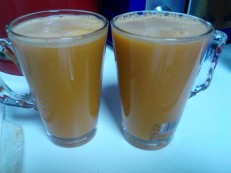
A green juice made with the Cold Pressed juicer.
Part of the joy of drinking a green smoothie is that it is green!
A green smoothie can quickly turn a not so nice colour if you add certain ingredients to it such as raspberries, blueberries or blackberries. It could go a brown colour and will taste great, but won’t look so appetising.
Choosing your ingredients:
1. Start by picking your choice of greens. You can have just the one such as cos lettuce, kale, spinach or silverbeet or a mixture. Cos lettuce is so sweet and lovely and l love the smaller green spinach leaves.
2. What liquid are you going to have in your juice? I would advise either plain coconut water or filtered water.
3. Choose the fruit you are going to add. This could be banana, apple, peach, apricot, pear, mango, pineapple, orange and mandarin as examples. Citrus is wonderful as it will help your body absorb the iron from the greens.
4. Add a few interesting things to your smoothie. Limes and lemon’s with the skin on will give the smoothie a kick, while fresh ginger and herbs such as parsley and mint will help to enhance the flavour.
5. Add additional nutrients such as chia seeds, green powders or nuts.
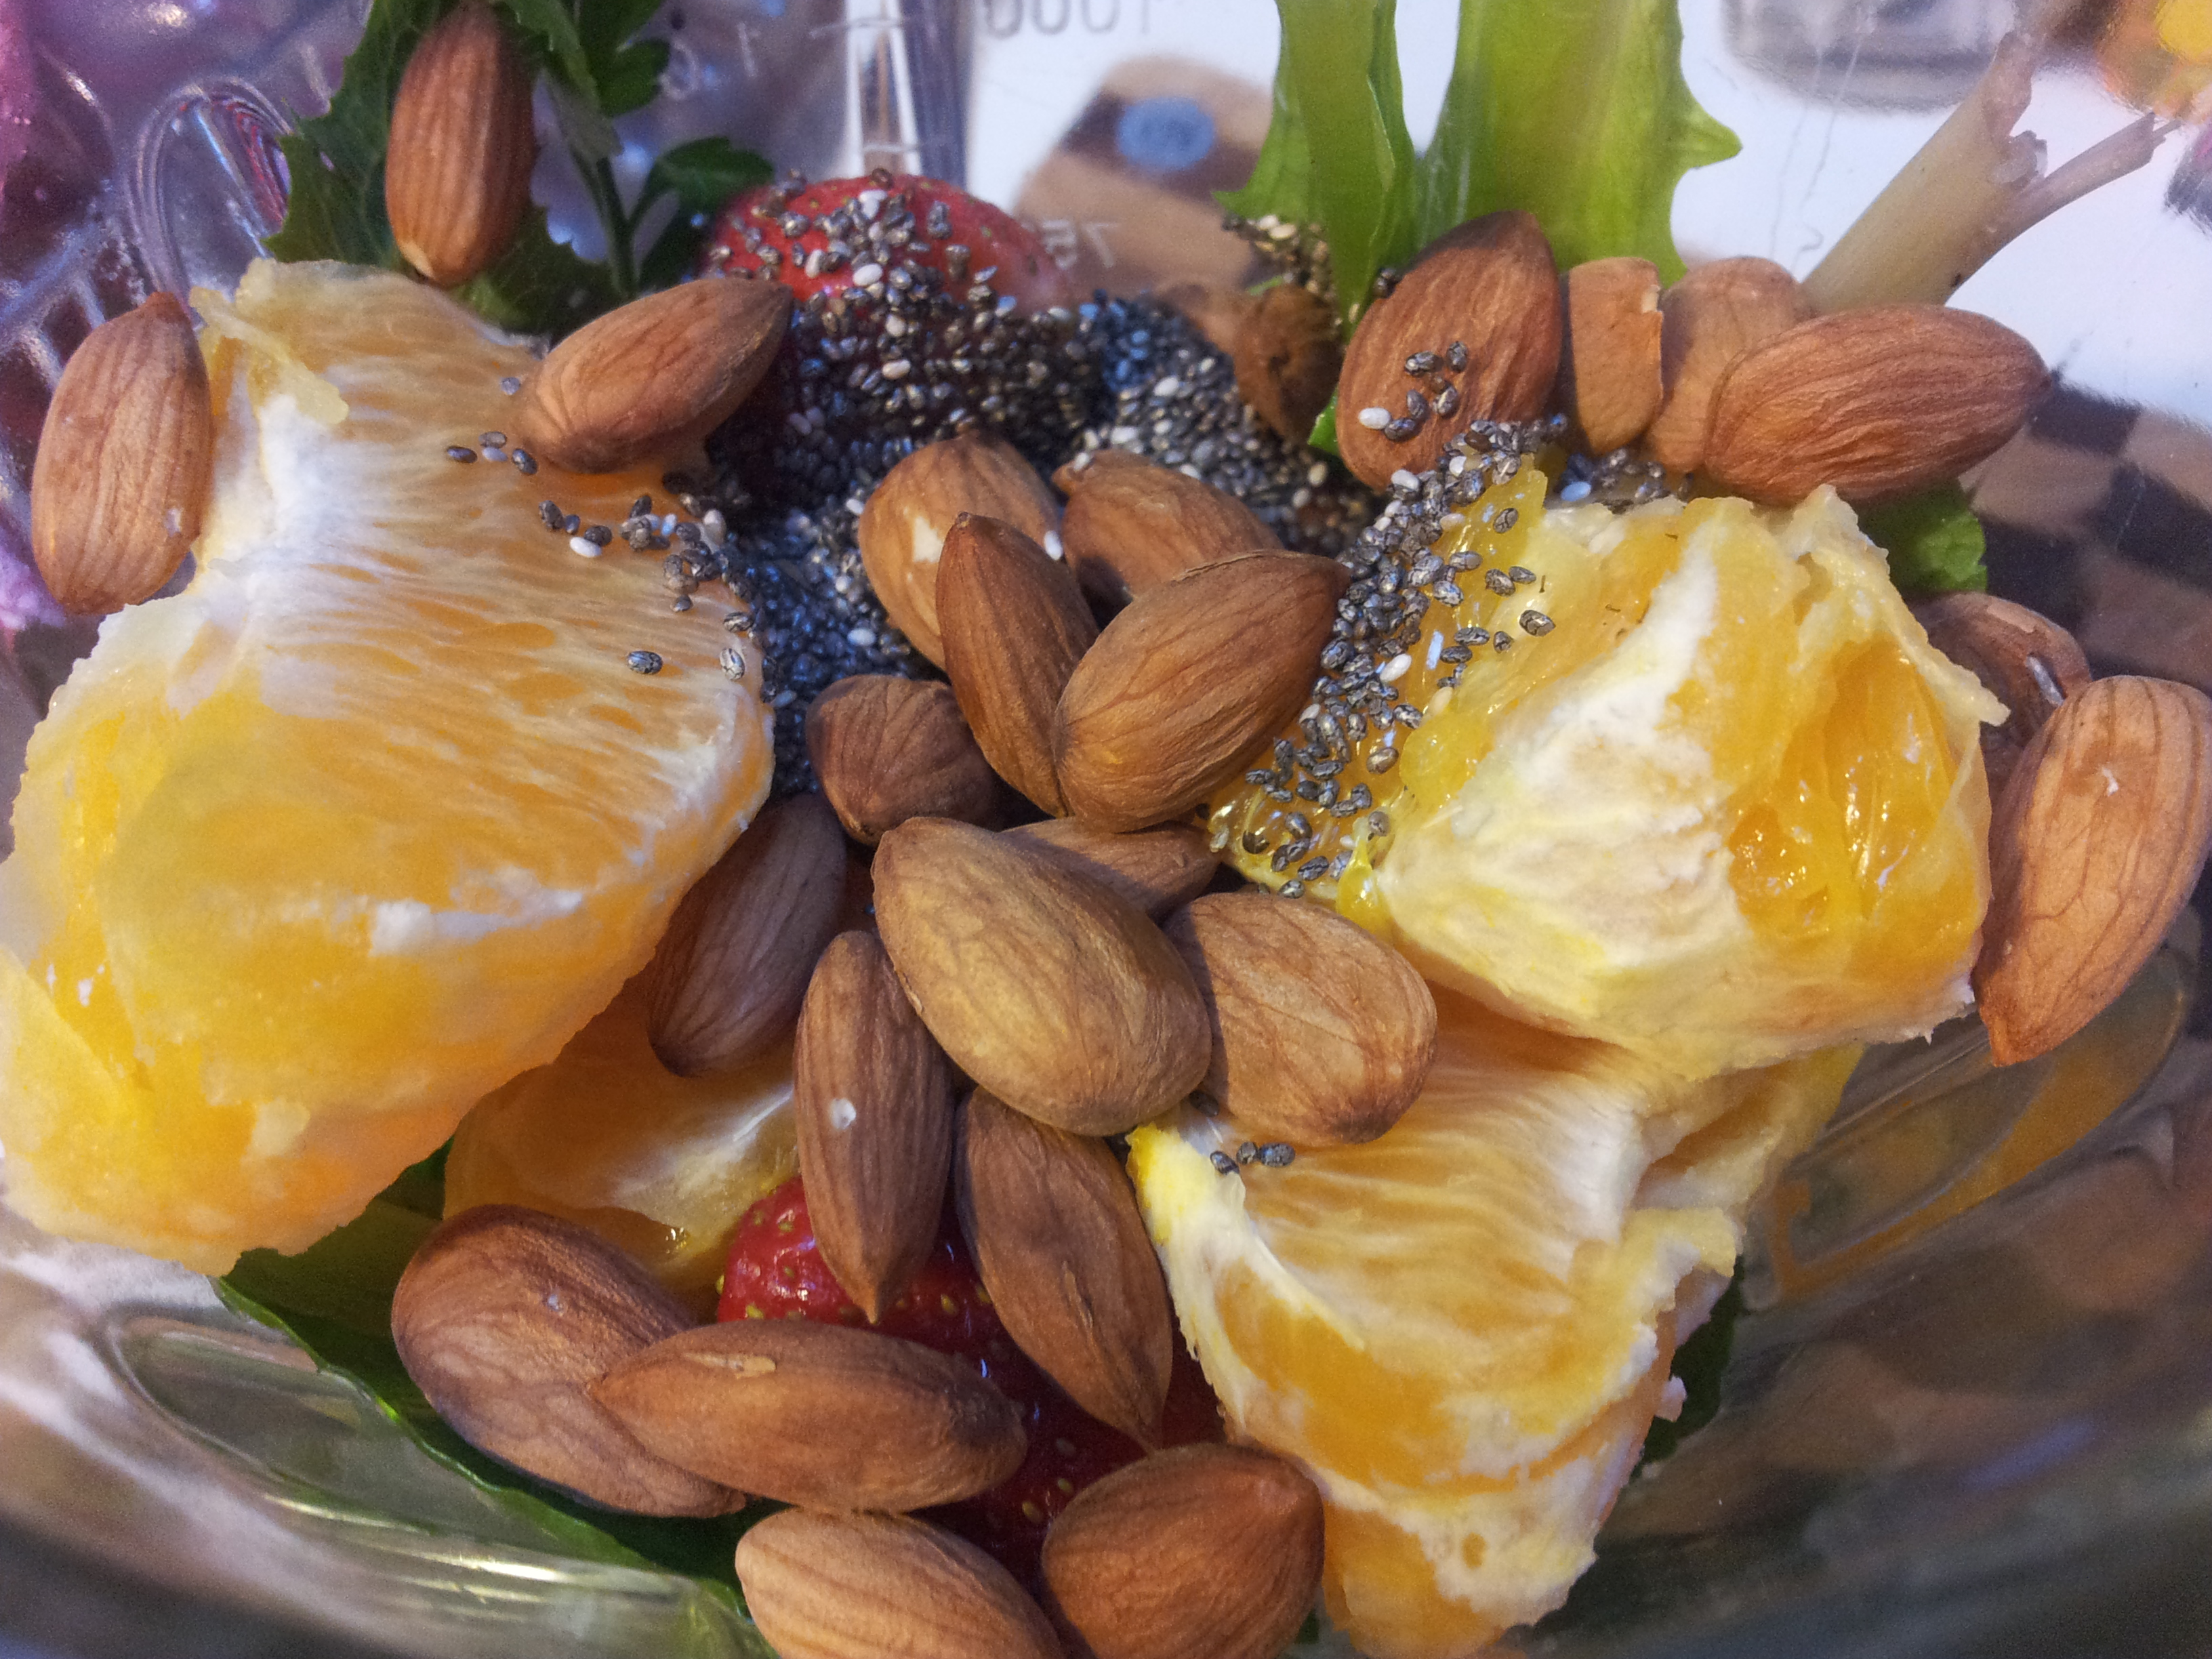
This smoothie has lots of greens, a few strawberries, chia seeds, activated almonds, orange and filtered water.This was such a filling smoothie and there are speckles of red through it from the strawberries.
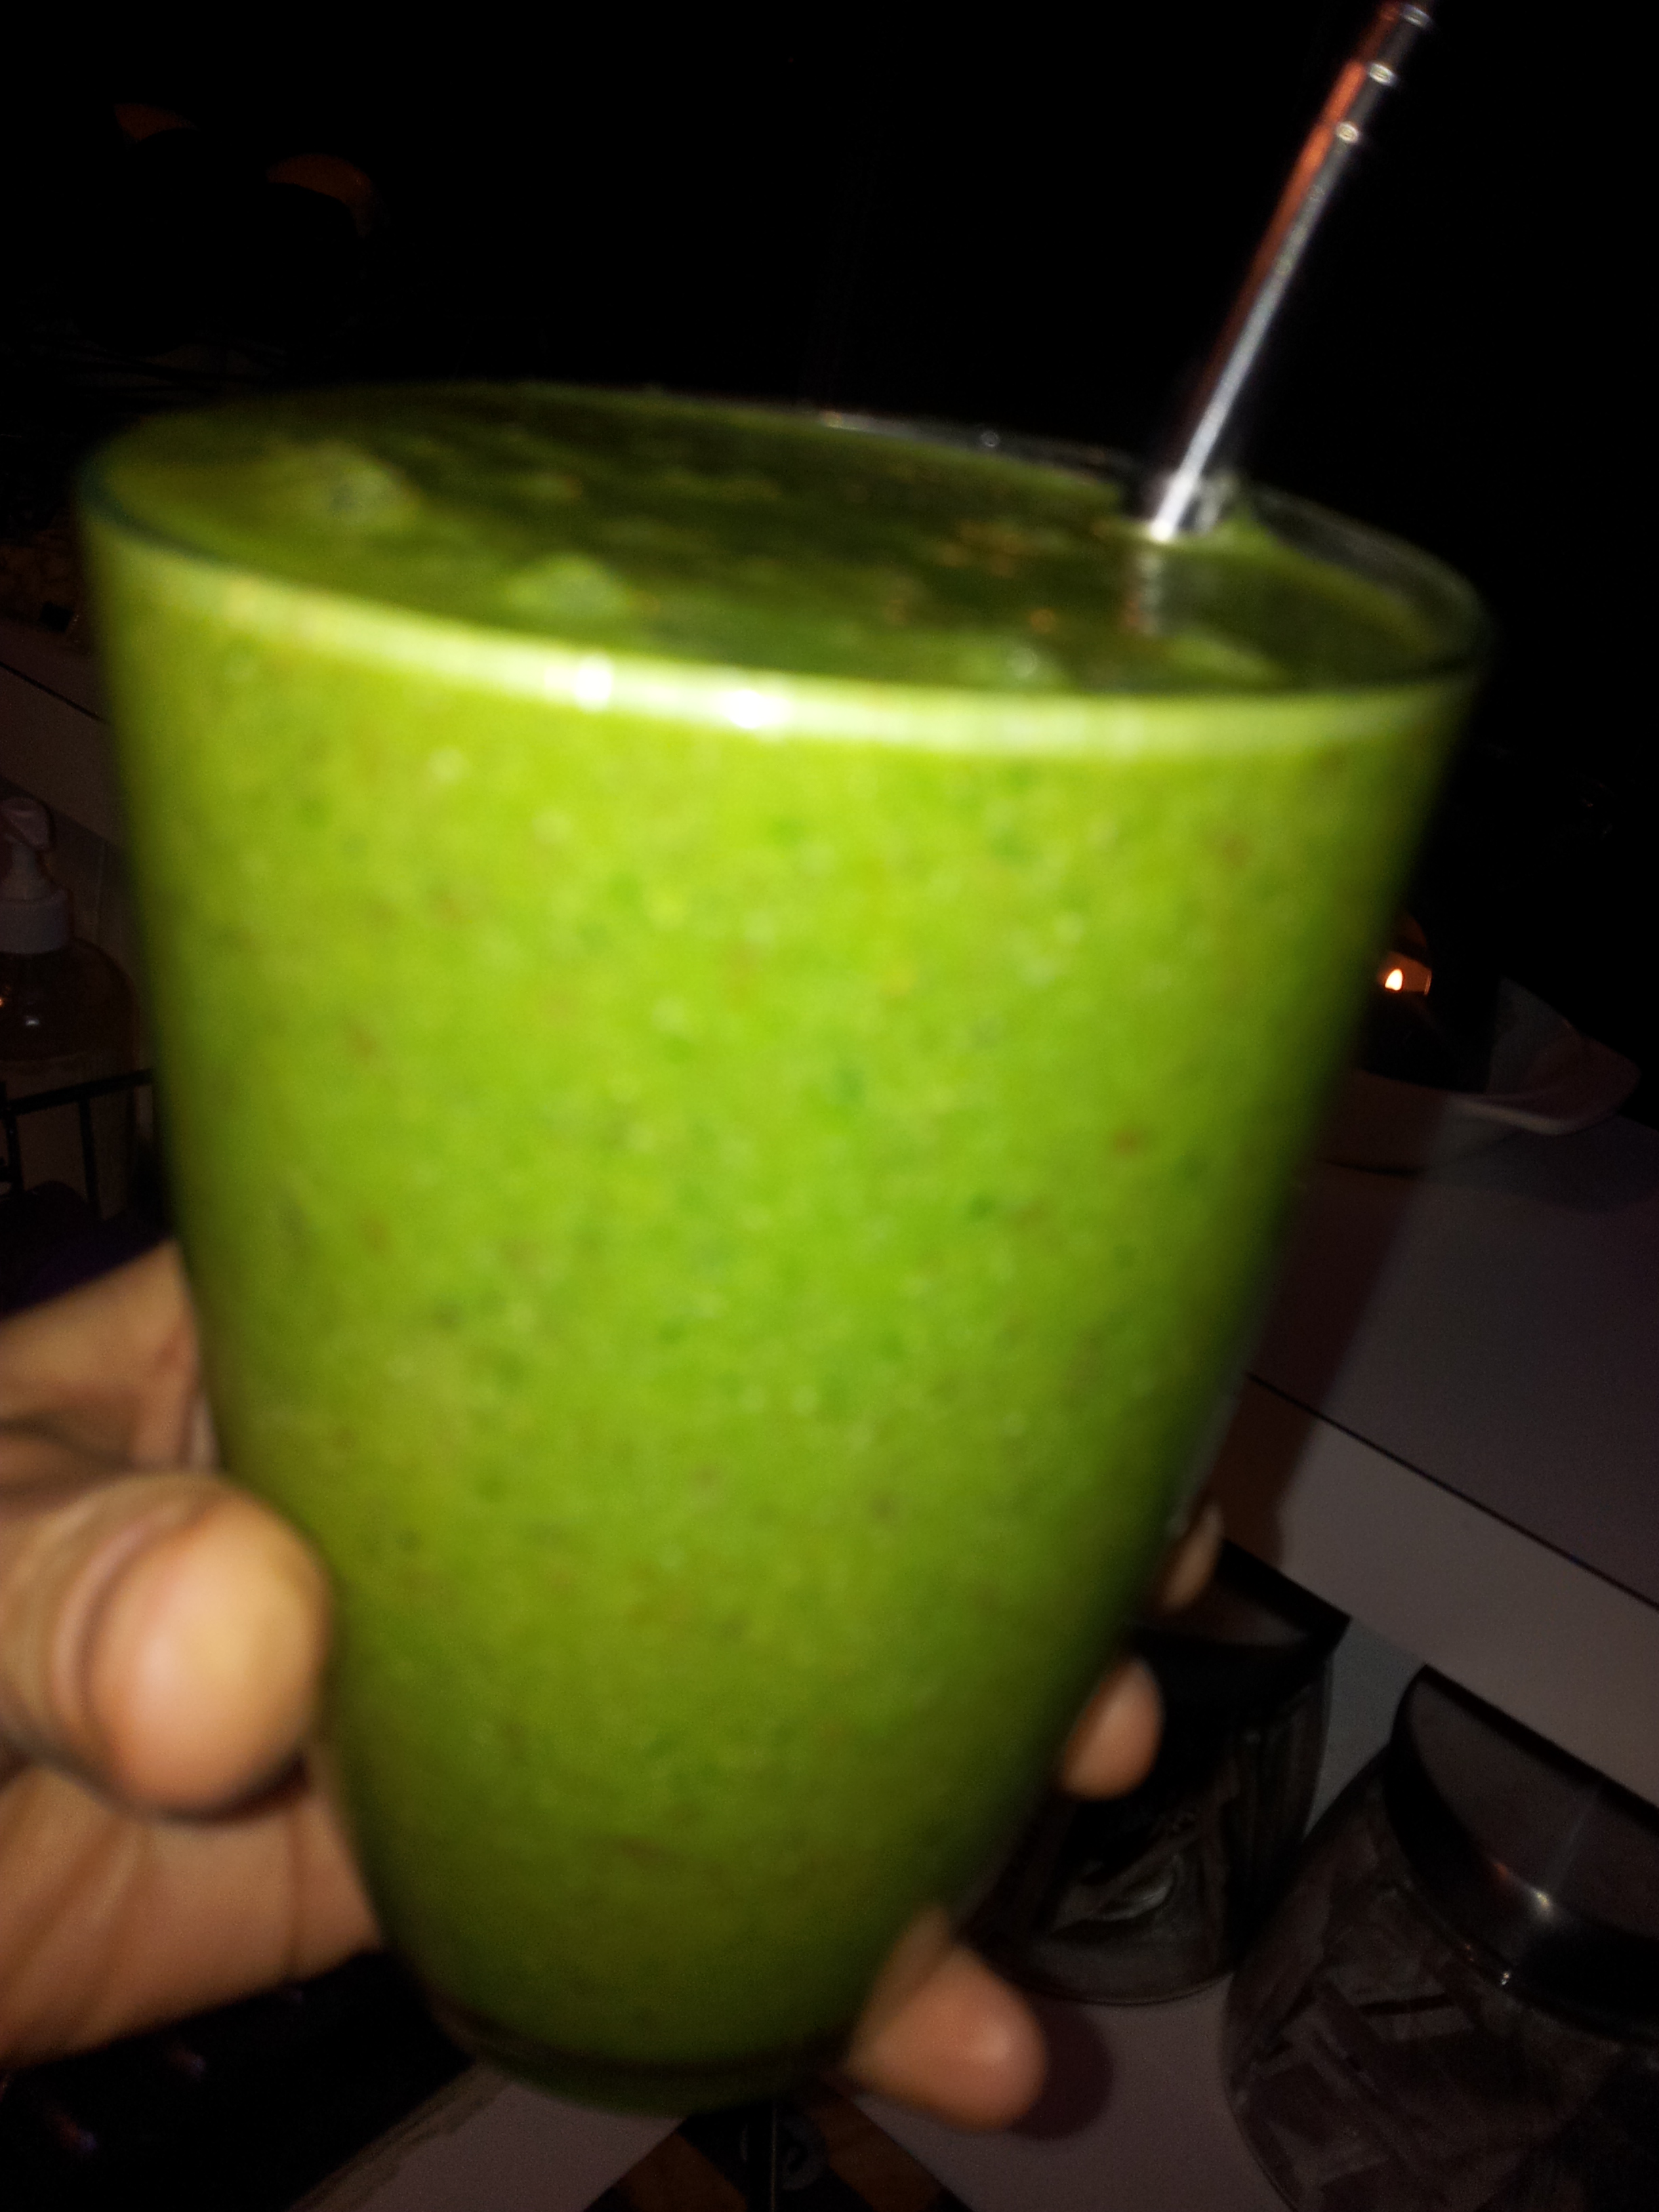
A way to combine a green smoothie with a more colourful ingredients and still have it looking good is to have some fun putting it together as in the one below. Both the green and pink sections tasted wonderful, but when mixed together were a not so nice brown colour.
A green smoothie with a dash of colour!
The green section is cos lettuce, banana, green apple and coconut water. The pink layer is strawberries, blueberries, acai berry powder, chia seeds, banana and coconut water. I make the green part first and pour it into two glasses and wash the blender, then make the pink part. The decorative pointy bits l do with a stainless steel straw and it looks nice to drink!
A smoothie can easily be a meal if you add in good sources of protein such as chia seeds and nuts. I drink them slowly as it is a lot of liquid going into the stomach all at once and adding the nuts and chia seeds make it a bit heavier and thicker as well as slowing down the digestion of the sugars in the drink. Sometimes l have a handful of nuts with the smoothie if it has a lot of fruit in it and this balances out the snack.
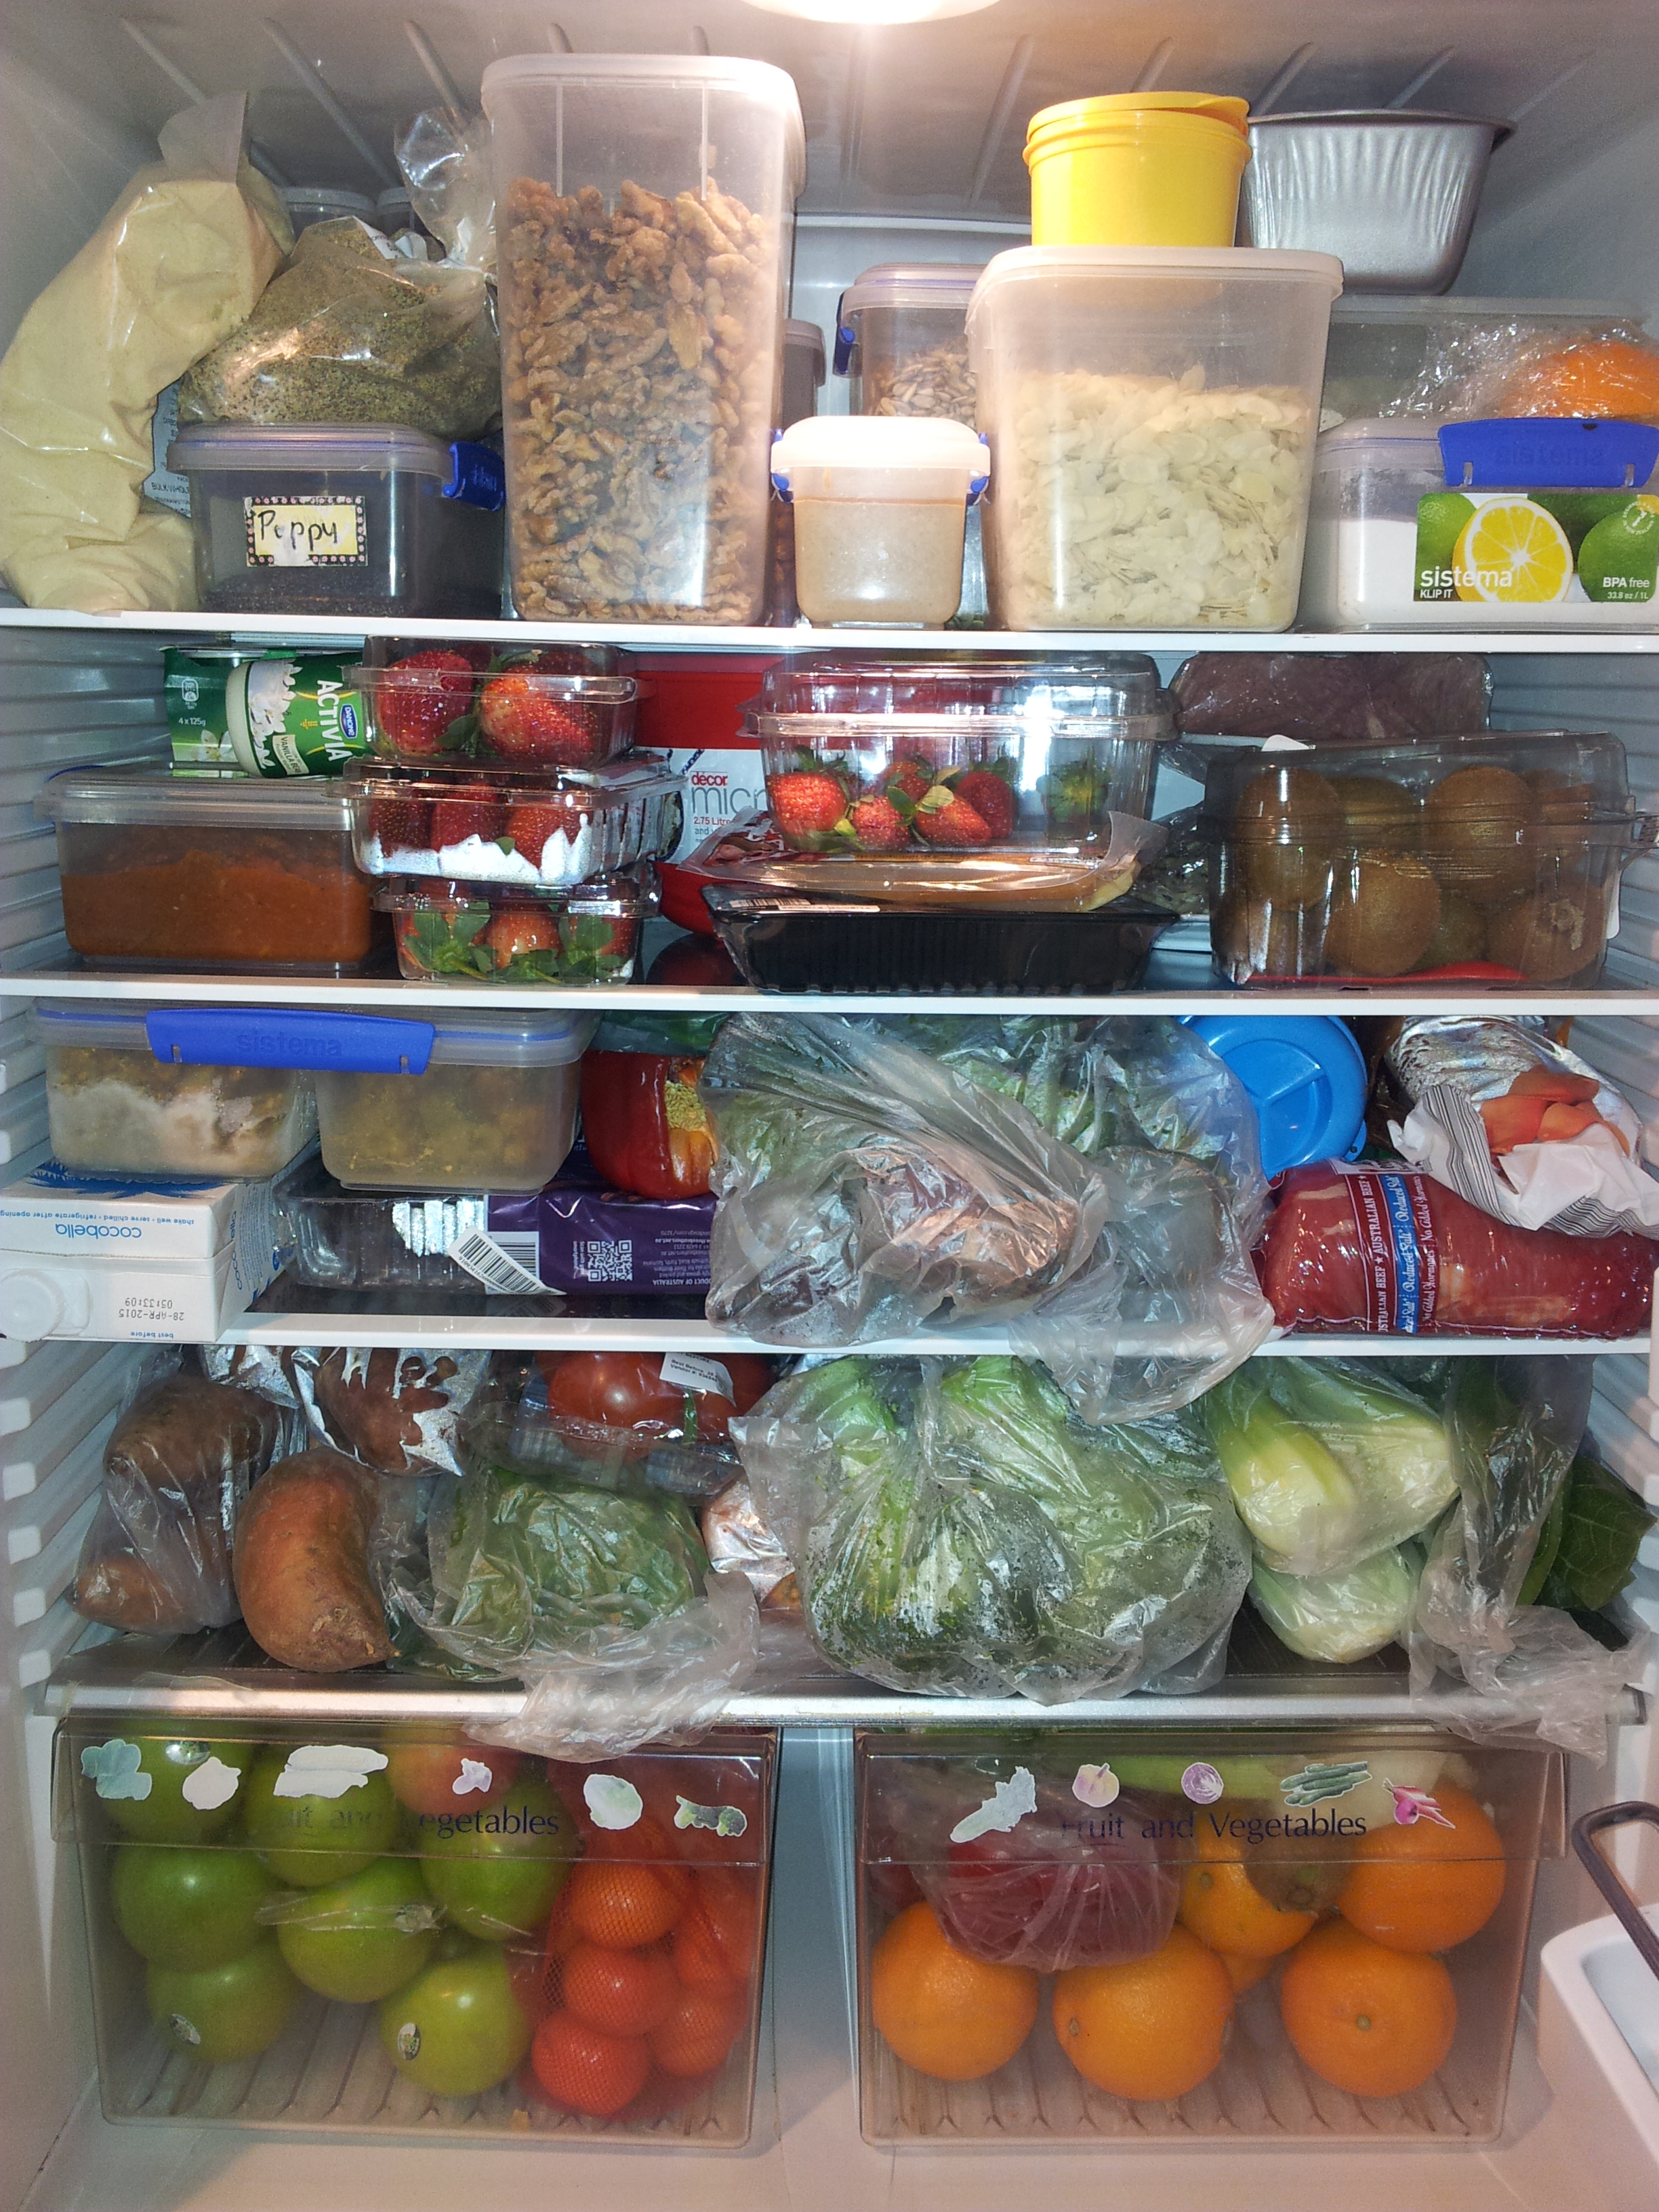
The best way to get started on your smoothie adventure is to fill up your fridge with lots of healthy fresh food. Here is a quick snapshot of my fridge as it looks most of the time.
I really need a bigger fridge!
If you have enjoyed this post please share it with a friend. You can keep up to date with my daily meals and wellness tips on Facebook: holistic wellness for life, Instagram at holistic_paleo as well as Twitter, Flickr, Tumblr and Pinterest.
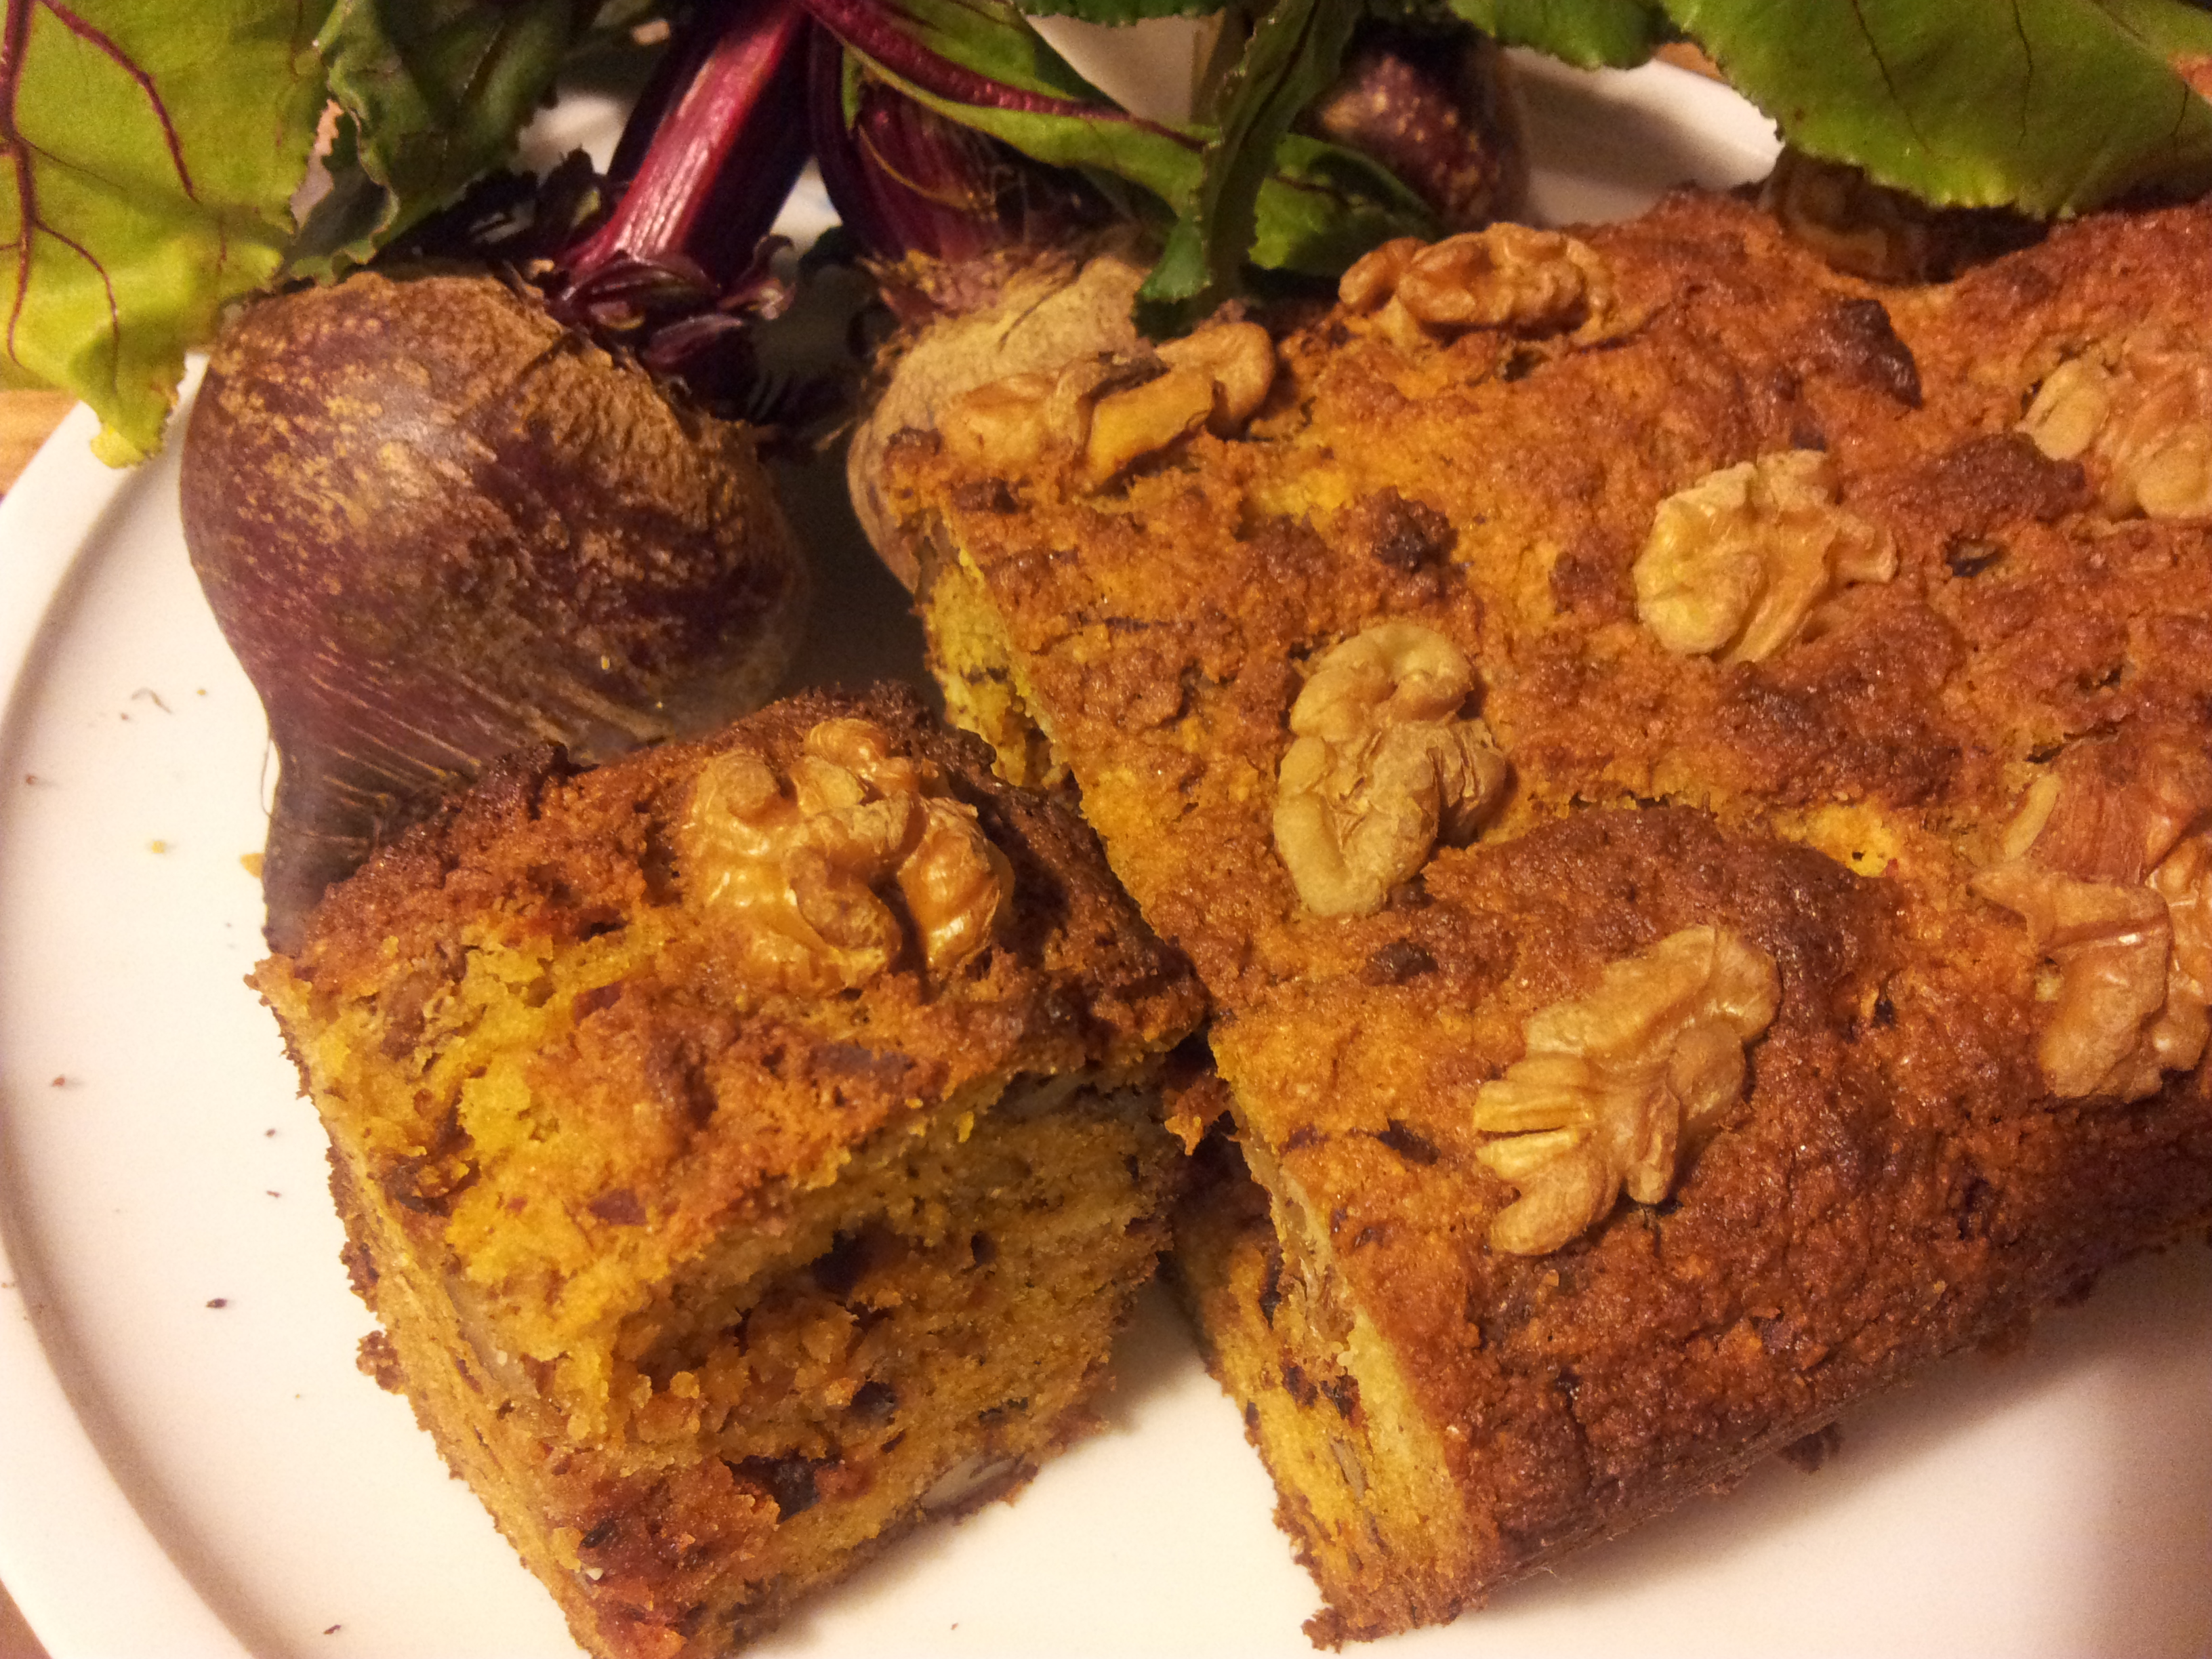
A lovely cake which is Paleo friendly, gluten, dairy and processed sugar-free. Before this cake is cooked it is the loveliest pink colour which unfortunately disappears after it has been baked in the oven.
The end piece is always so crunchy and delicious!
Ingredients:
2 cups almond meal
1/4 cup organic coconut flour (no need to sift, just squash the lumps))
6 free range eggs (700g)
A generous 1/4 cup organic coconut oil (gently melted)
A generous 1/4 cup raw organic honey (gently melted)
1 teaspoon organic cinnamon
1 teaspoon bicarbonate soda (Bob’s Red Mill Aluminium free ).
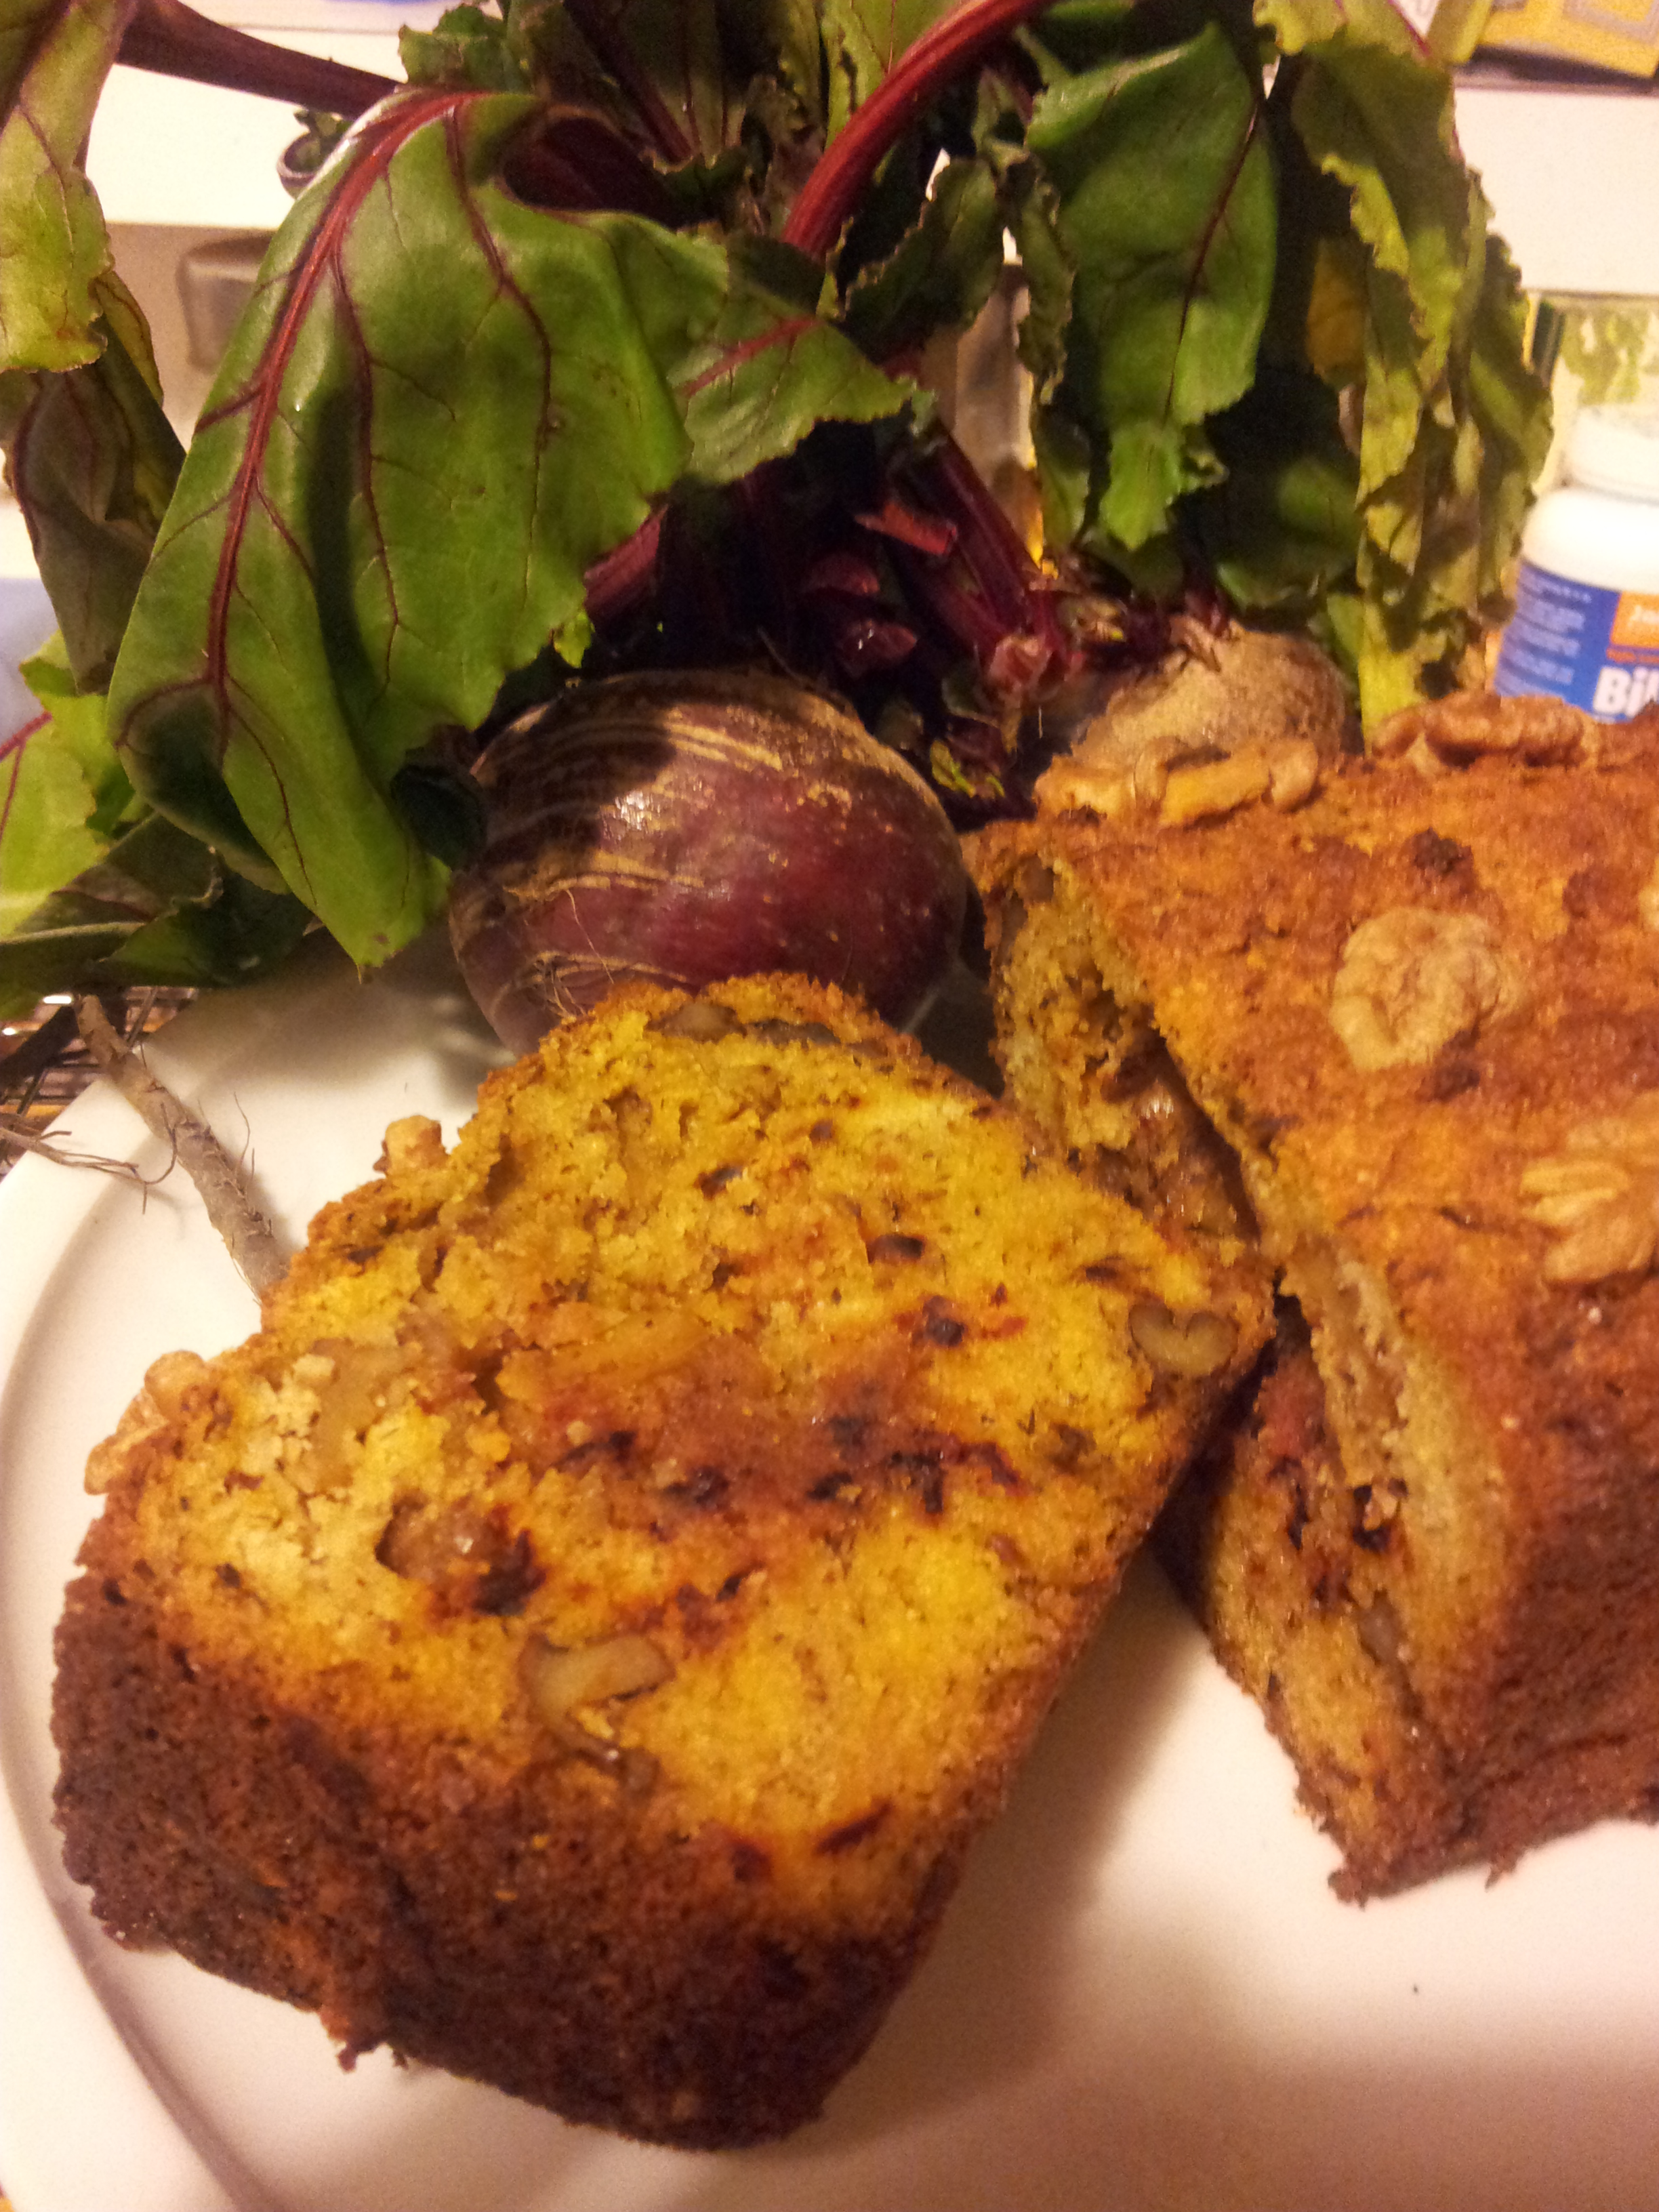
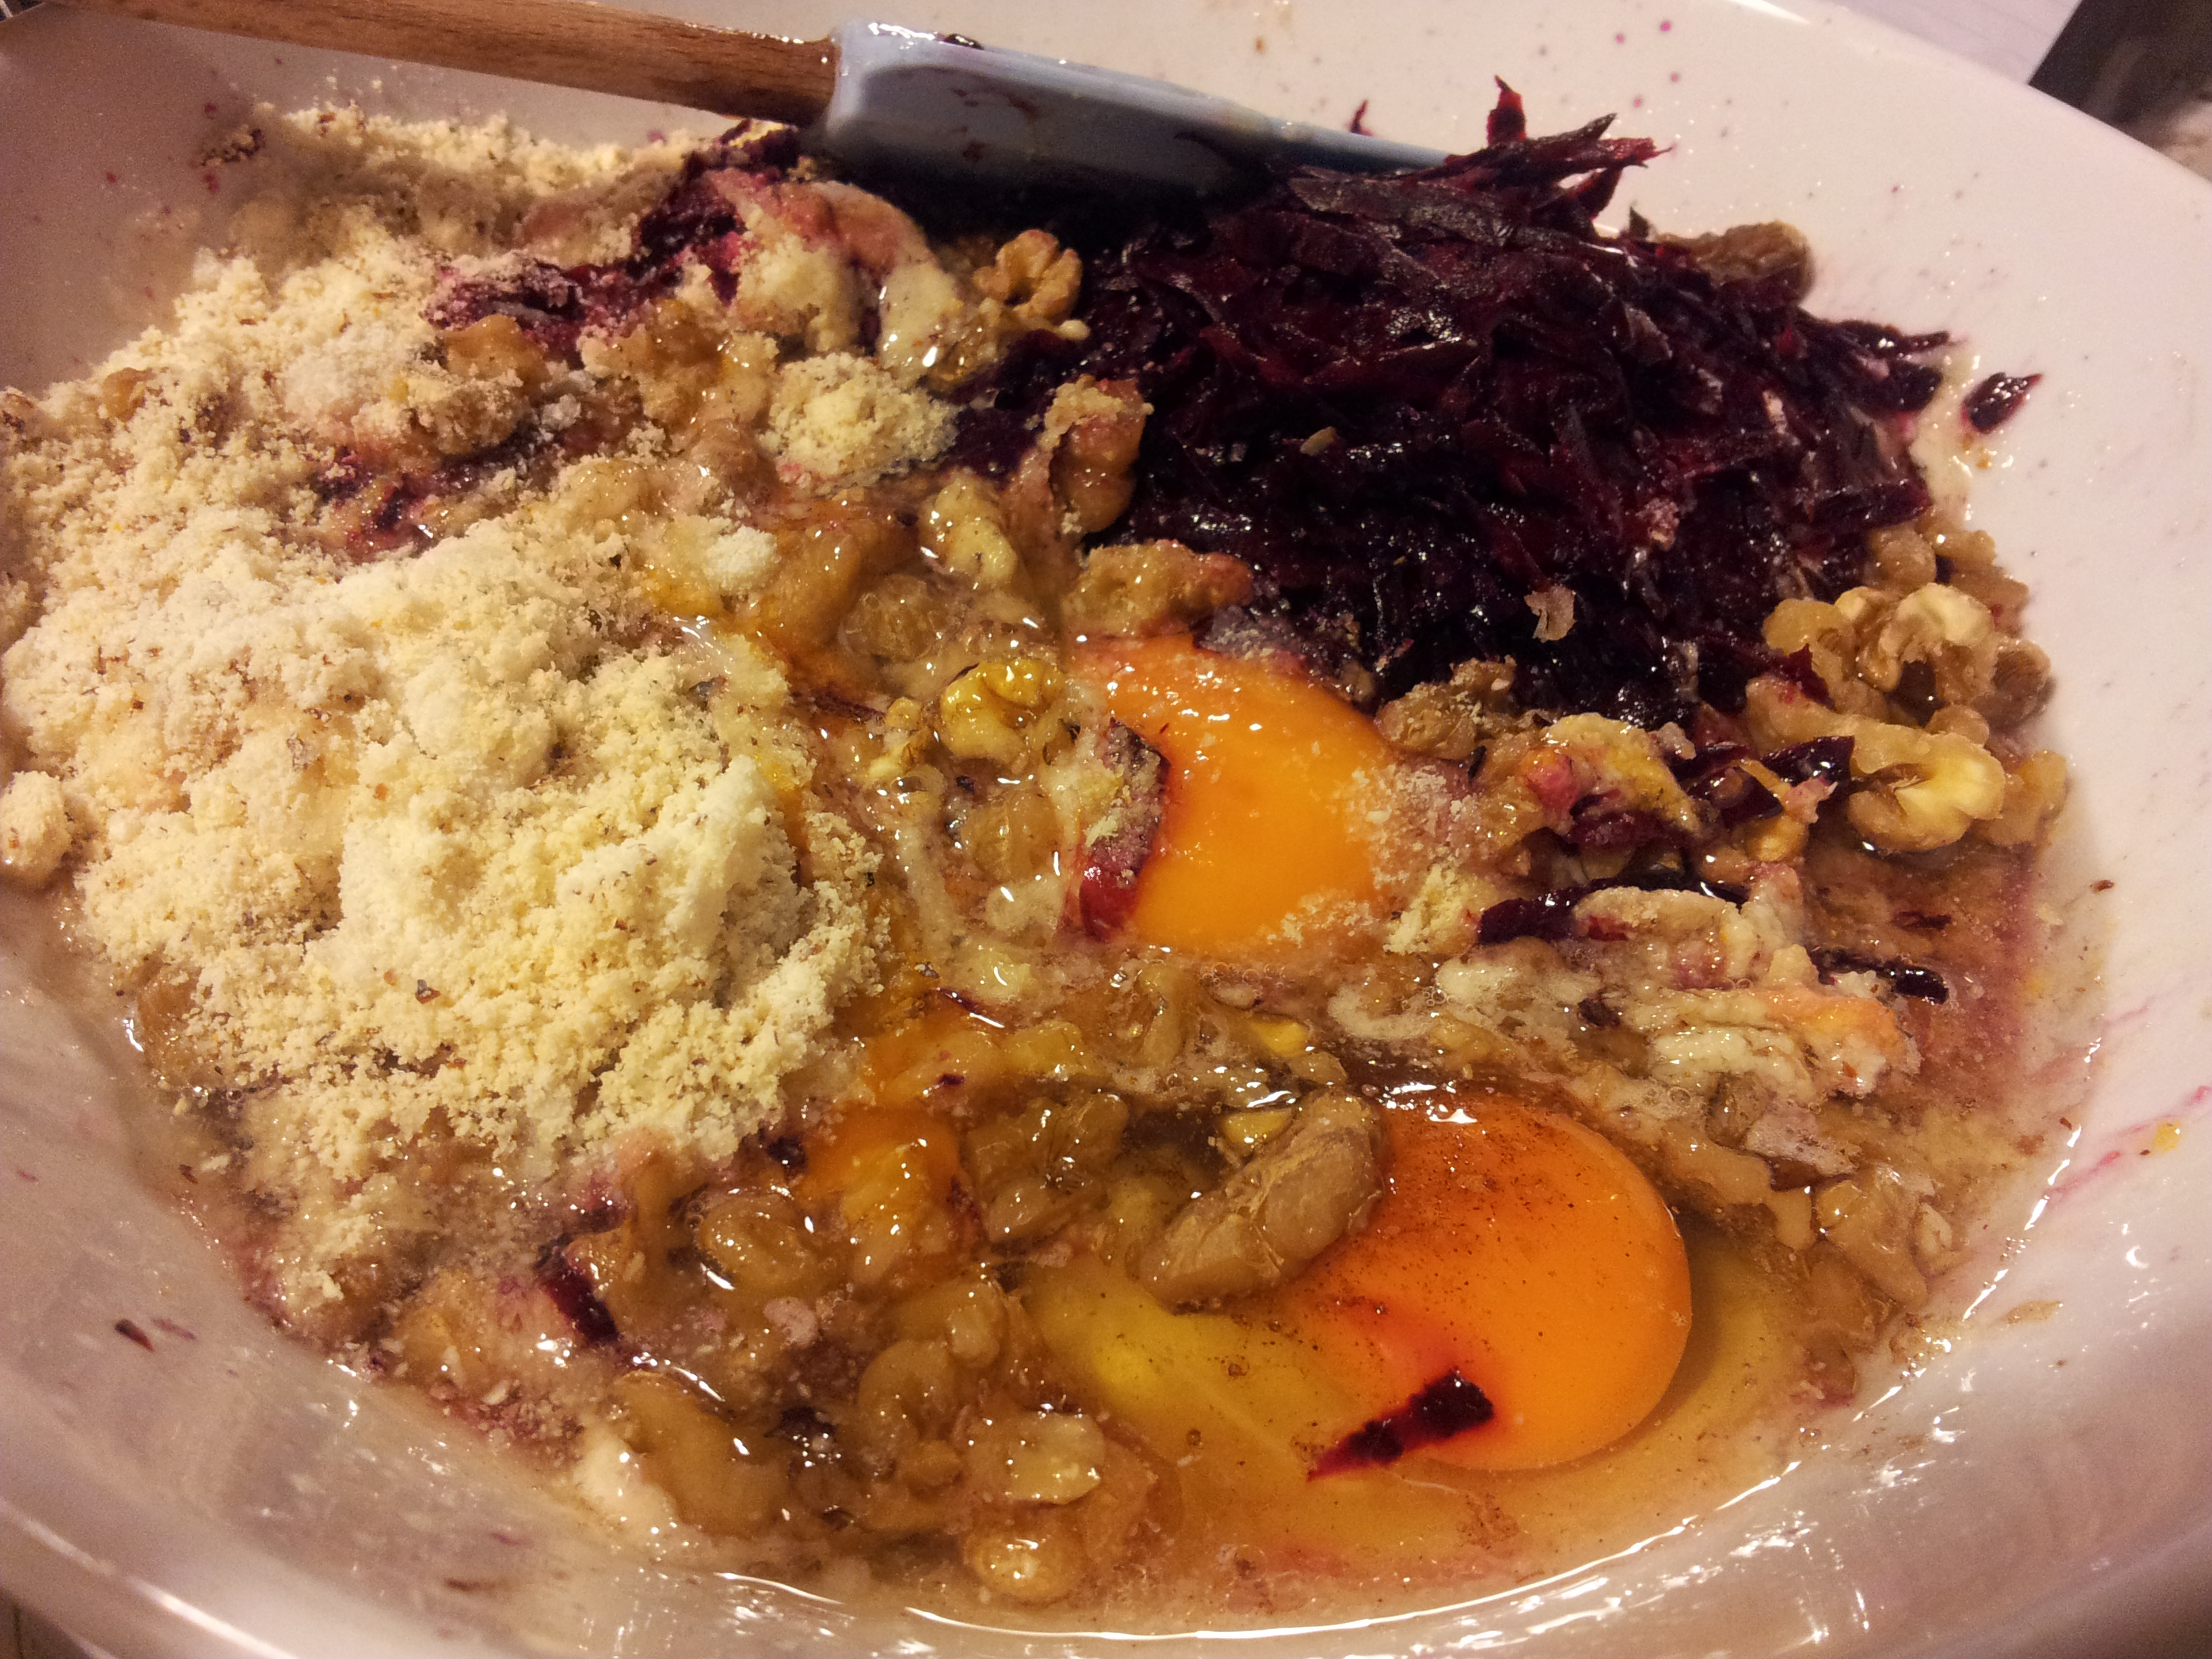
One small fresh beetroot peeled and grated
1/2 cup raw activated walnuts chopped roughly (or just raw walnuts)
Extra whole walnuts for the top of the cake.
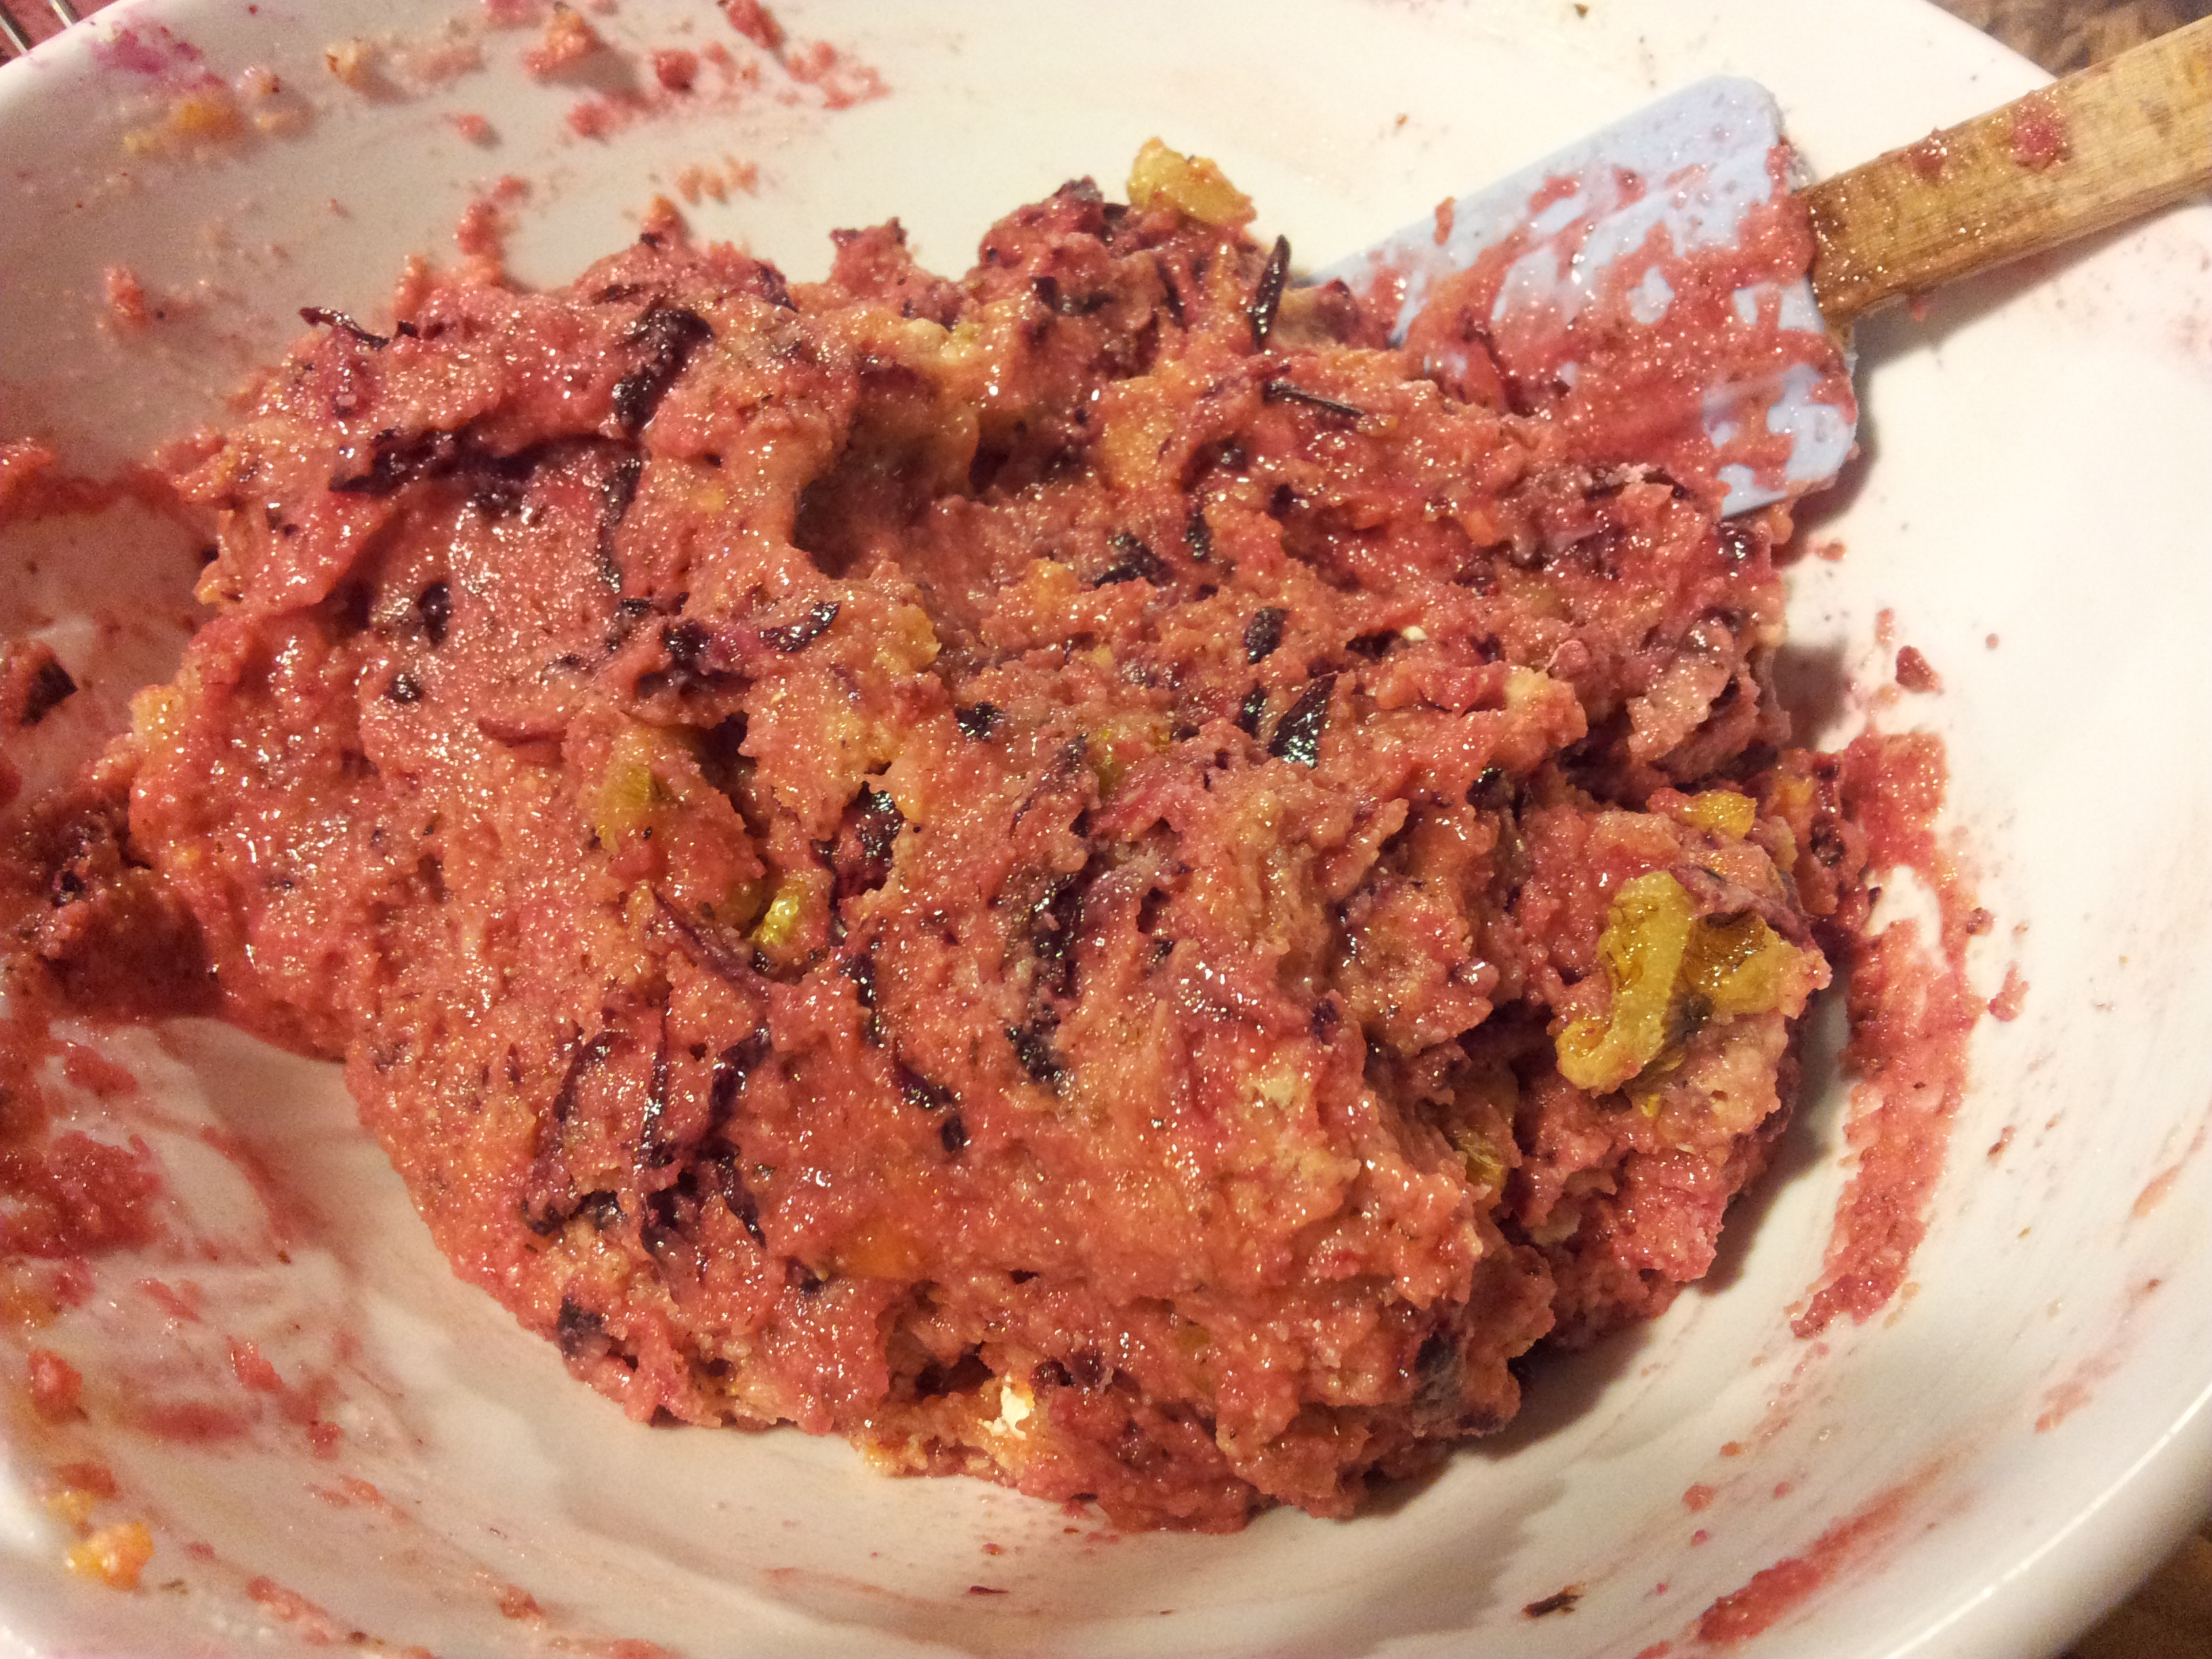
Ready to be mixed
Place all of the ingredients in a mixing bowl and gently combine with a spatula.
The colour is lovely
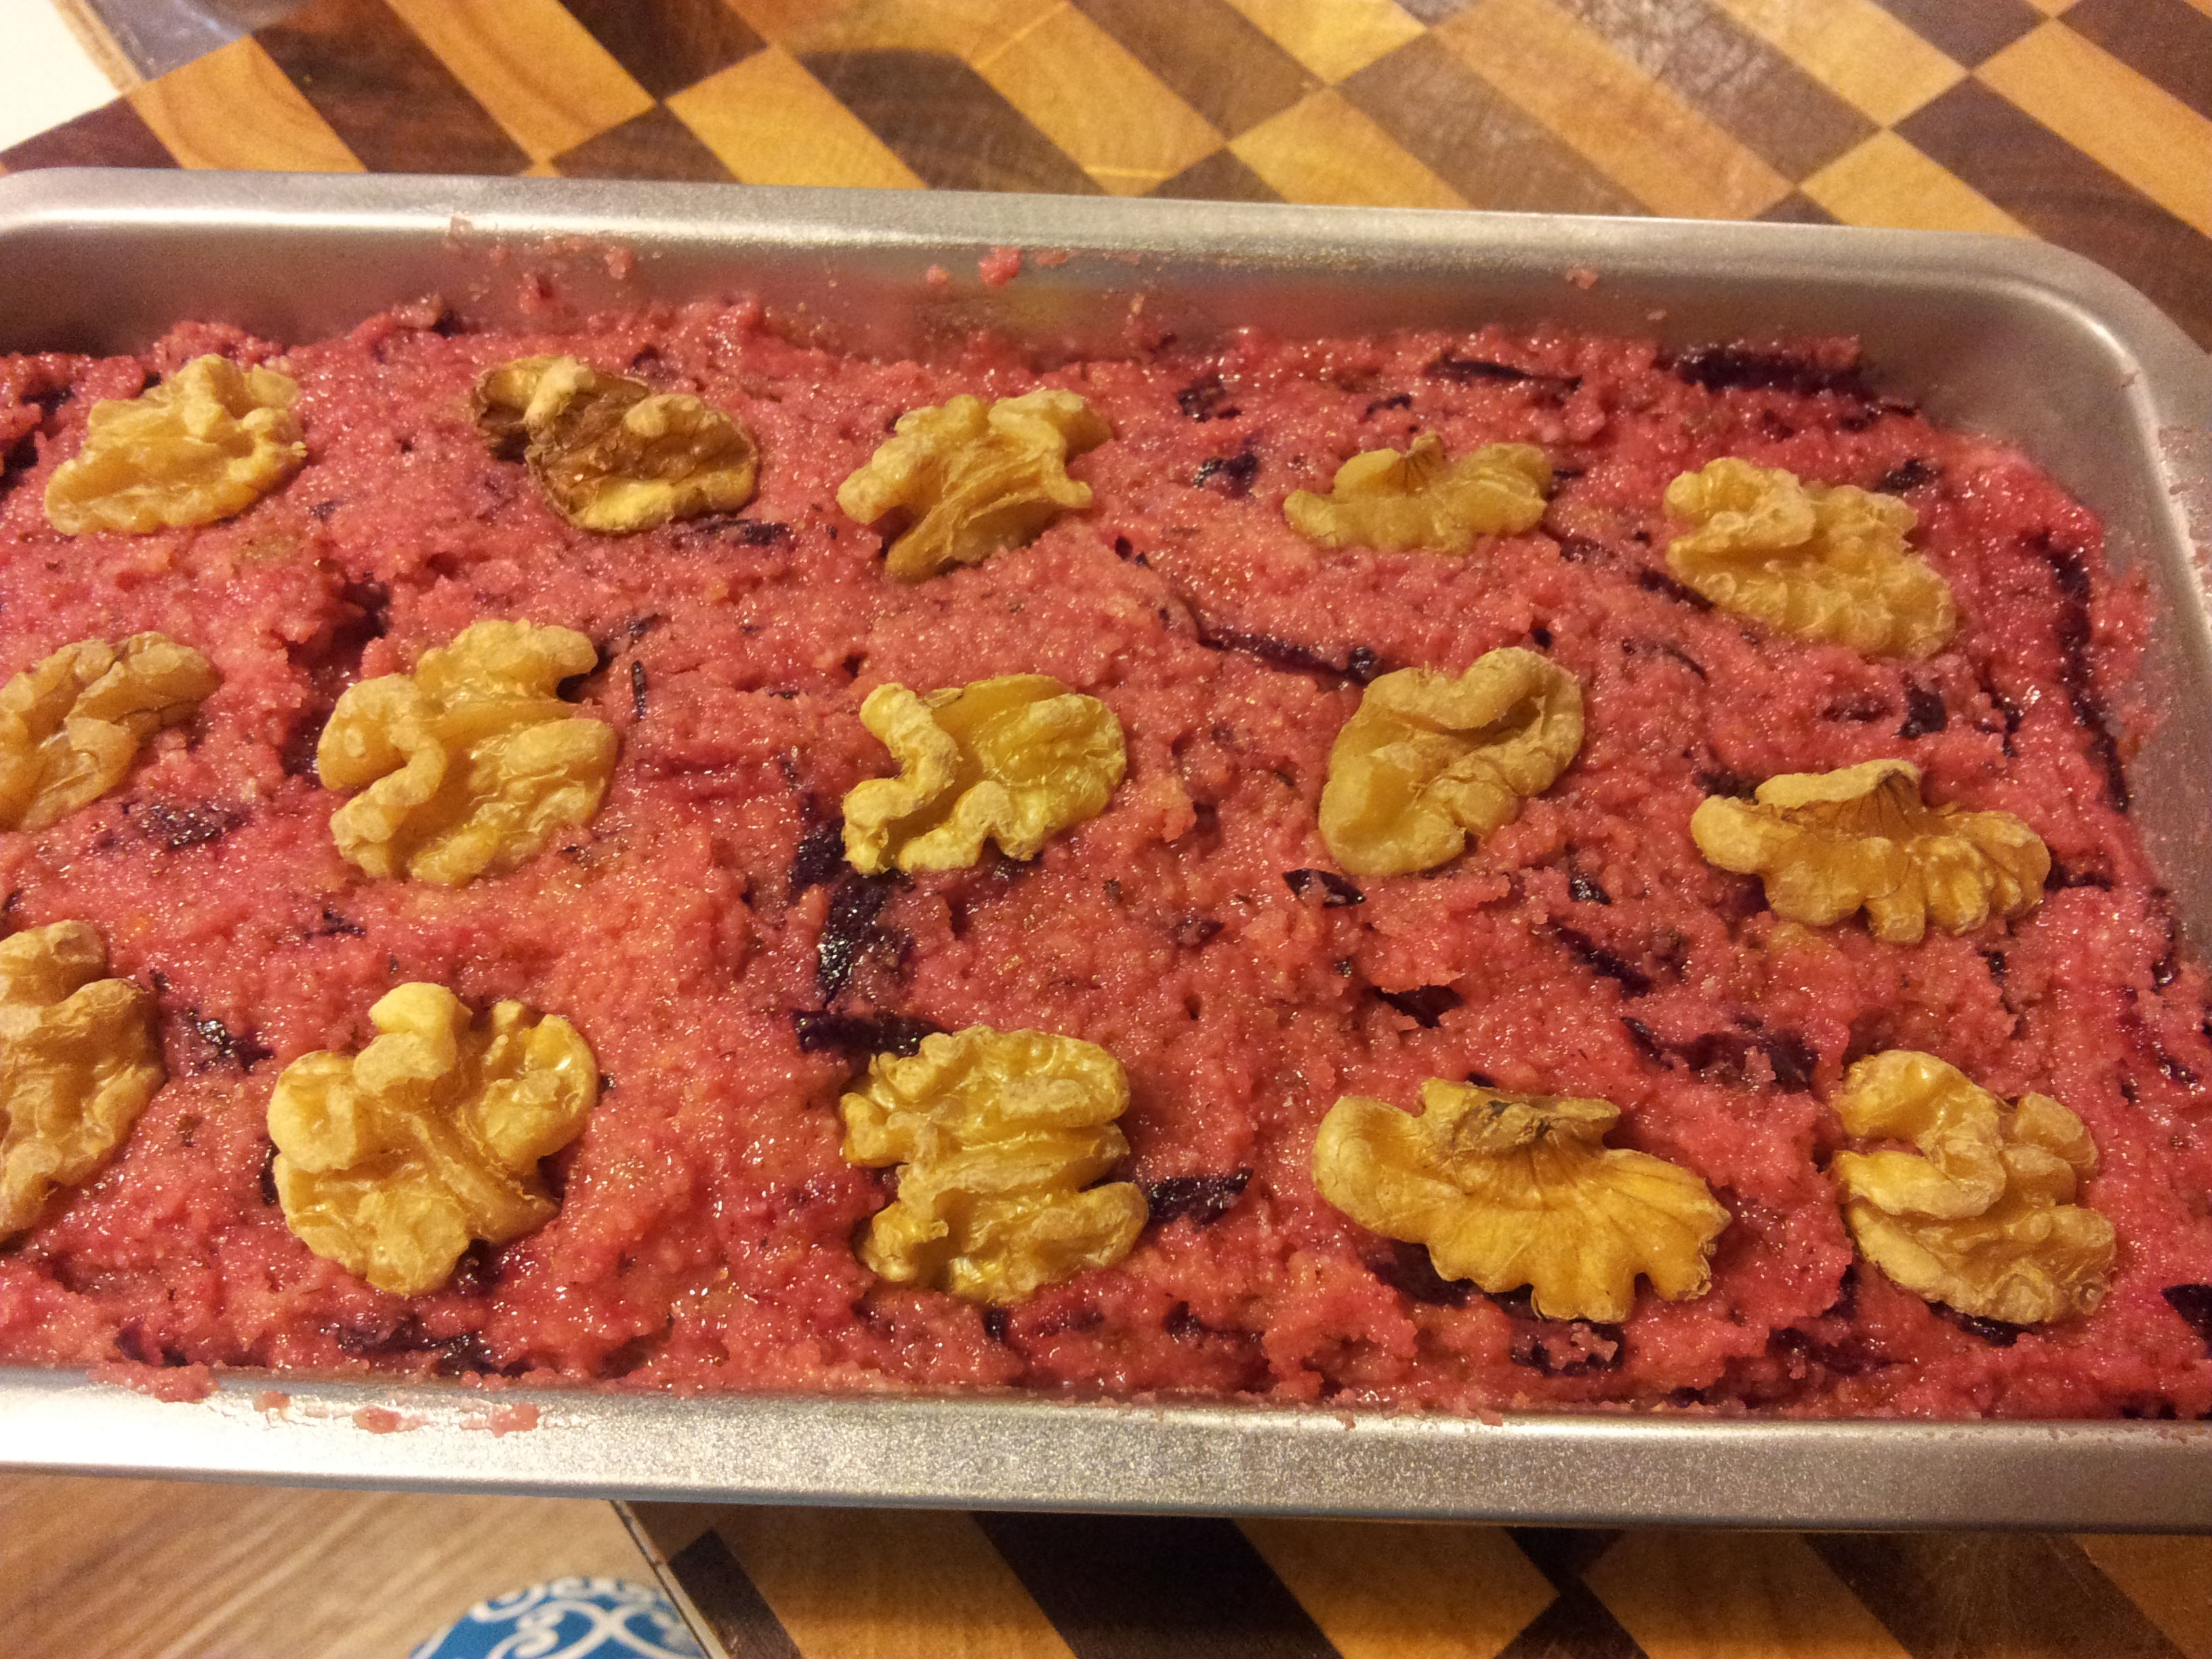
Place the mixture in a greased and lined baking tin. Smooth the top with a spatula and then place the extra whole walnuts on top of the cake
I greased my tin with coconut oil.
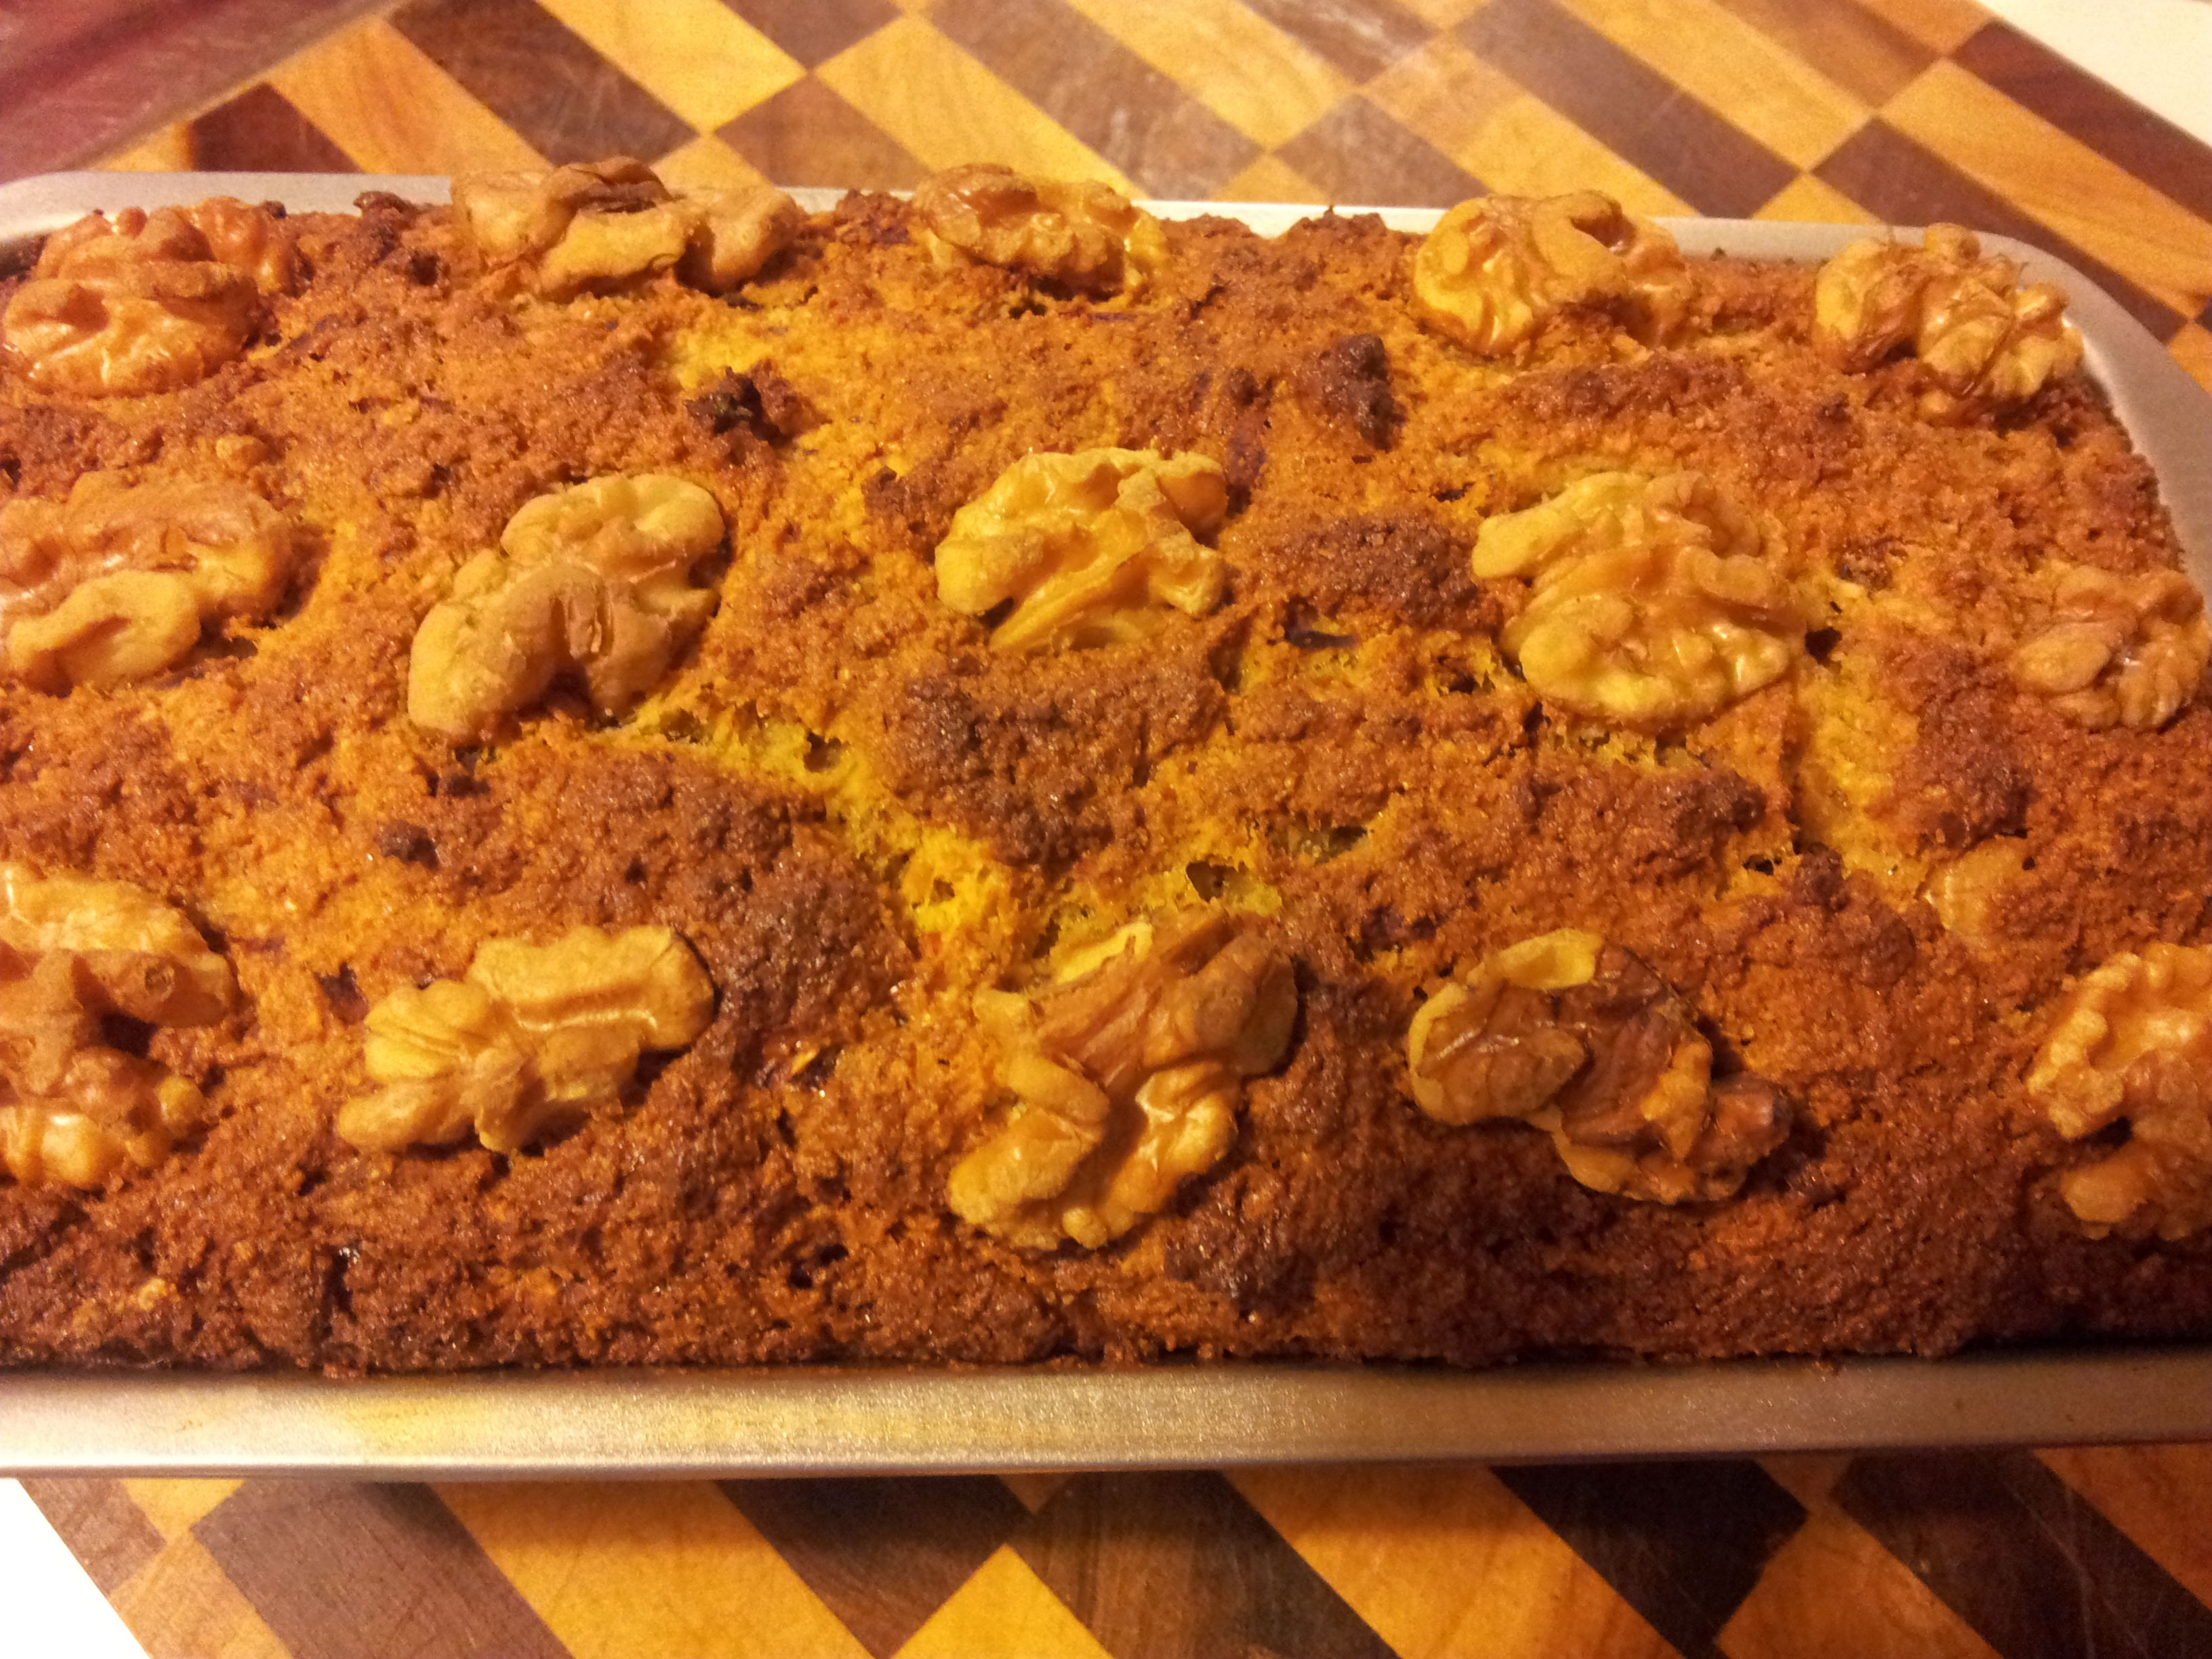
Bake in a 180 degree celsius oven until golden and quite firm.
The cake will be golden and smell delicious
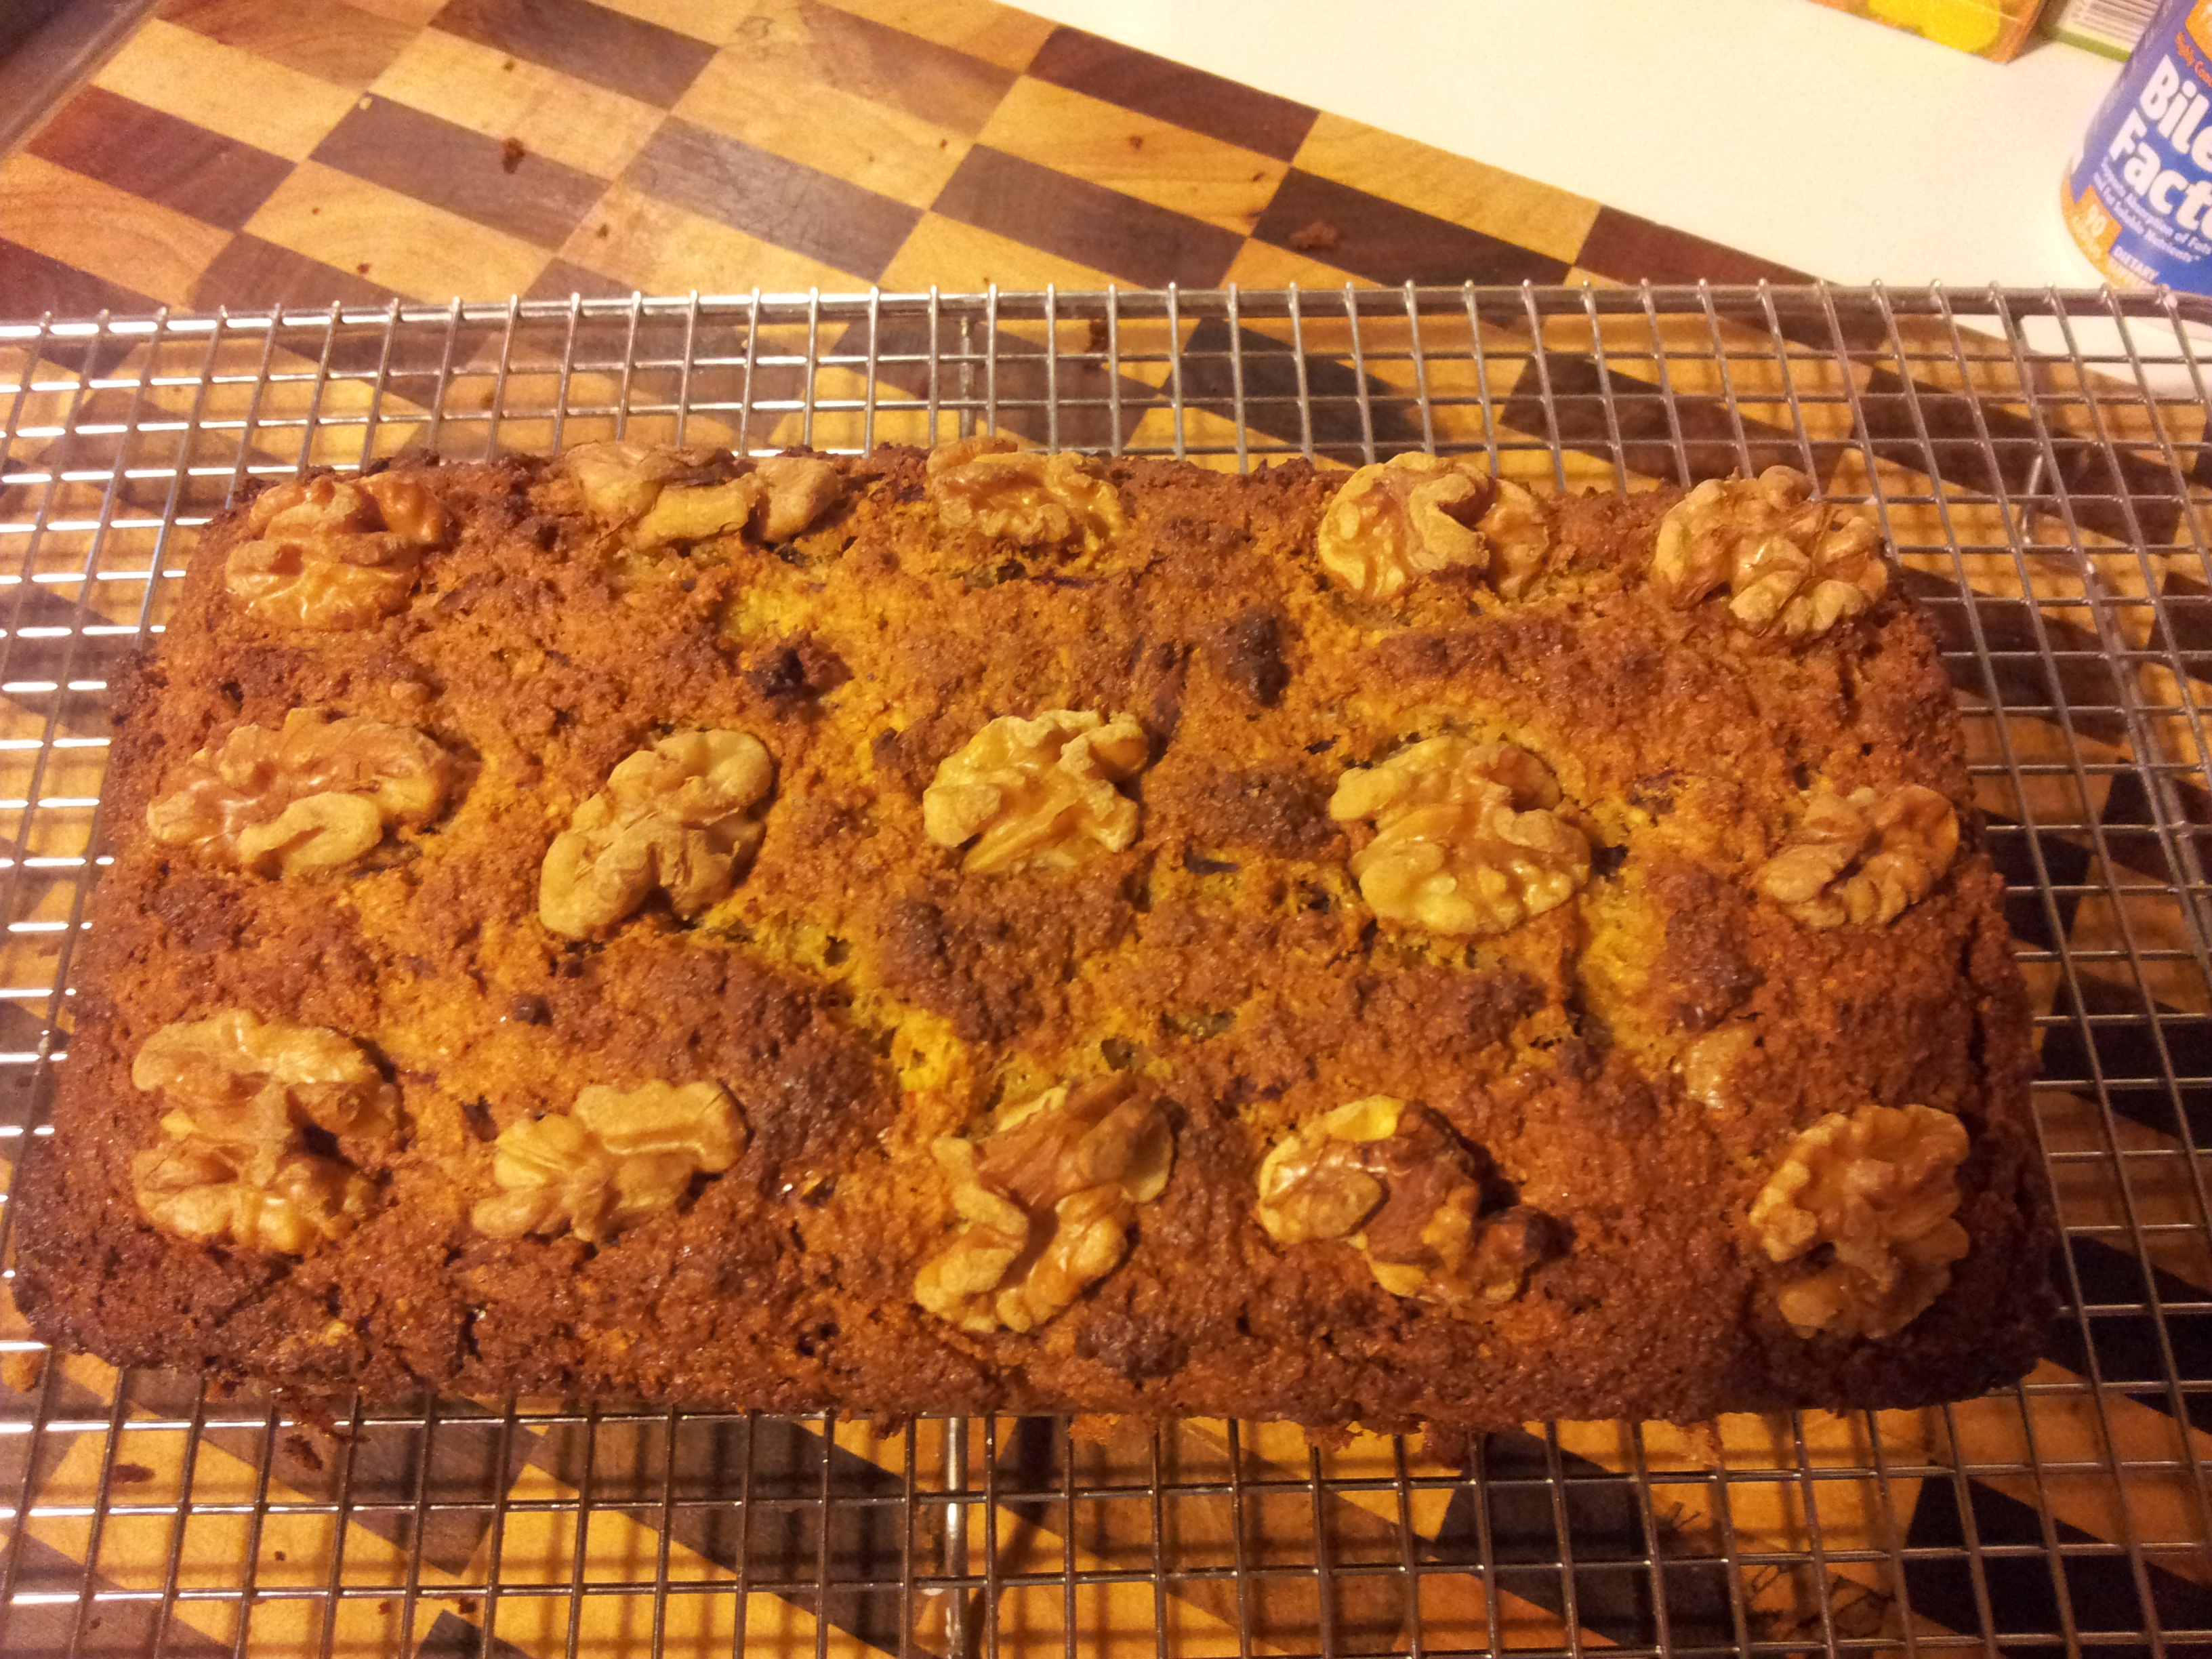
Remove the cake from the oven and run a knife around the edge of the cake to separate it from the tin. Turn the cake gently onto the cooling rack, remove the baking paper from the bottom and turn over.
Let the cake cool and then sample a piece! I use a serrated knife to gently cut a piece.The cake is lovely eaten warm!
If you have enjoyed this post please share it with a friend. You can also follow me on Instagram at holistic_paleo.
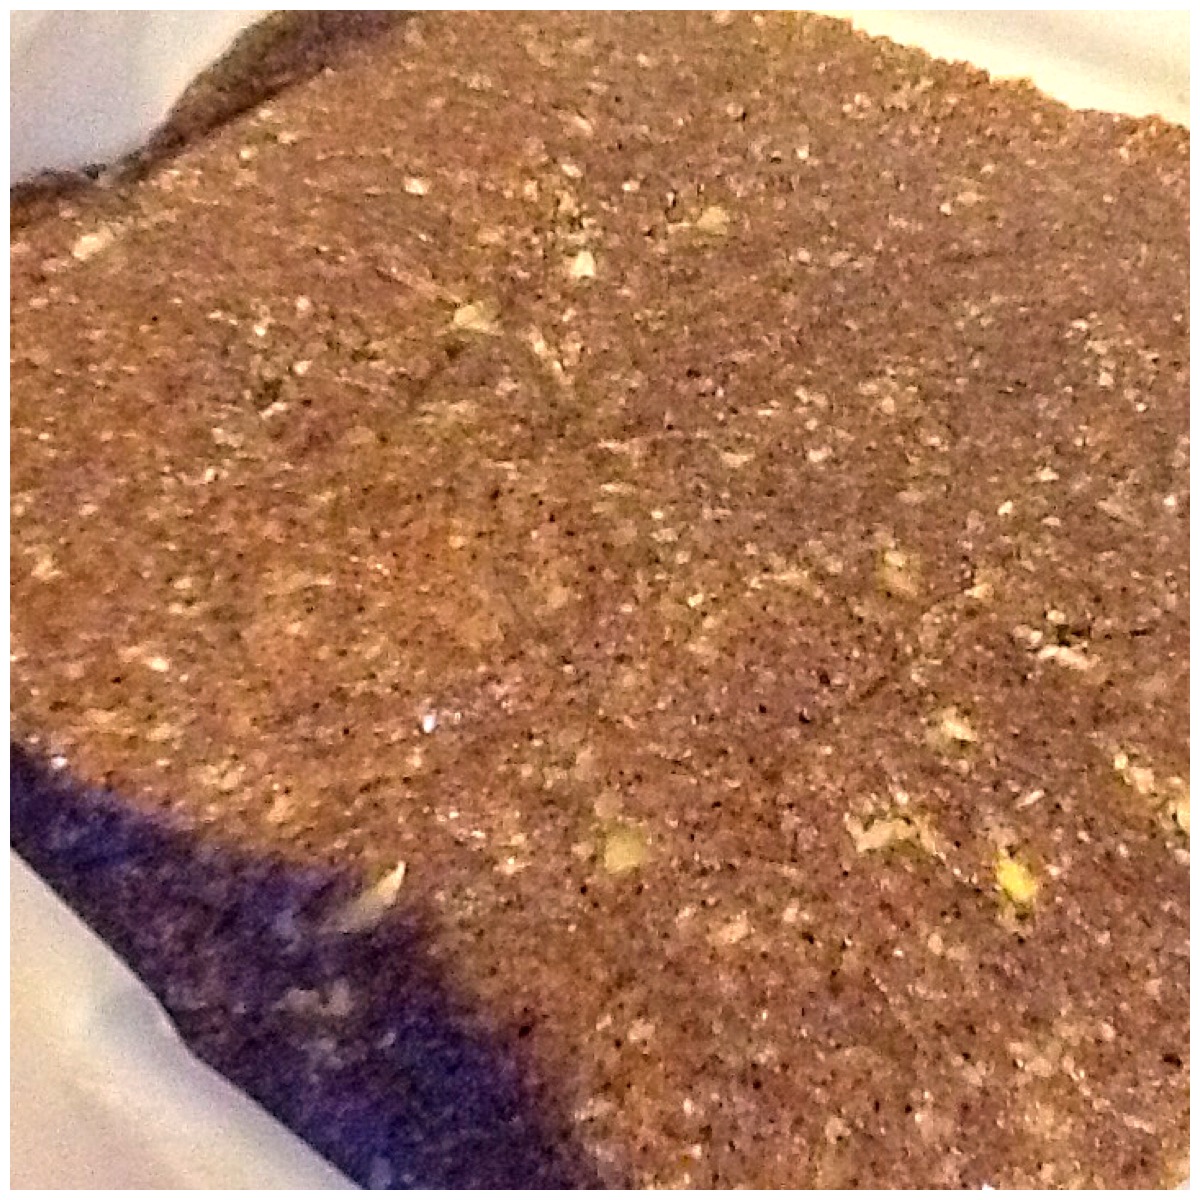
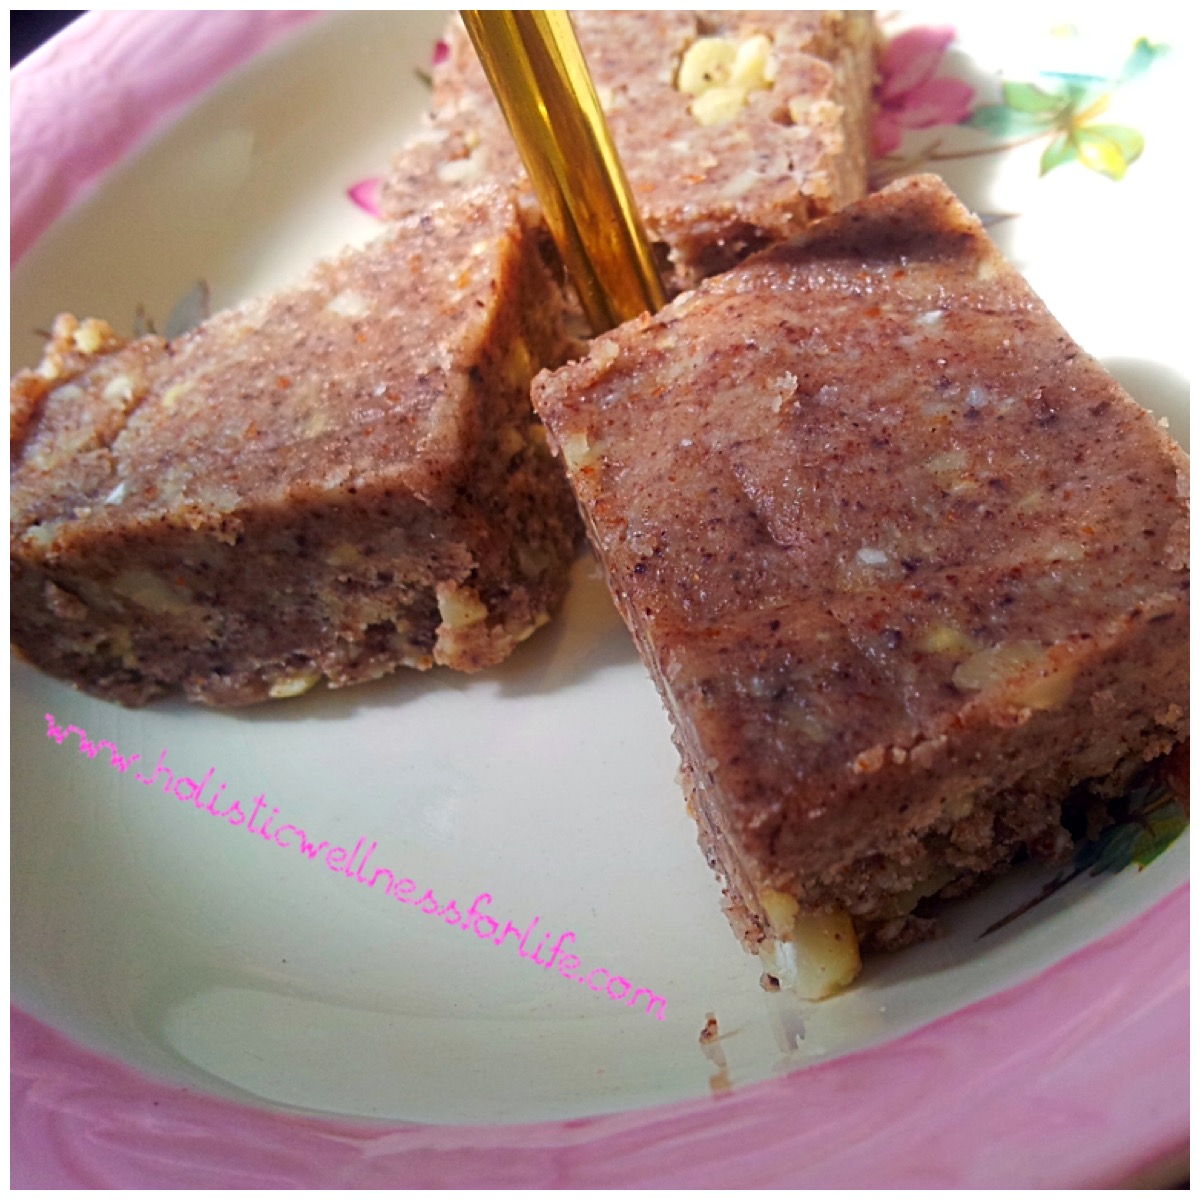
A delicious healthy snack bar that will add some sweetness to your day!
Eat them straight from the freezer or pack them into the lunch box.
Having healthy snacks on hand is vital if you are going to avoid making poor food choices. Being on a restricted diet is hard enough without feeling hungry or as though you are missing out. These bars are healthy, sweet, paleo, gluten, dairy and processed sugar free. They are filled with natural goodness and are a favourite snack of mine. The recipe is flexible and you can change them to suit your own preferences such as leaving out the nuts, using different seeds or changing some of the quantities. All of the ingredients l use are organic and the nuts and larger seeds are activated which means l have soaked them in filtered water and sea salt for a day, rinsed them well and then dehydrated. This process helps to remove the anti-nutrients and support good digestion.
Ingredients:
1 cup activated organic sunflower seeds
1 cup activated organic pumpkin seeds
1 cup organic sesame seeds
1 cup black chia seeds
1 cup activated mixed nuts (e.g almond, walnut, and brazil)
A generous 1/2 cup organic shredded coconut
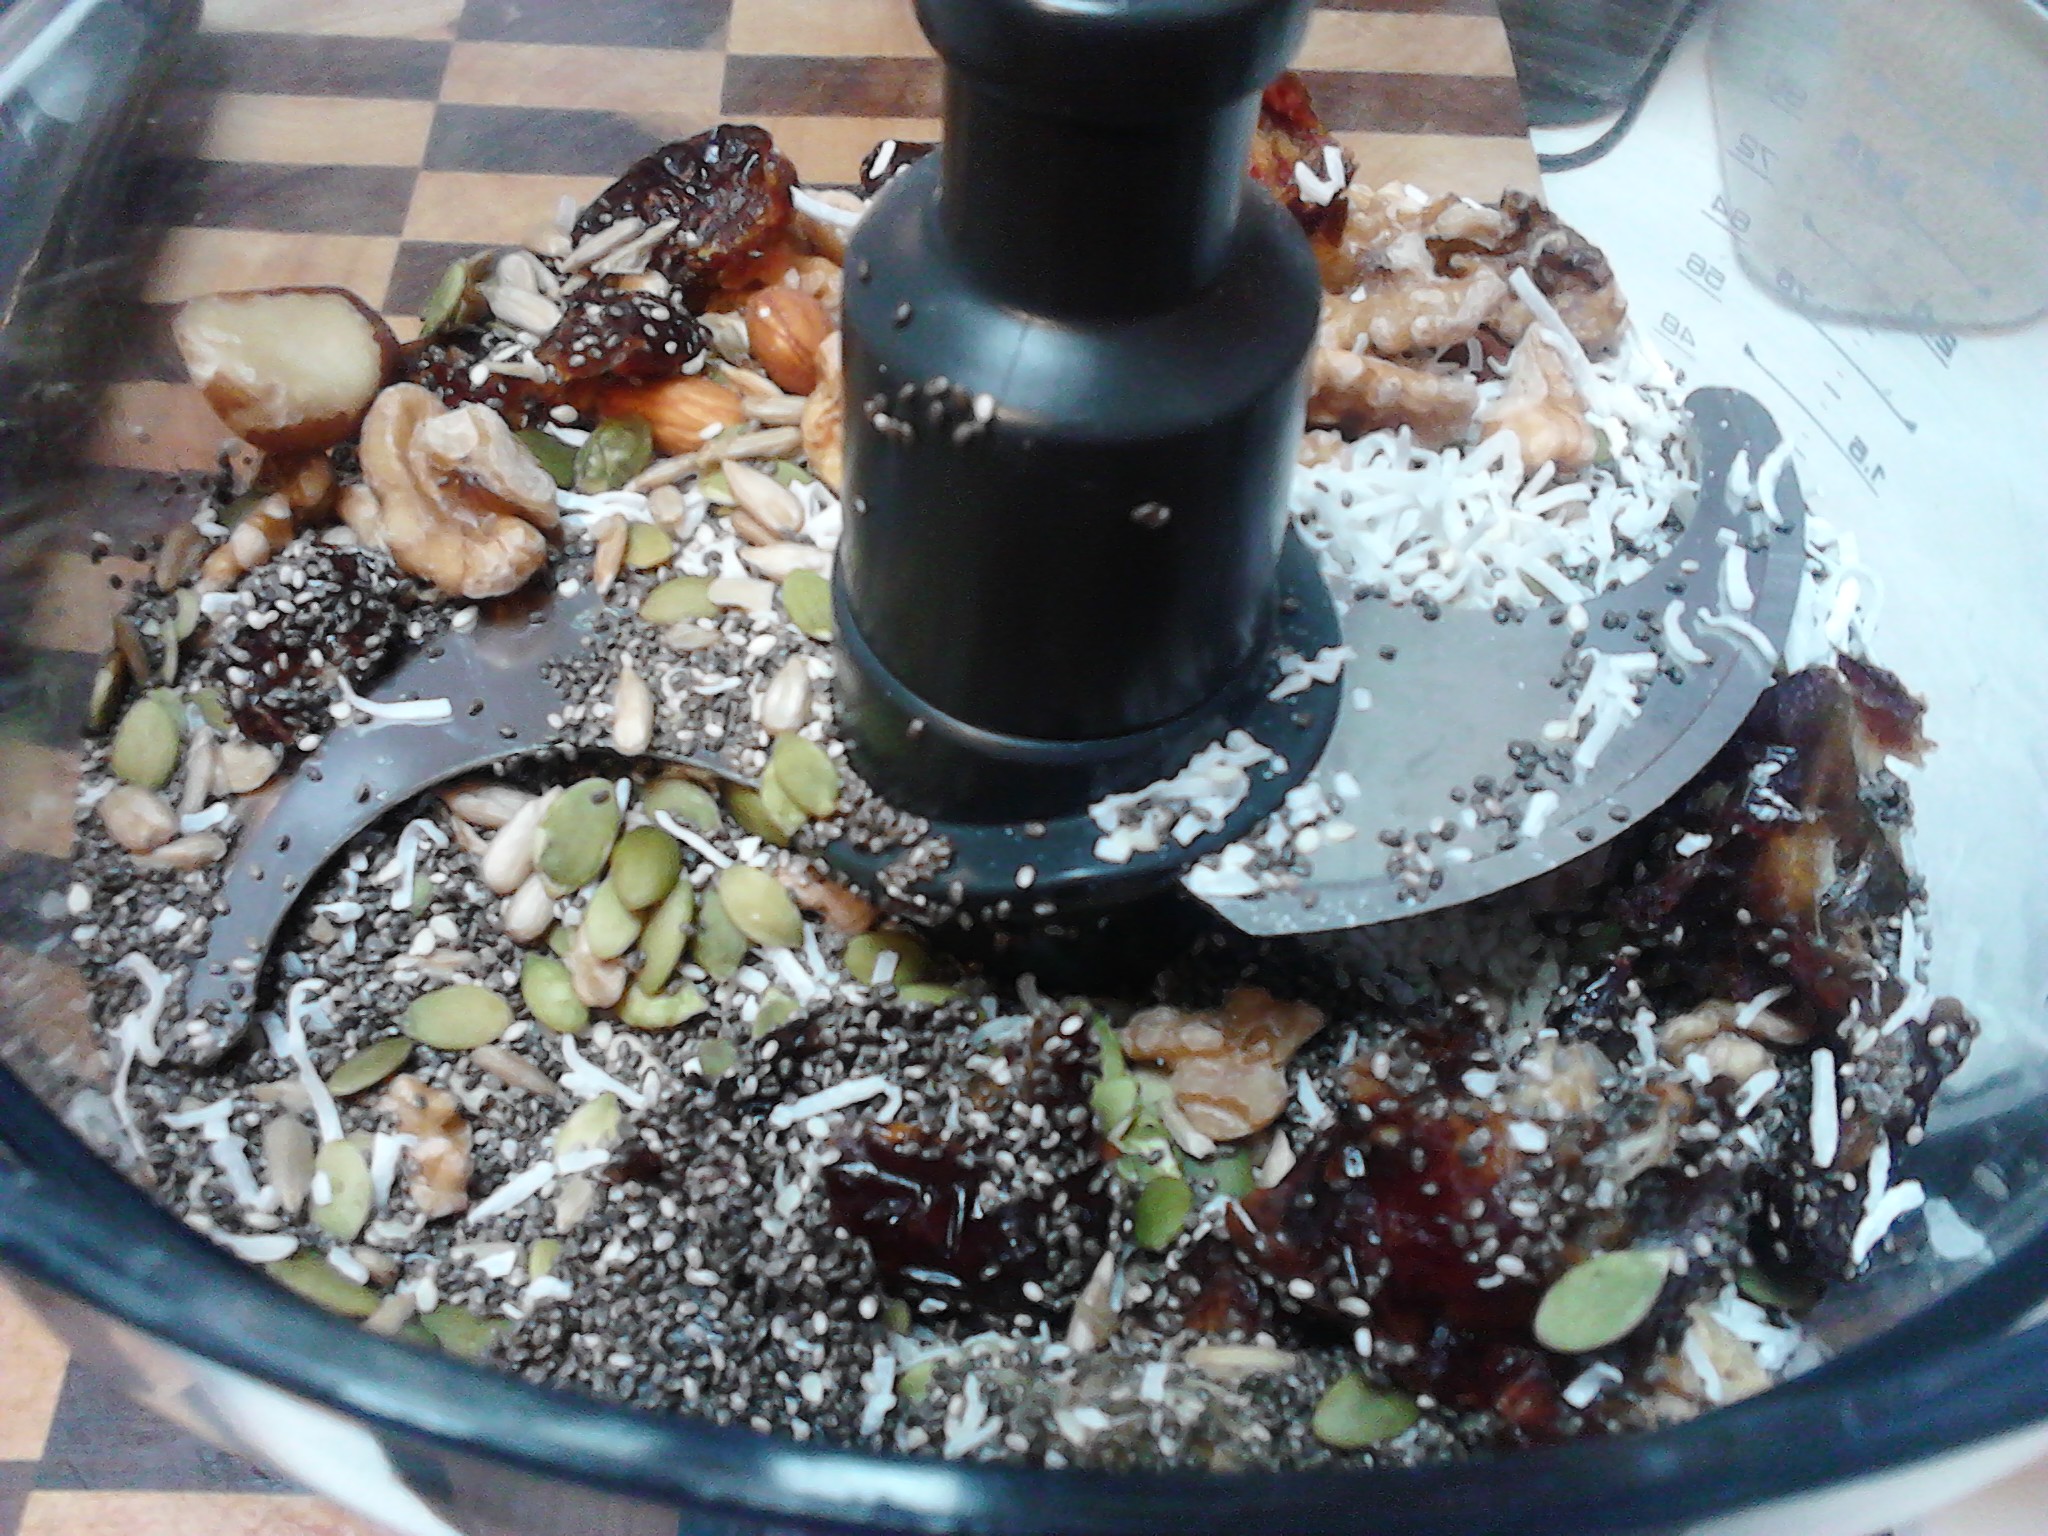
8 Medjool Dates seeded and chopped (roughly chop just to make it easier for the food processor)
A good 1/2 cup raw organic honey (use organic or regular honey if that is what you have)
A good 1/2 cup organic coconut oil
These ingredients add a delicious flavour to the bars.
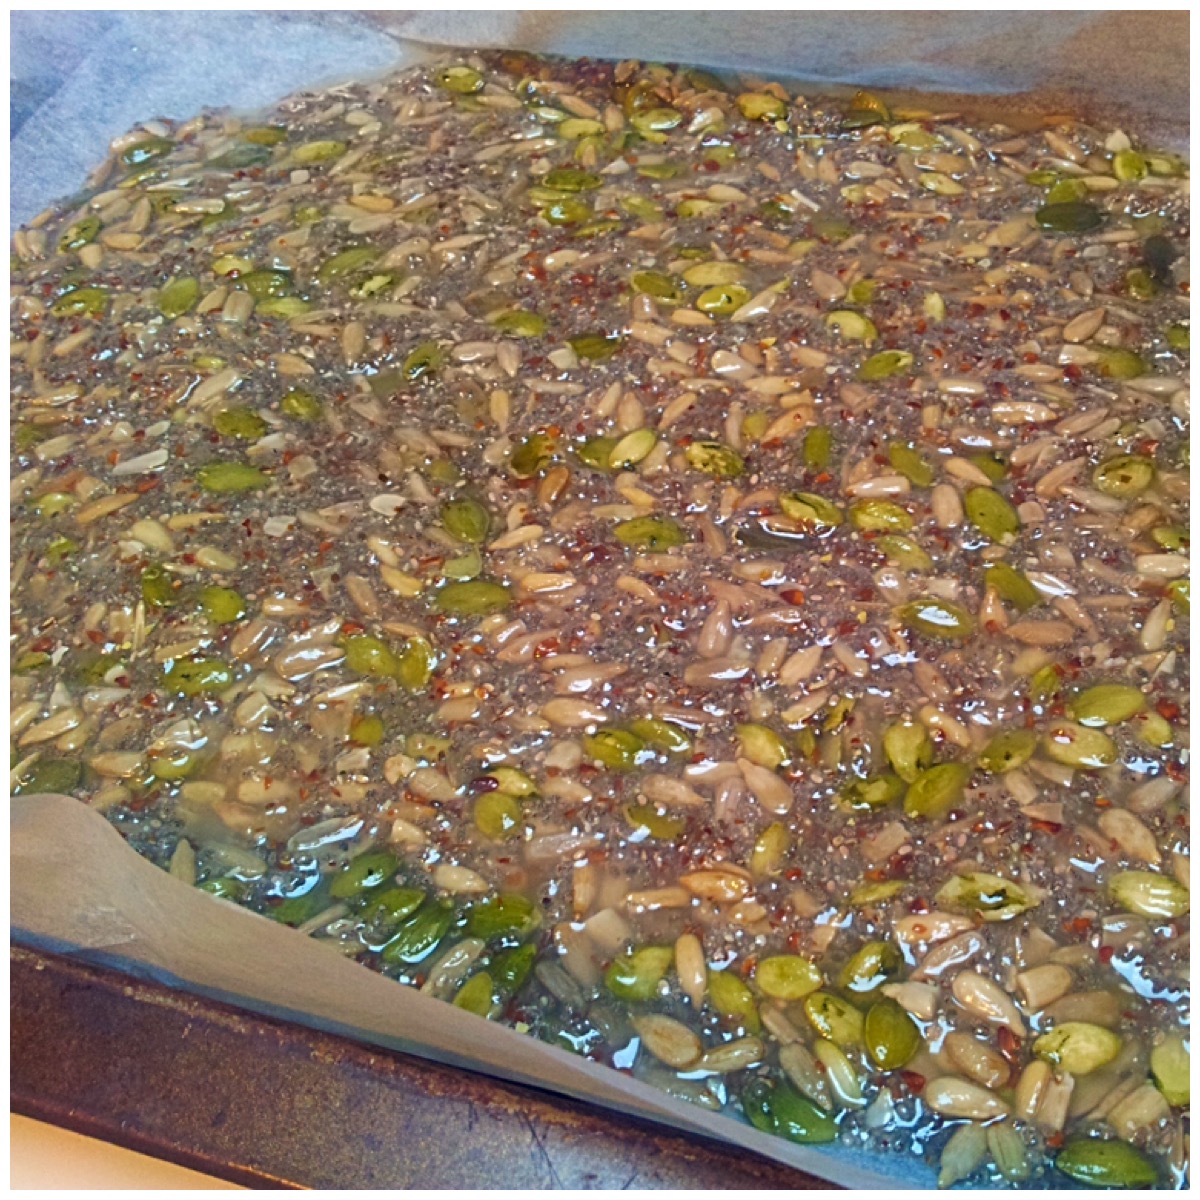
Place the nuts, seeds, shredded coconut and dates in the food processor and chop until roughly chopped. Gently warm the honey and coconut oil in a saucepan and pour into the food processor. Pulse until all there is a good consistency and all the nuts and seeds have been broken up.
Be careful of the very sharp blade.
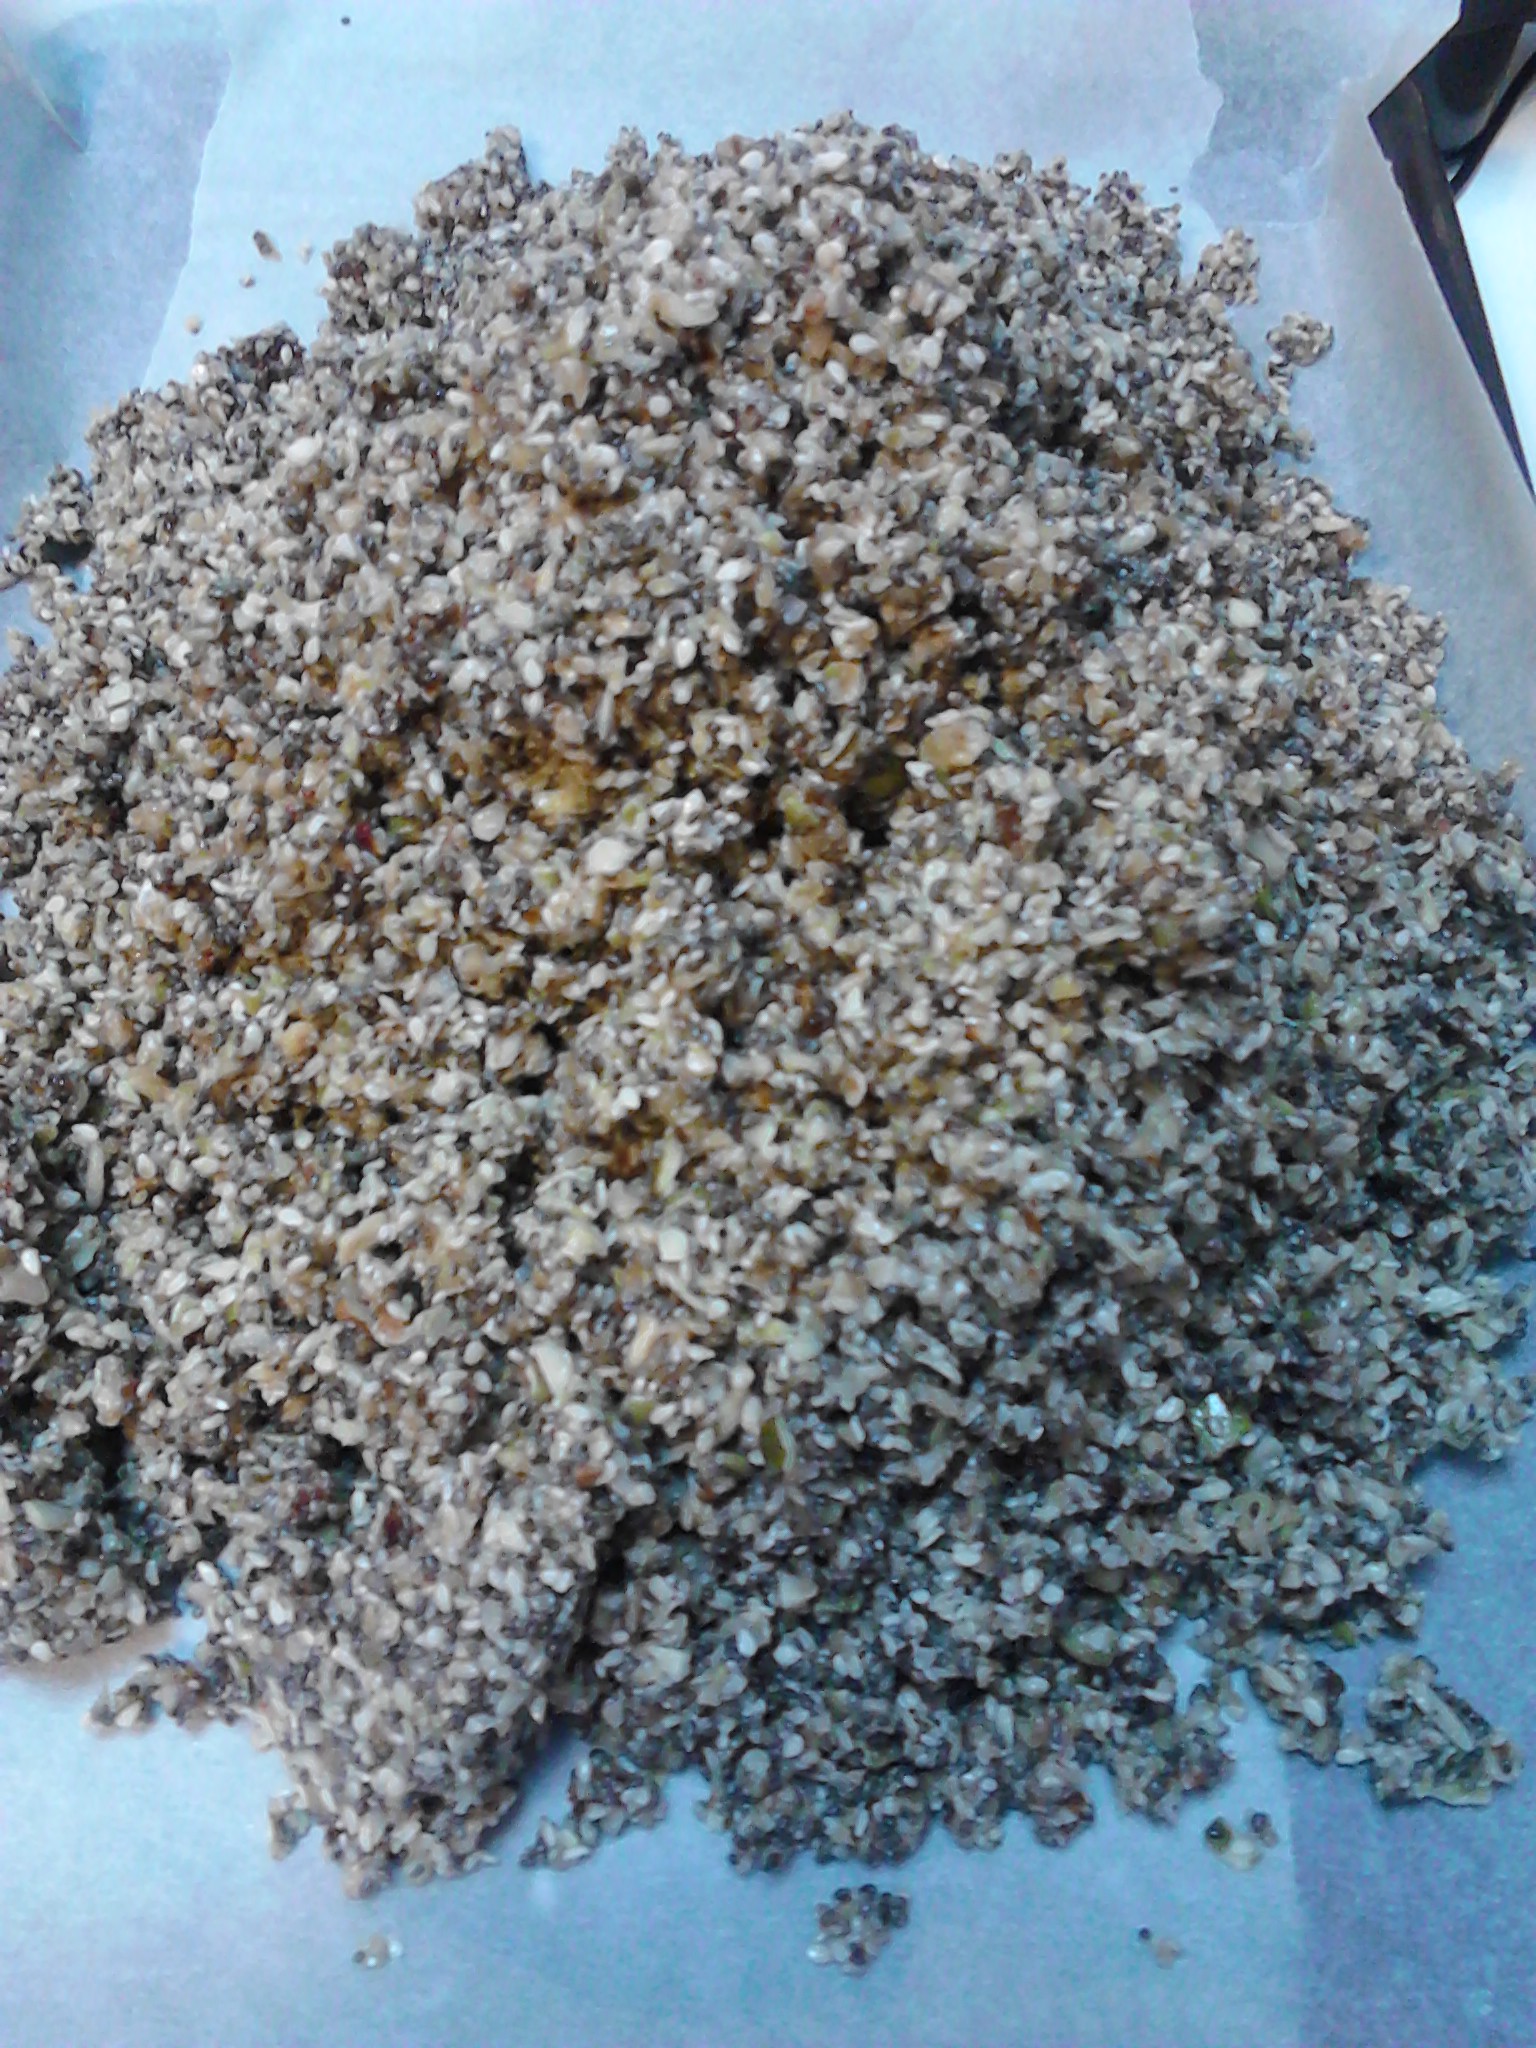
Have a tray ready which is lined with baking paper. Run your finger around the edge of the tray so there is a crease in the paper. Pour the ingredients onto a tray lined with baking paper. Now is a good time to have a taste test. The mix should be sweet and delicious.
The mix is ready to be flattened.
Use a spatula to flatten the mix and make sure it is quite even across the whole tray and give special attention to the corners.
Ready for the oven
I have tried a few different oven temperatures and times but basically you don’t want the oven too hot as you will burn the seeds and lose lots of nutrients, and you want to just cook it until the edges are going golden. I cooked mine today in a Fan Forced Convection Oven at 170 Degrees Celsius for 30 minutes. You will be able to check this after your first batch.
Remove the tray from the oven and let cool until cold. Another option is when it is slightly cool to place it in the freezer for an hour whilst still on the tray. This is what l do now as l don’t like to wait.
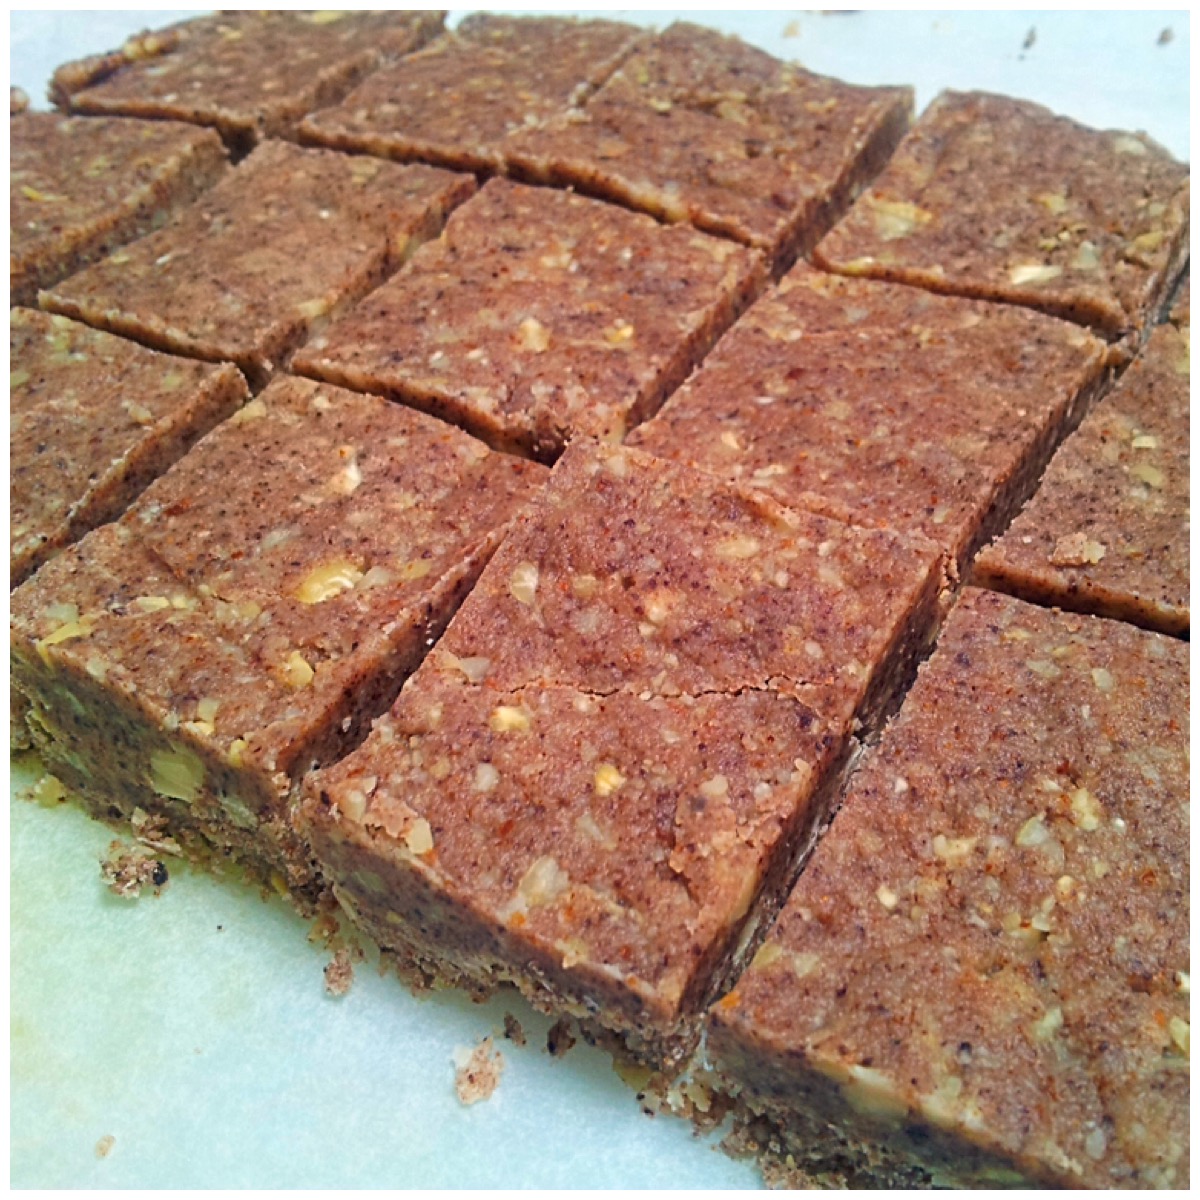
Remove from the freezer and cut.
Use the edges of the baking paper to carefully remove the bars as a whole from the tray and lay it on a flat bench. Cut the bars while still on the baking paper into whatever size suits you using a very sharp knife and wiping clean after cutting a row. Another option is to use a pizza cutter and it helps to give it or the knife a wipe after each row. I think it is better to have the bars quite small as then you have more of a choice over serving size.
Carefully lift each bar into the container for freezing unless you are going to eat them all fresh, but they are very nice eaten when they are just out of the freezer and such a handy snack to take to work or when you are out.
Store in an airtight container in the freezer
The best part of the whole cooking experience is eating the crumbs. Scrape them off the baking paper and into a bowl. Enjoy! You could dip something into these crumbs such as a banana or use them as a topping.
I love this part!
Something to be aware of when eating these bars is that the chia seeds can get stuck in your teeth. This is really a cosmetic issue, so it is best to do a quick tooth check after you have eaten them and you may need a tooth pick to remove them as they can be a bit stubborn.
If you have enjoyed this post please share with a friend. You can follow me on Instagram, Facebook, Twitter, Flickr, Pinterest and Tumblr.
Live & eat mindfully. Gluten & dairy free recipes.