A flavour taste sensation filled with so many wonderful nourishing nutrients and making use of ingredients that usually go to waste.
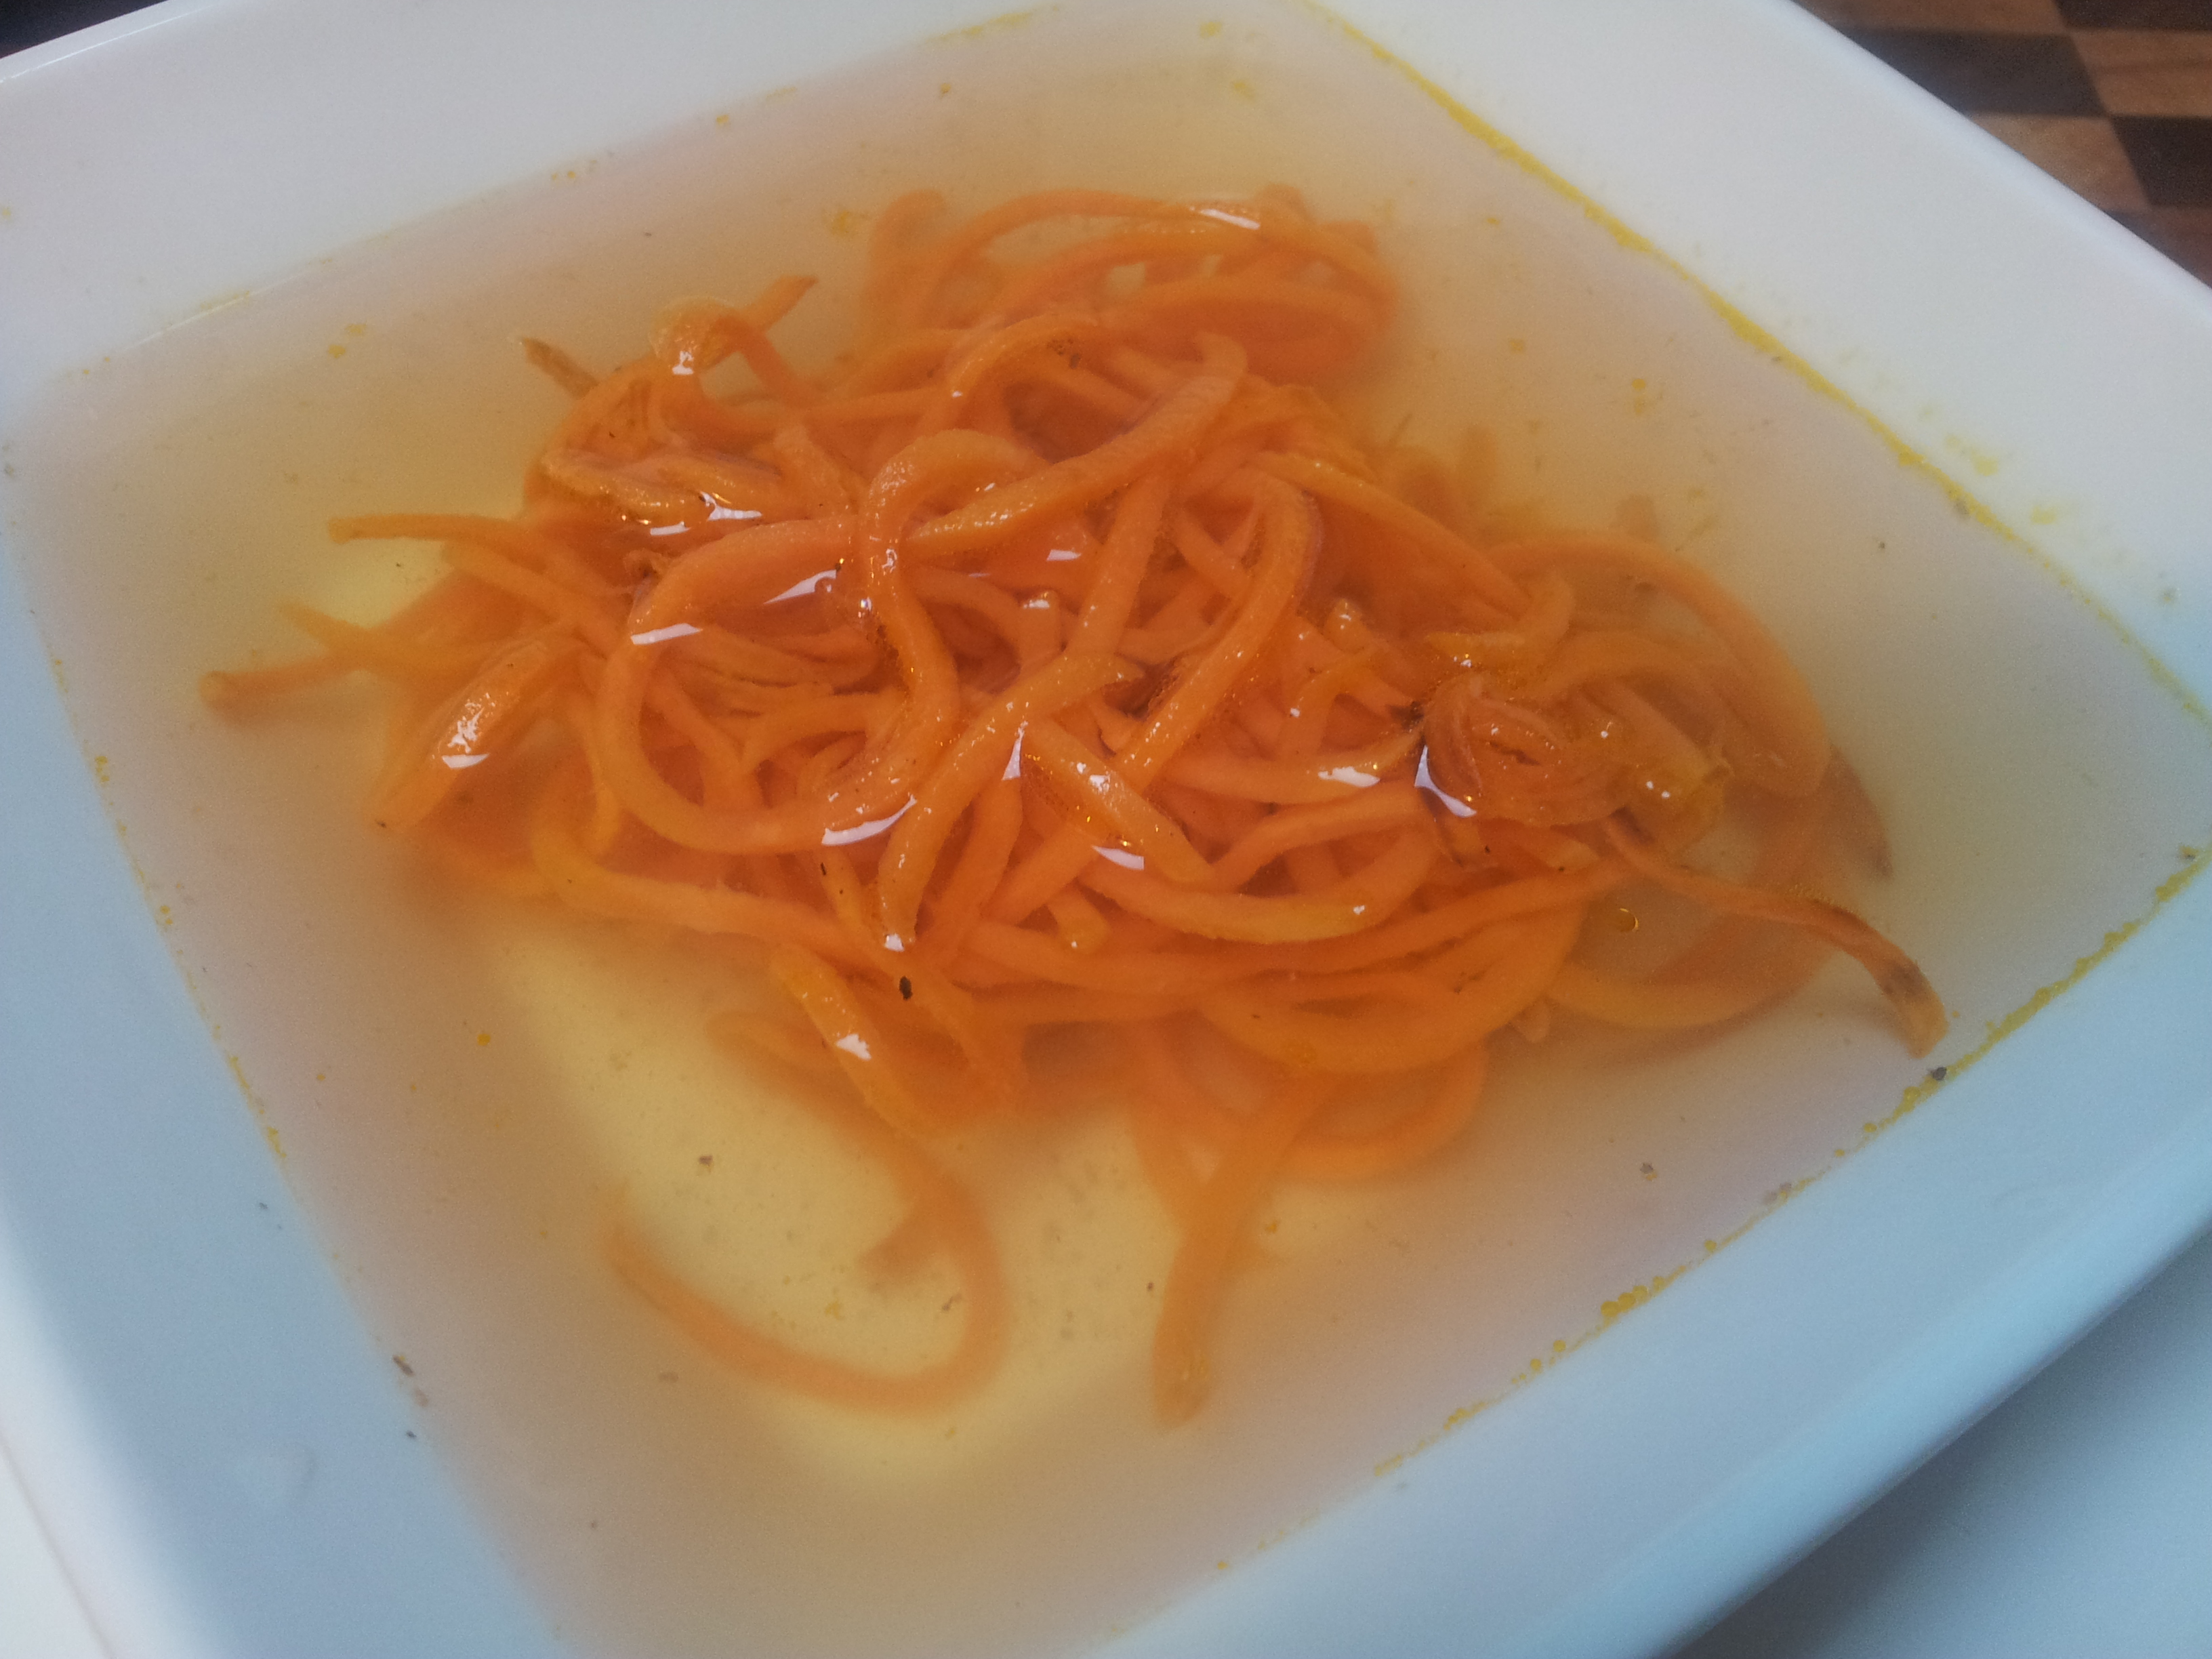
An amazing turkey bone broth with pan fried sweet potato noodles. It was completely delicious.
Bone broth is nutrient dense and extremely healing for the digestive system. In addition to this it is filled with an incredible flavour that can be enjoyed on its own as a drink or used in your favourite meals.
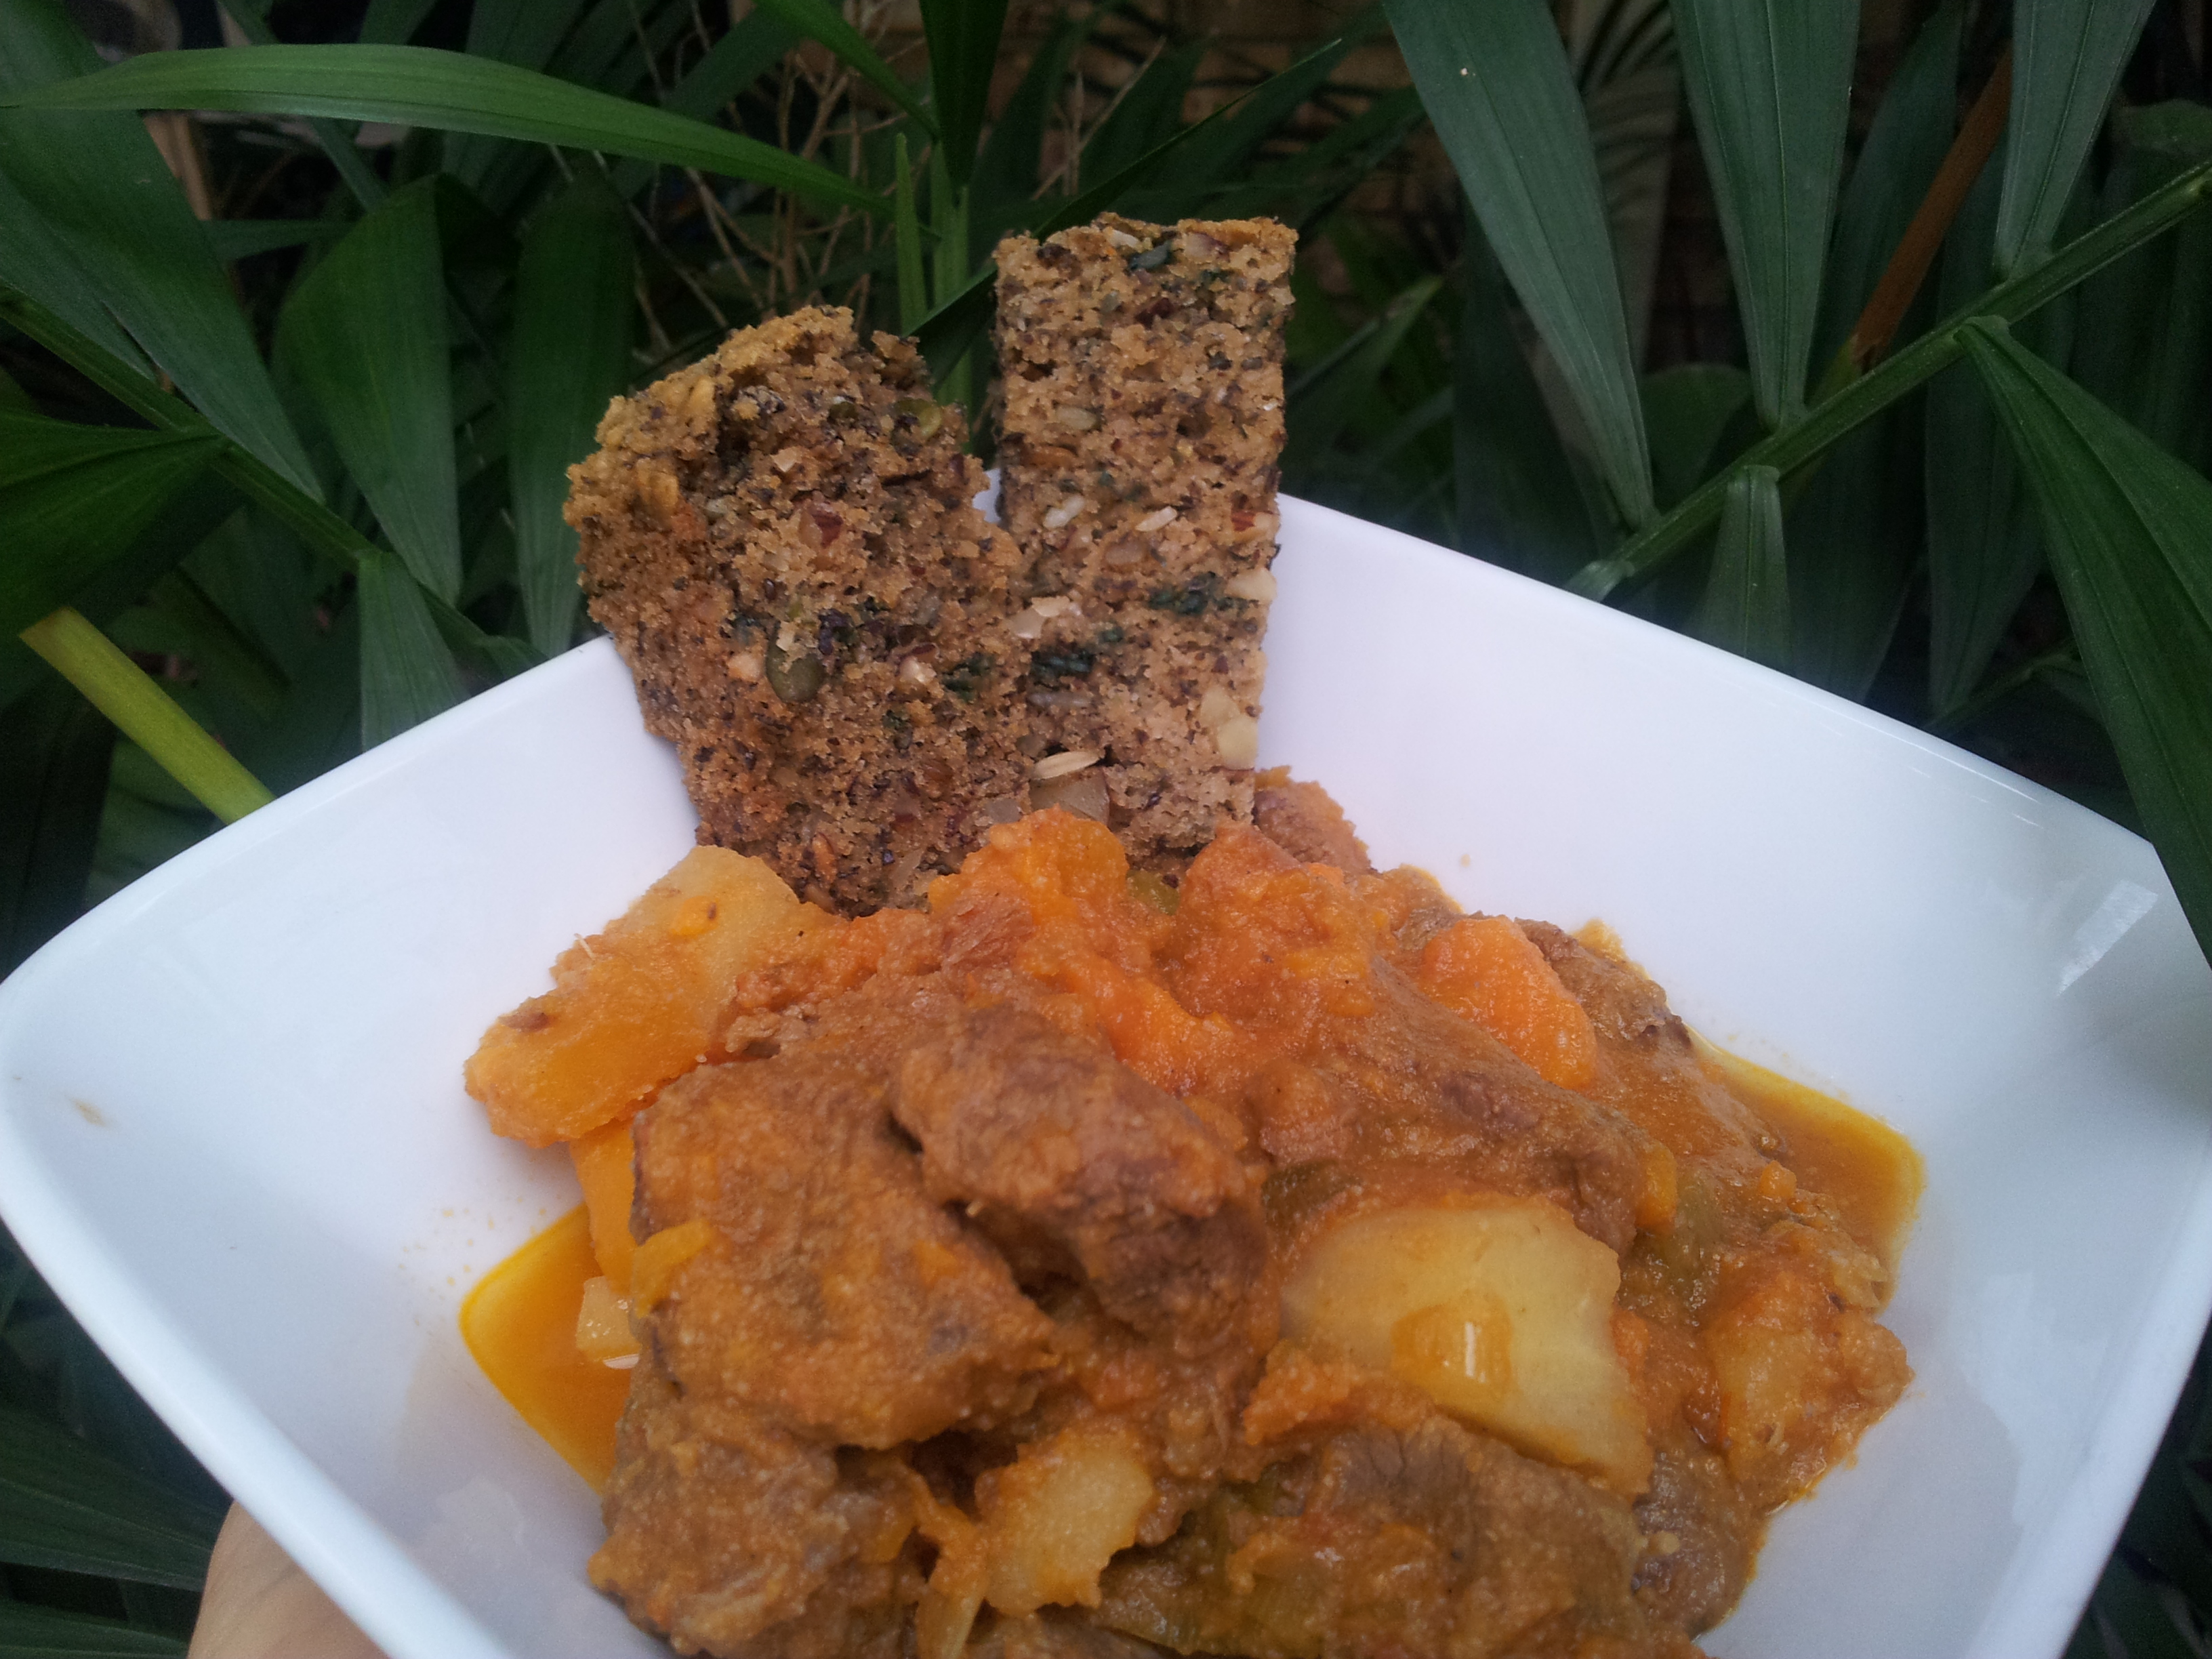
This is a beautiful beef and vegetable casserole where l added about 1 litre of turkey stock to create an amazing flavour.
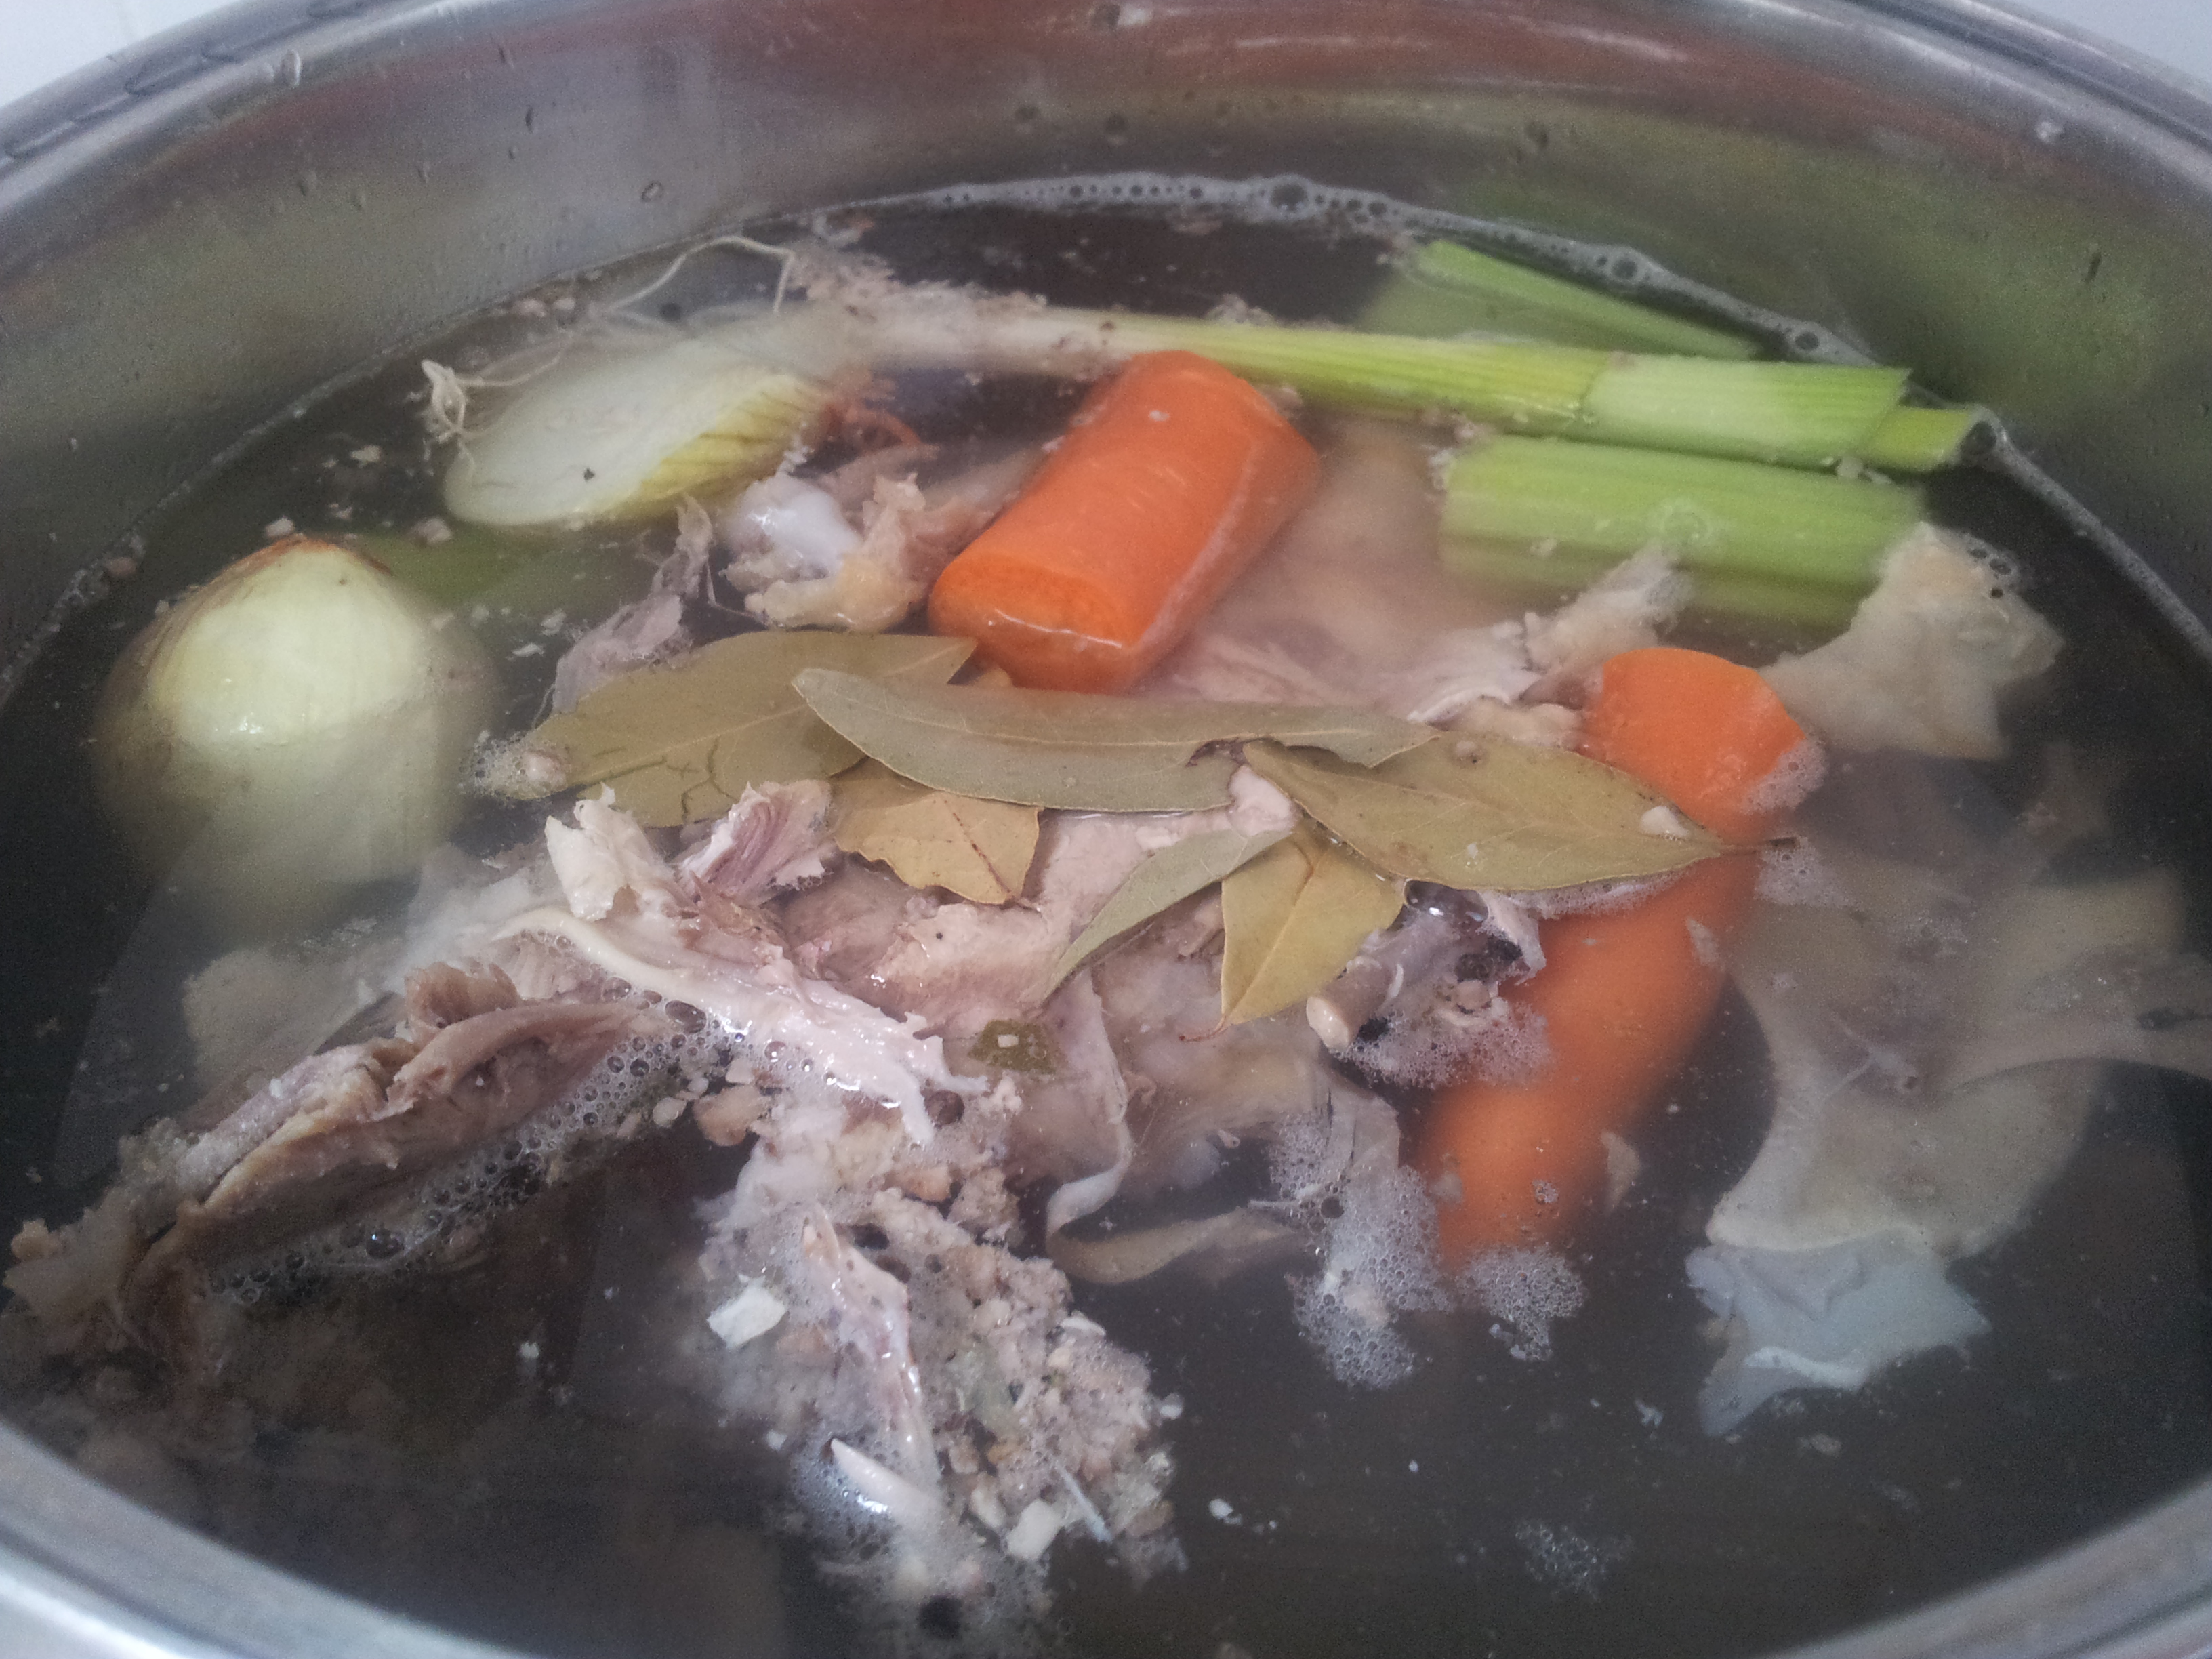
To make the stock you need to have the remainders of the turkey after you have cooked it and enjoyed a lovely meal.
Cook your turkey and enjoy a delicious meal saving the leftover meat, skin and bone for your broth.
To make the broth place your turkey leftovers in a big pot and fill it 3/4 of the way with filtered water. Add to the pot 1/4 cup of organic apple cider vinegar, a few peppercorns, onion, 1/2 teaspoon sea salt, a few bay leaves and an assortment of vegetables such as celery ends or carrots.
Everything is in the pot.
It is hard to go wrong and the actual quantity of each ingredient doesn’t have to be exact. The apple cider vinegar is important though as it helps to leach the minerals and nutrients from the bones.
Bring the broth to the boil and then let simmer with the lid on for around 24 hours. The house will smell lovely.
When the broth is cool strain it to so you are left with a clear liquid. Let it cool in the fridge and then skim the fat and solids off the top. The broth is now ready to use or can be frozen.
This broth is so precious. Try to always have a broth of some kind in your fridge or freezer.
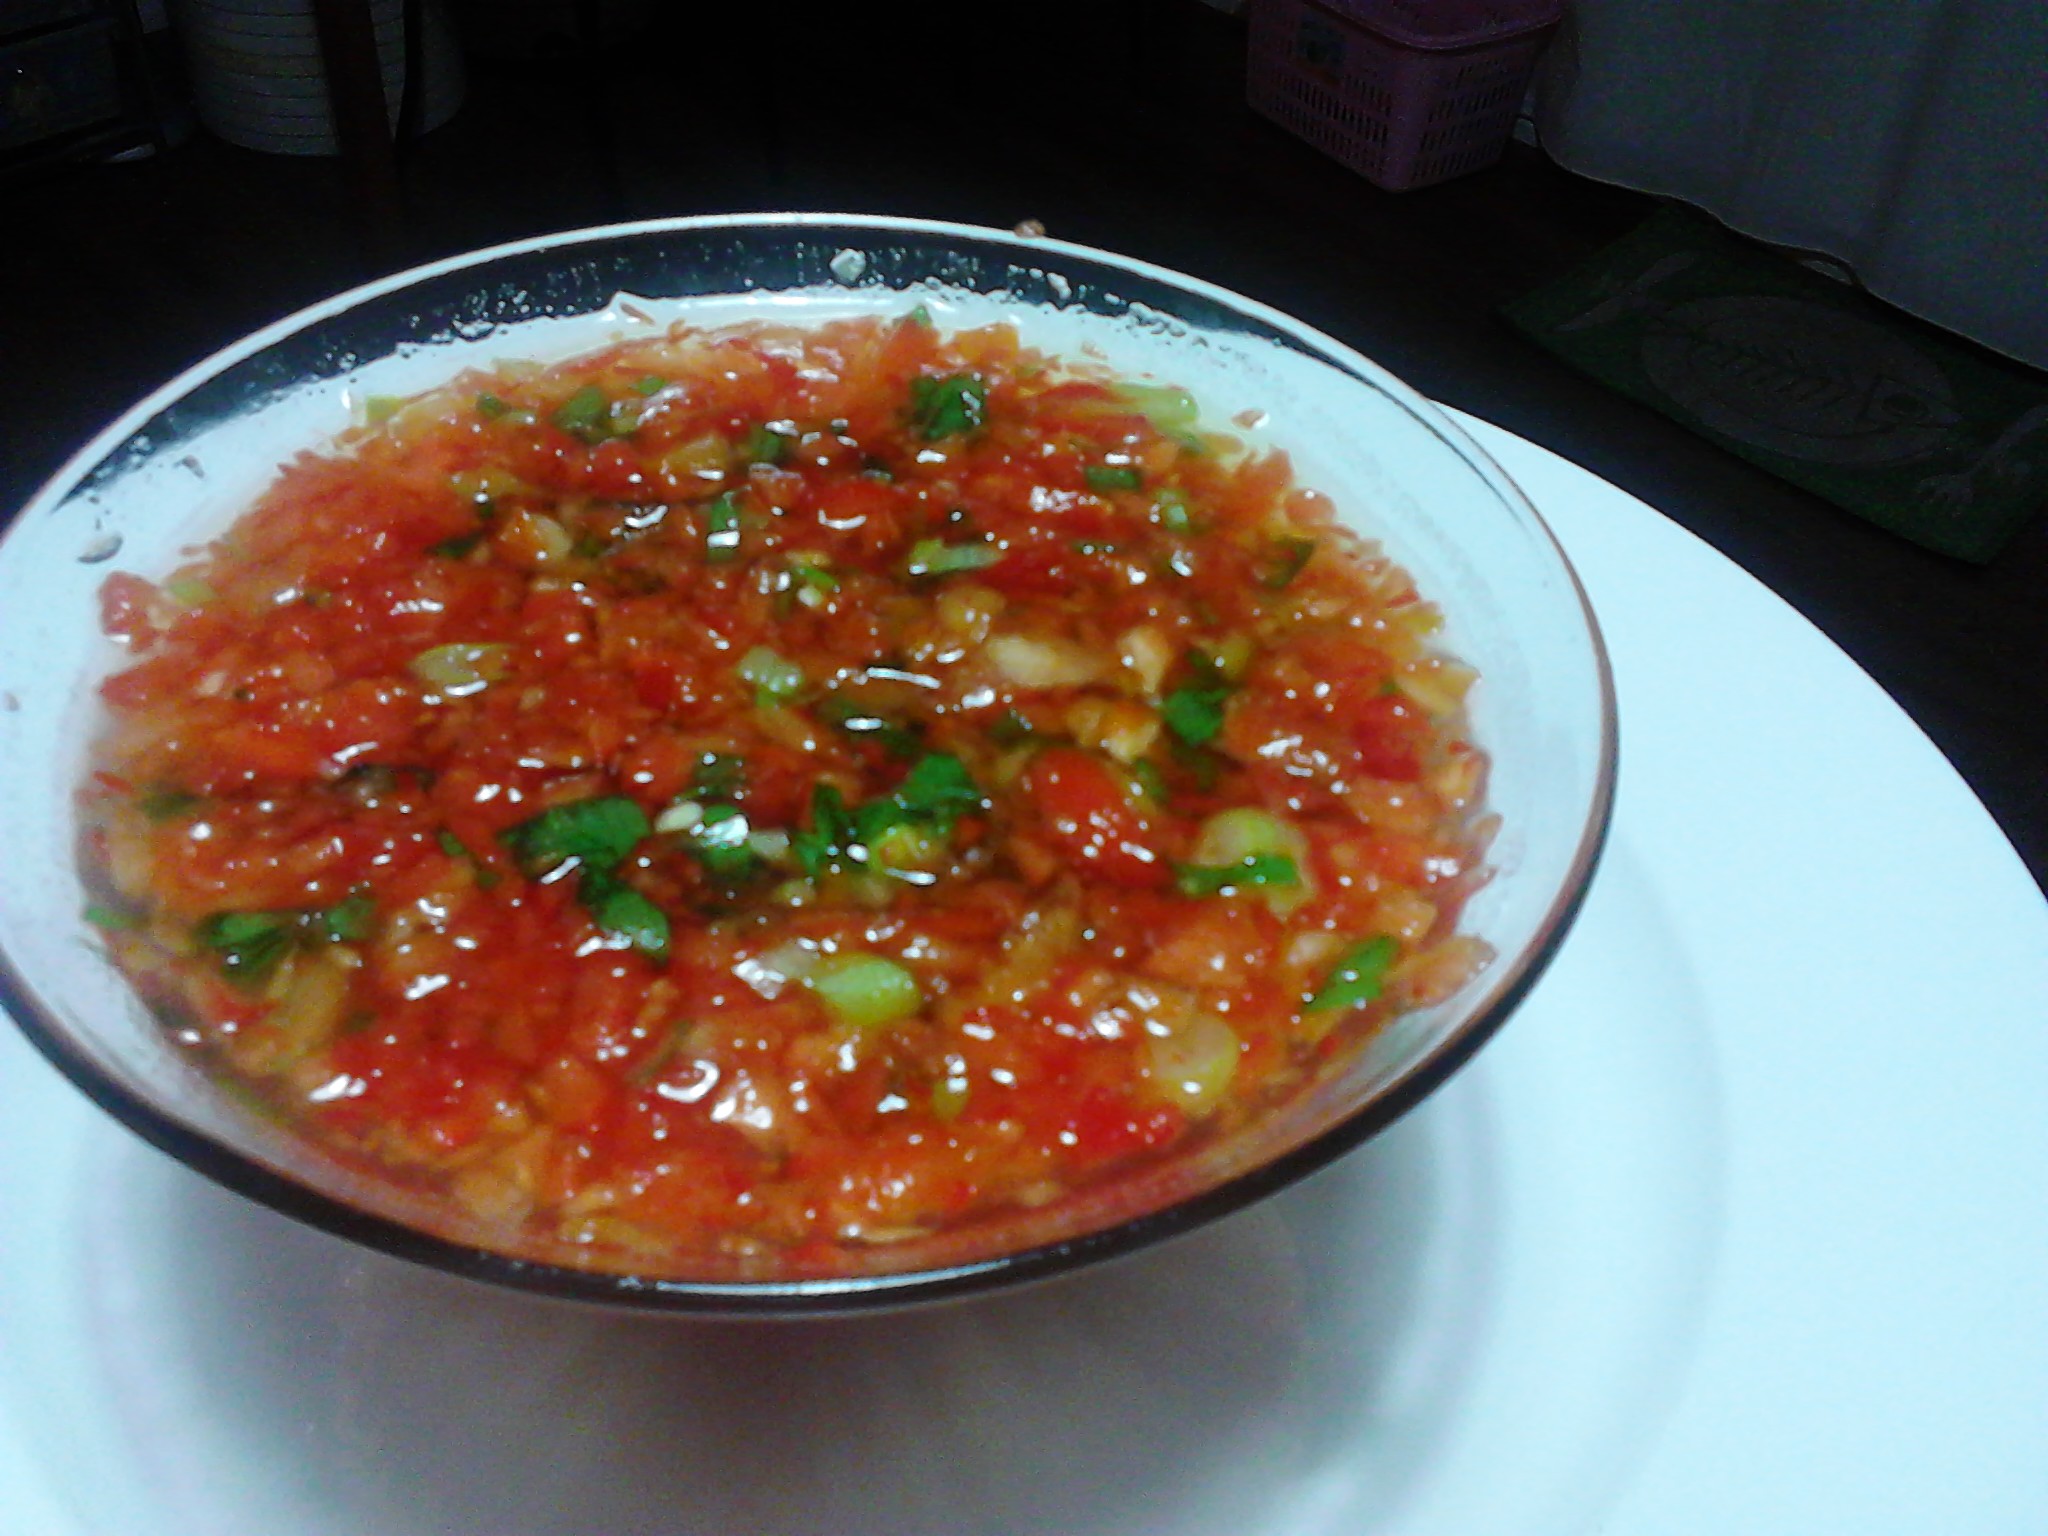
A tangy and sweet sauce that is versatile and can be used as a dipping sauce or as part of a main meal. The natural ingredients give it a lovely flavour and the sauce is quick to make and will last a few days in the fridge.
Not too spicy, refreshing, tangy and best of all made with nourishing ingredients.
This sauce is a breath of fresh air for people like myself living gluten free and who are sensitive to most things in a bottle or package. It is a recipe taken from the Gawler Foundation Cook Book ‘eat well: be well’ which is a book l have reviewed and can highly recommend, especially if you require a healing diet.
Amazing ingredients!
Gather together the ingredients shown above:
3/4 cup Organic Apple Cider Vinegar which l keep in the fridge.
1/2 cup Raw organic Honey (any honey is fine but l like this one)
1/8 teaspoon dried chilli flakes or 1/ fresh chilli finely diced (I used the dried chilli and used the smallest amount which l cut finely with a knife. The amount added will vary for each person).
5cm piece fresh ginger (grated)
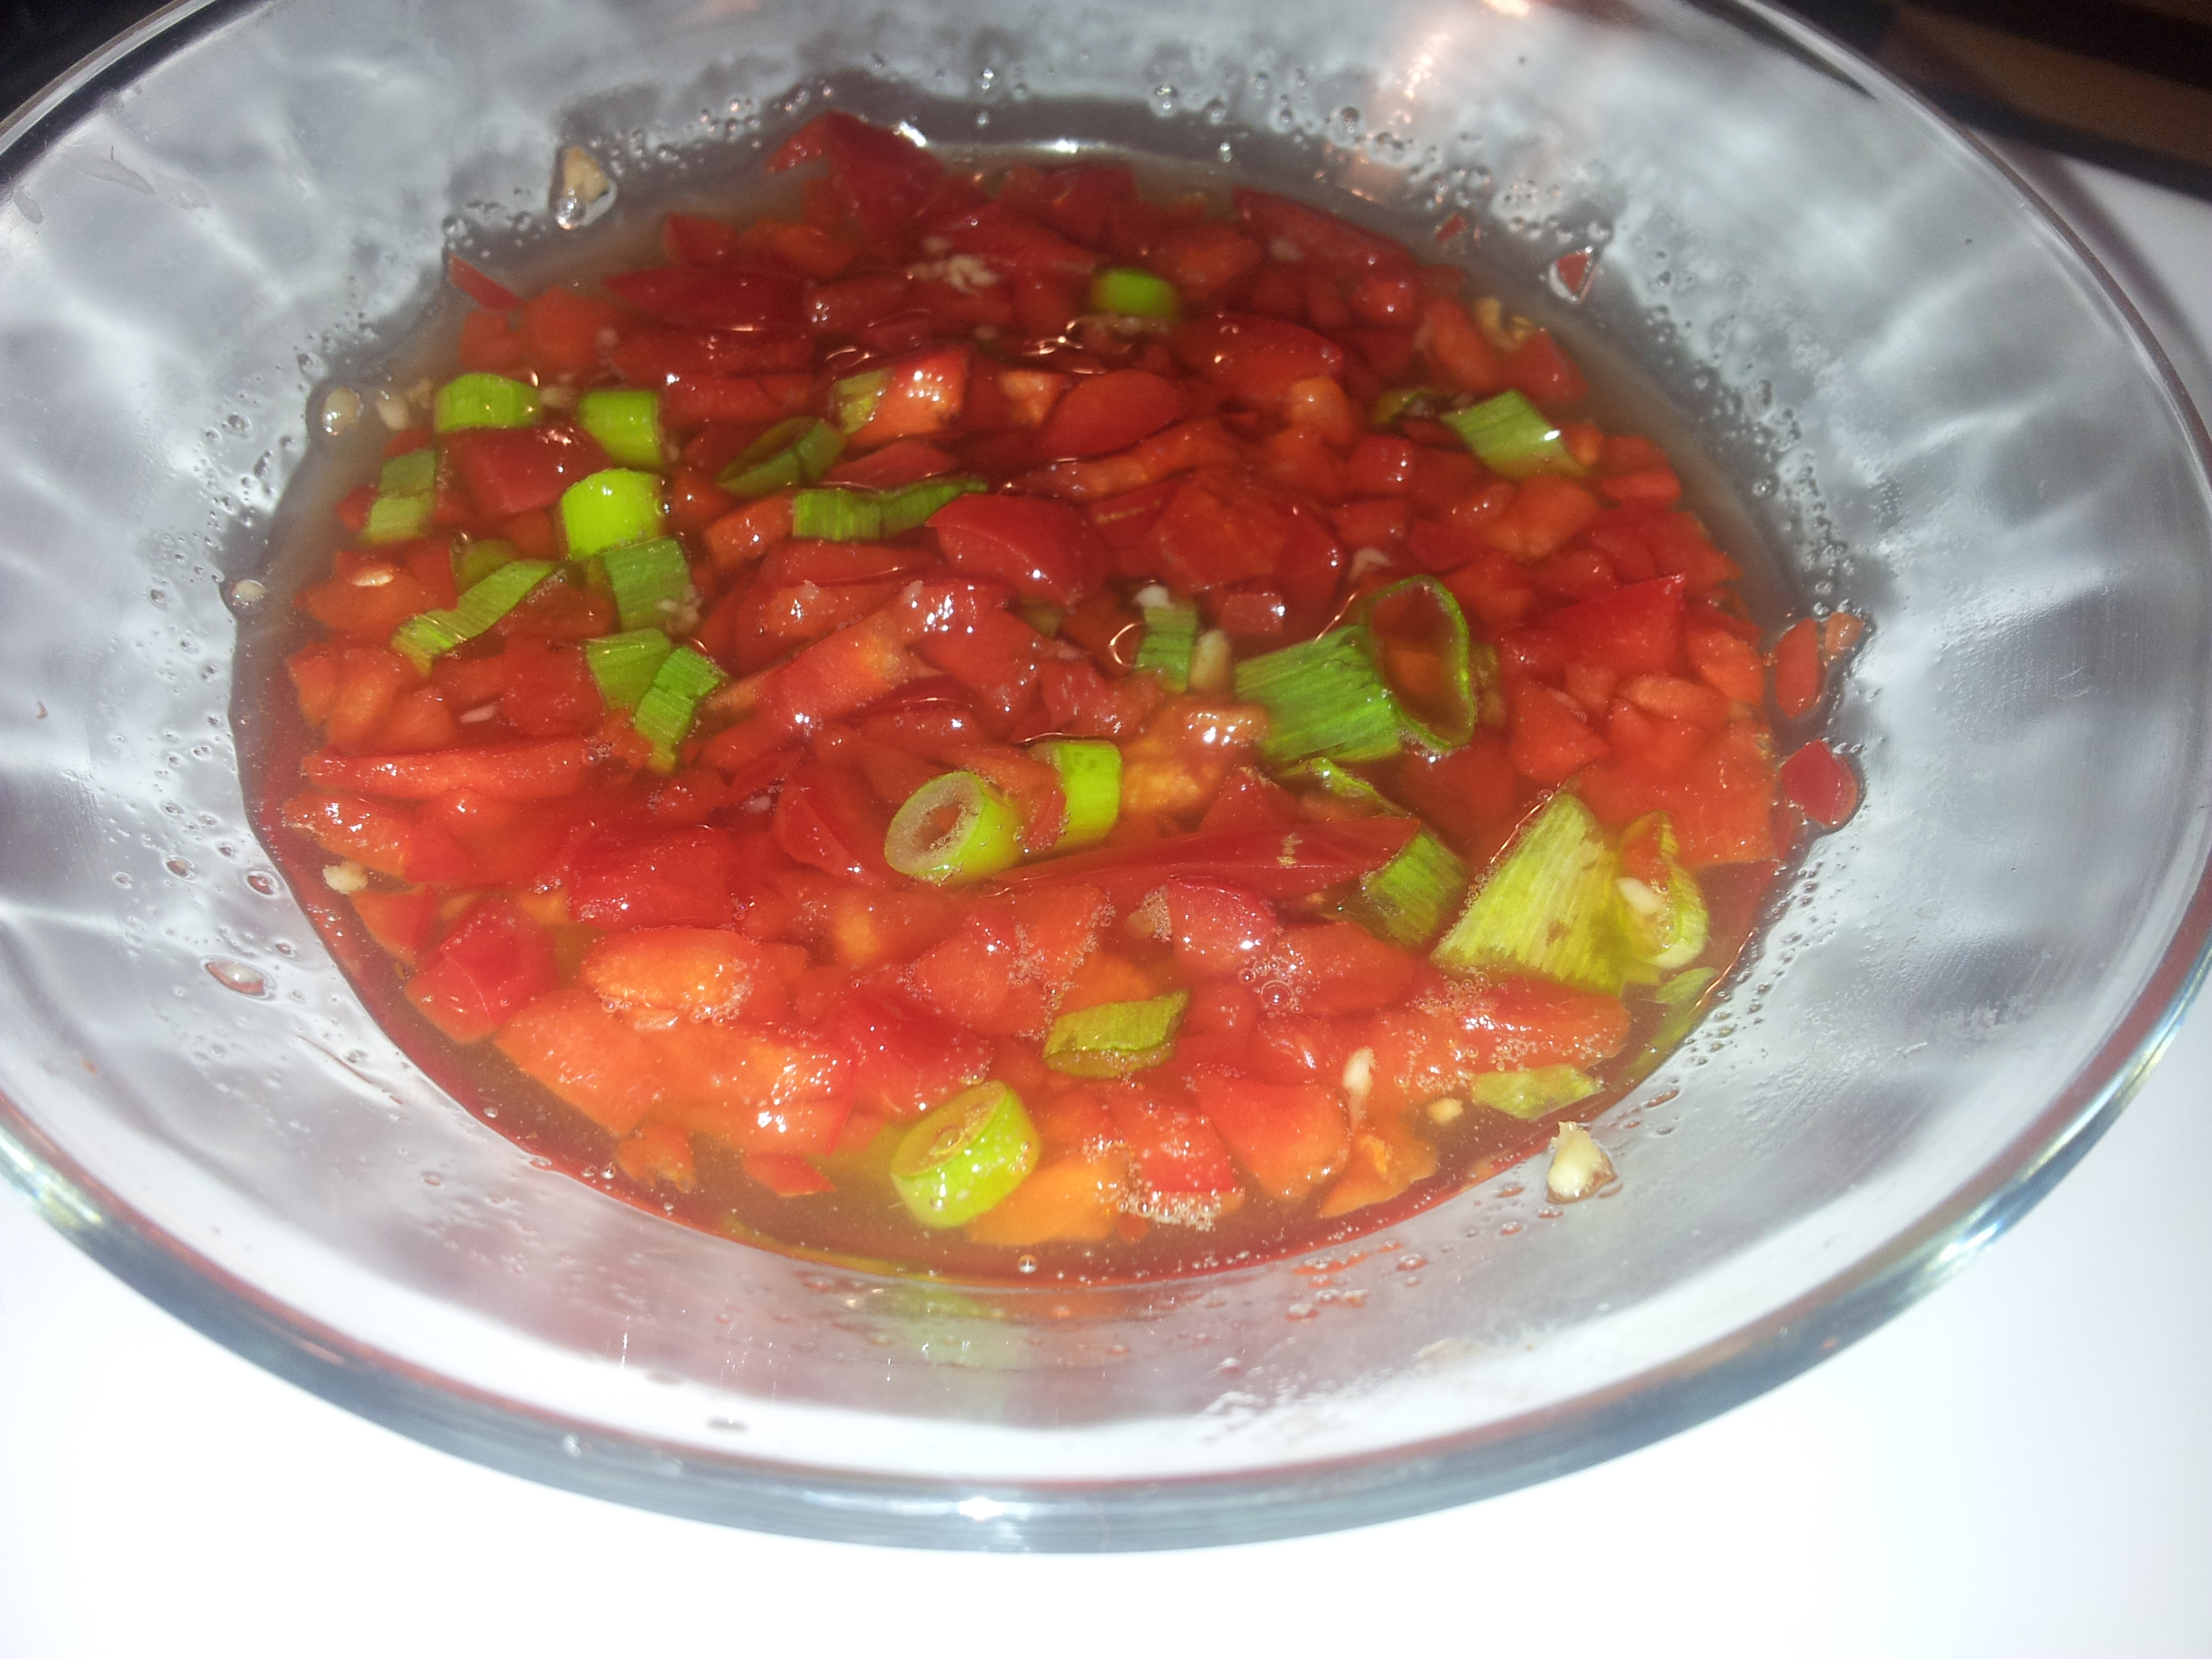
1 small red capsicum or 1/2 a largish one (Finely diced. I did this in the food processor)
1 spring onion finely chopped (I only use the green tops due to a food sensitivity)
Method:
In a small saucepan bring the honey and vinegar to the boil, then add the chilli and let the sauce simmer for 20 minutes.
Place the red capsicum in a bowl and squeeze the grated ginger so the juice falls on top of the capsicum. Give it a gentle mix.
The original recipe now says to pour the honey mixture over the capsicum mix and let it cool and then add the spring onion, but l did something different here. I let the honey mix cool first and then poured it over the capsicum as l wanted the capsicum to remain raw and then added the spring onion, so up to you as to which method you choose.
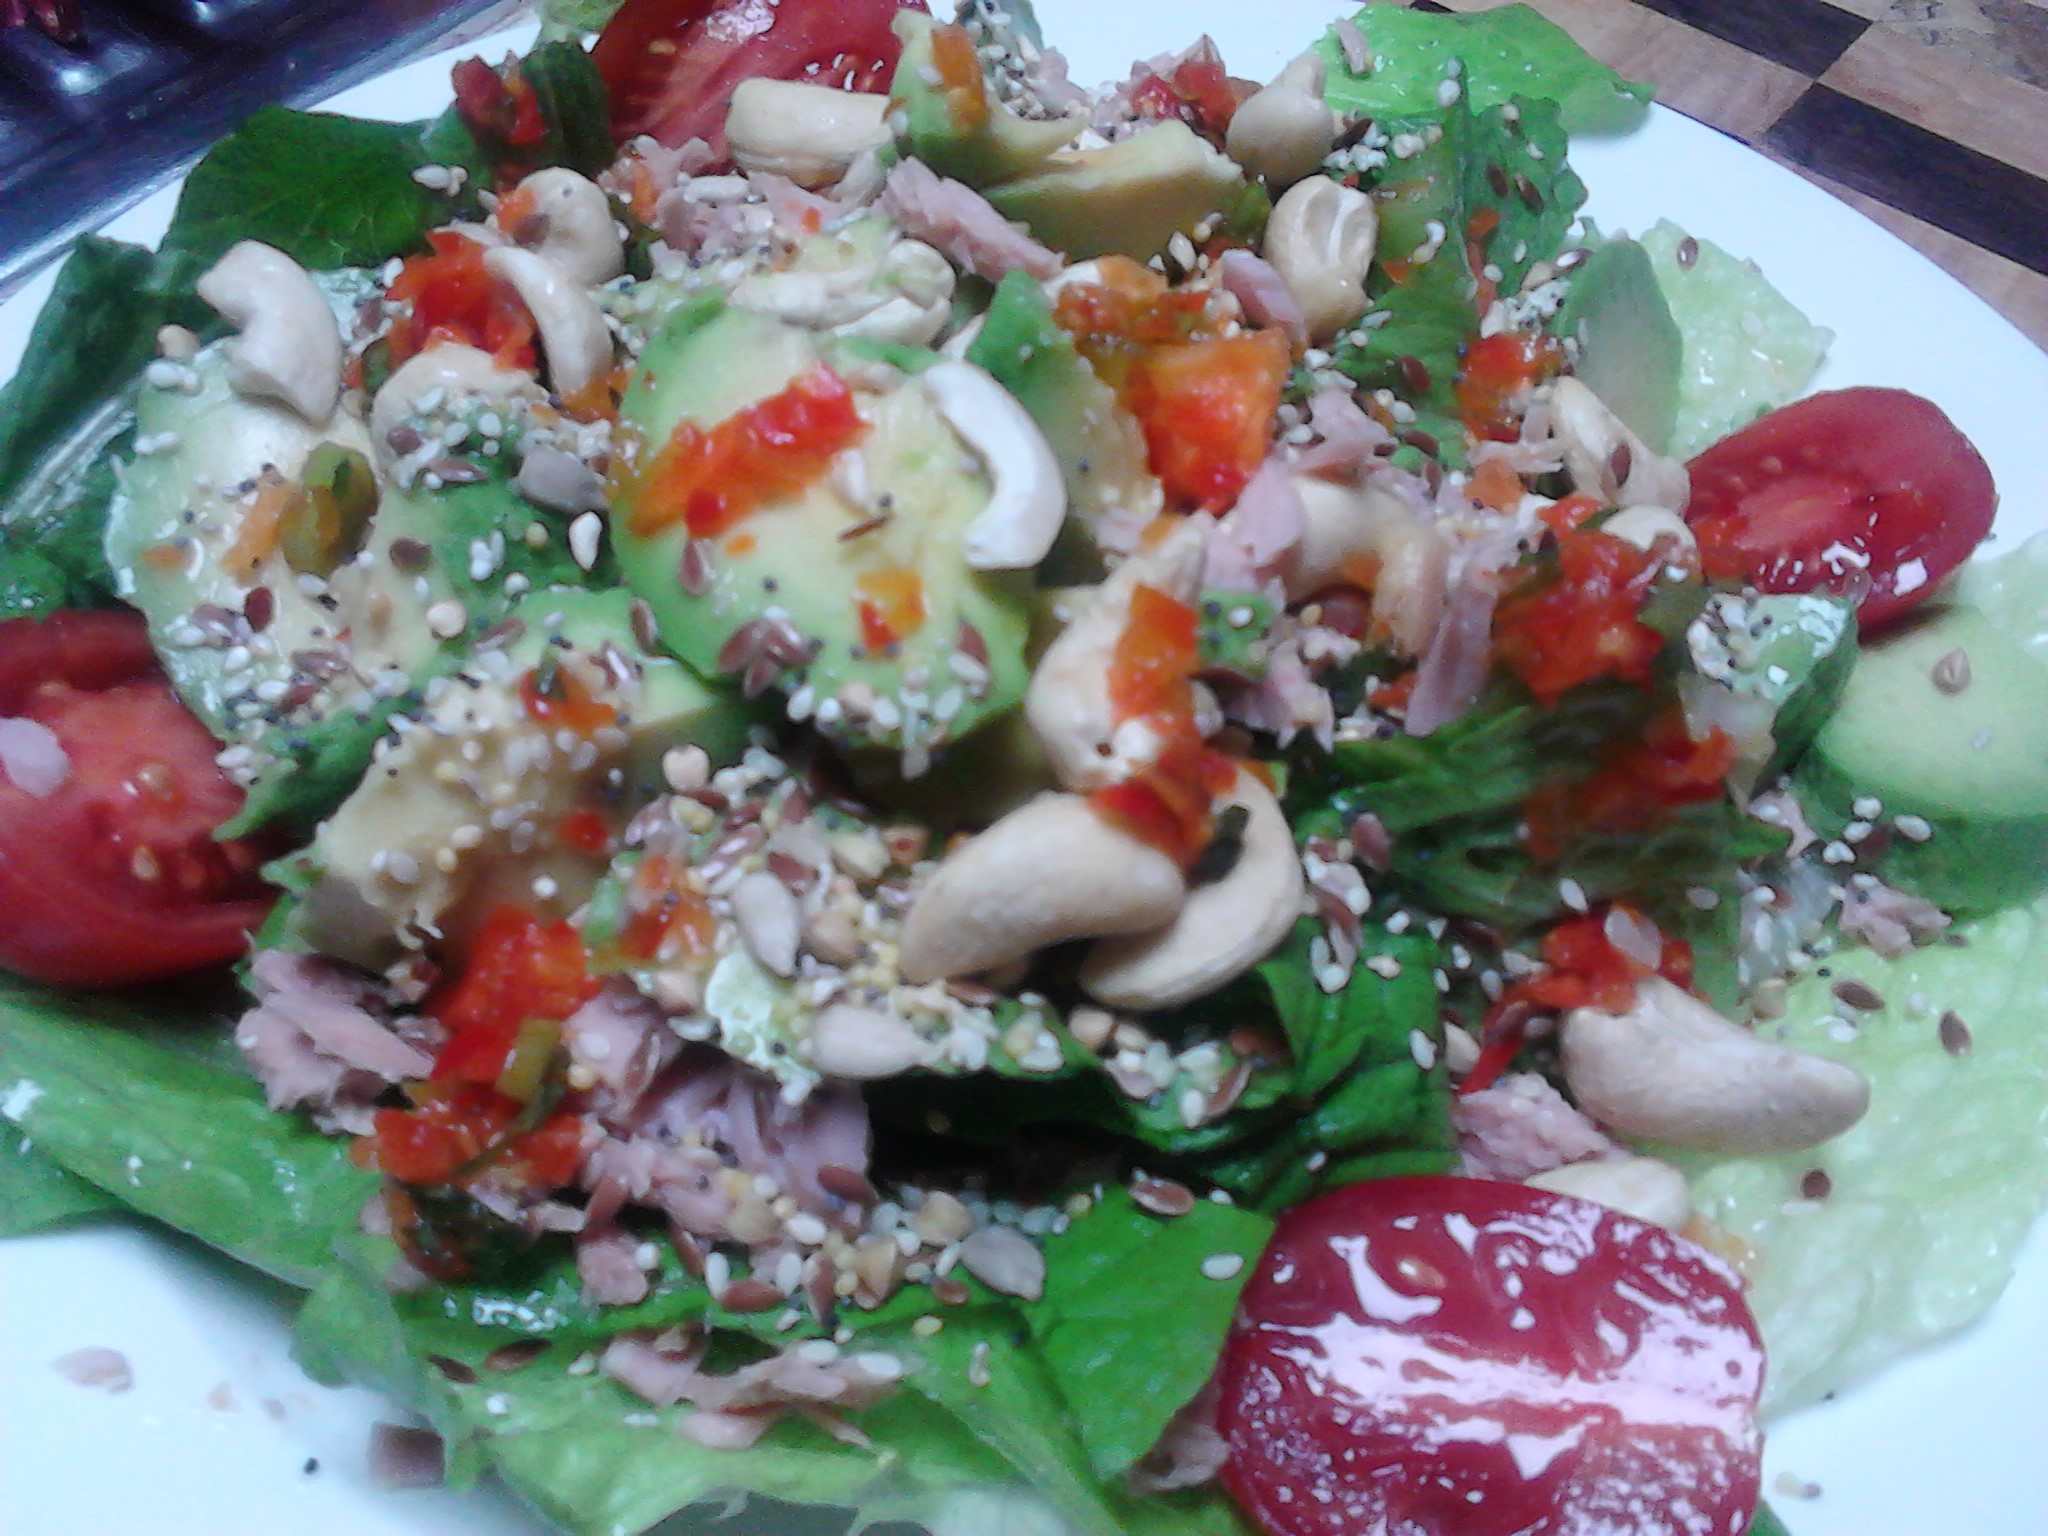
Lunchtime healthy salad. I drizzled the chilli sauce over the salad. It was a taste sensation!
This is a very versatile sauce and really easy to make as long as you have the ingredients on hand. Adding flavour to a meal can be a challenge when you have food intolerances or sensitivities and this sauce definately adds some brightness and flavour to those of us living on a restricted diet.
Bake a batch of mini quiche and discover how delicious they are! Fantastic for the whole family.
A small quiche can be part of a meal or a great snack.
The basic ingredient of the mini quiche is eggs (preferably free range or organic). What you add to the mix is entirely up to your preferences. This could include seeds, nuts, vegetables, cheese and seasonings as examples.
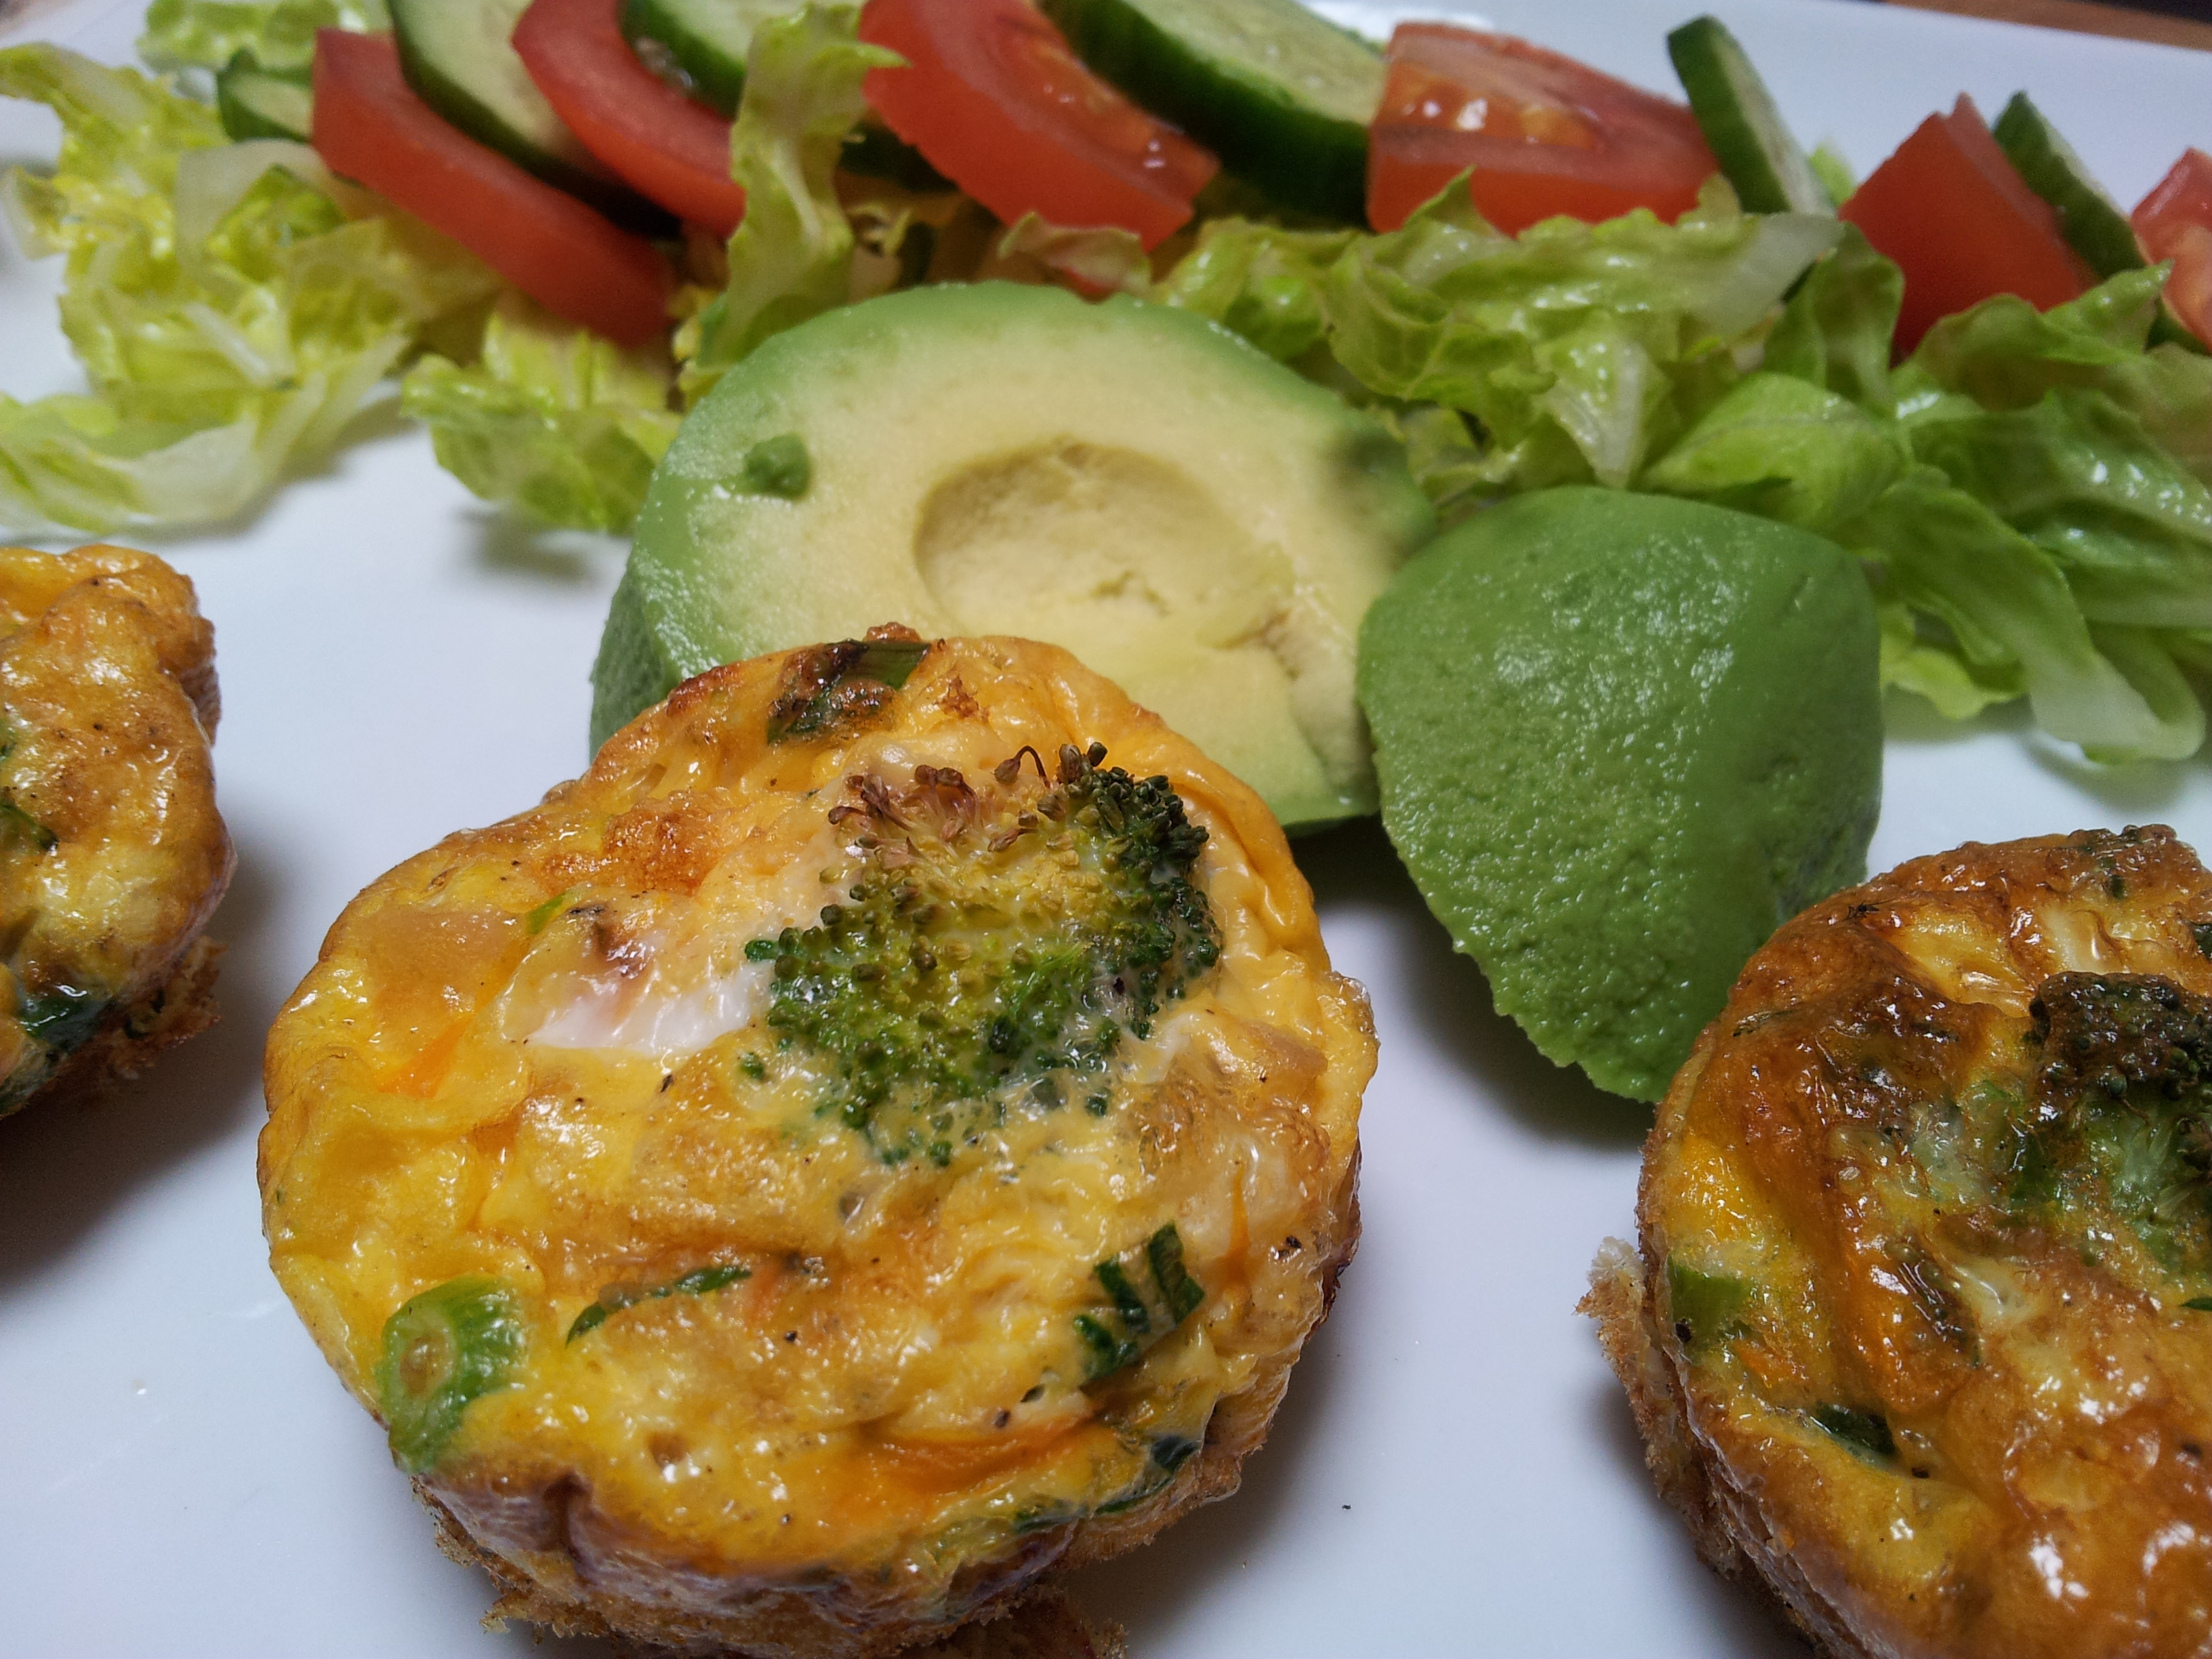
Broccoli quiche:
Mix in a bowl eggs, grated carrot, spring onion green tops, parsley, a meat such as tuna (optional), pink rock salt and black pepper. Grease the pan very well or use patty pans. Pour the mixture into each hole in the pan and place a piece of raw broccoli in the centre of each. Cook in a 200 degree celsius oven until firm and golden.
These muffins are poured directly into the pan. Ensure you grease it well.Nice and golden,. Use a knife to cut around the edges and gently pull out.
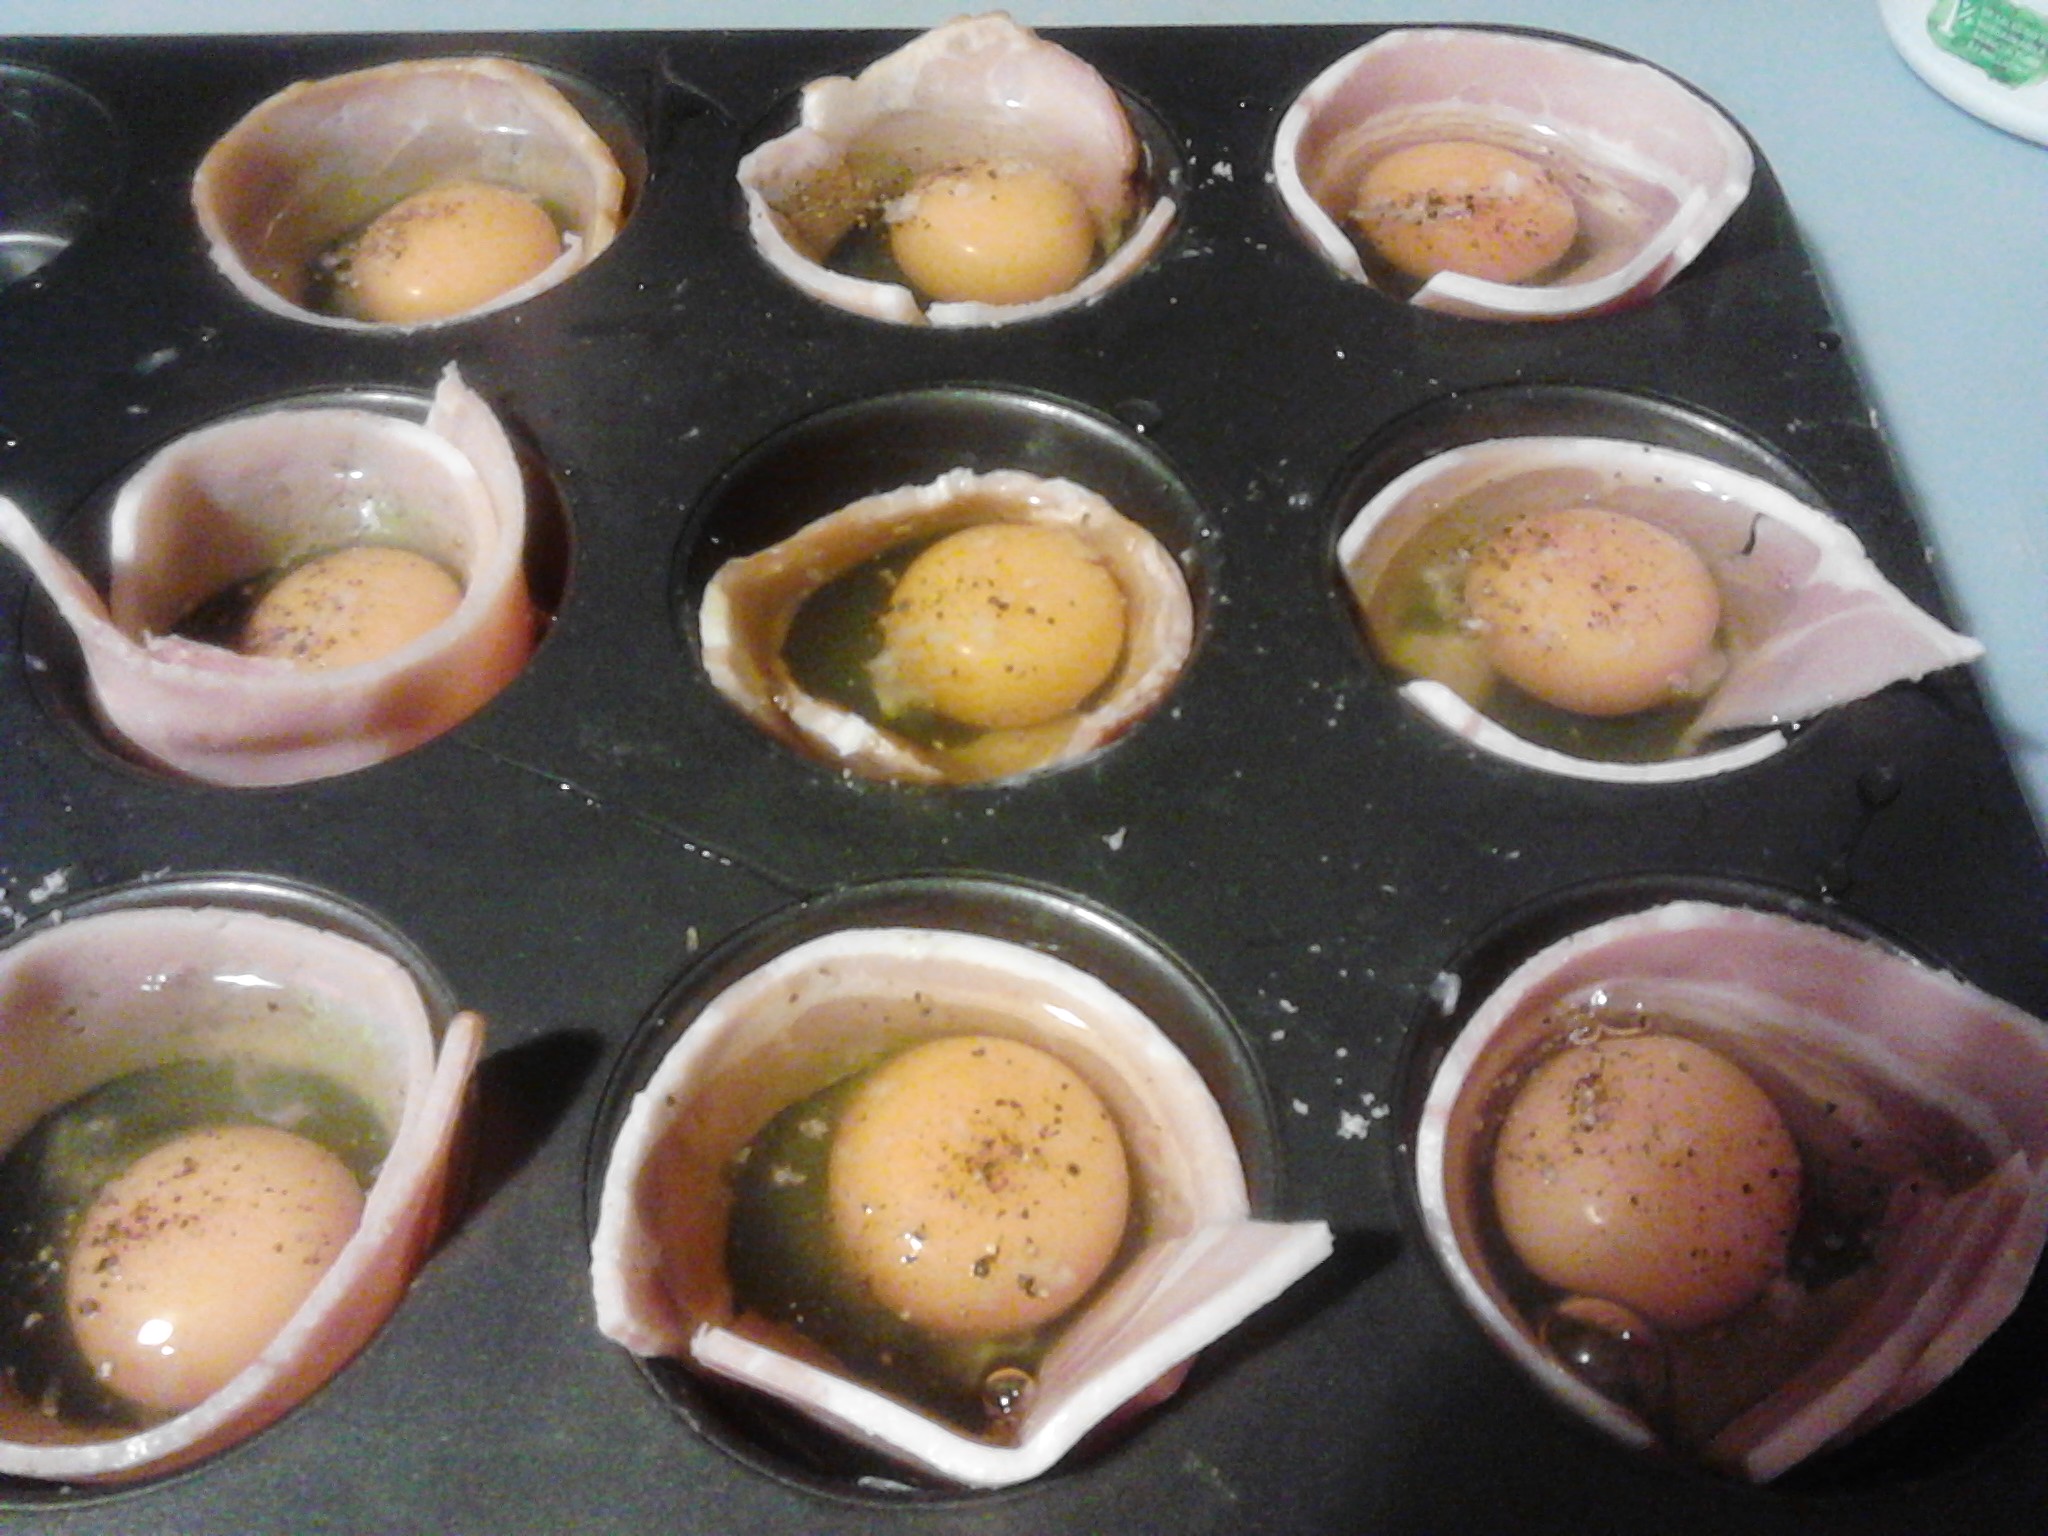
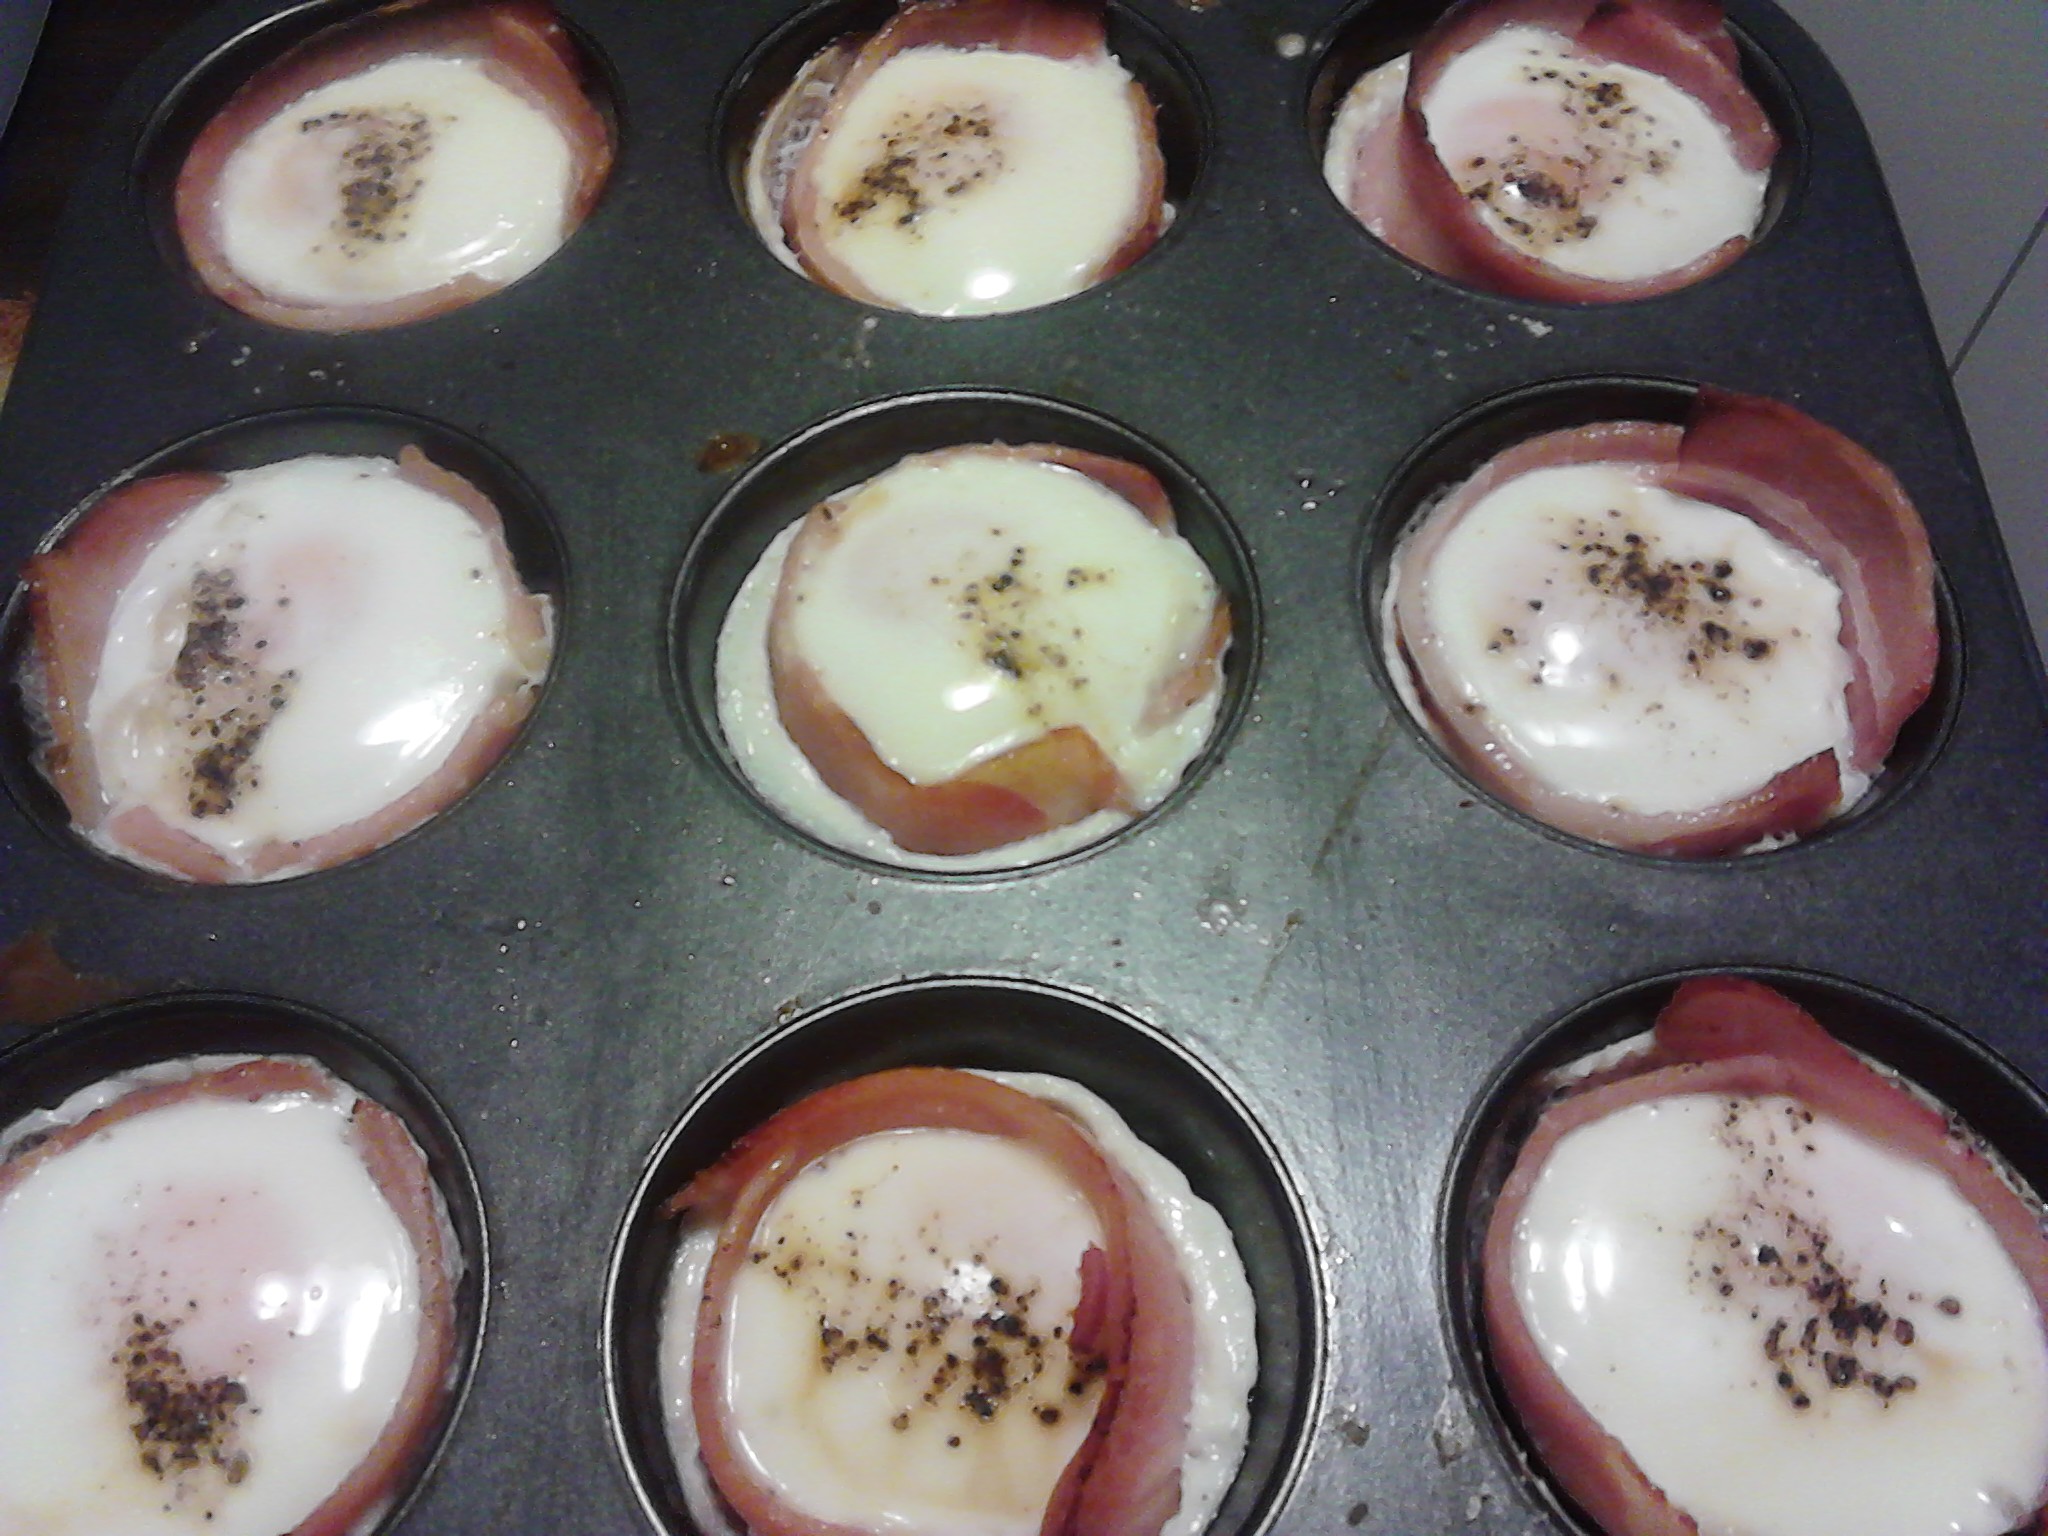
Egg and bacon quiche are delicious straight out of the oven.
Place a strip of bacon into the greased tray and crack an egg into each hole. Season with pink rock salt and black pepper.
These simple egg and bacon snacks are so easy to make and the bacon makes them easy to lift out of the pan.Cook until the eggs are just cookedFantastic served with vegetables
Mini quiche are also a great snack and lunch box filler. Have the leftovers the next day with a salad for lunch or grab one for morning tea. Alternatively enjoy the quiche the next night by gently reheating in the oven and serving with a delicious salad or roast vegetables.
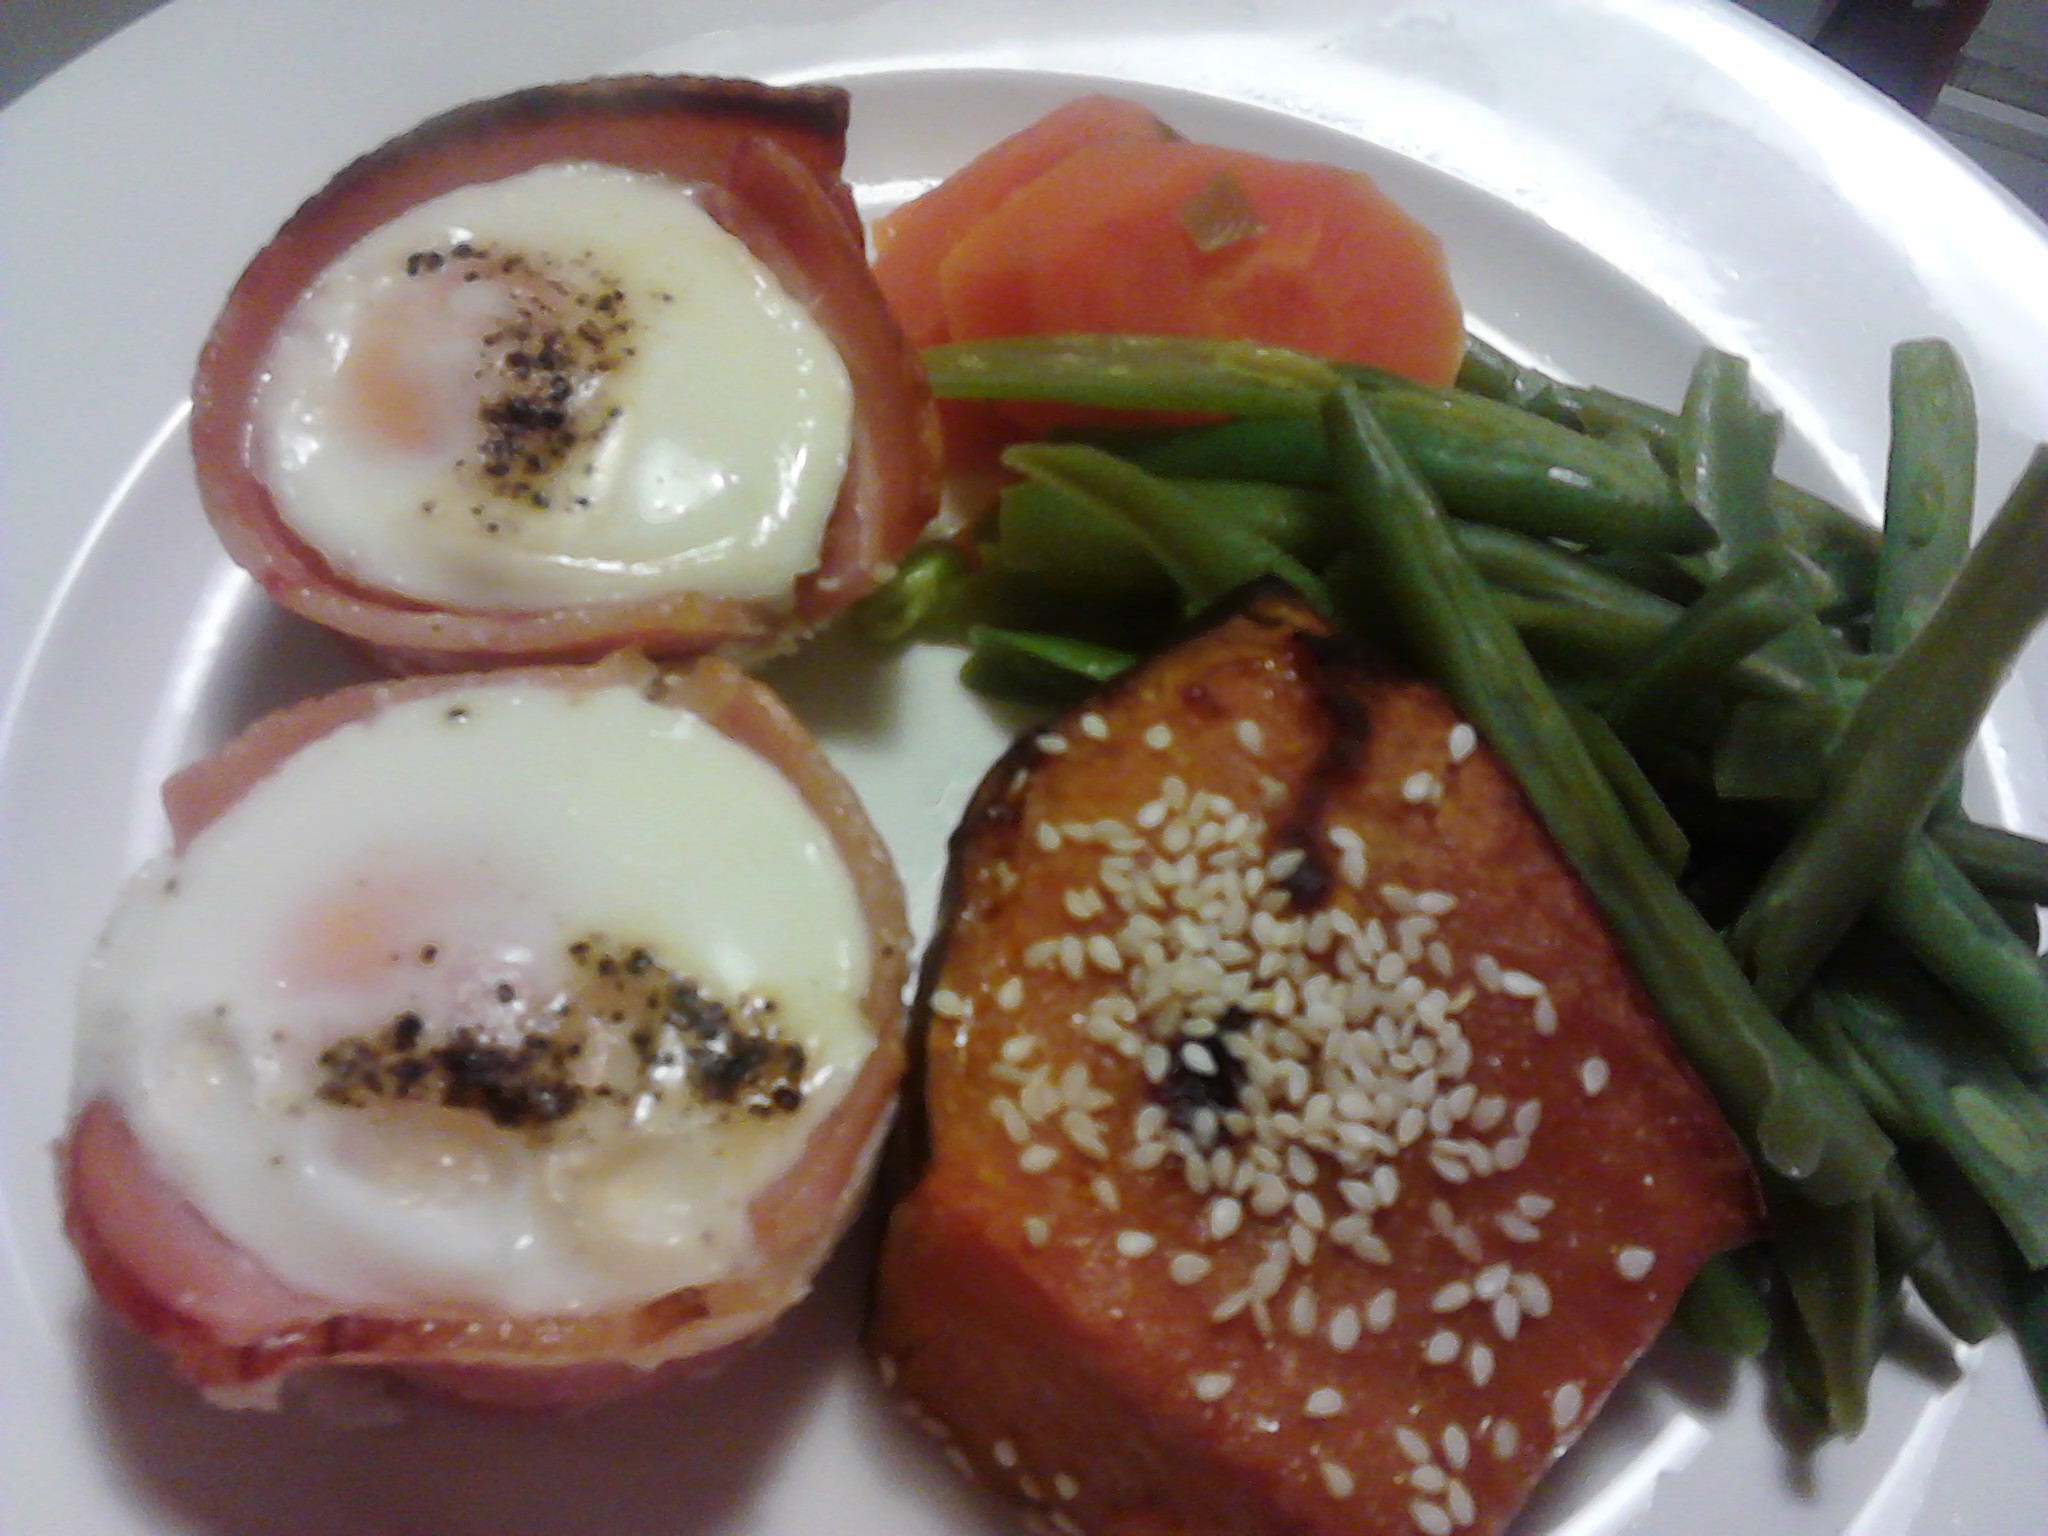
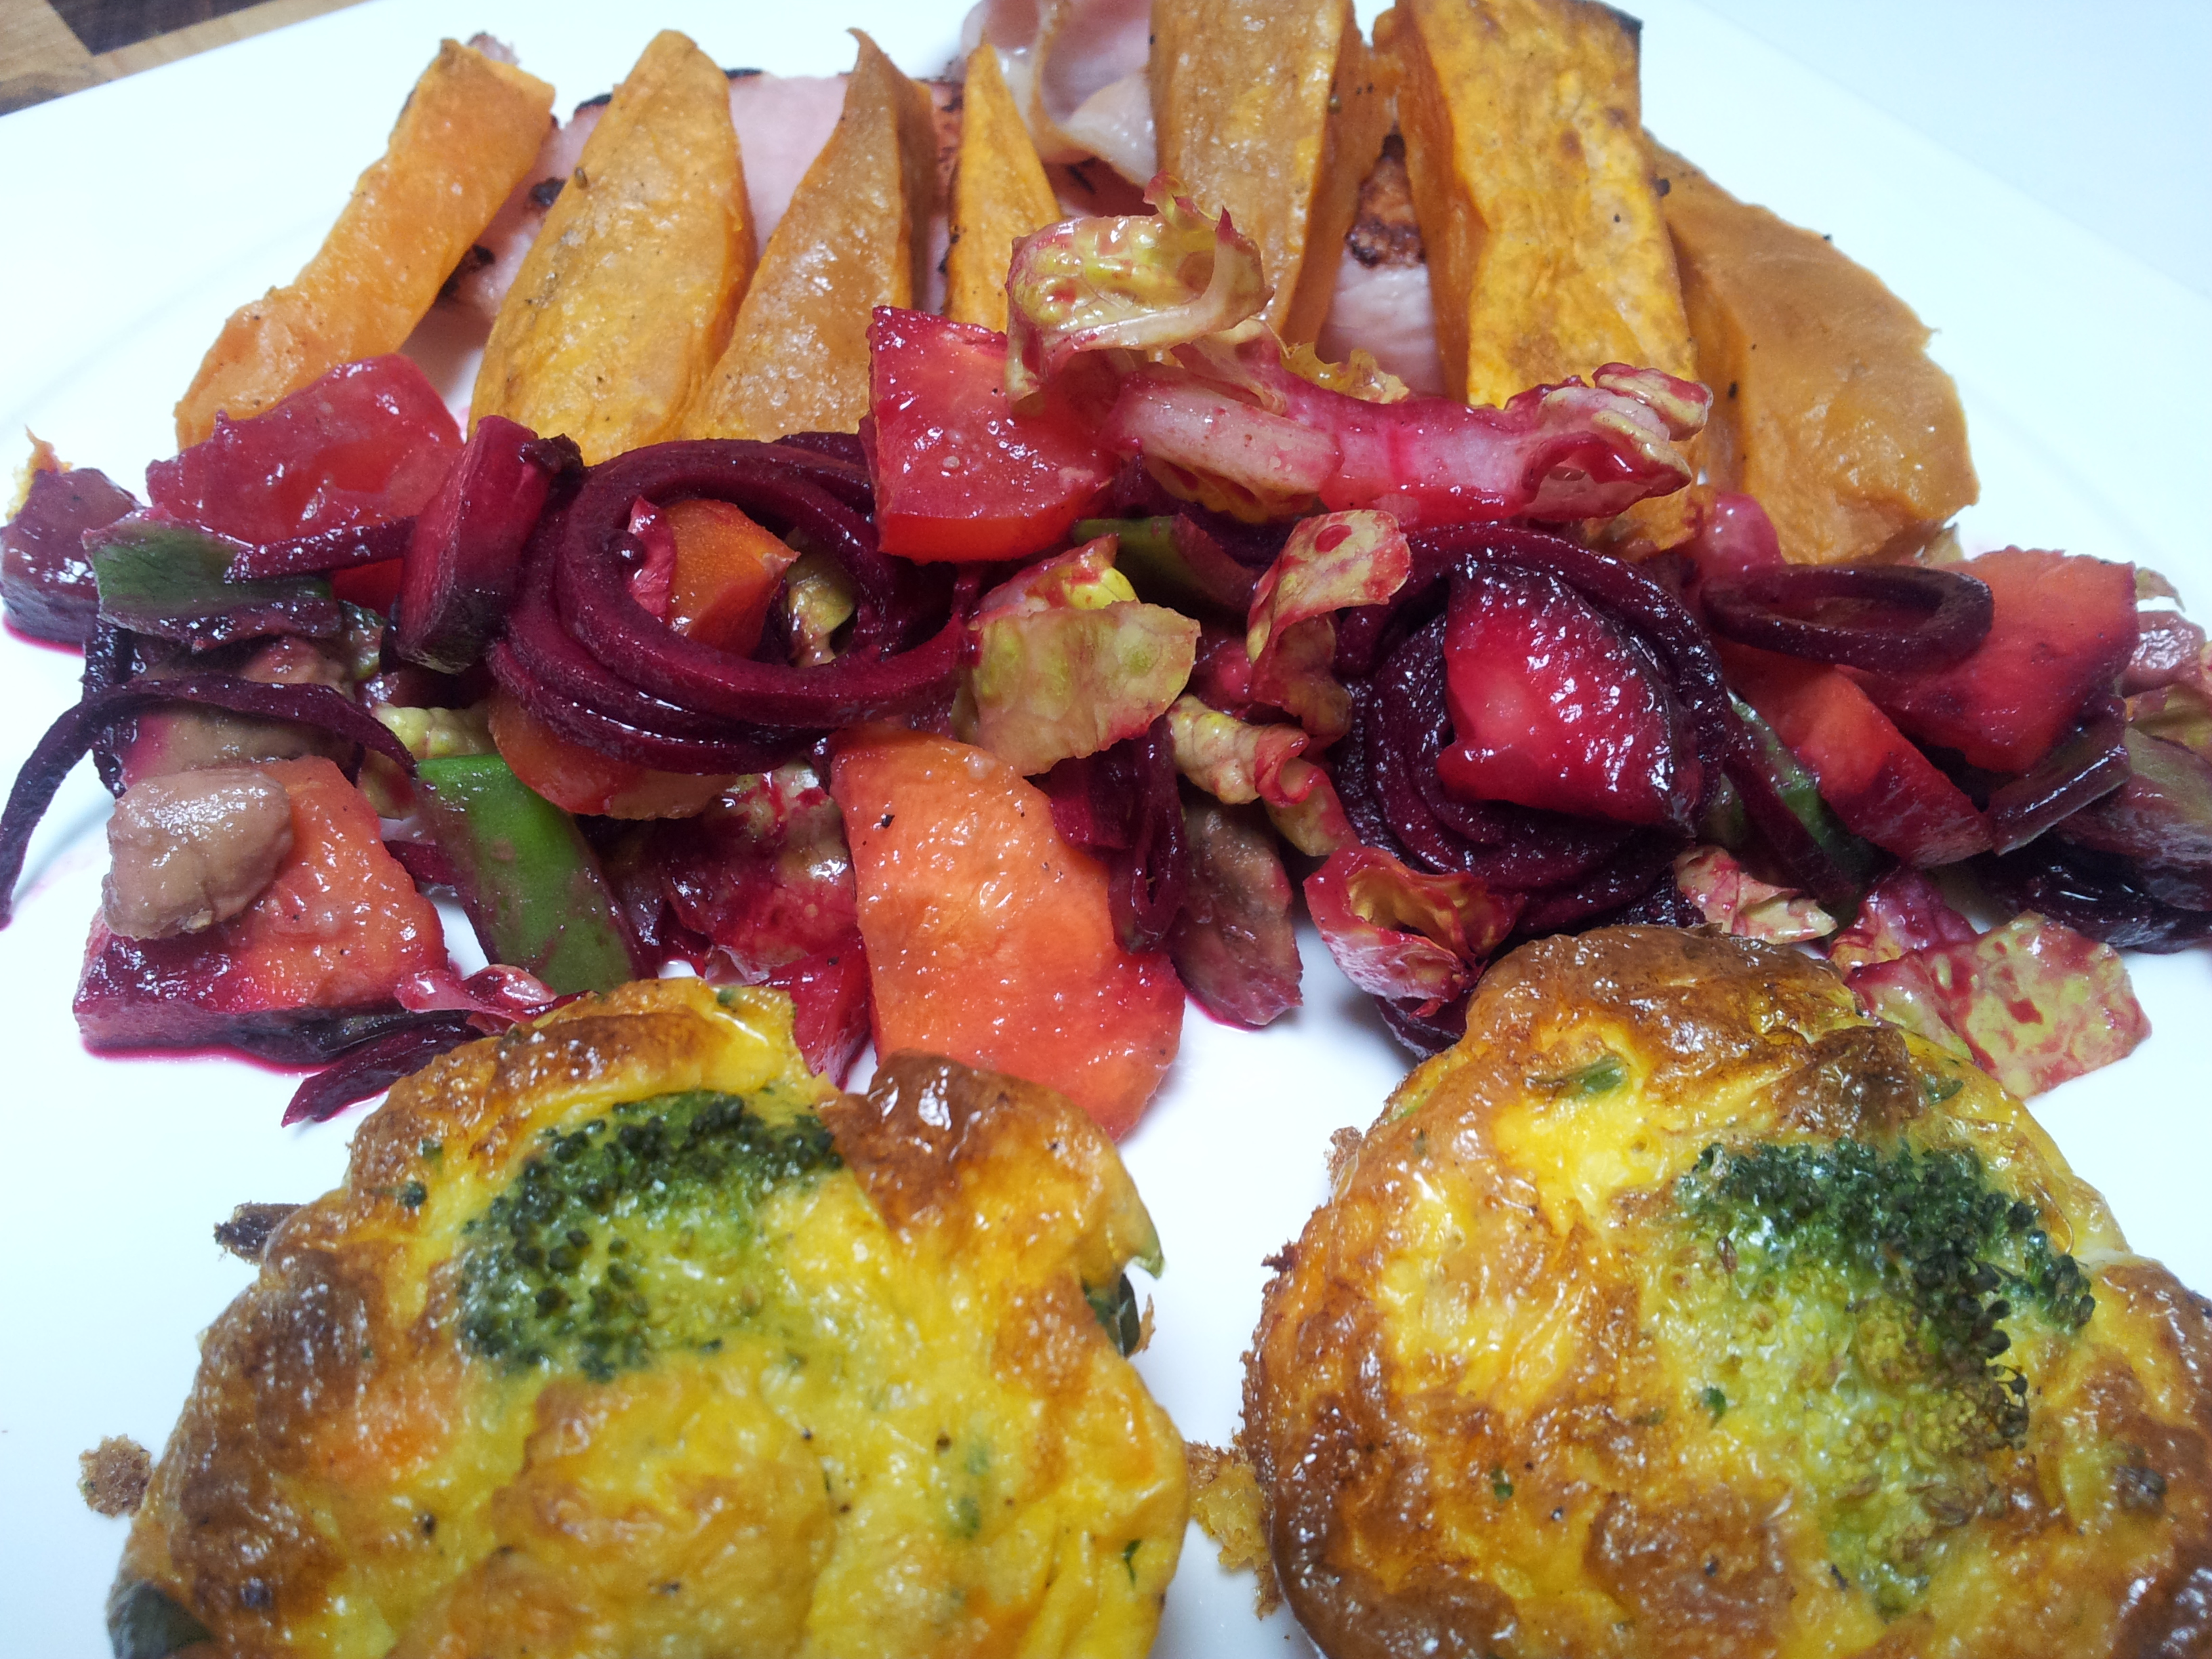
Small broccoli quiche with a beetroot spiral salad, sweet potato chips and bacon. Quite a combination.
I hope you have enjoyed this post. You can follow me daily on Instagram at holistic_paleo
For all your gluten free and organic pantry suppliesBrighten up your kitchen and life today
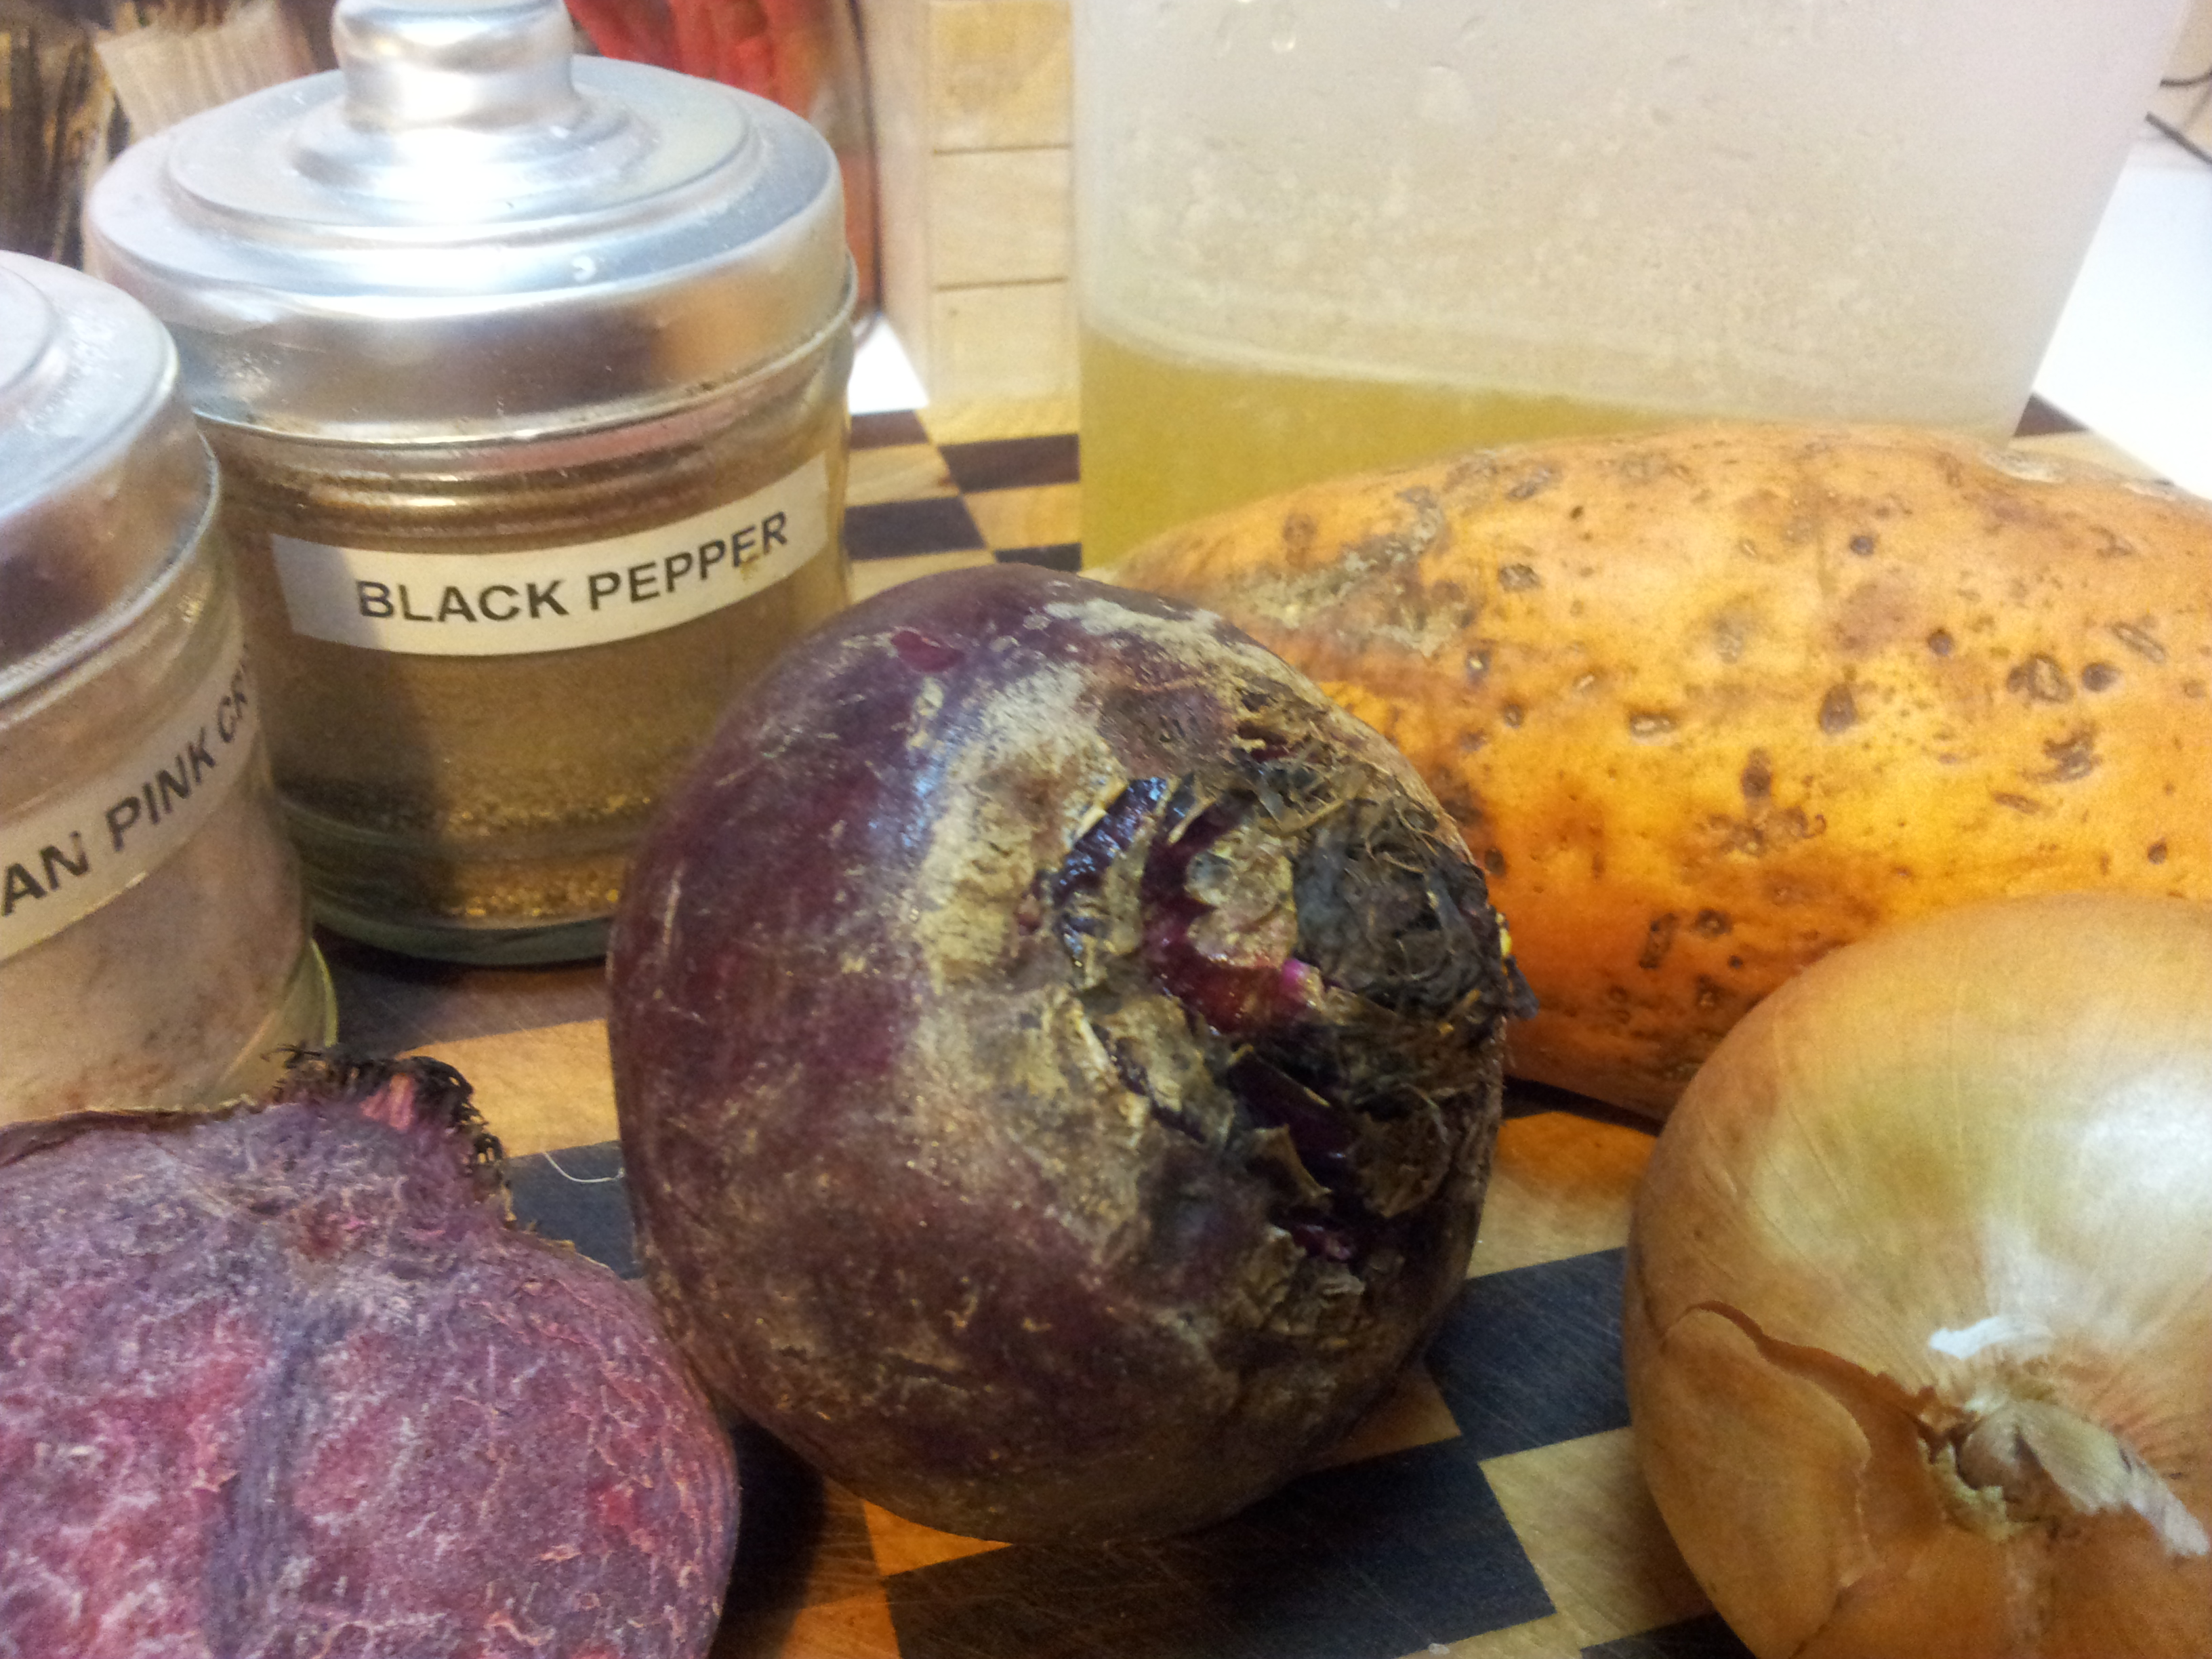
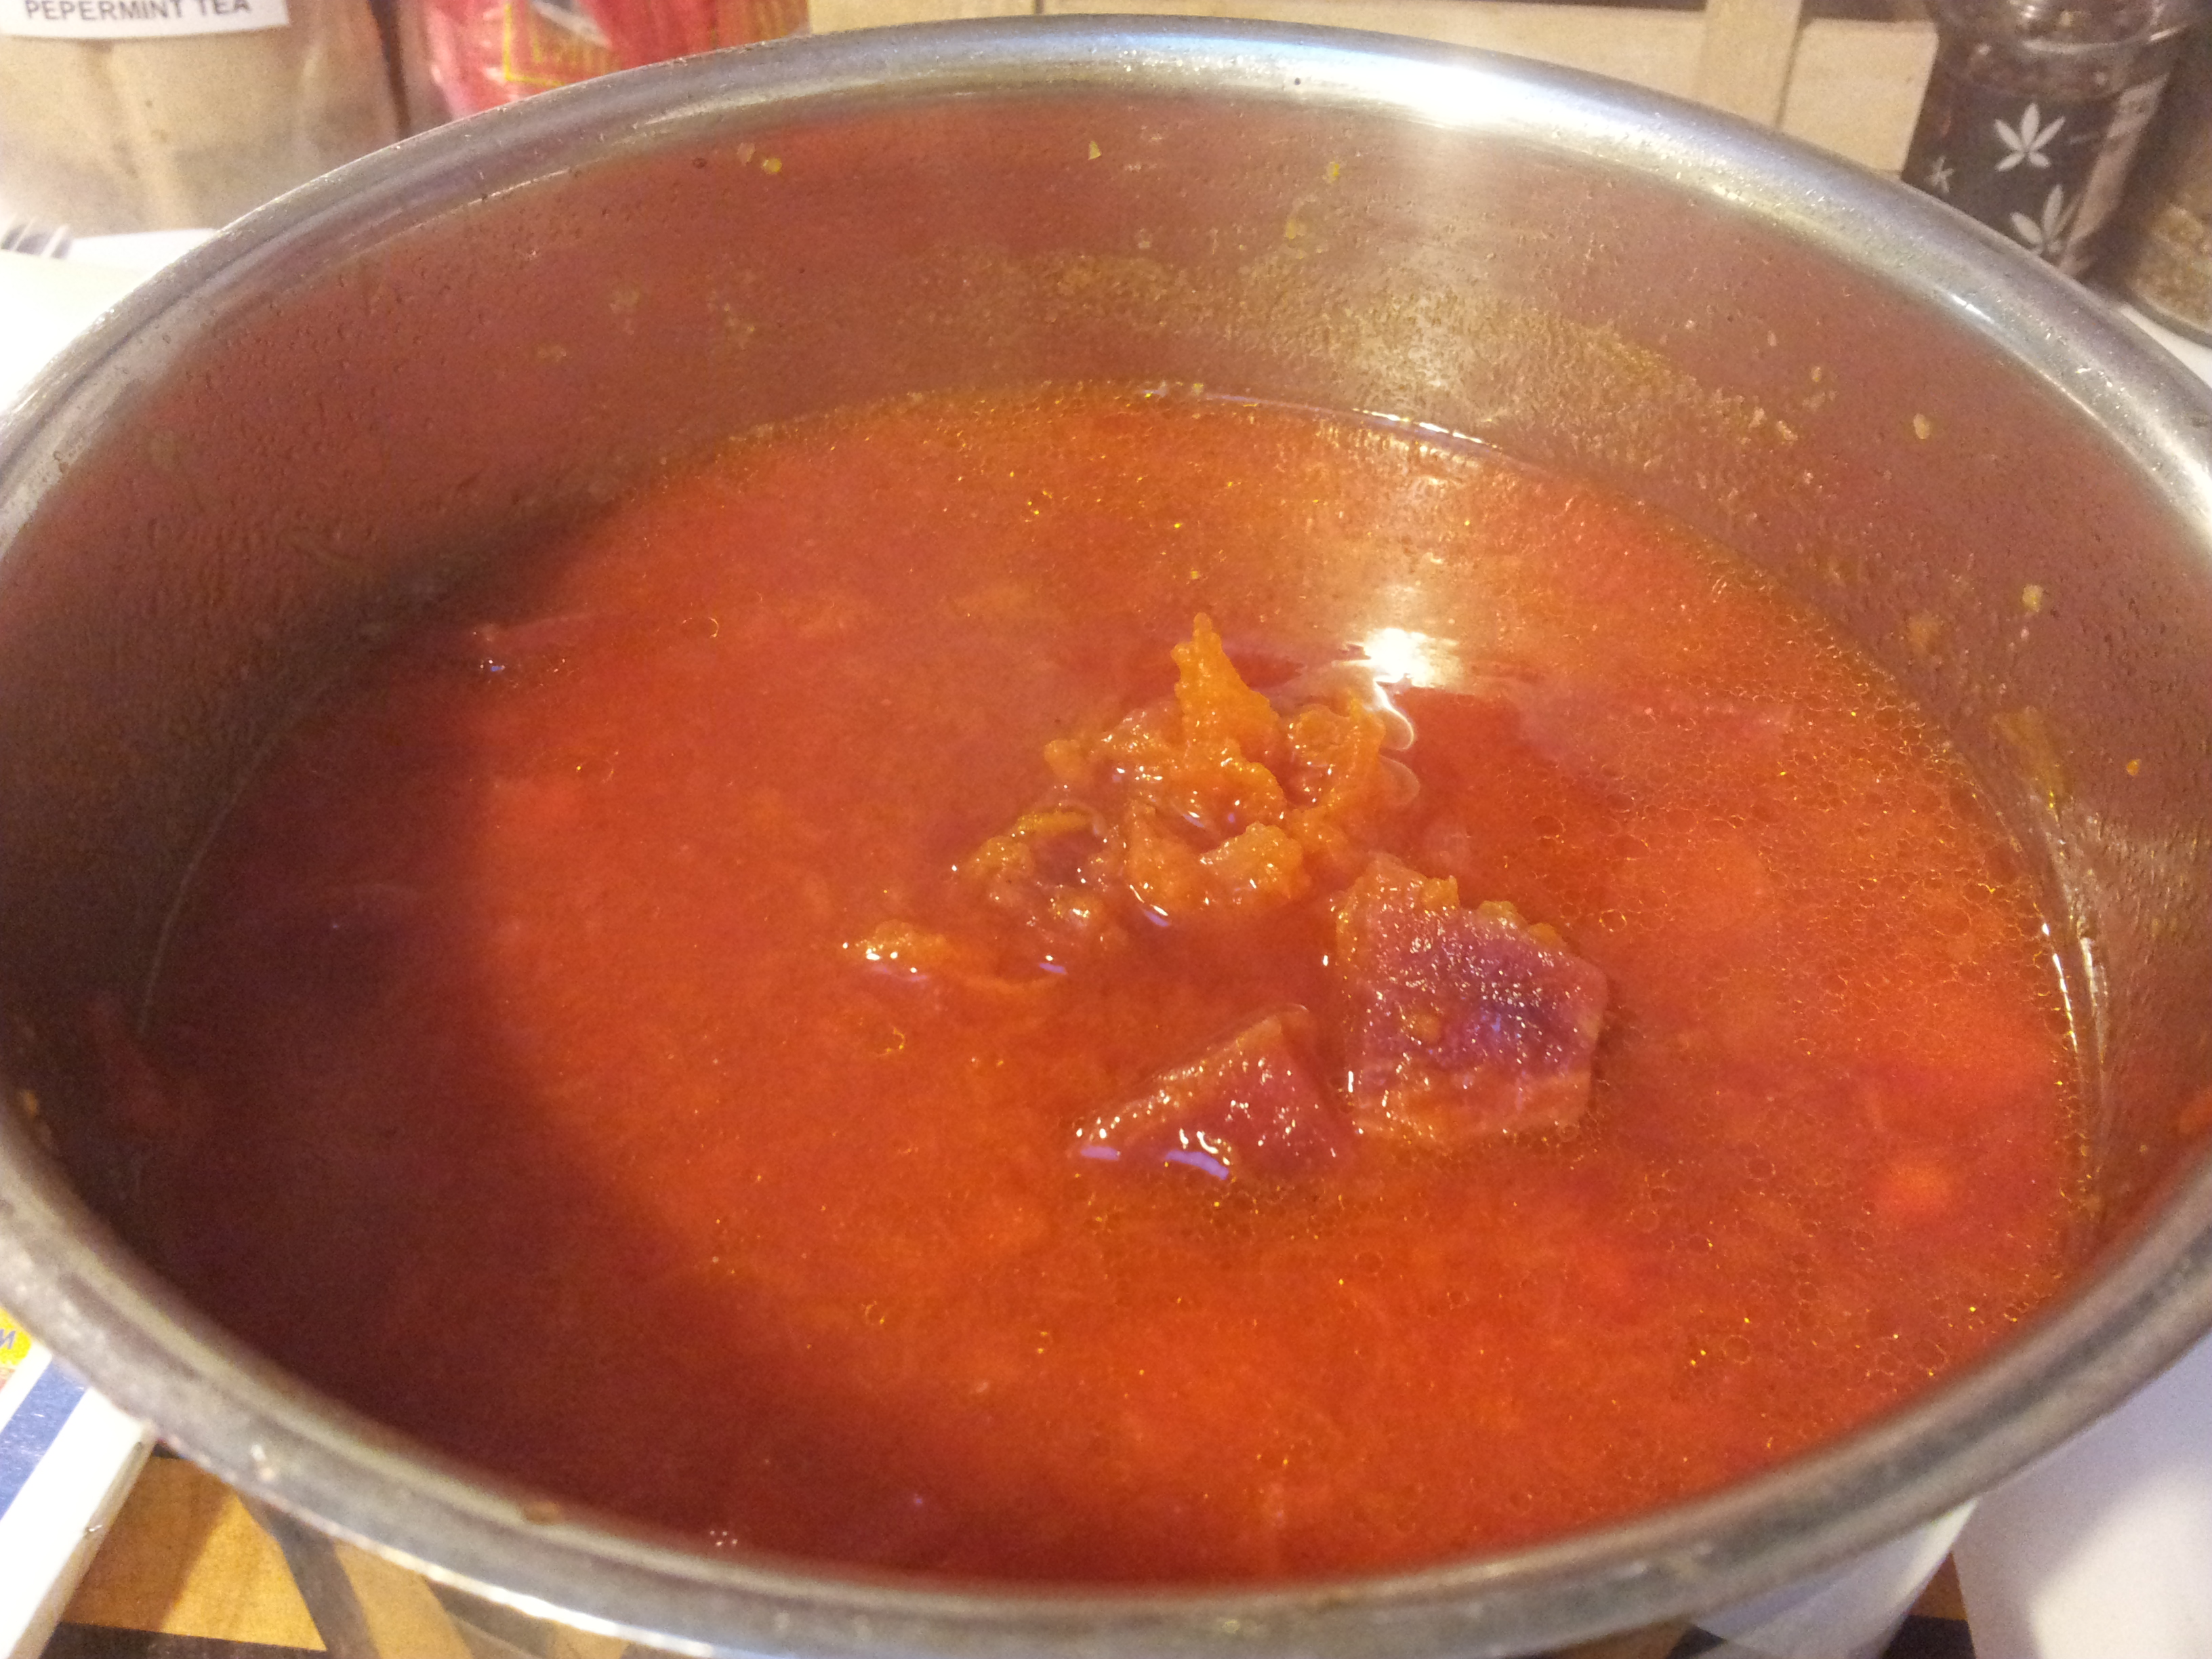
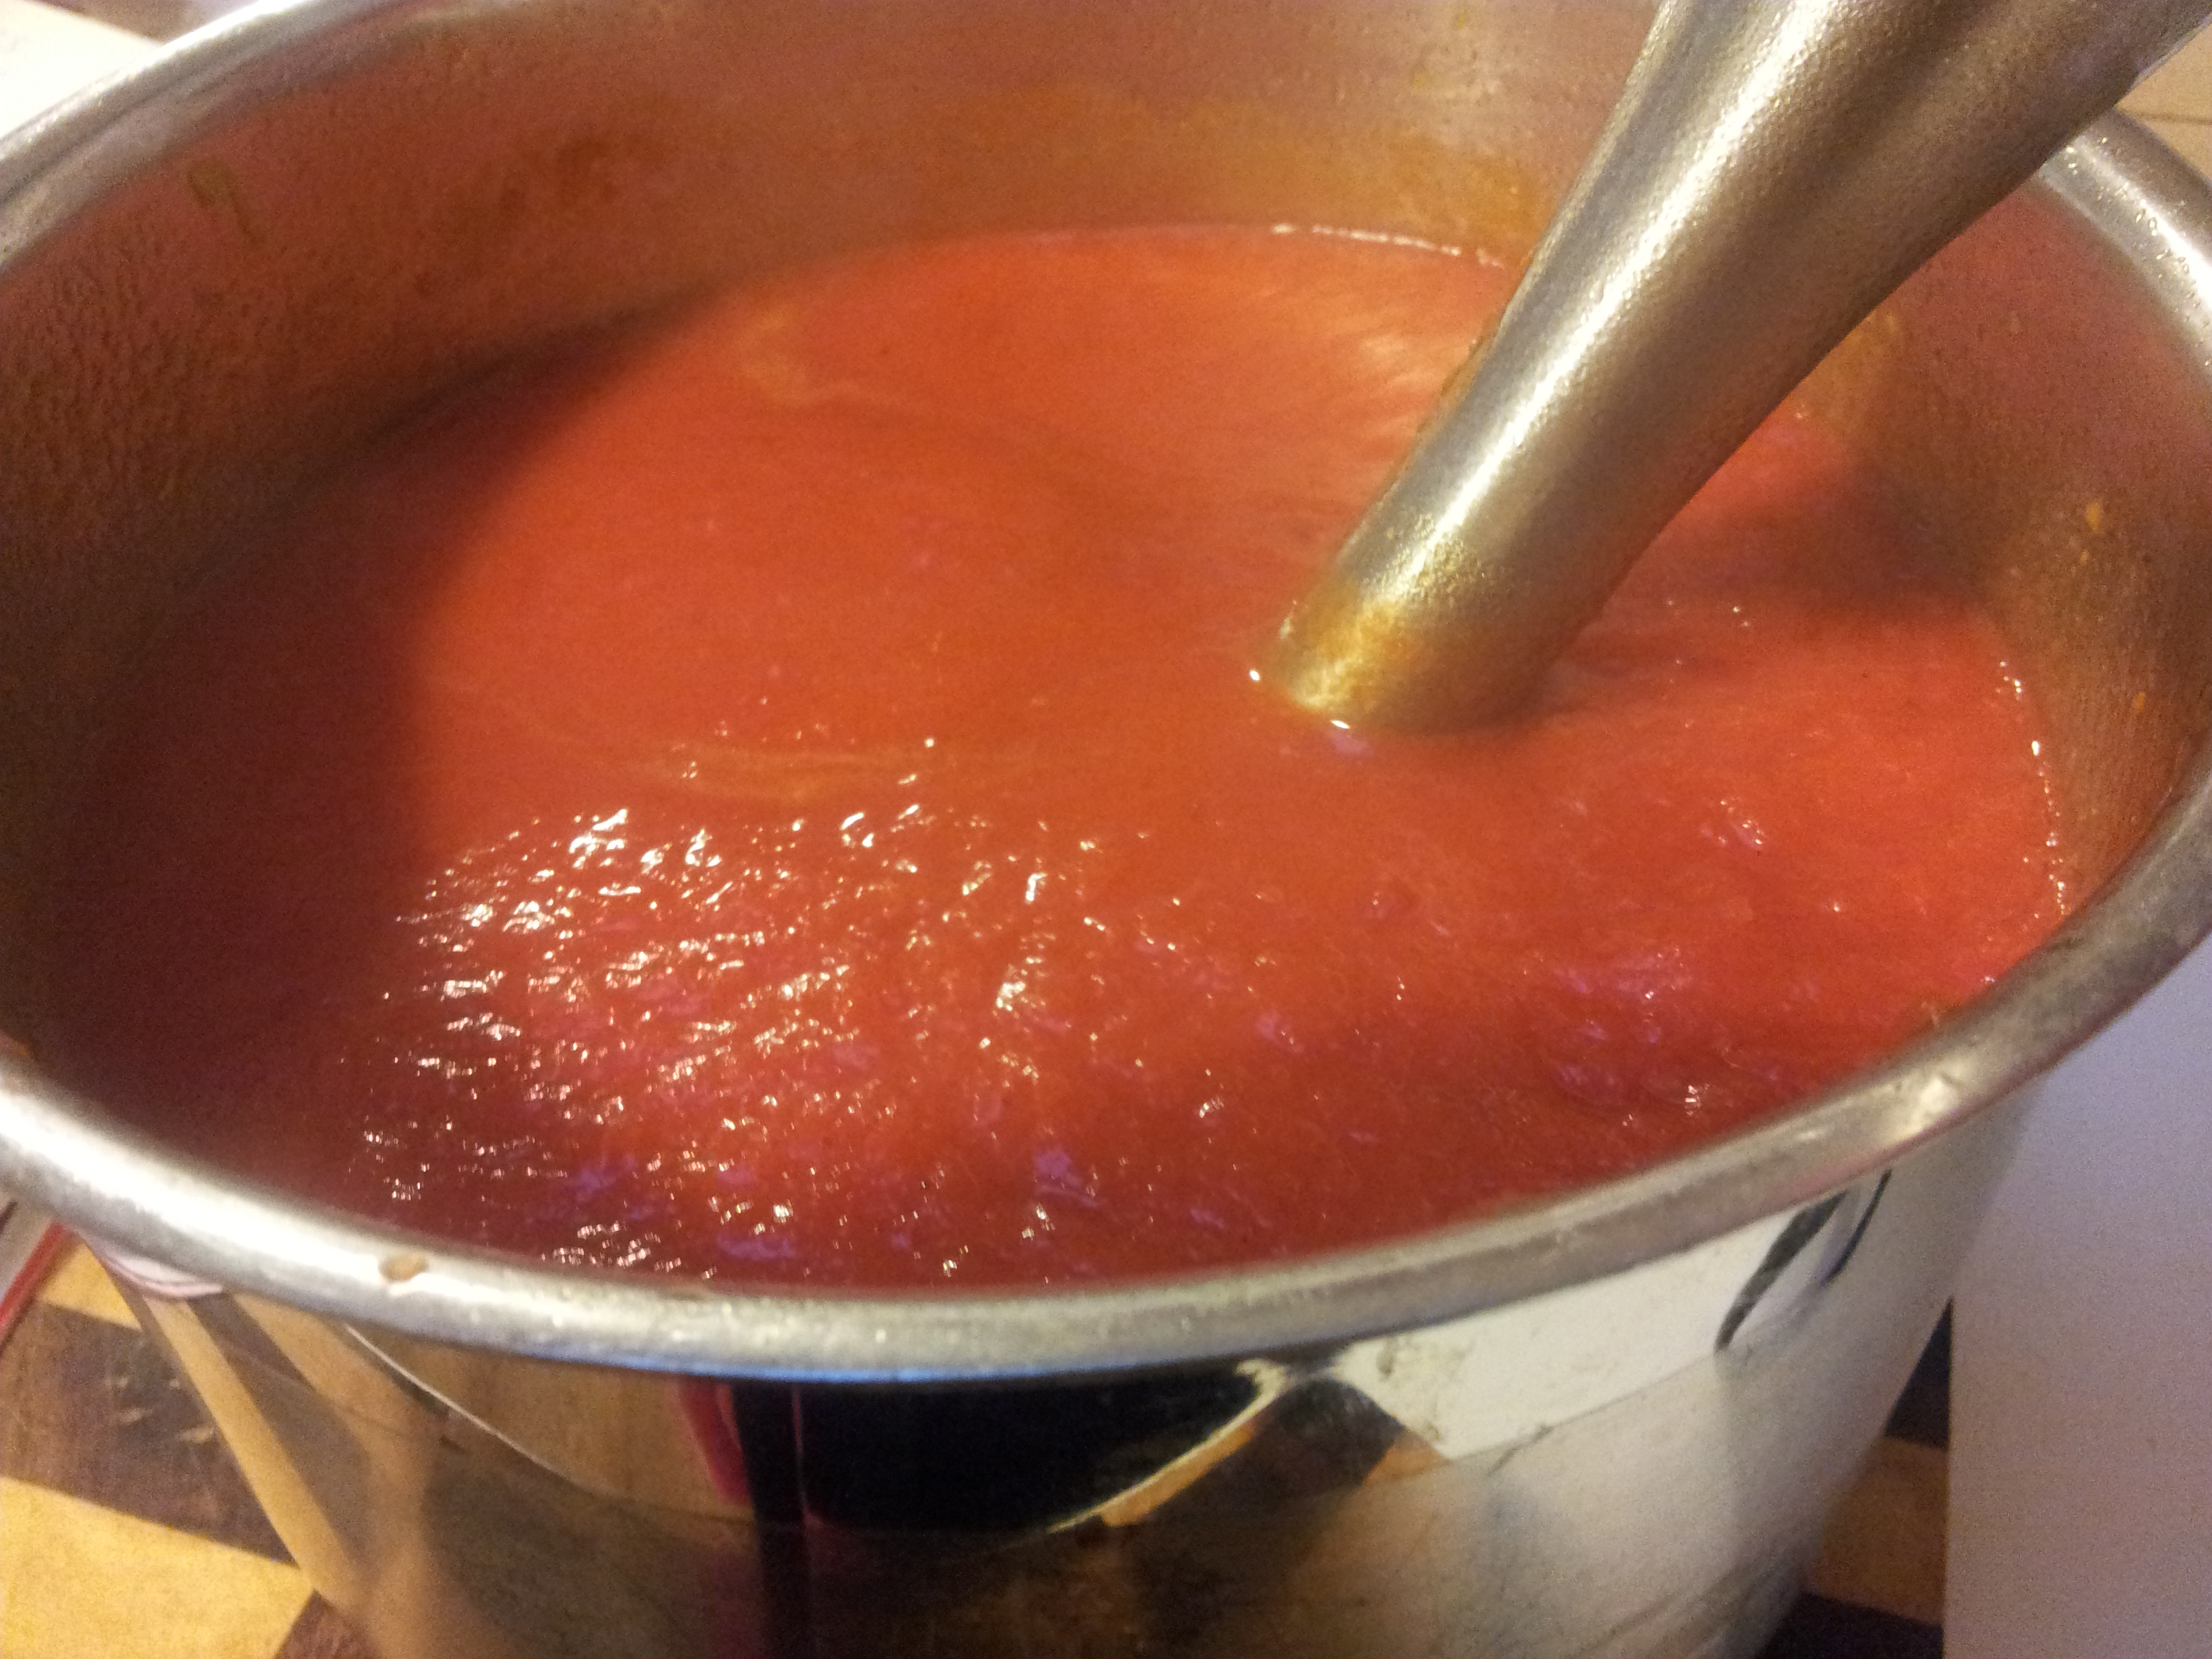
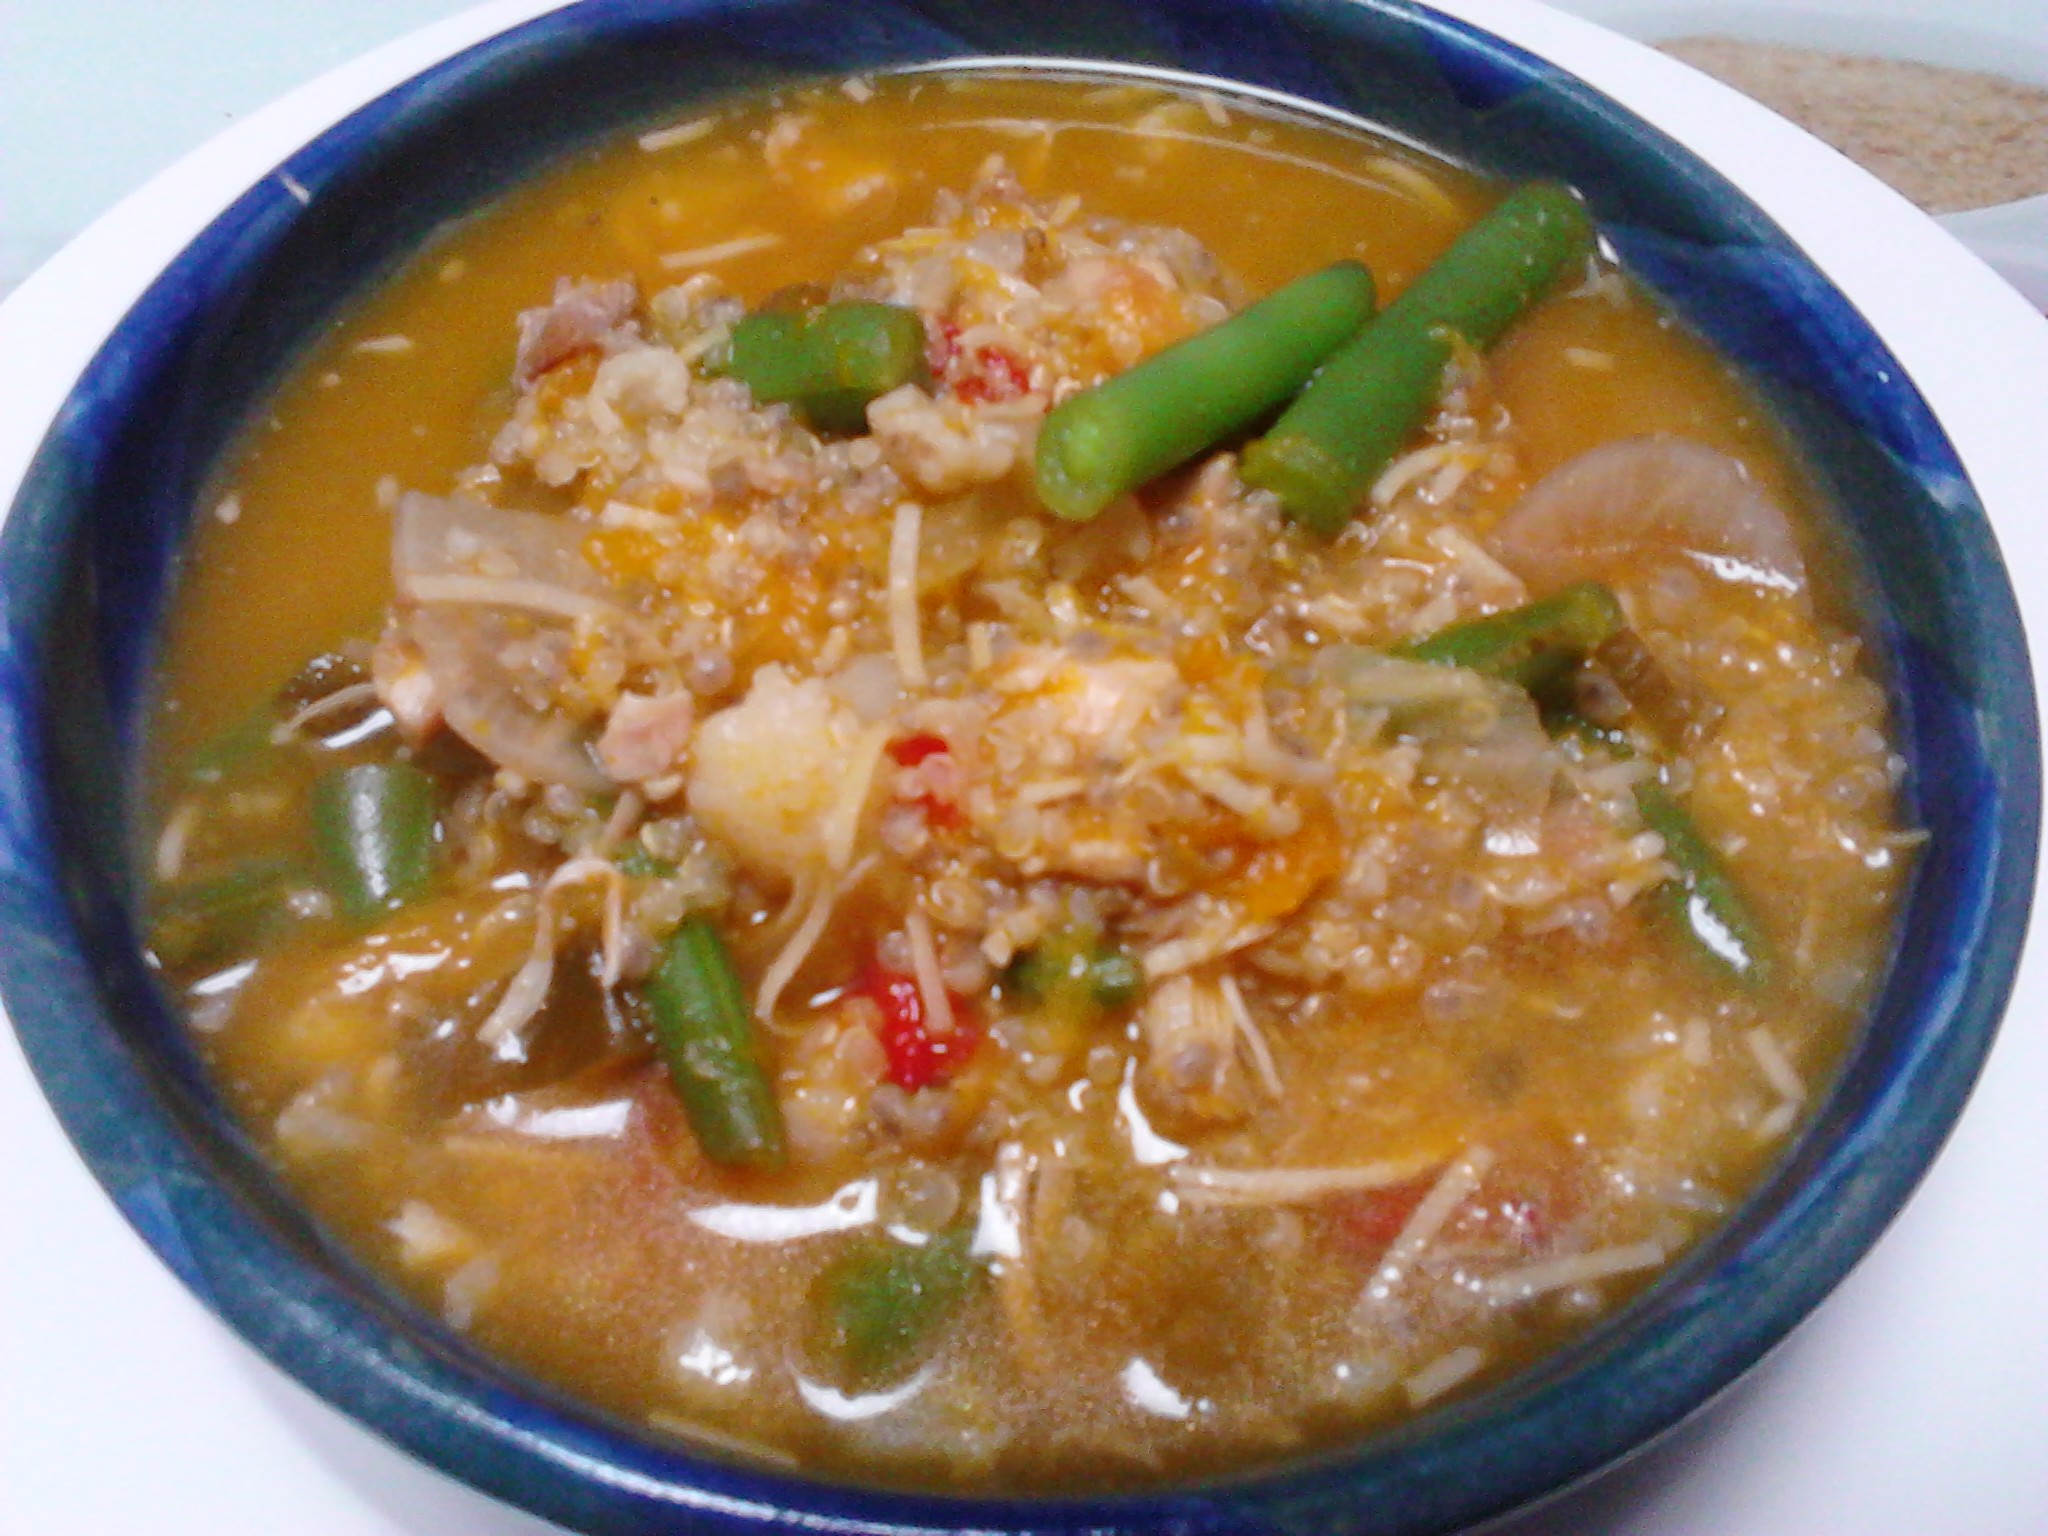
This soup has a wonderful balance of flavours with the most important element being a beautiful home-made chicken stock. It is such a delightful colour and looks so much like tomato soup but has a very distinctive flavour of beetroot with a lovely sweetness.
A thick and delicious soup with a surprising flavour.
Ingredients:
Check the recipe-soup section of the website for the chicken stock recipe.
1 litre of home-made chicken stock, 2 small beetroot or 1 1/2 large, 1 medium sweet potato, 1 large brown onion, 1/2 teaspoon pink rock salt and 1/4 teaspoon ground black pepper.Just a small amount of pumpkin to thicken up the soup.
Method:
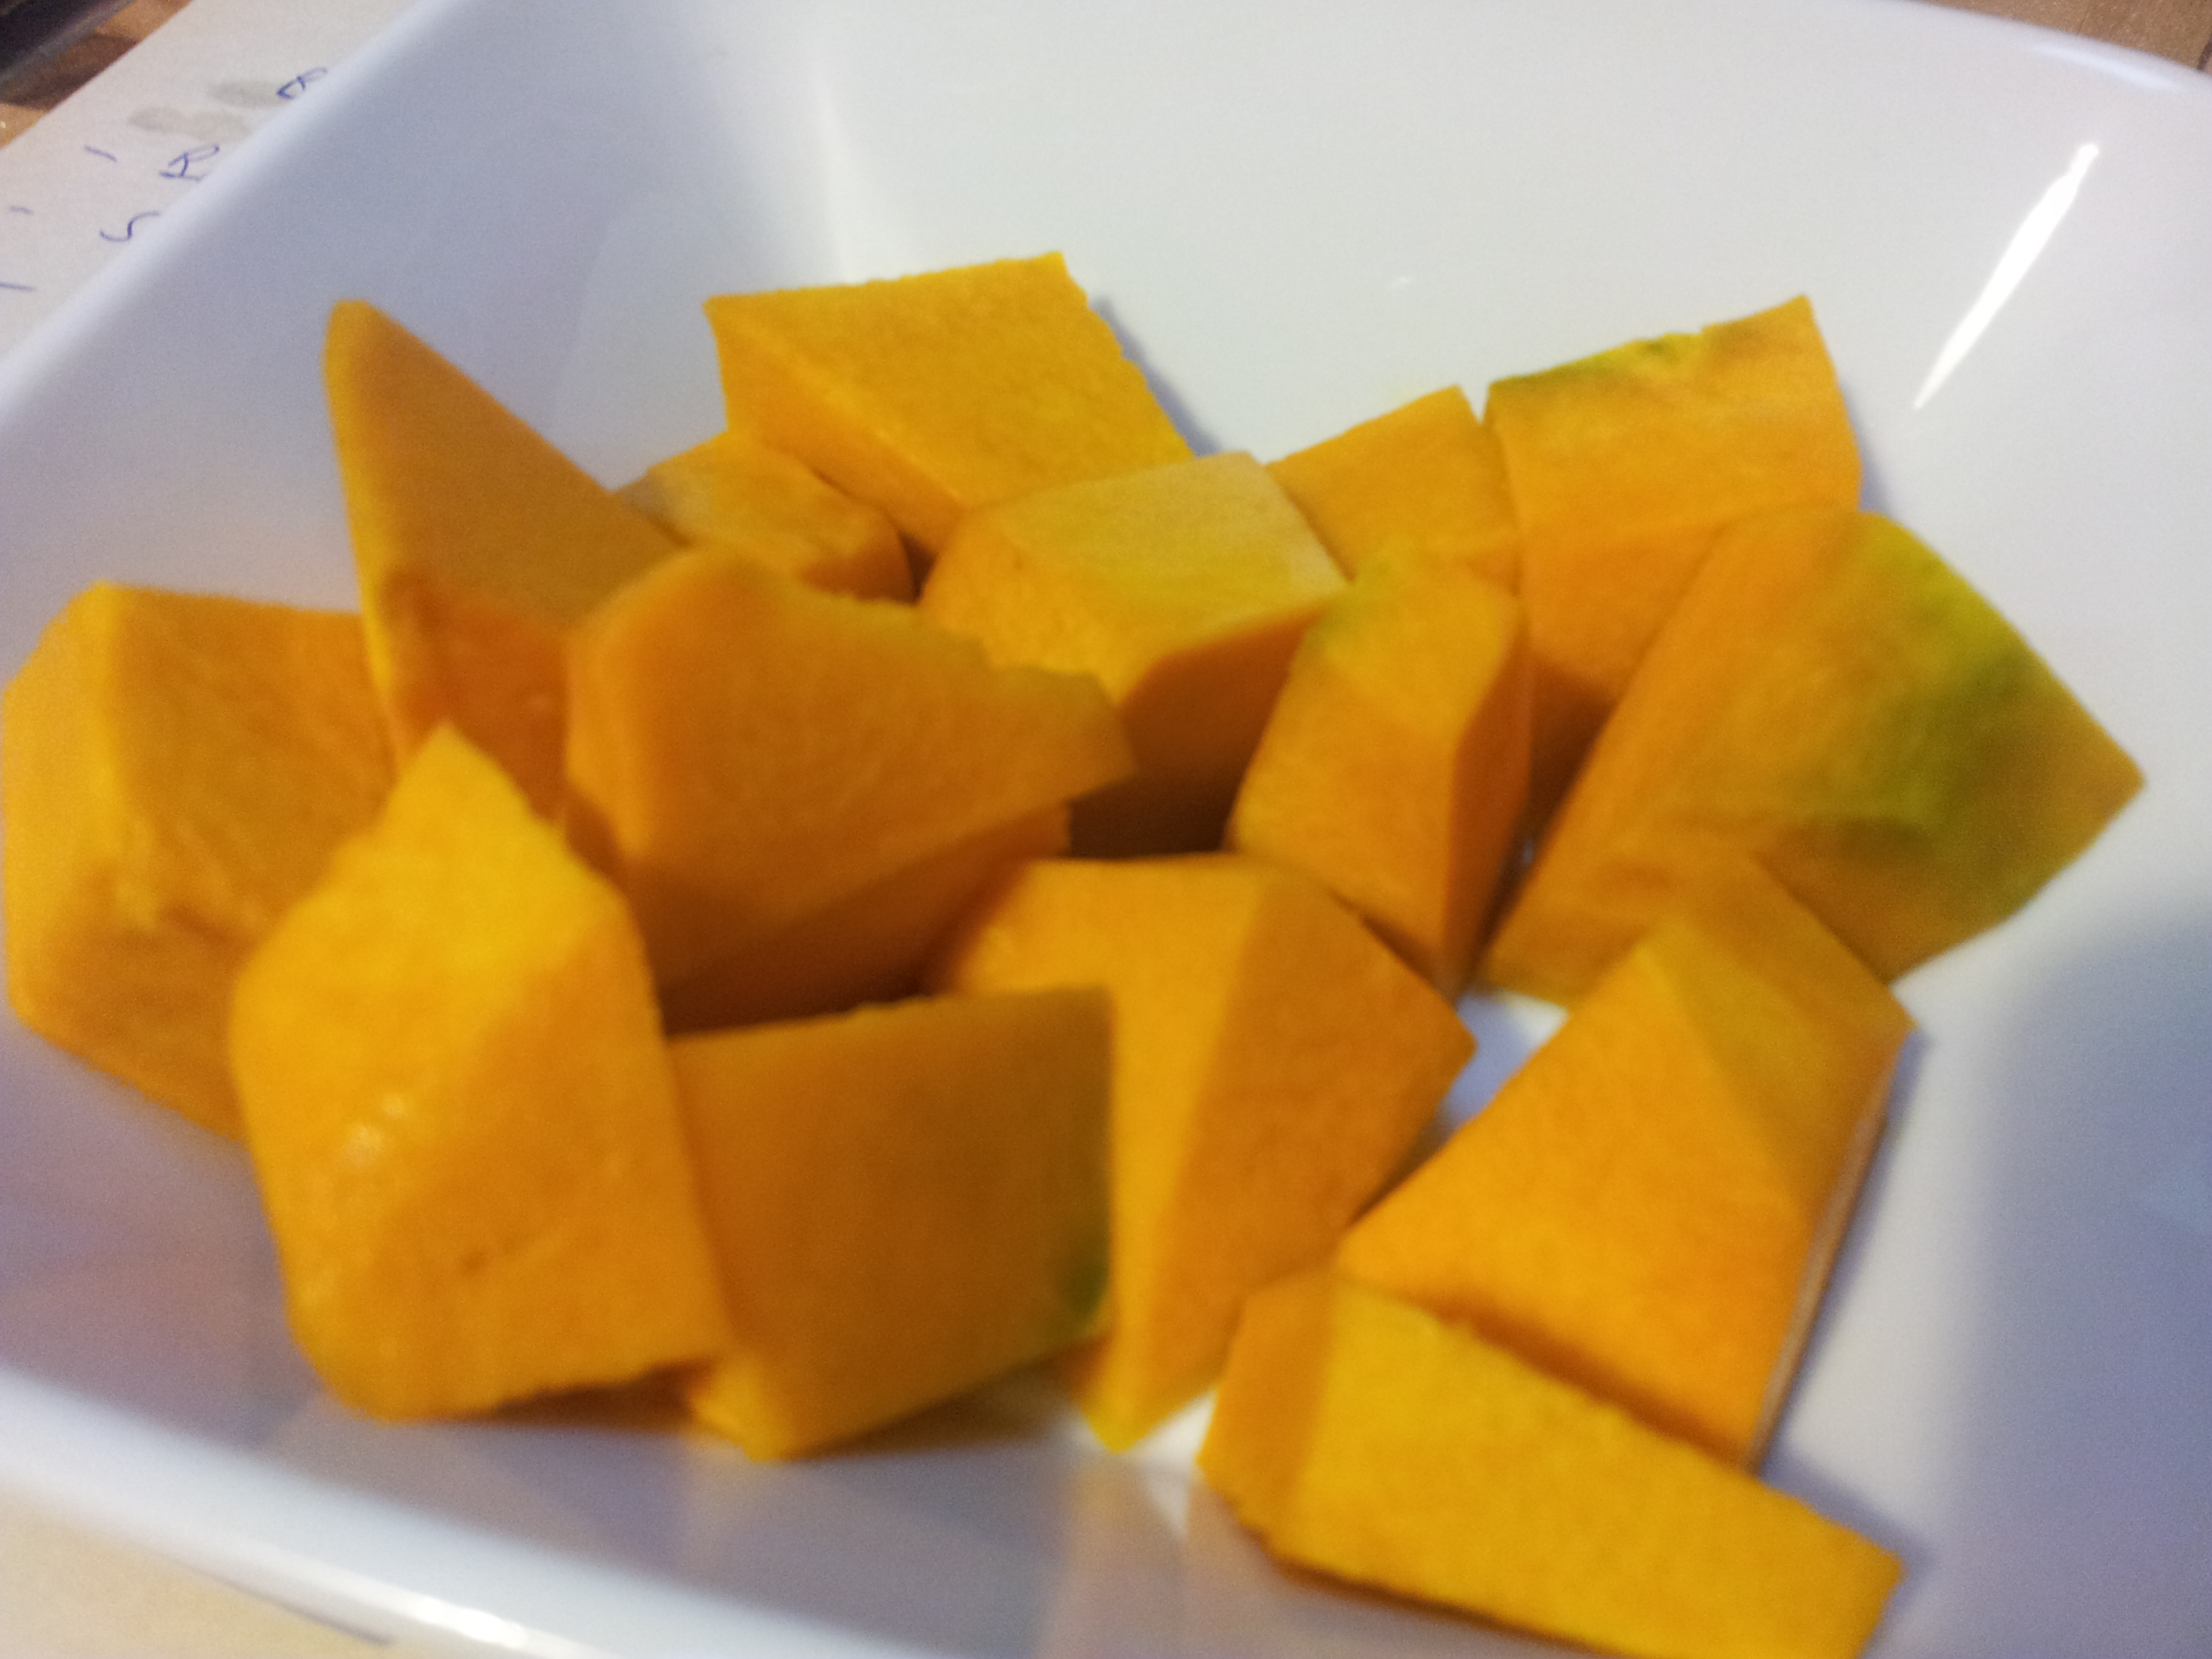
Prepare the vegetables by washing, peeling and chopping.
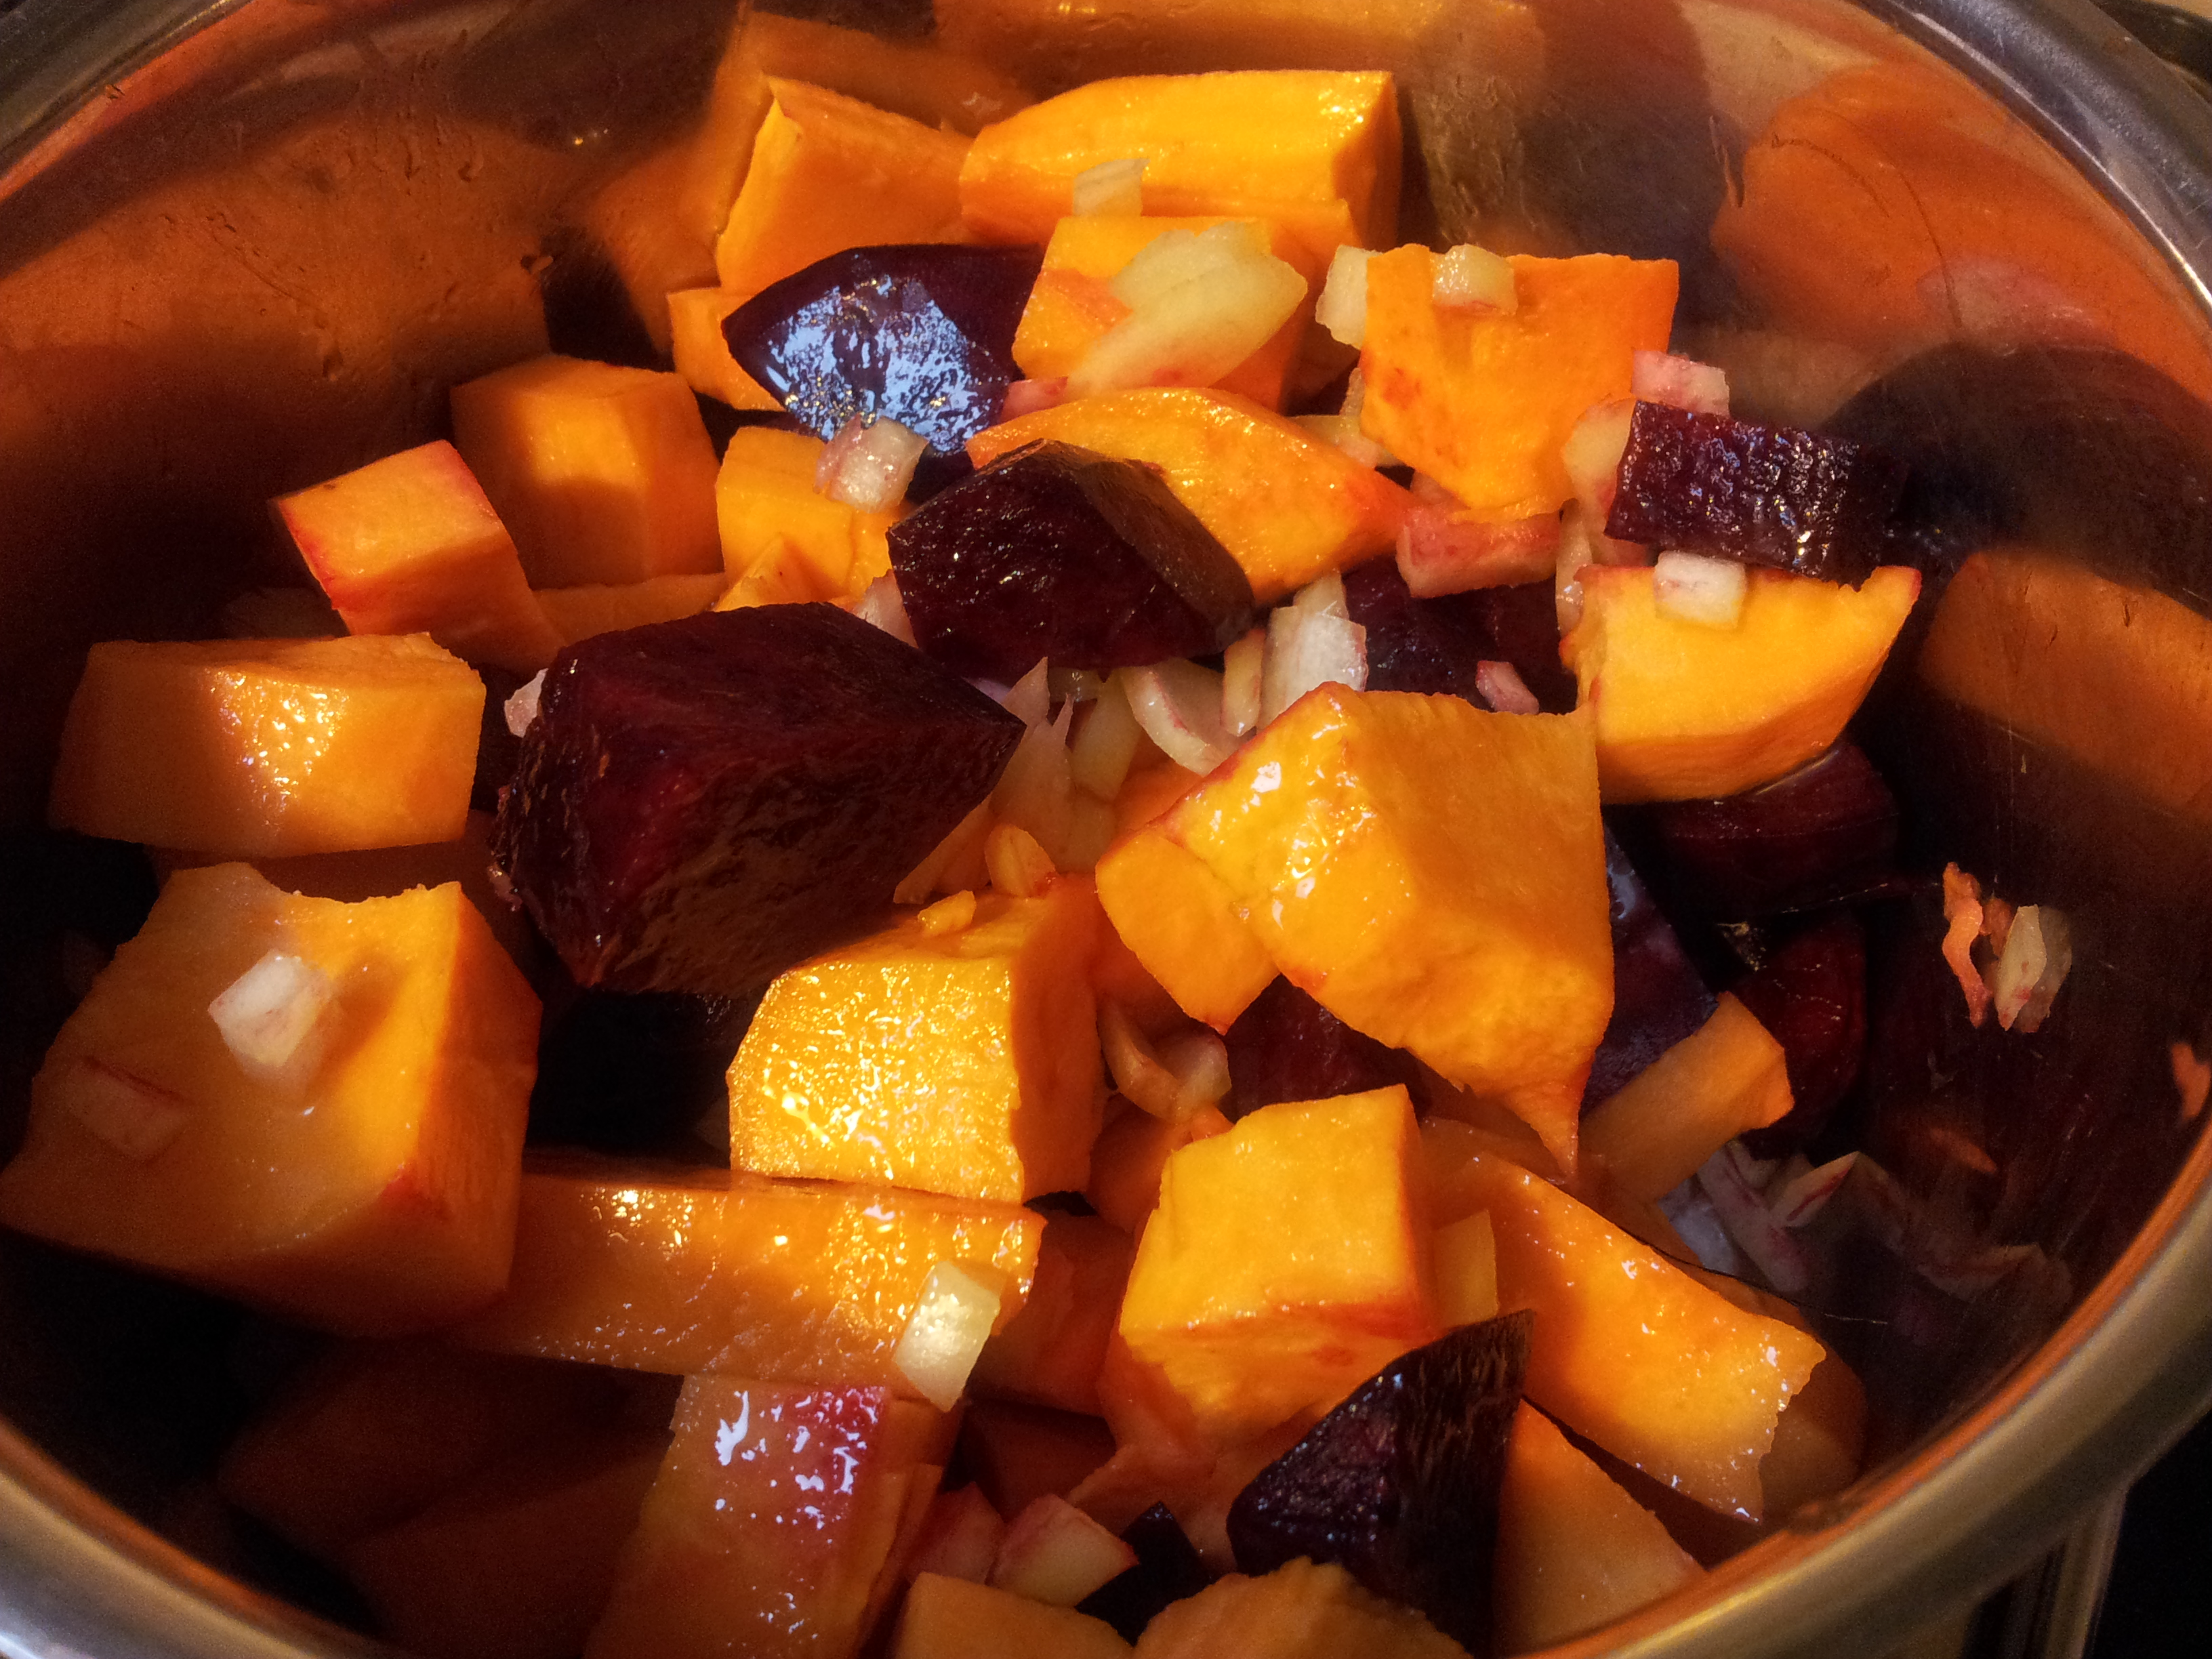
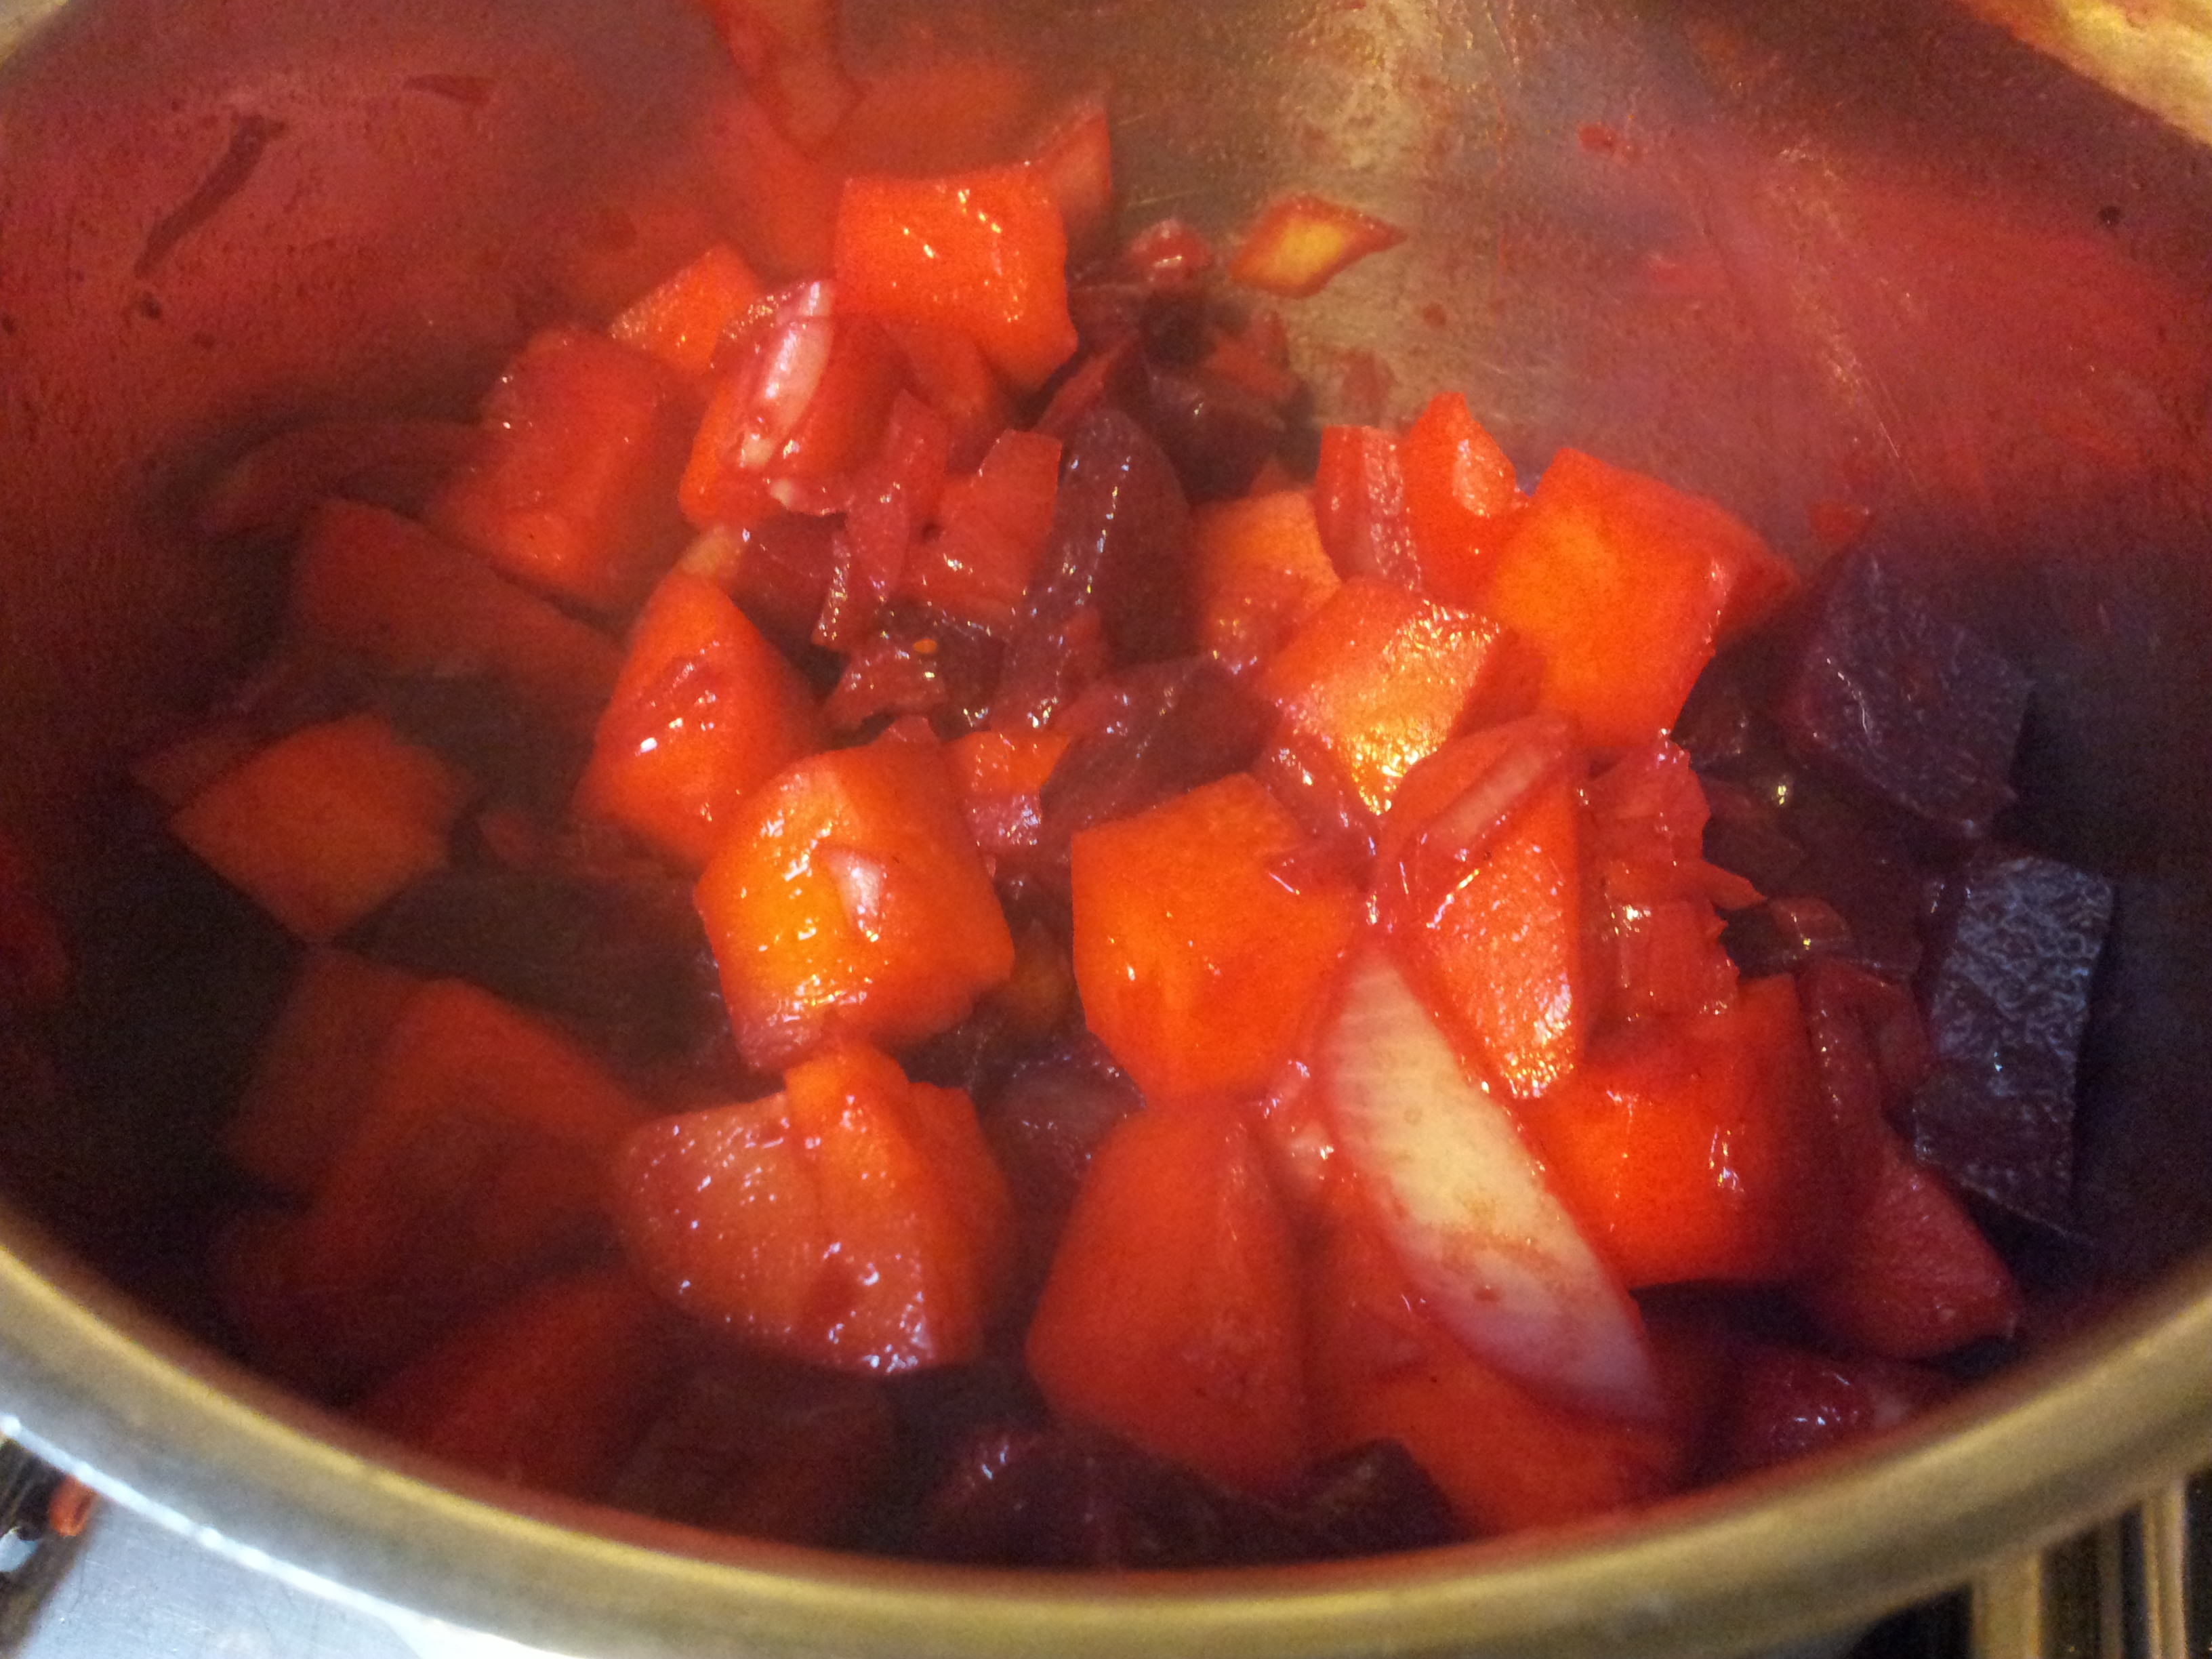
Add all ingredients except the stock, into a medium-sized saucepan with some olive oil.Cook until the vegetables are starting to soften and stir the ingredients every few minutes.
Add the stock and put the lid on and let simmer for about 60 minutes.
When the vegetables are soft take off the stove and blend with a hand blender.Blend well so that there are no lumps. Place back on the stove on a gentle simmer for approximately another 30 minutes. Check the seasoning and adjust as required.
This is a very thick and filling soup. It has the most delicious sweet flavour and the colour is enticing. The main tips for this soup are to brown the vegetables before you put the stock in, use a very good quality home-made stock and use fresh vegetables.
You can follow me daily on Instagram at holistic_paleo
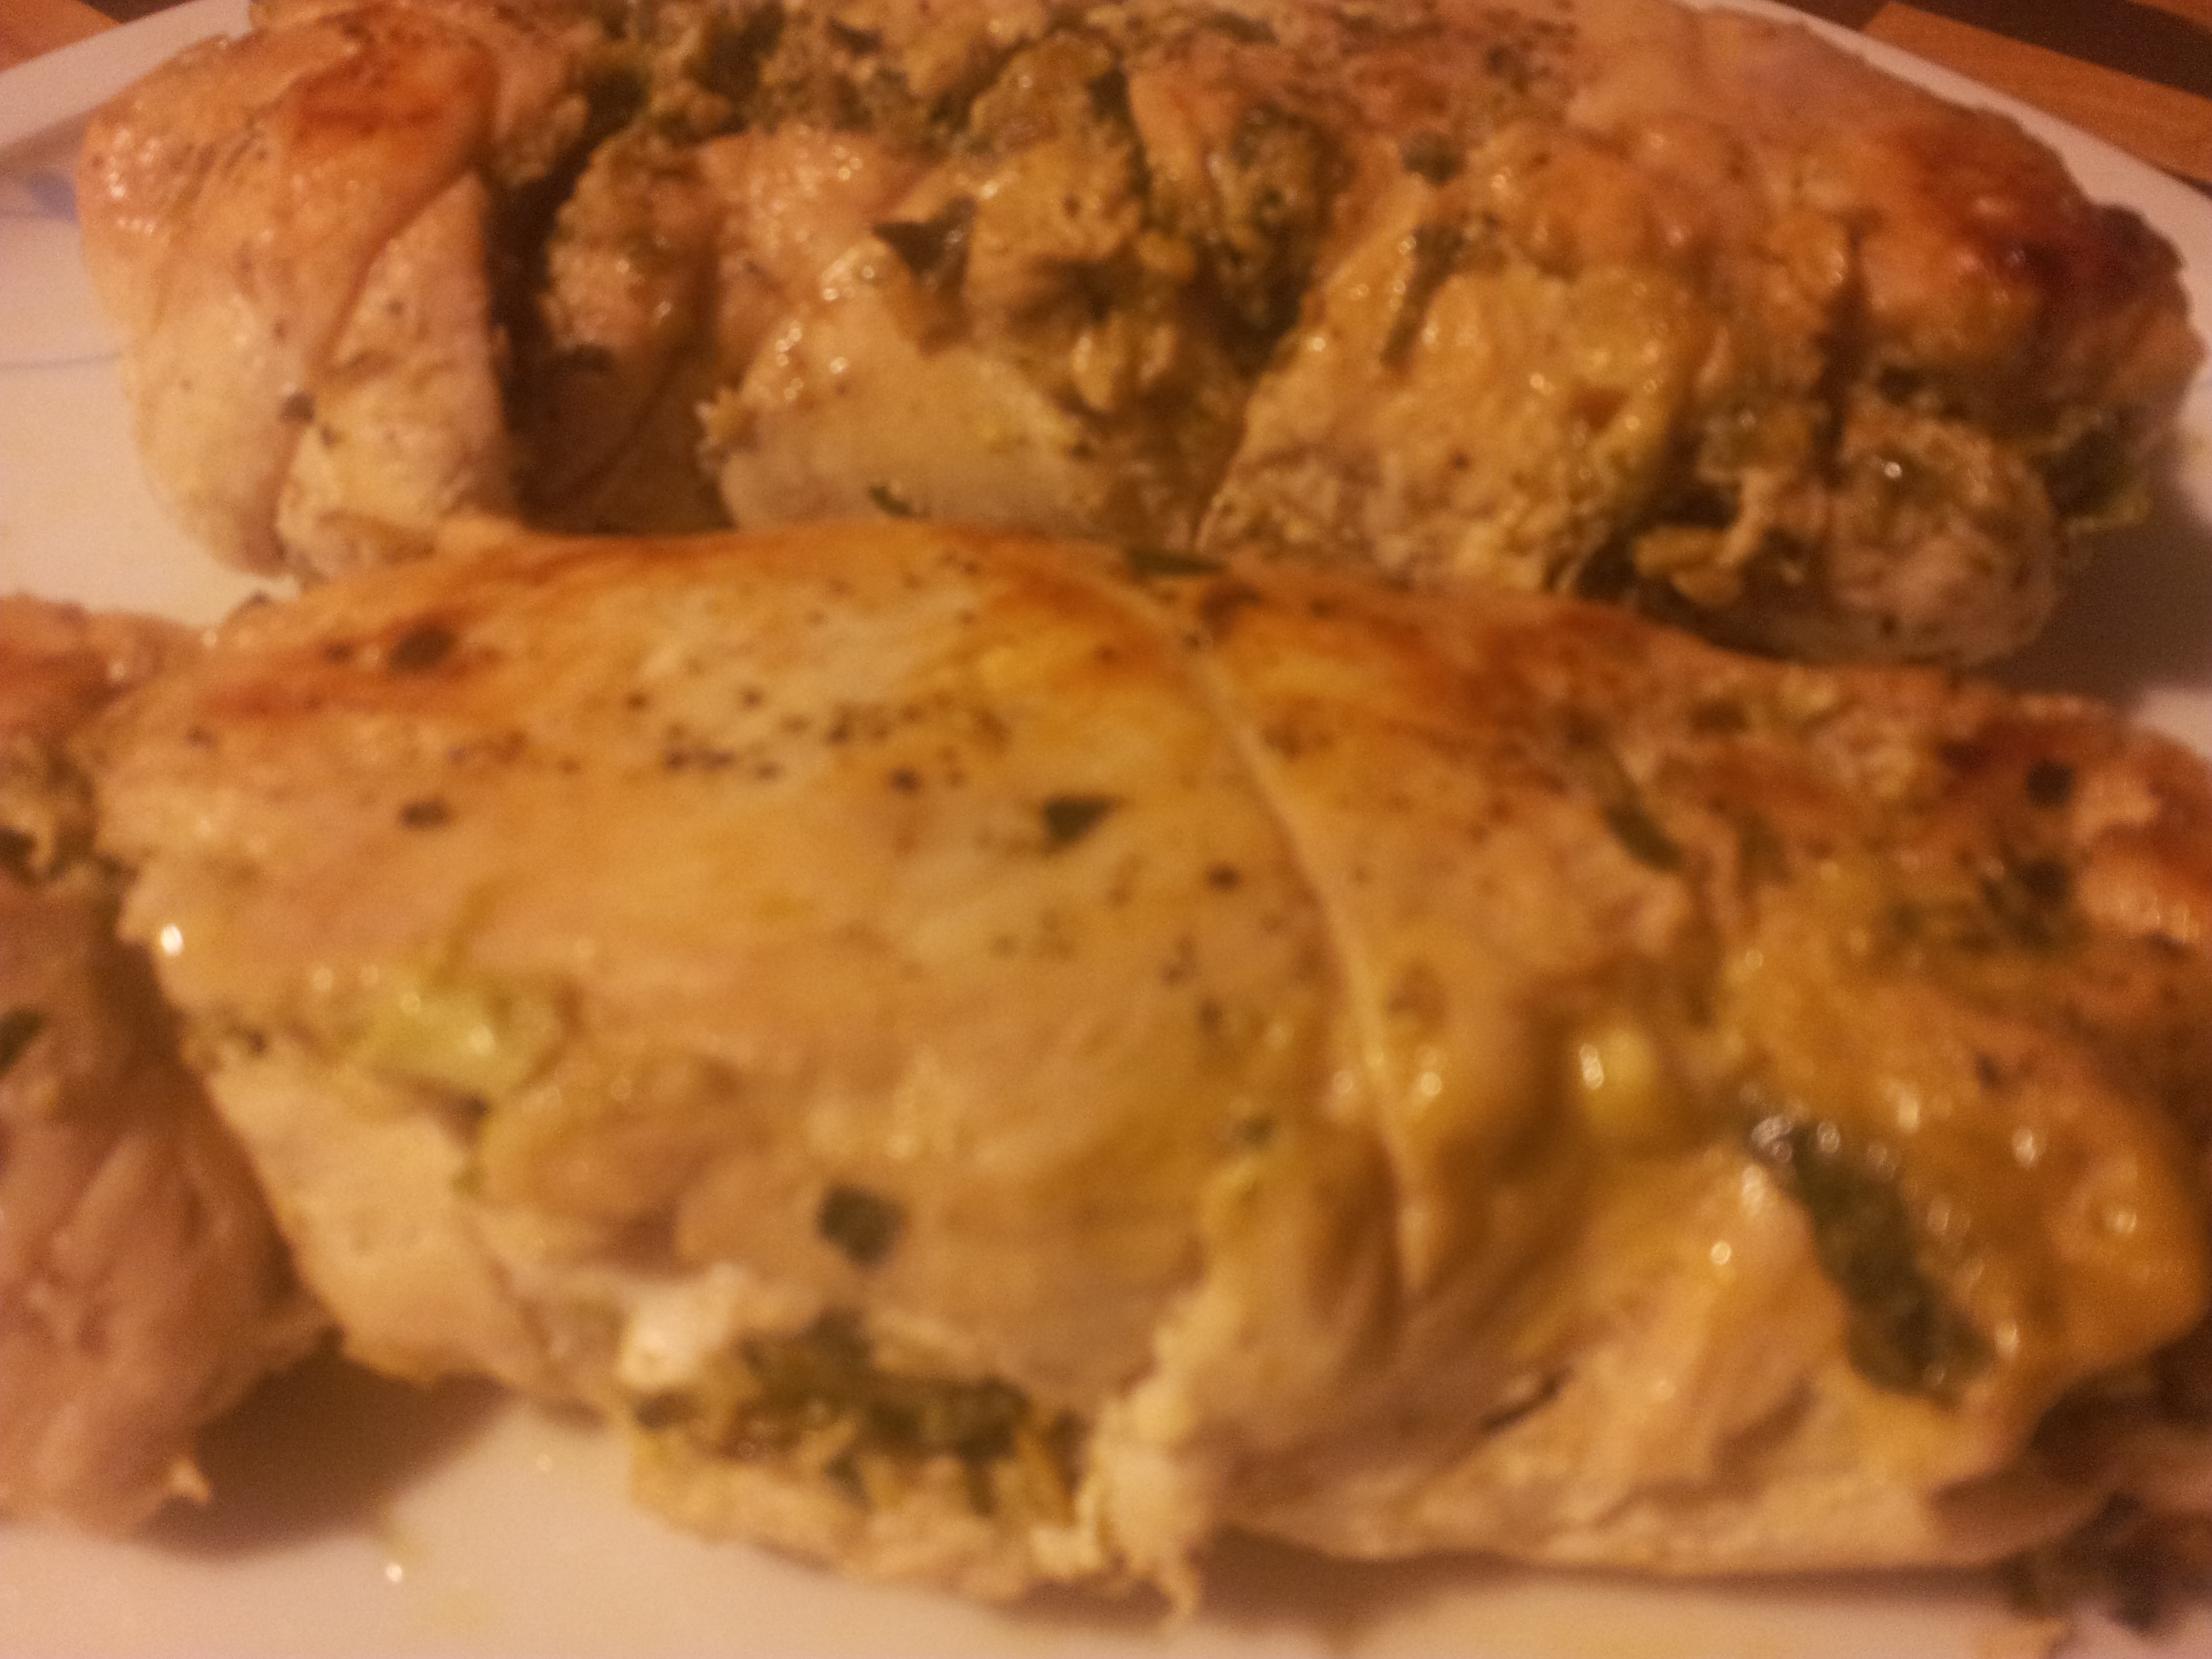
I feel quite clever making this dish as it is quite fiddly, but well worth the effort. The filling is a selection of lovely flavours and textures but you can easily change the ingredients to suit your own preferences. I used two chicken breasts which meant l had enough for a hot dinner when it is first cooked and then cold with a salad the next night. Each rolled chicken breast serves three people if you have a portion as in the pictures below which highlight how important it is to balance the meal out with healthy vegetables.
Have it cold with a salad!Rolled chicken served with roasted swede chips, steamed brussel sprouts and roasted pumpkin slices topped with raw organic honey and organic sesame seeds.Served with steamed pumpkin, brussel sprouts and cauliflower.
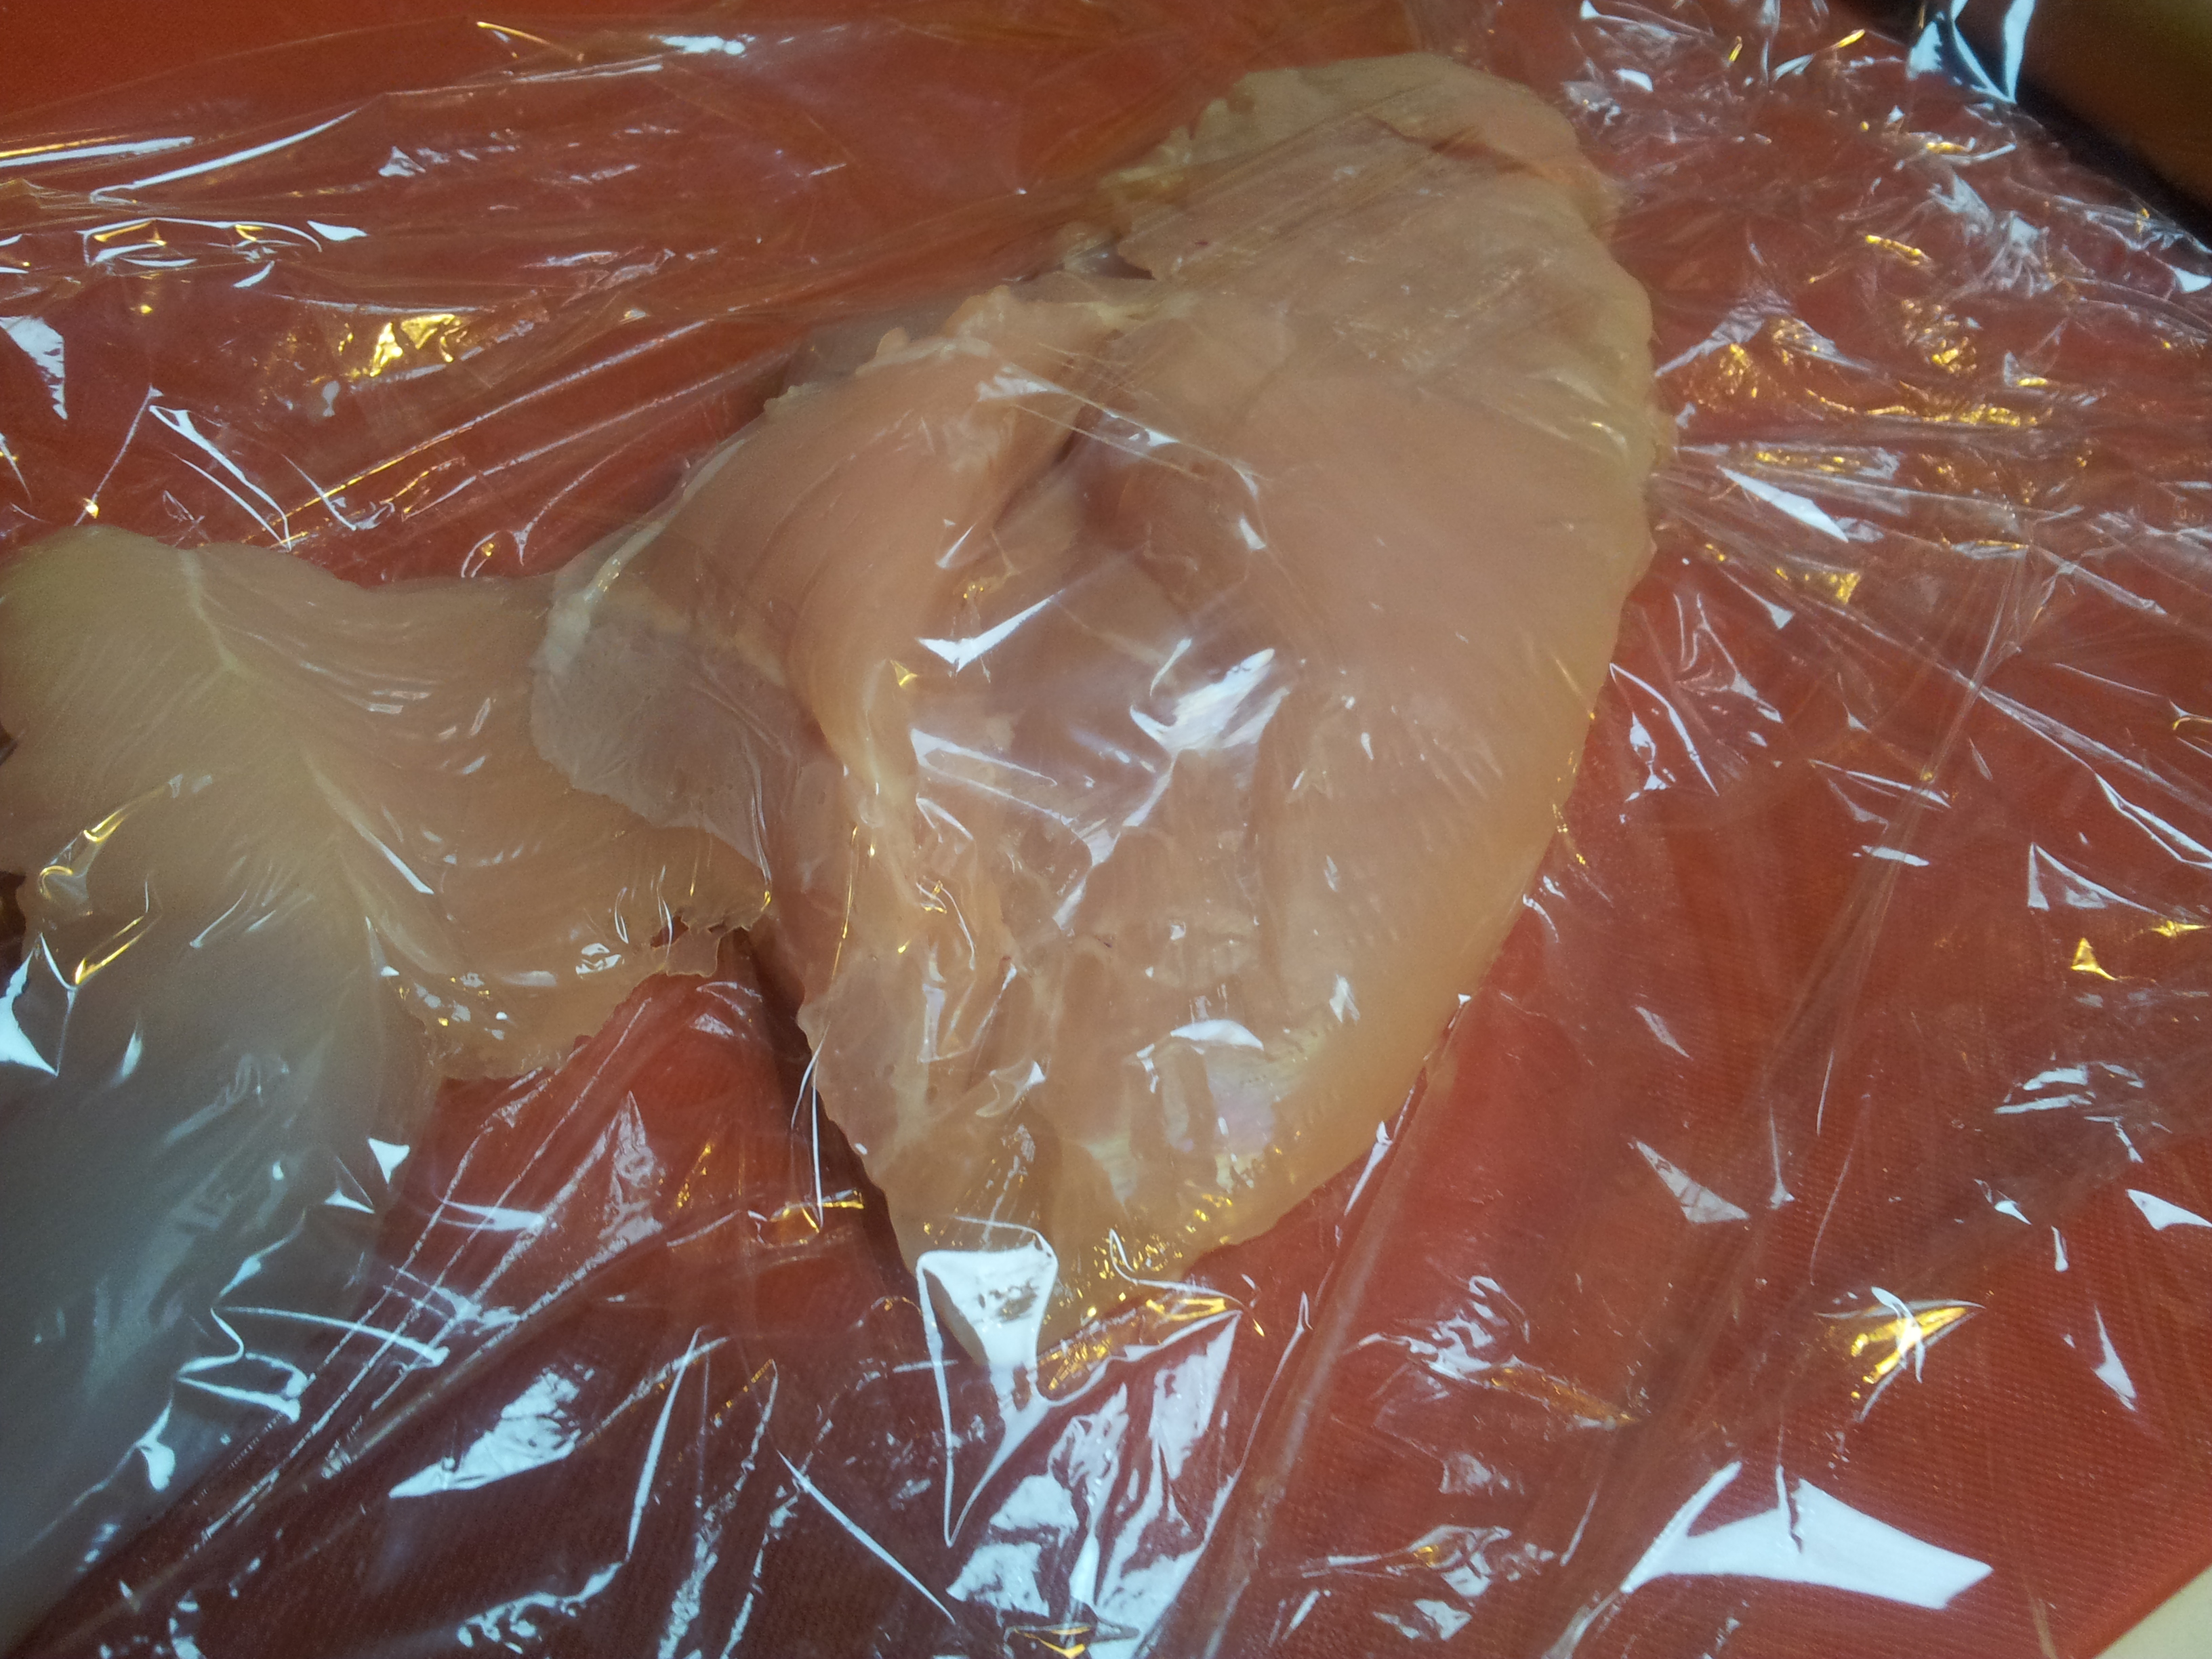
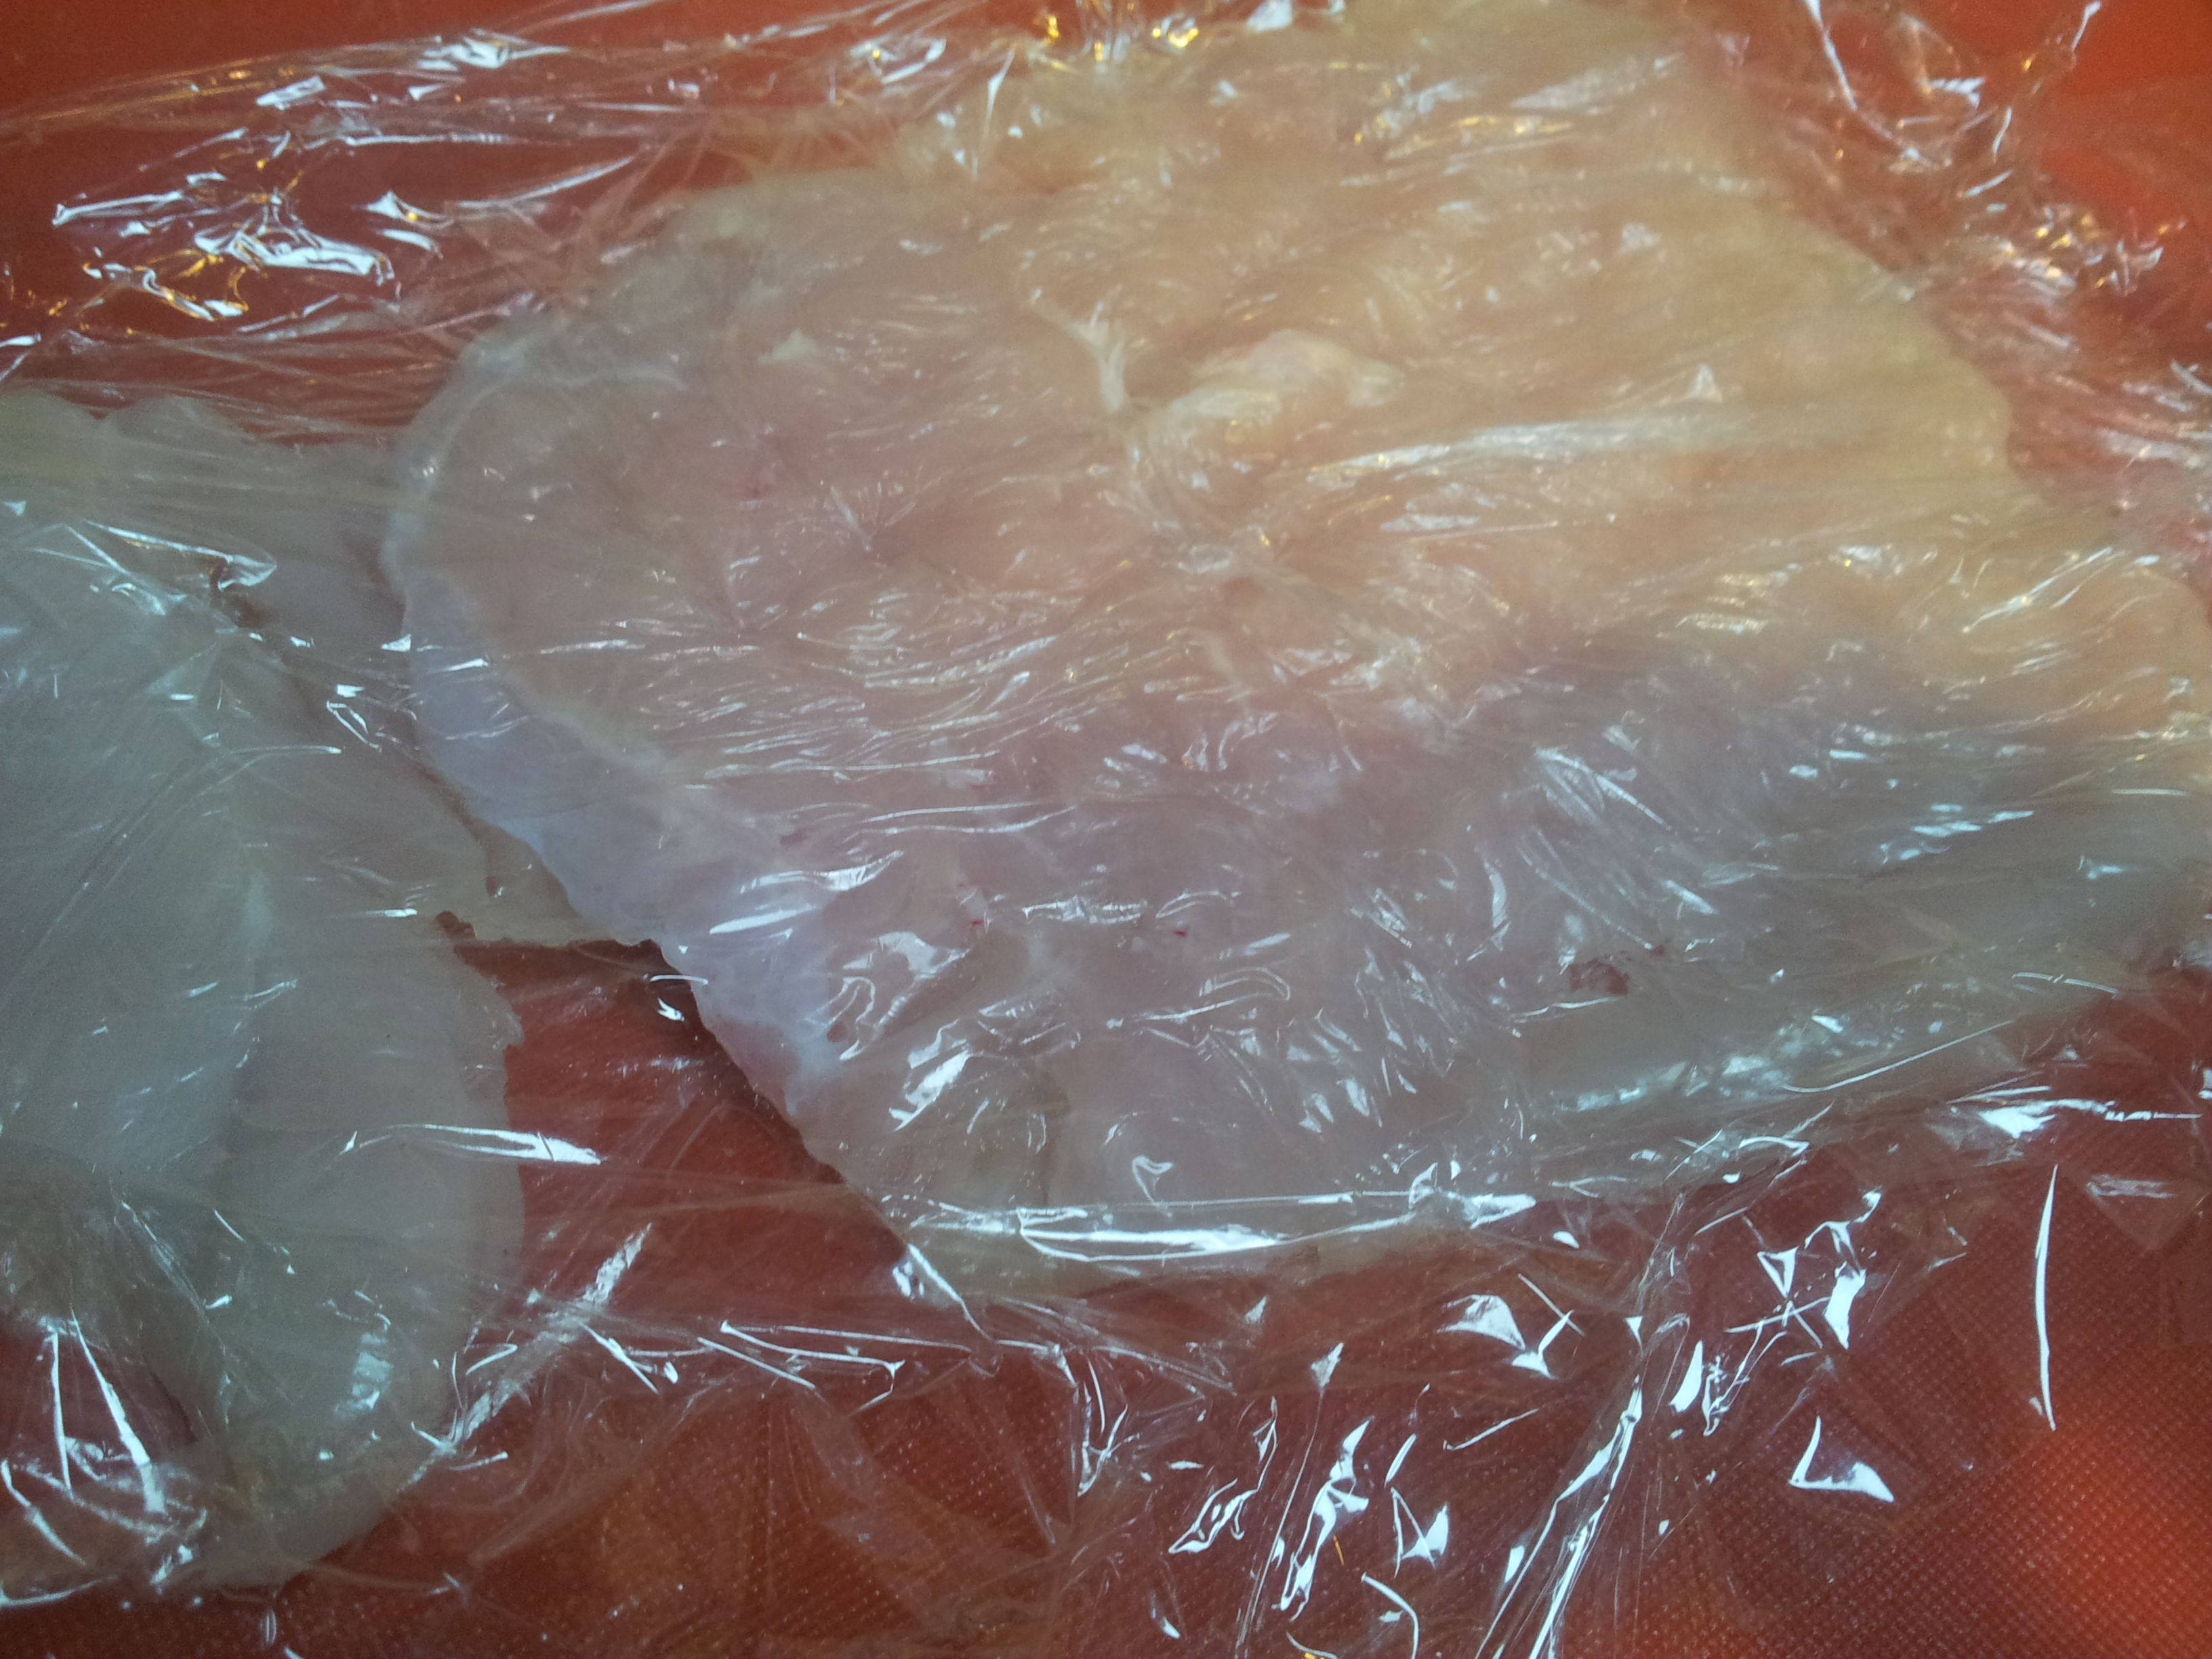
You can use as many chicken breast as you like but l buy the free-range breasts in a pack of two. Give them a good wash with filtered water and pat dry.
Place the chicken breast in between two pieces of cling wrap. Put a tea towel under the chopping board in preparation for the flattening of the chicken as this will make the noise less and stop the board moving on the bench.Flatten the chicken so that it is a nice shape by gently pounding it with a wooden rolling pin.
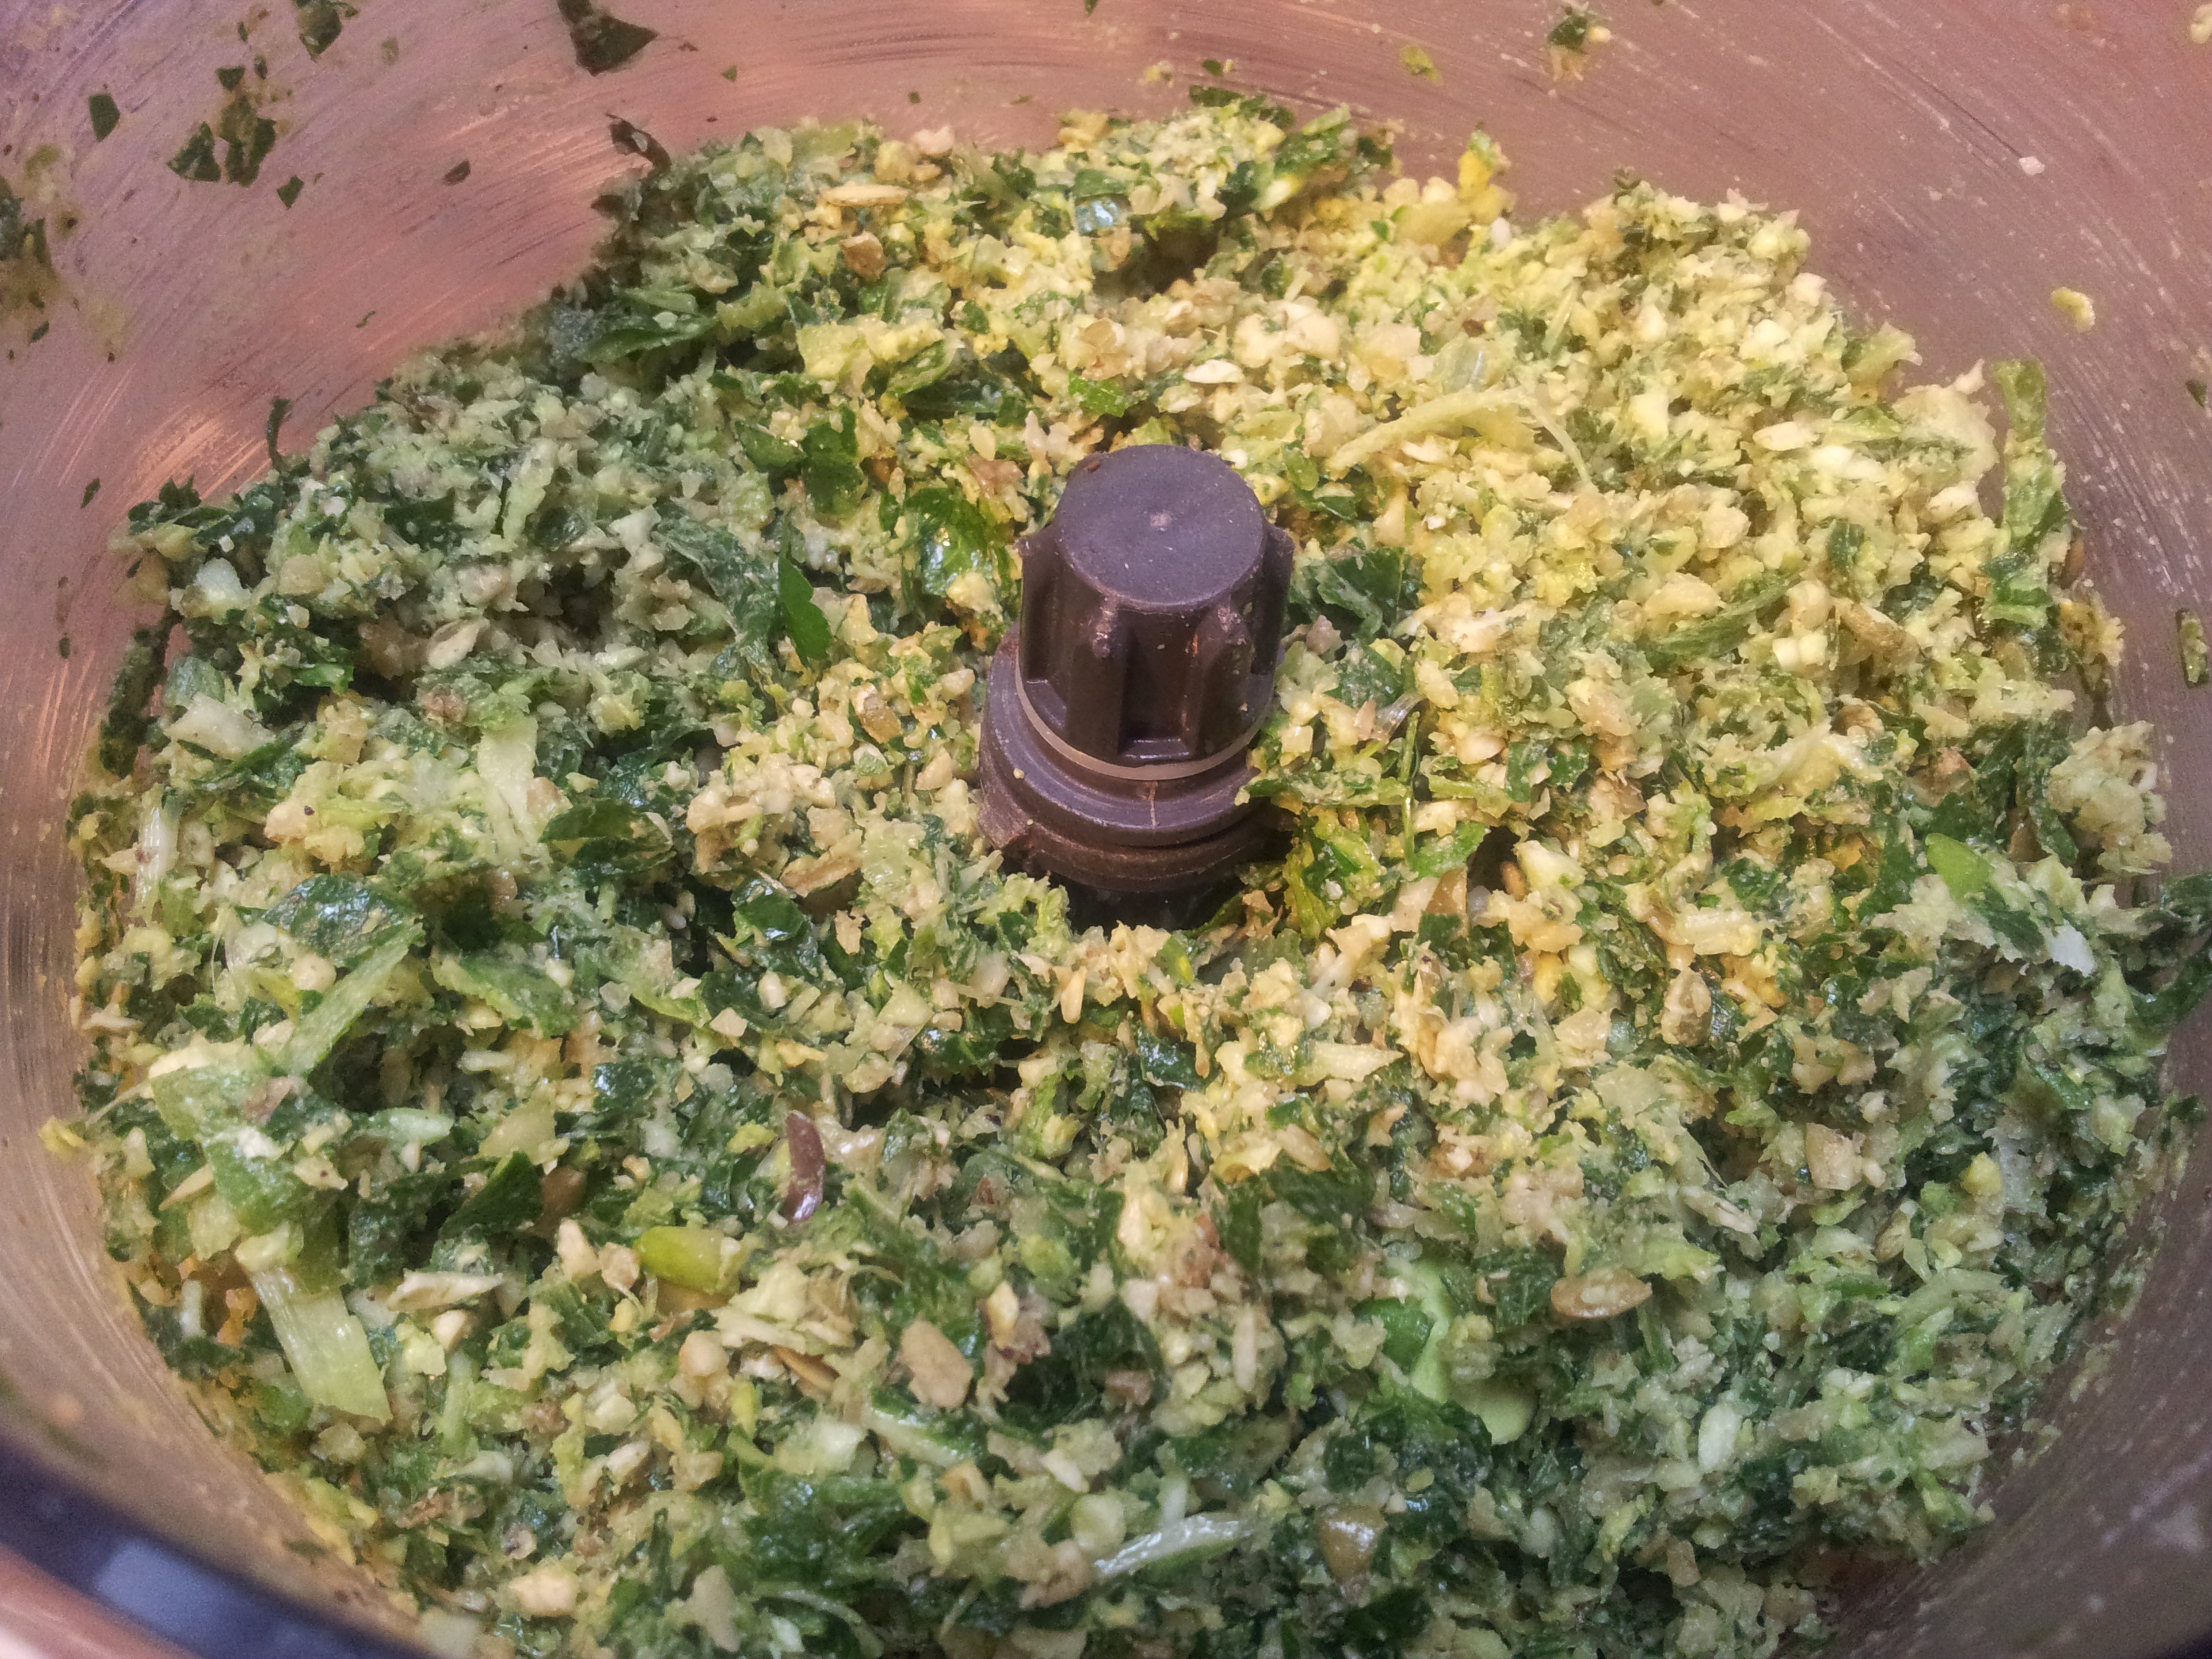
Make the filling by combining all of the ingredients in a food processor, or alternatively cut and chop them by hand and mix in a bowl. Change any of the ingredients if you don’t like the flavour combination or add in some more spices. The ingredients below don’t have to be exact as long as there are a good mix of flavours.
Ingredients for the filling:
4 brussel sprouts
2 spring onion green tops
1/2 cup raw activated walnuts
1/4 cup raw activated pepitas (pumpkin seeds)
Pink rock salt and ground black pepper
1 tablespoon organic coconut oil
1/2 cup fresh parsley and mint (or any other herbs you have)
A few leaves of silverbeet(use spinach, kale or bok choy as an alternative)
A food processor is convenient here but not essential.
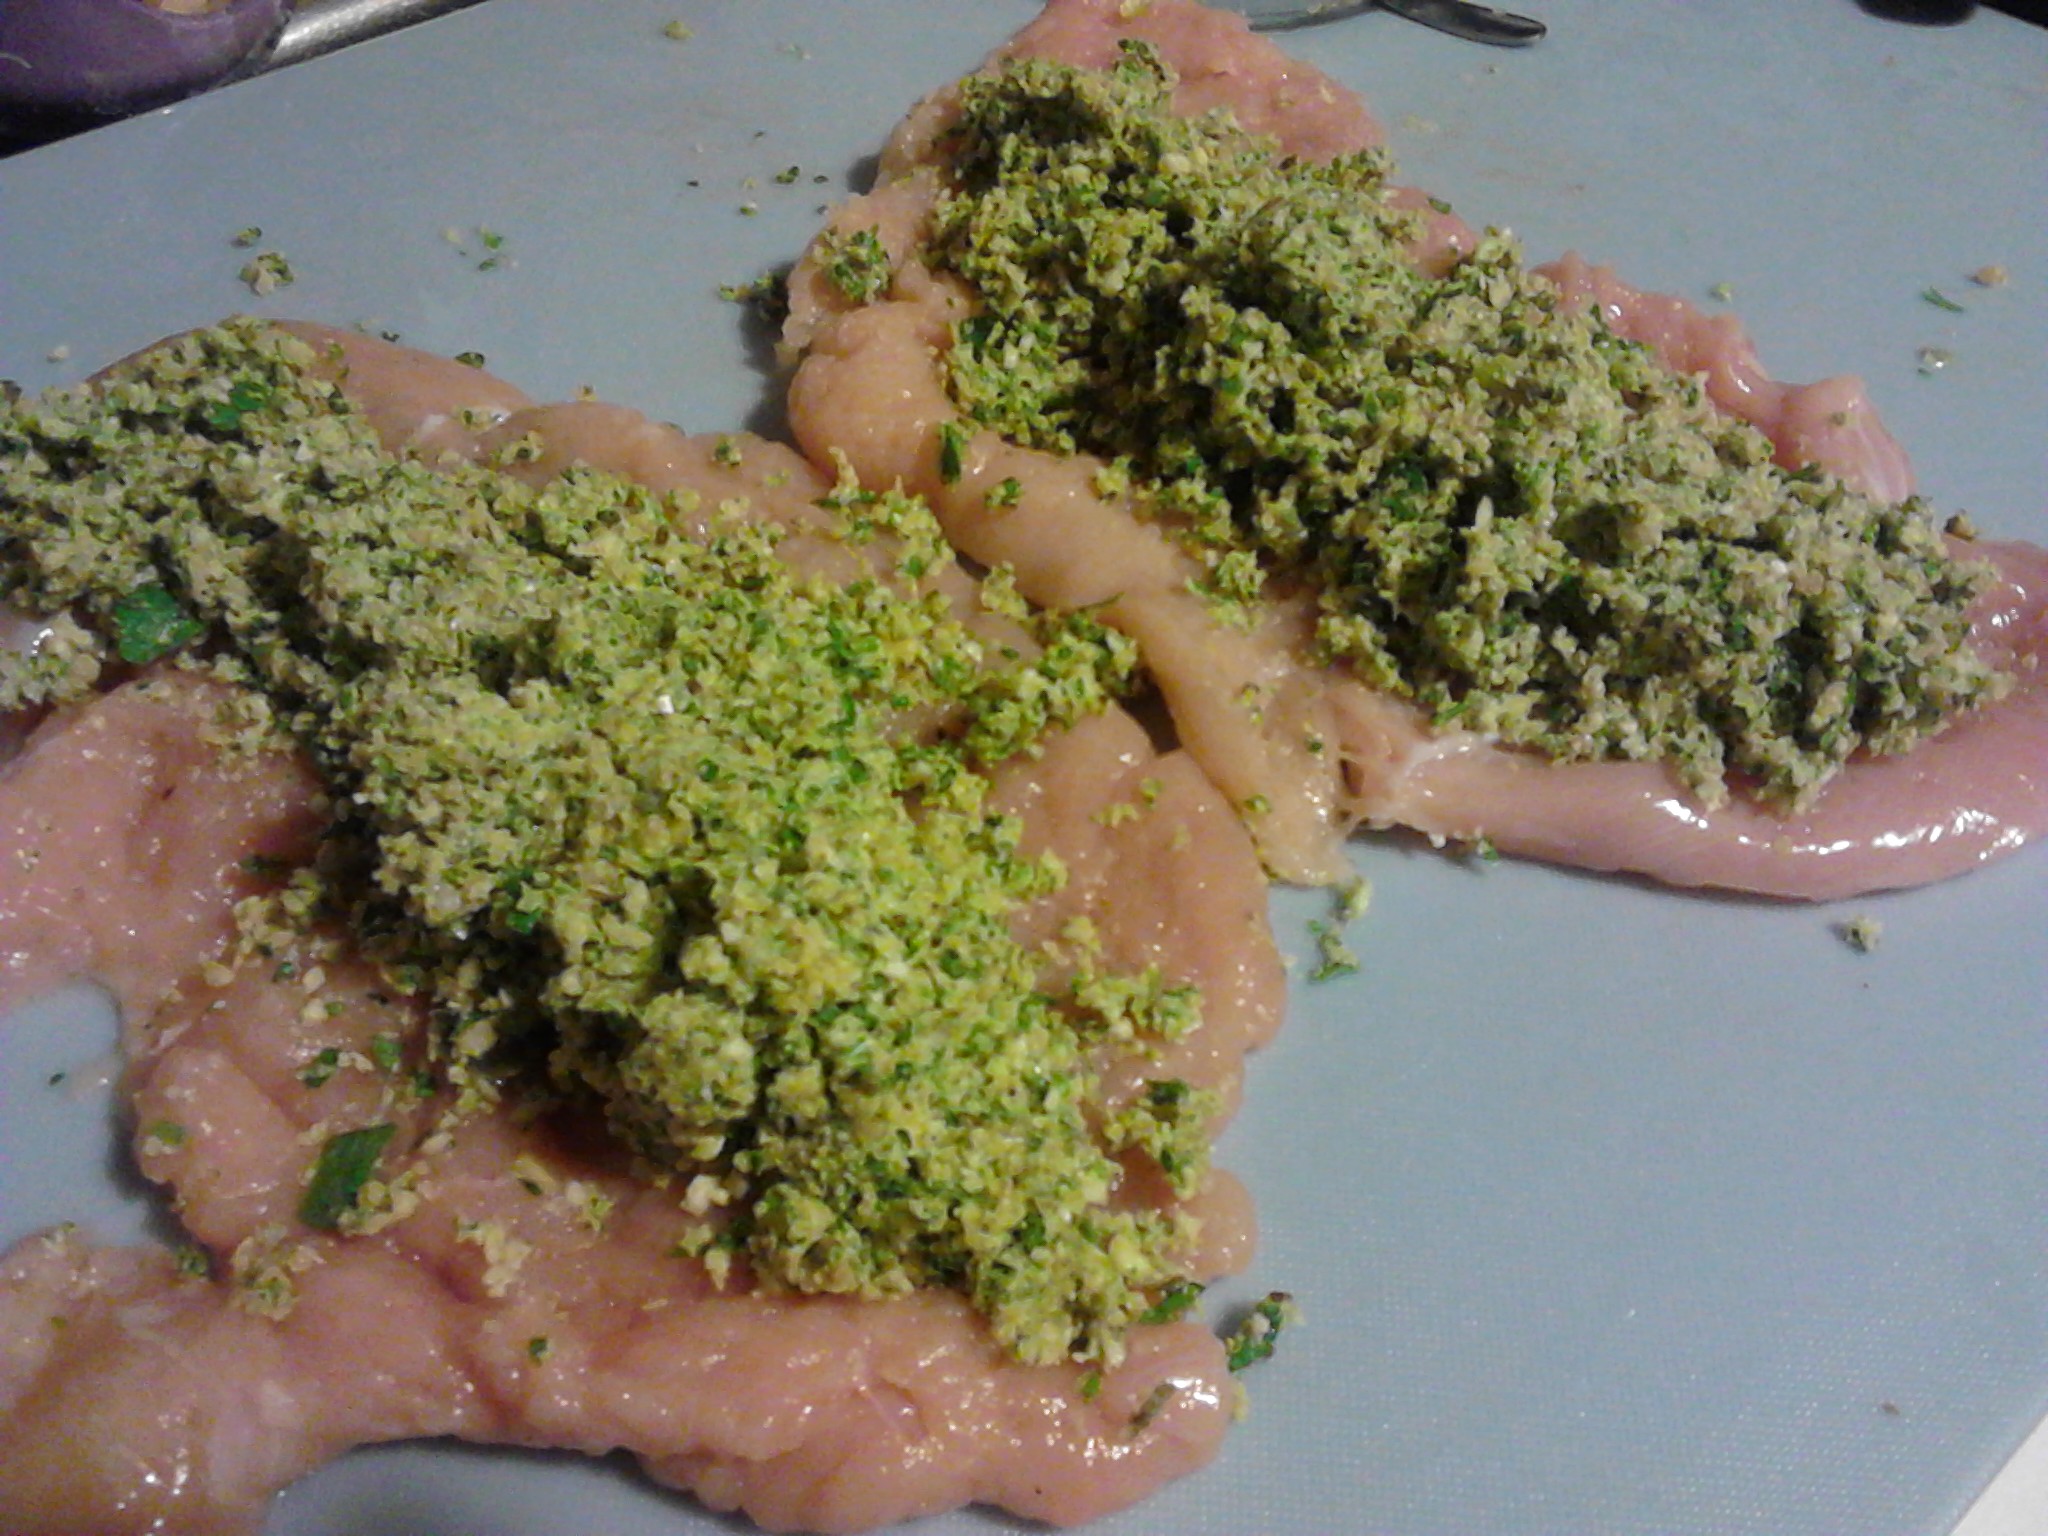
Spread the filling on top of the chicken breasts.
The free range chicken breasts flattened and topped with the filling.Roll the breast around the filling
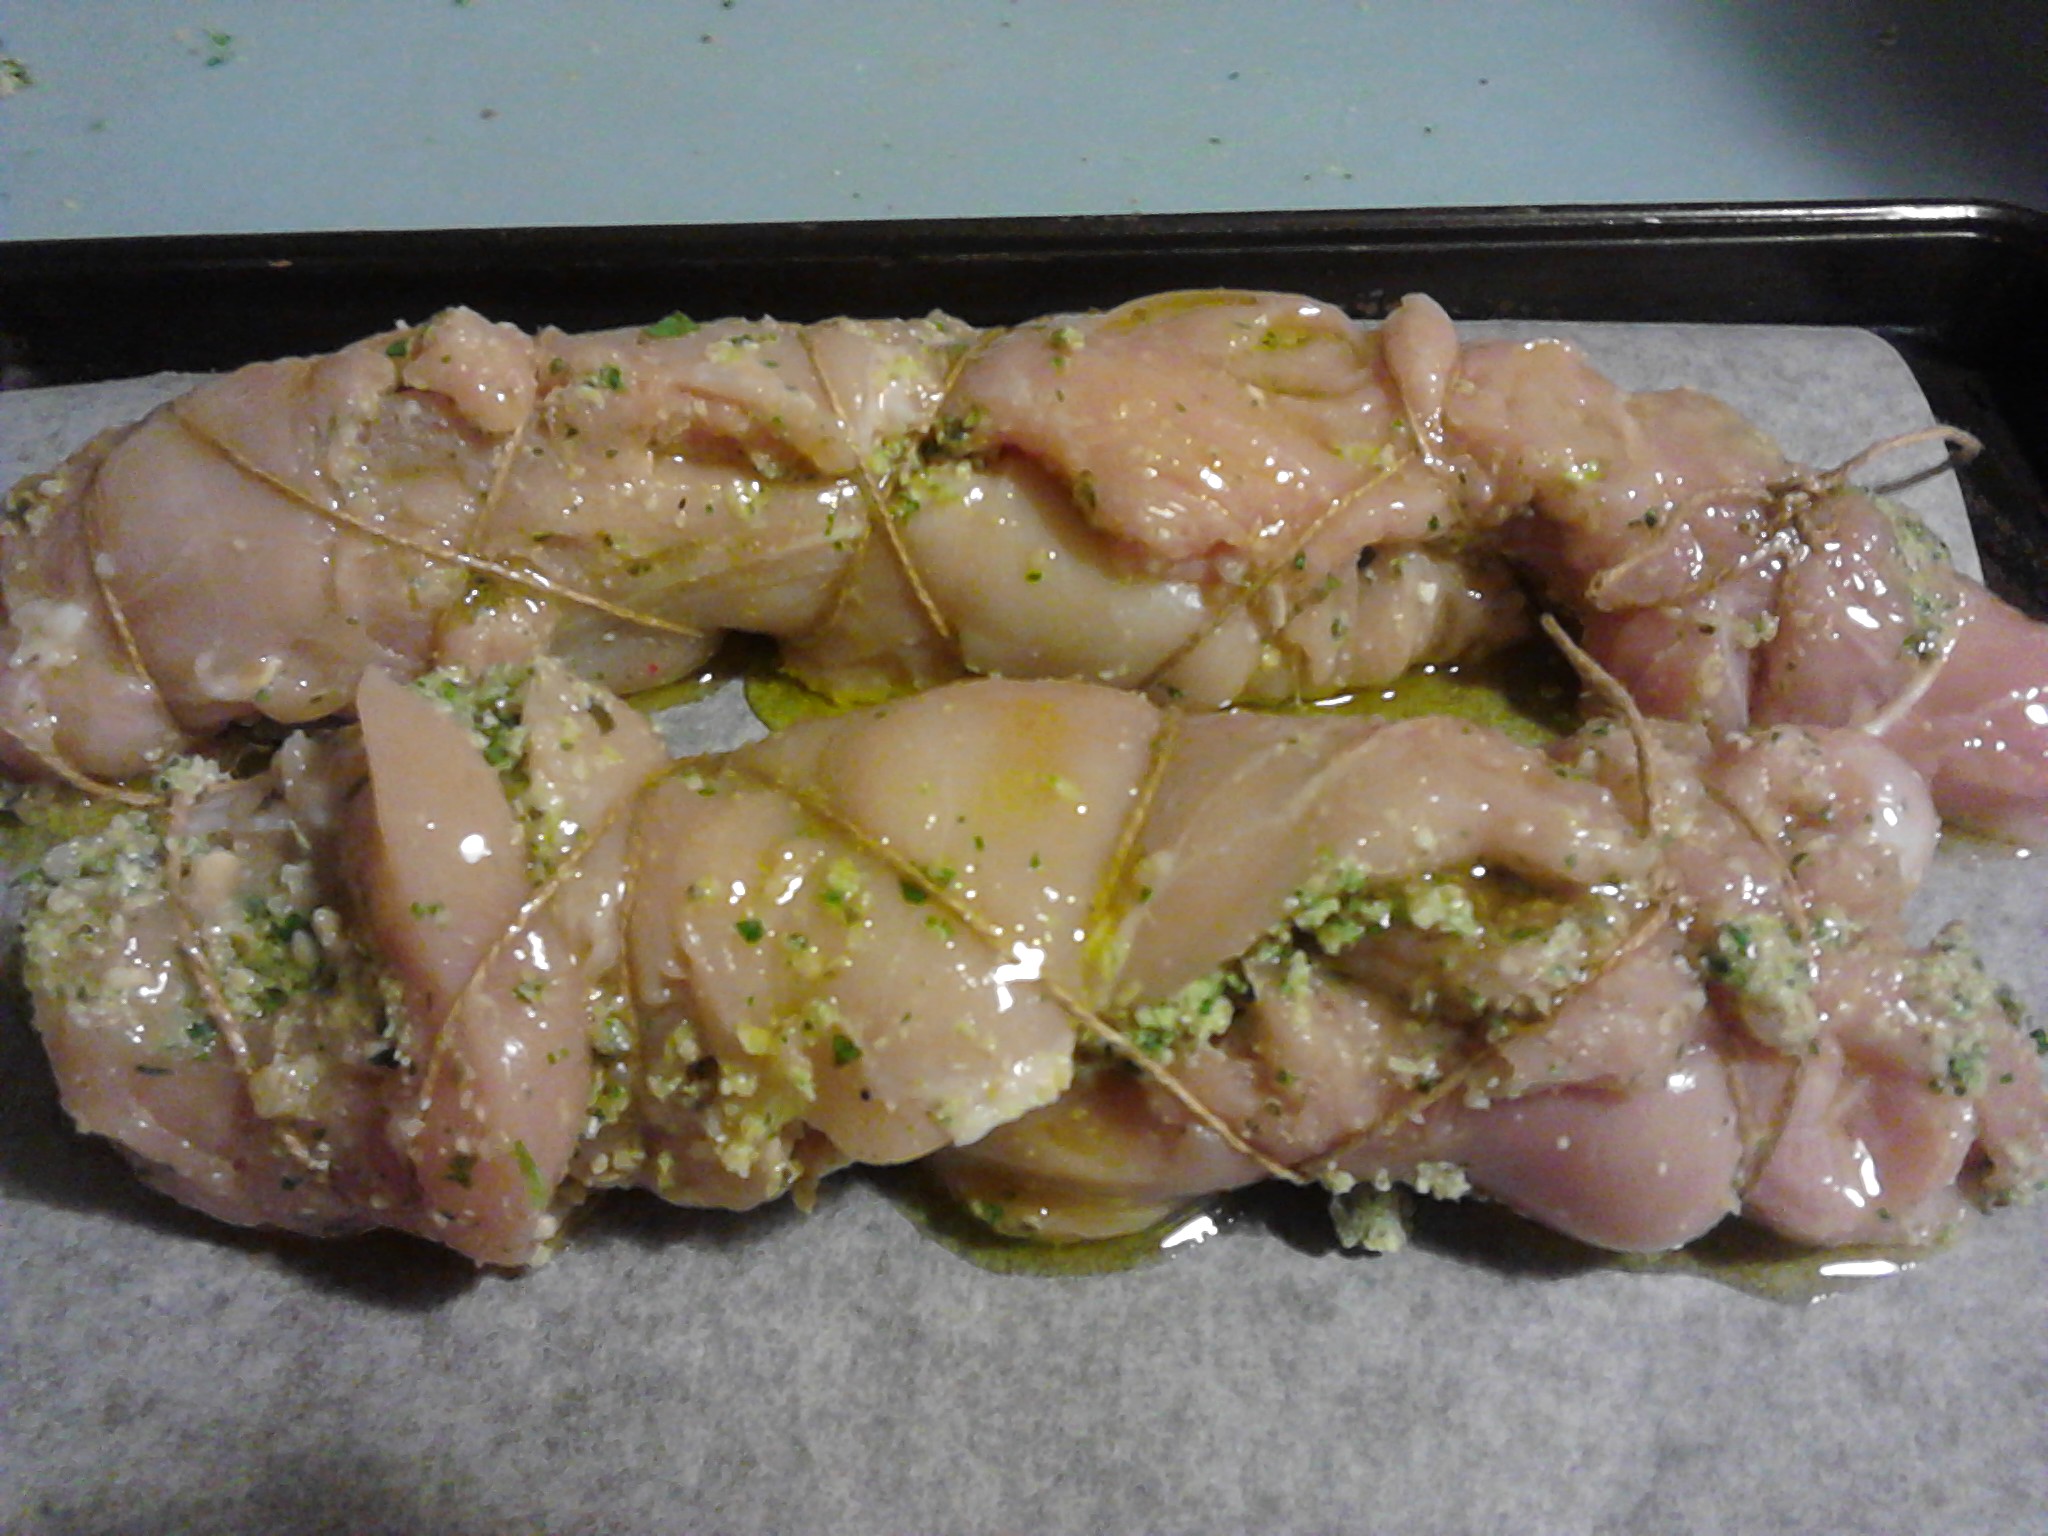
Use kitchen string to gently hold the breast in place. Tie the string at each end and push in any filling that has come out. Gently lift onto a lined baking tray and drizzle with your favourite oil, pink rock salt and black pepper.
The rolled and tied chicken breast drizzled with extra virgin olive oil, pink rock salt and black pepper.
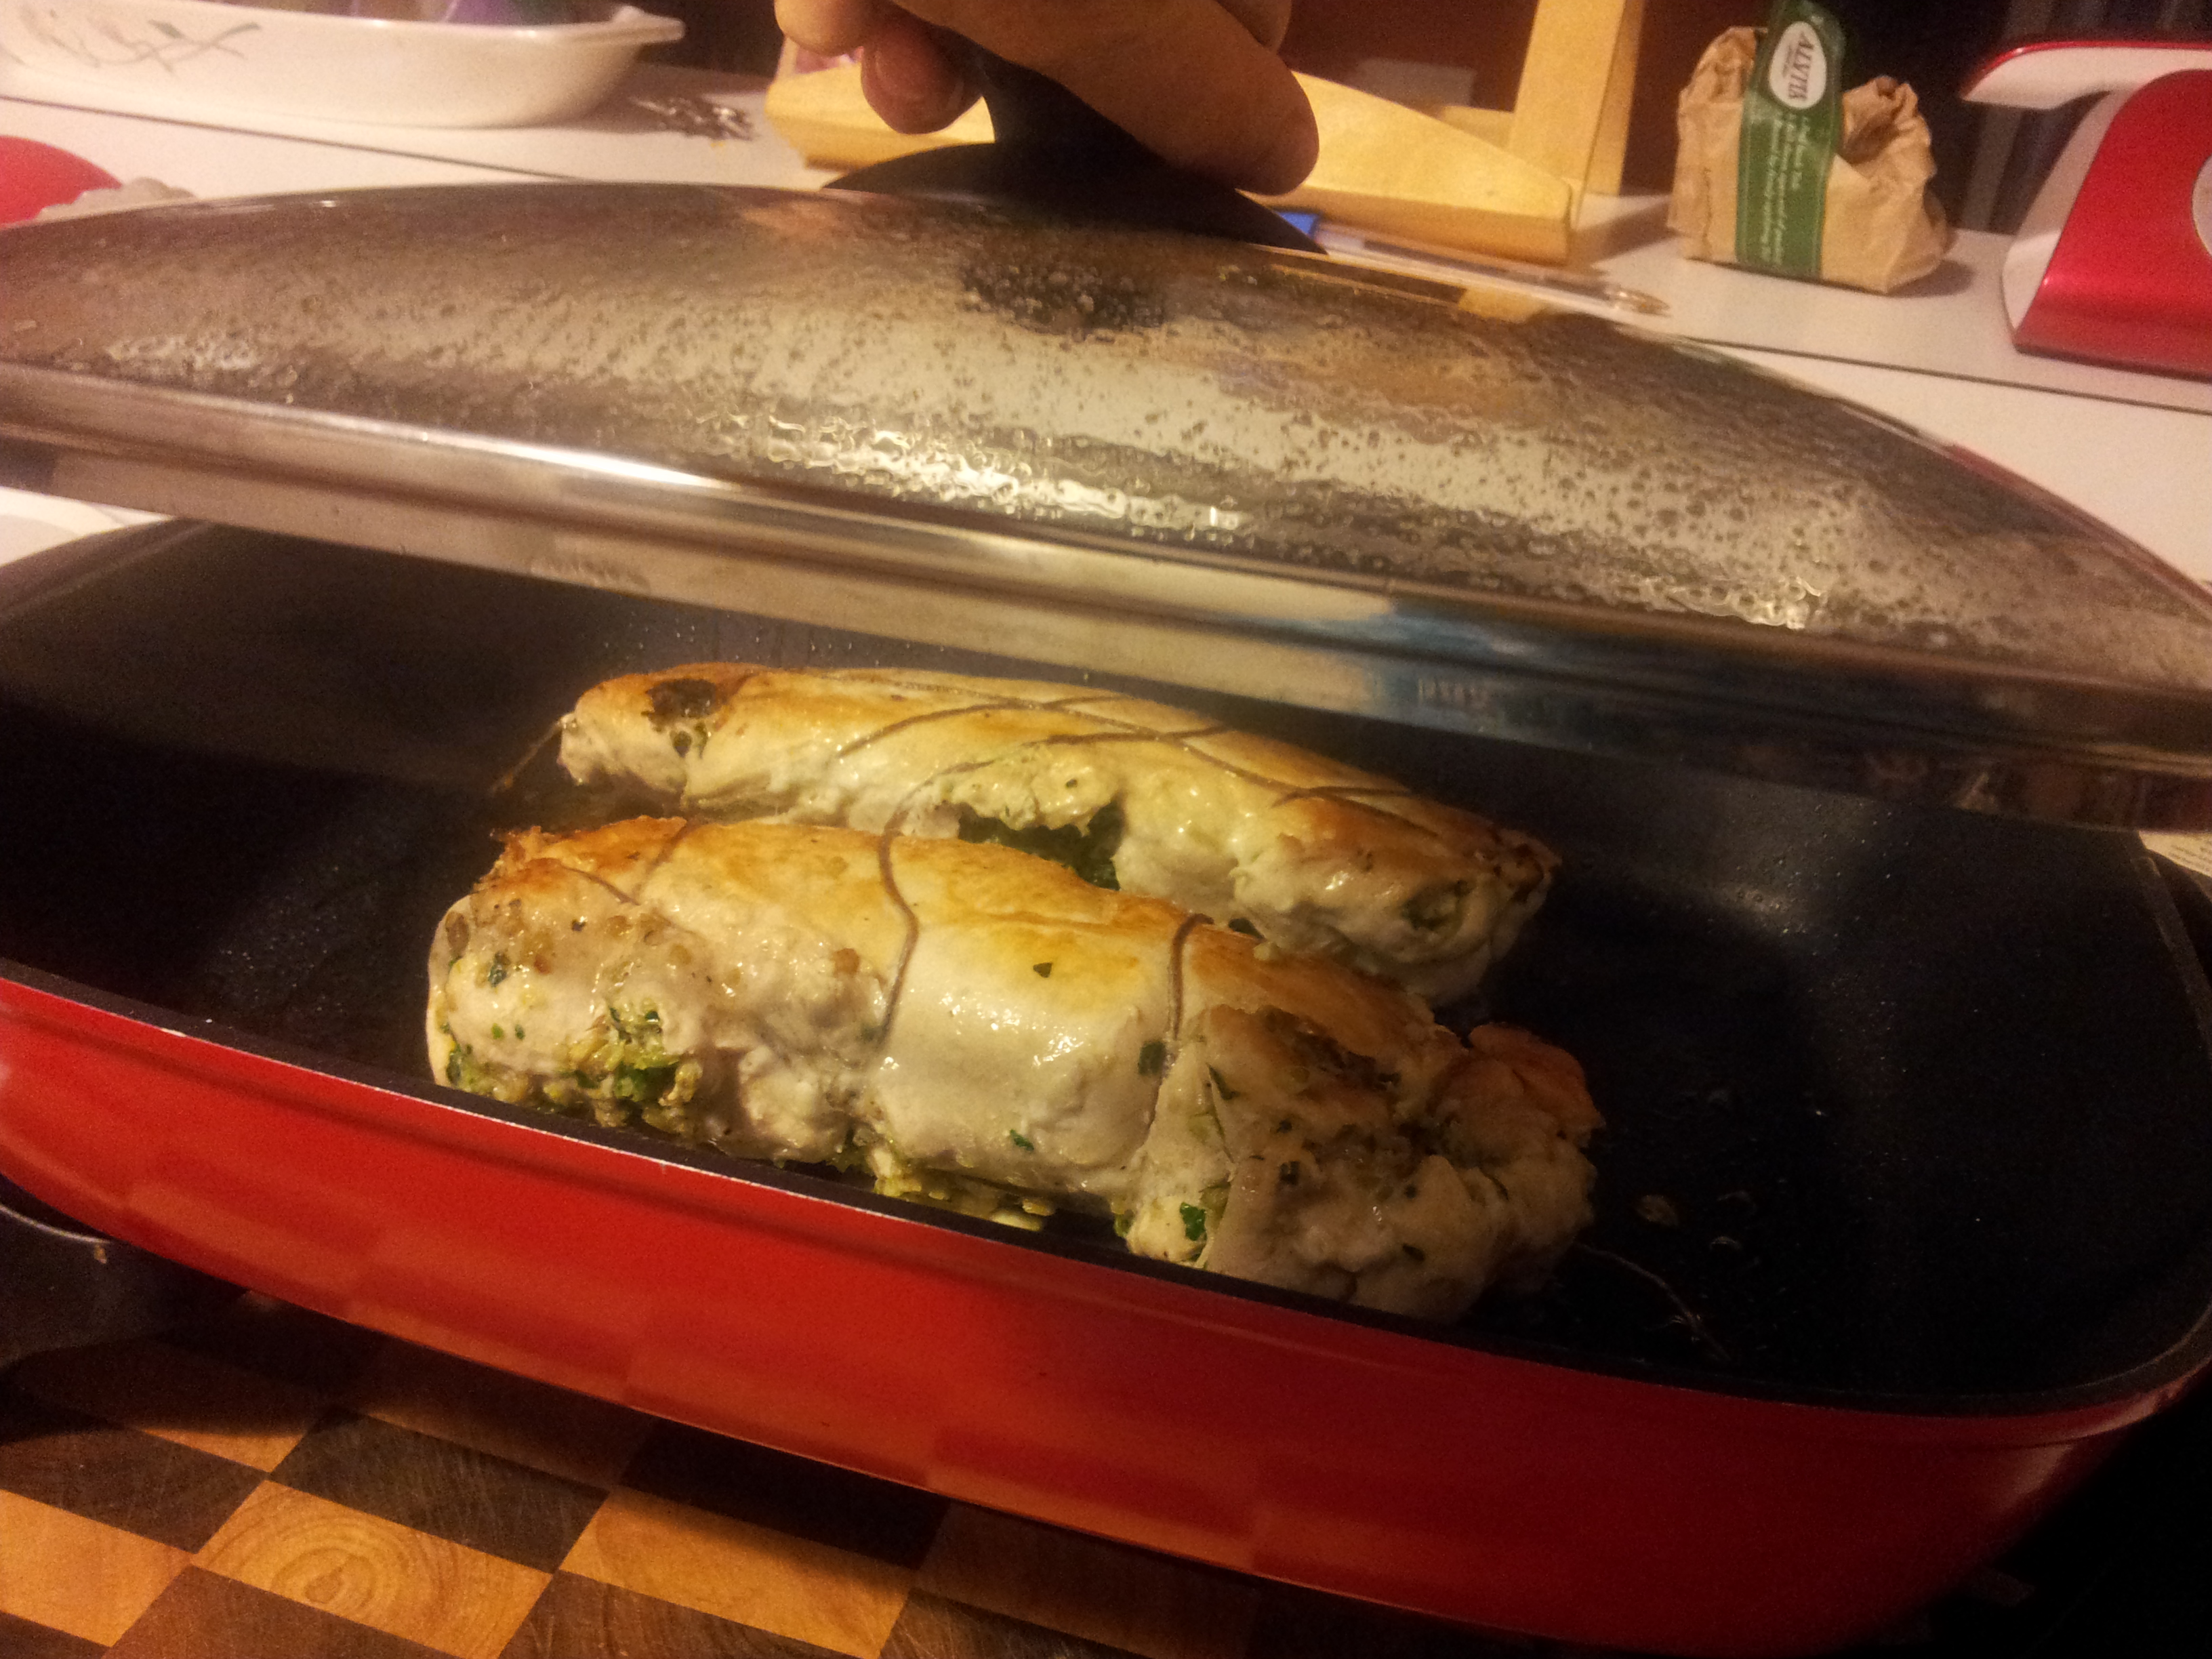
Cover with foil and place in the oven. Cook until the chicken is golden and then take the foil off and let it brown or place under the grill ensuring it doesn’t dry out.
Another option is to pan fry the rolled chicken which will give a more golden appearance.
Cook on a very low heat with the lid on.Both the oven and fry pan methods work well.
Carefully cut the string along the length of the chicken and remove. Let the chicken rest for a few minutes before serving.
Golden and delicious!
There are so many fillings that would be delicious with this recipe. I am going to try a pumpkin or sweet potato filling next, but the combinations are really endless.
Have one for dinner and the second one cold the next day. A great way to add variety to the same dish and the flavours are quite different between the warm and cold versions.
If you have enjoyed this post please share it with a friend. I also post my recipes and wellness tips daily on Instagram at holistic_paleo.
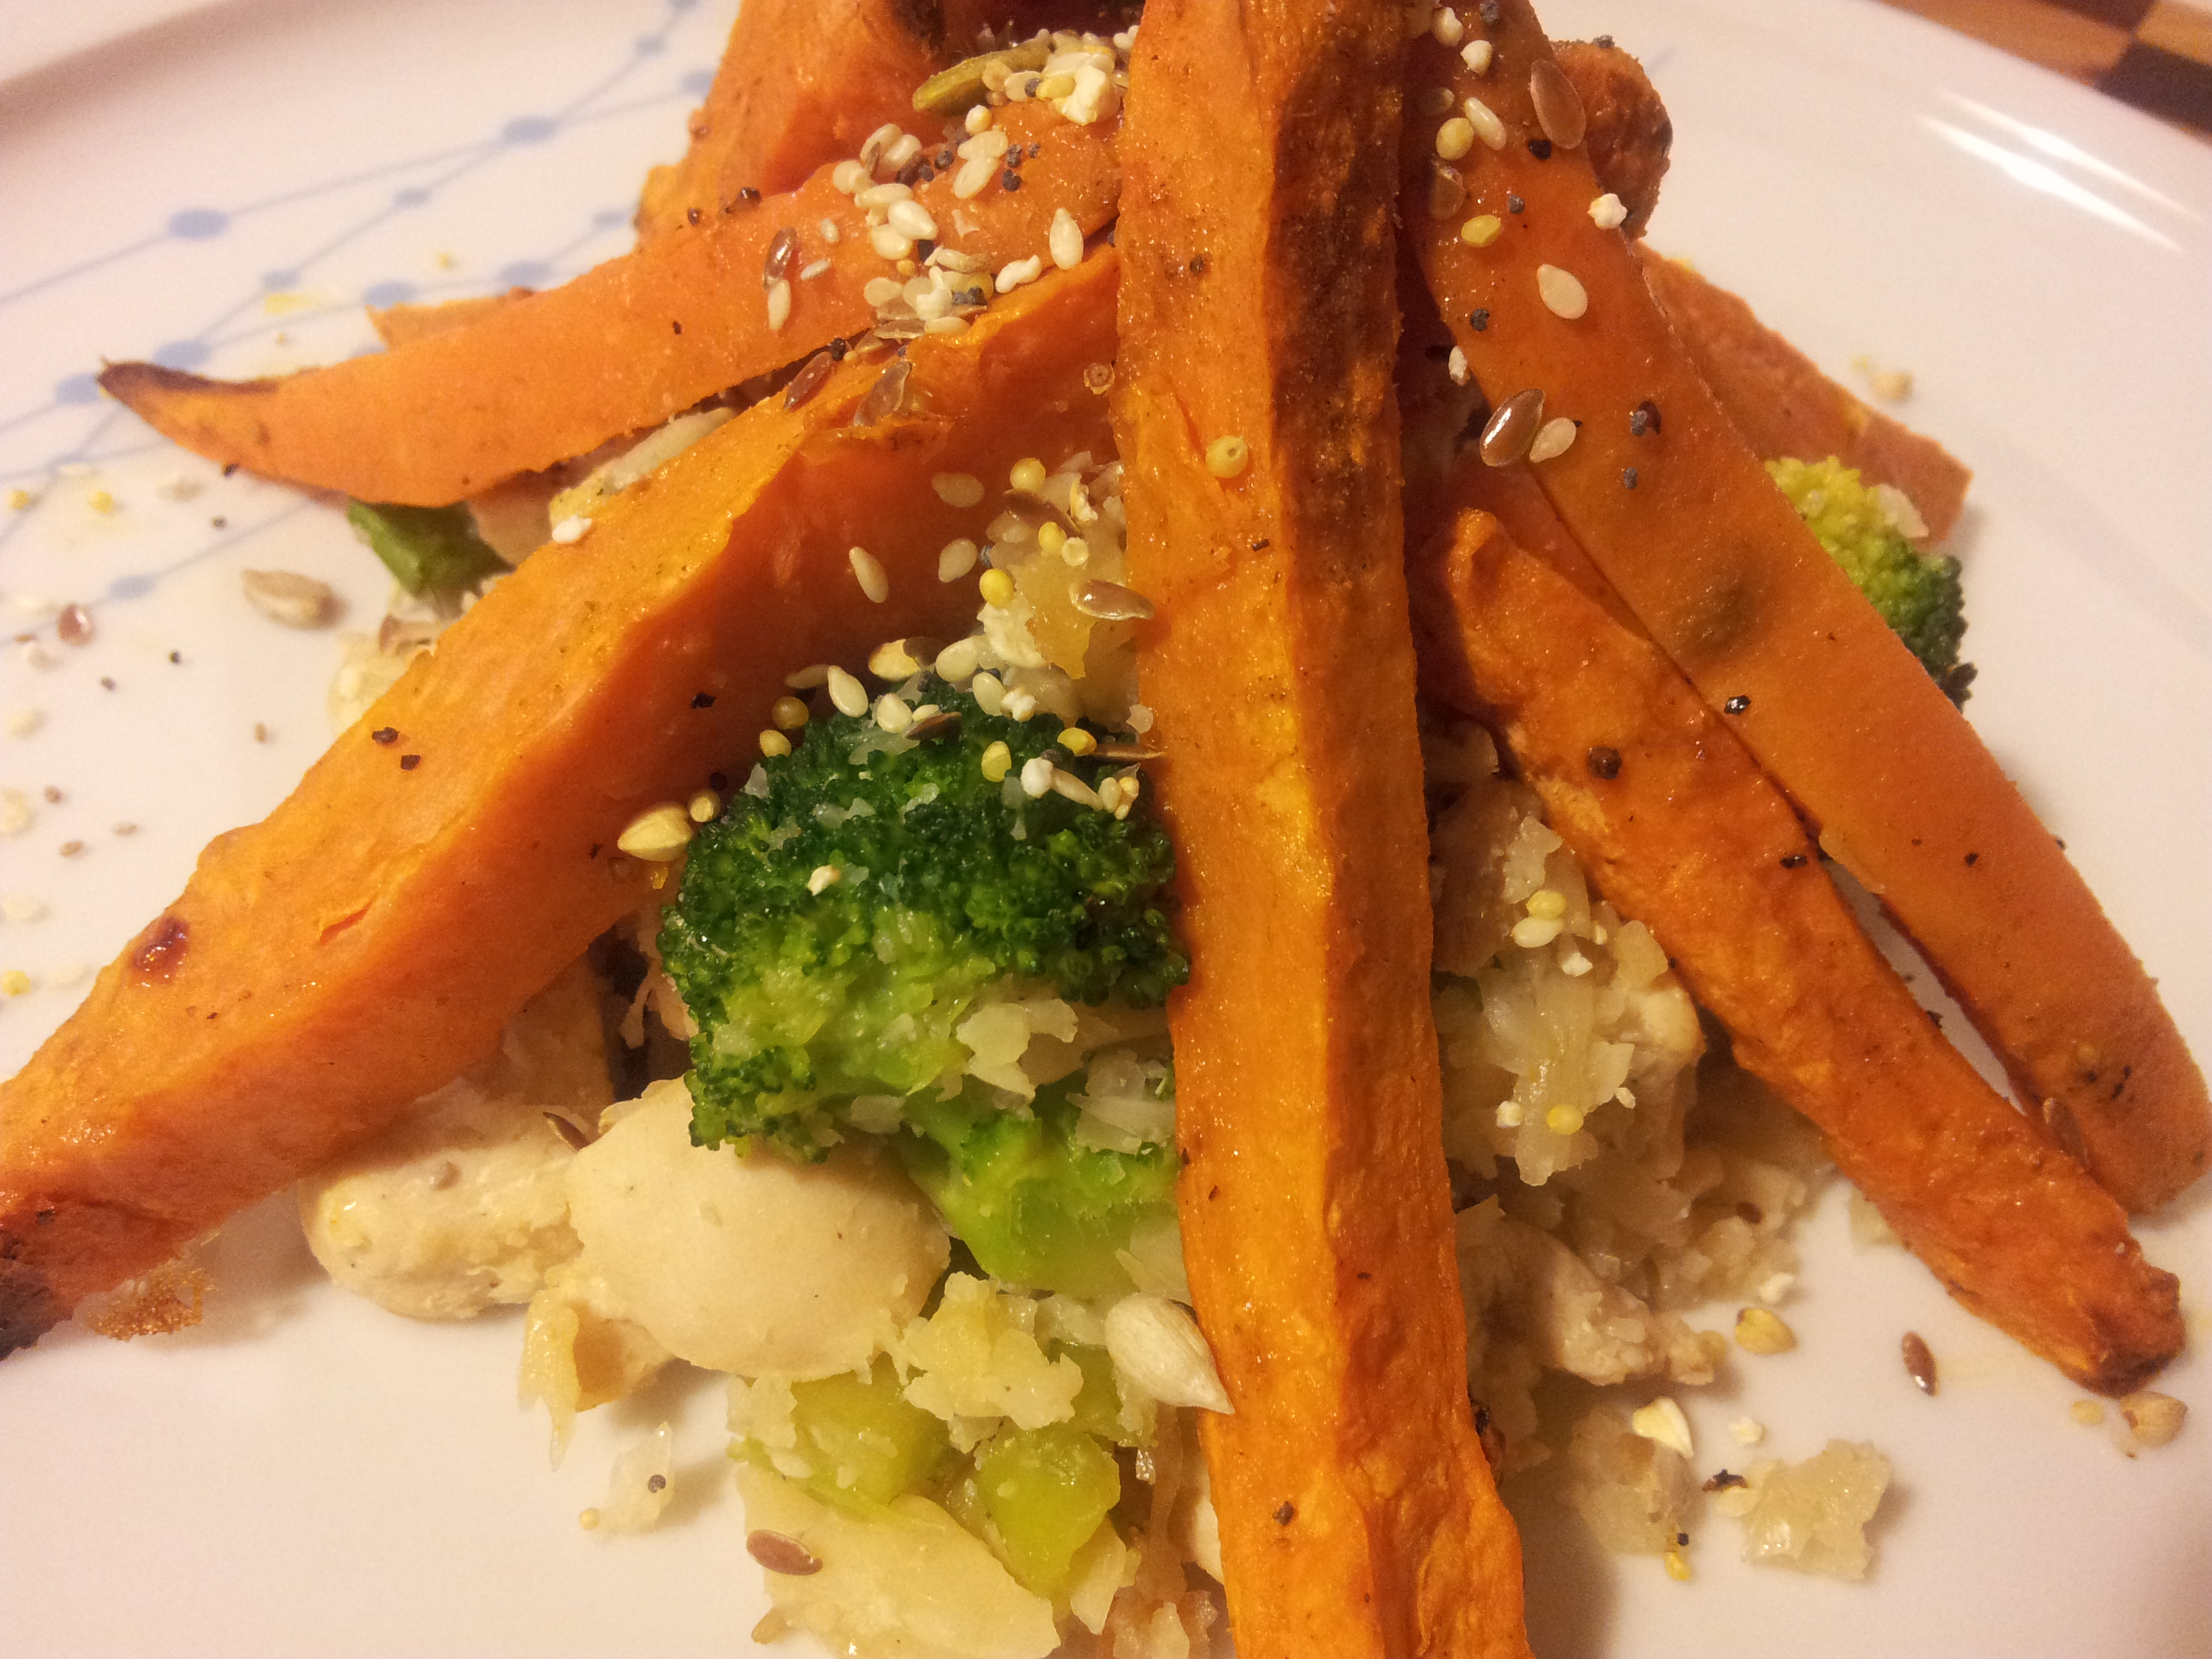
Sweet potatoes are versatile, sweet, nutritious and affordable!
A simple dinner with sweet potato as the centre piece.
Oh, how l love the sweet potato which is also known as kumara or yam. Not much to look at in the shops, but once cooked the flavour is enticing.
The orange sweet potato is always in my fridge.
Sweet Potato is a good source of complex carbohydrates, dietary fibre and beta carotene, and this root vegetable also has modest amounts of Vitamin C, Iron, Calcium, Vitamin B6 and Magnesium.
A sweet potato mash with silverbeet, parsley and spring onion adds some colour to this meal.
Since l stopped eating processed sugar l like to include foods which are naturally sweet as part of my everyday diet. The sweet potato is a lovely addition to a meal because of its beautiful sweet taste, soft texture and bright colour. It is extremely easy to cook with and difficult to ruin. I am amazed at the lovely flavour it adds to baked goods such as cakes and pancakes and although l prefer it cooked it can be a good addition raw to a smoothie.
Sweet Potato noodles with soupSweet Potato and Walnut cake.A Paleo, gluten, dairy sugar free pancake with grated sweet potato mixed through the batter.Raw sweet potato in a juice tastes a lot like carrot and makes it creamy.
I can’t remember when l first ate a sweet potato but it certainly wasn’t until l was an adult. It has some similarities in flavour and colour to the pumpkin but holds together better when cooked and is especially delicious cut into chips. Sweet Potatoes can be bought quite small or enormously large, and the surprising thing is that in my experience the flavour is the same whatever size you buy. They are also available with a red skin and a white flesh and this is one of those times when your taste buds can get very confused as the taste is the same as the orange version. I have to admit here that l have on occasion tricked my children into thinking they were eating normal potato when in fact it was the red sweet potato just to get them to try a new vegetable.
How many ways can one vegetable be used in recipes?
Here are a few more pictures of how l have used the sweet potato in my cooking:
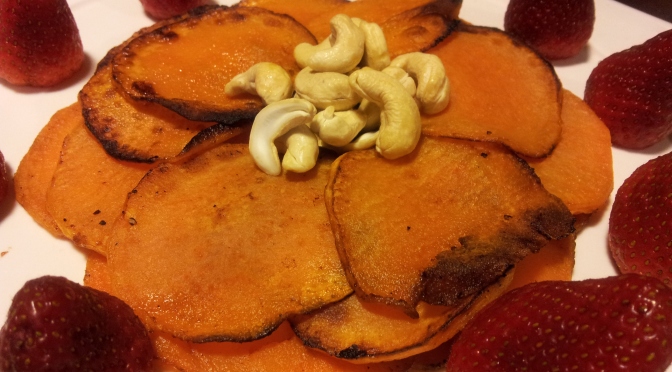
Sweet Potato Chips as a snack. Coat them in olive or coconut oil and season before cooking.Sweet Potato and vegetable soup. See the main meals section for a soup recipe.Sweet potato chips are my favourite.Sweet Potato casserole. This has chicken, vegetables, coconut and spices. It cooks in the slow cooker all day and is lovely. The recipe is in the main meals section.A gluten free pizza with sweet potato.
I hope you can enjoy the sweet potato as much as l do and make it a regular part of your meals.
Roasted sweet potato with salmon is delicious here. I roasted it with the skin on and then sliced it before serving.Vegetarian lasagna with sweet potato layers.
If you have enjoyed this post please share with a friend. You can follow me daily on Instagram at holistic_paleo.
Here is a link to a great online book store where you can purchase some Paleo and wellness books.
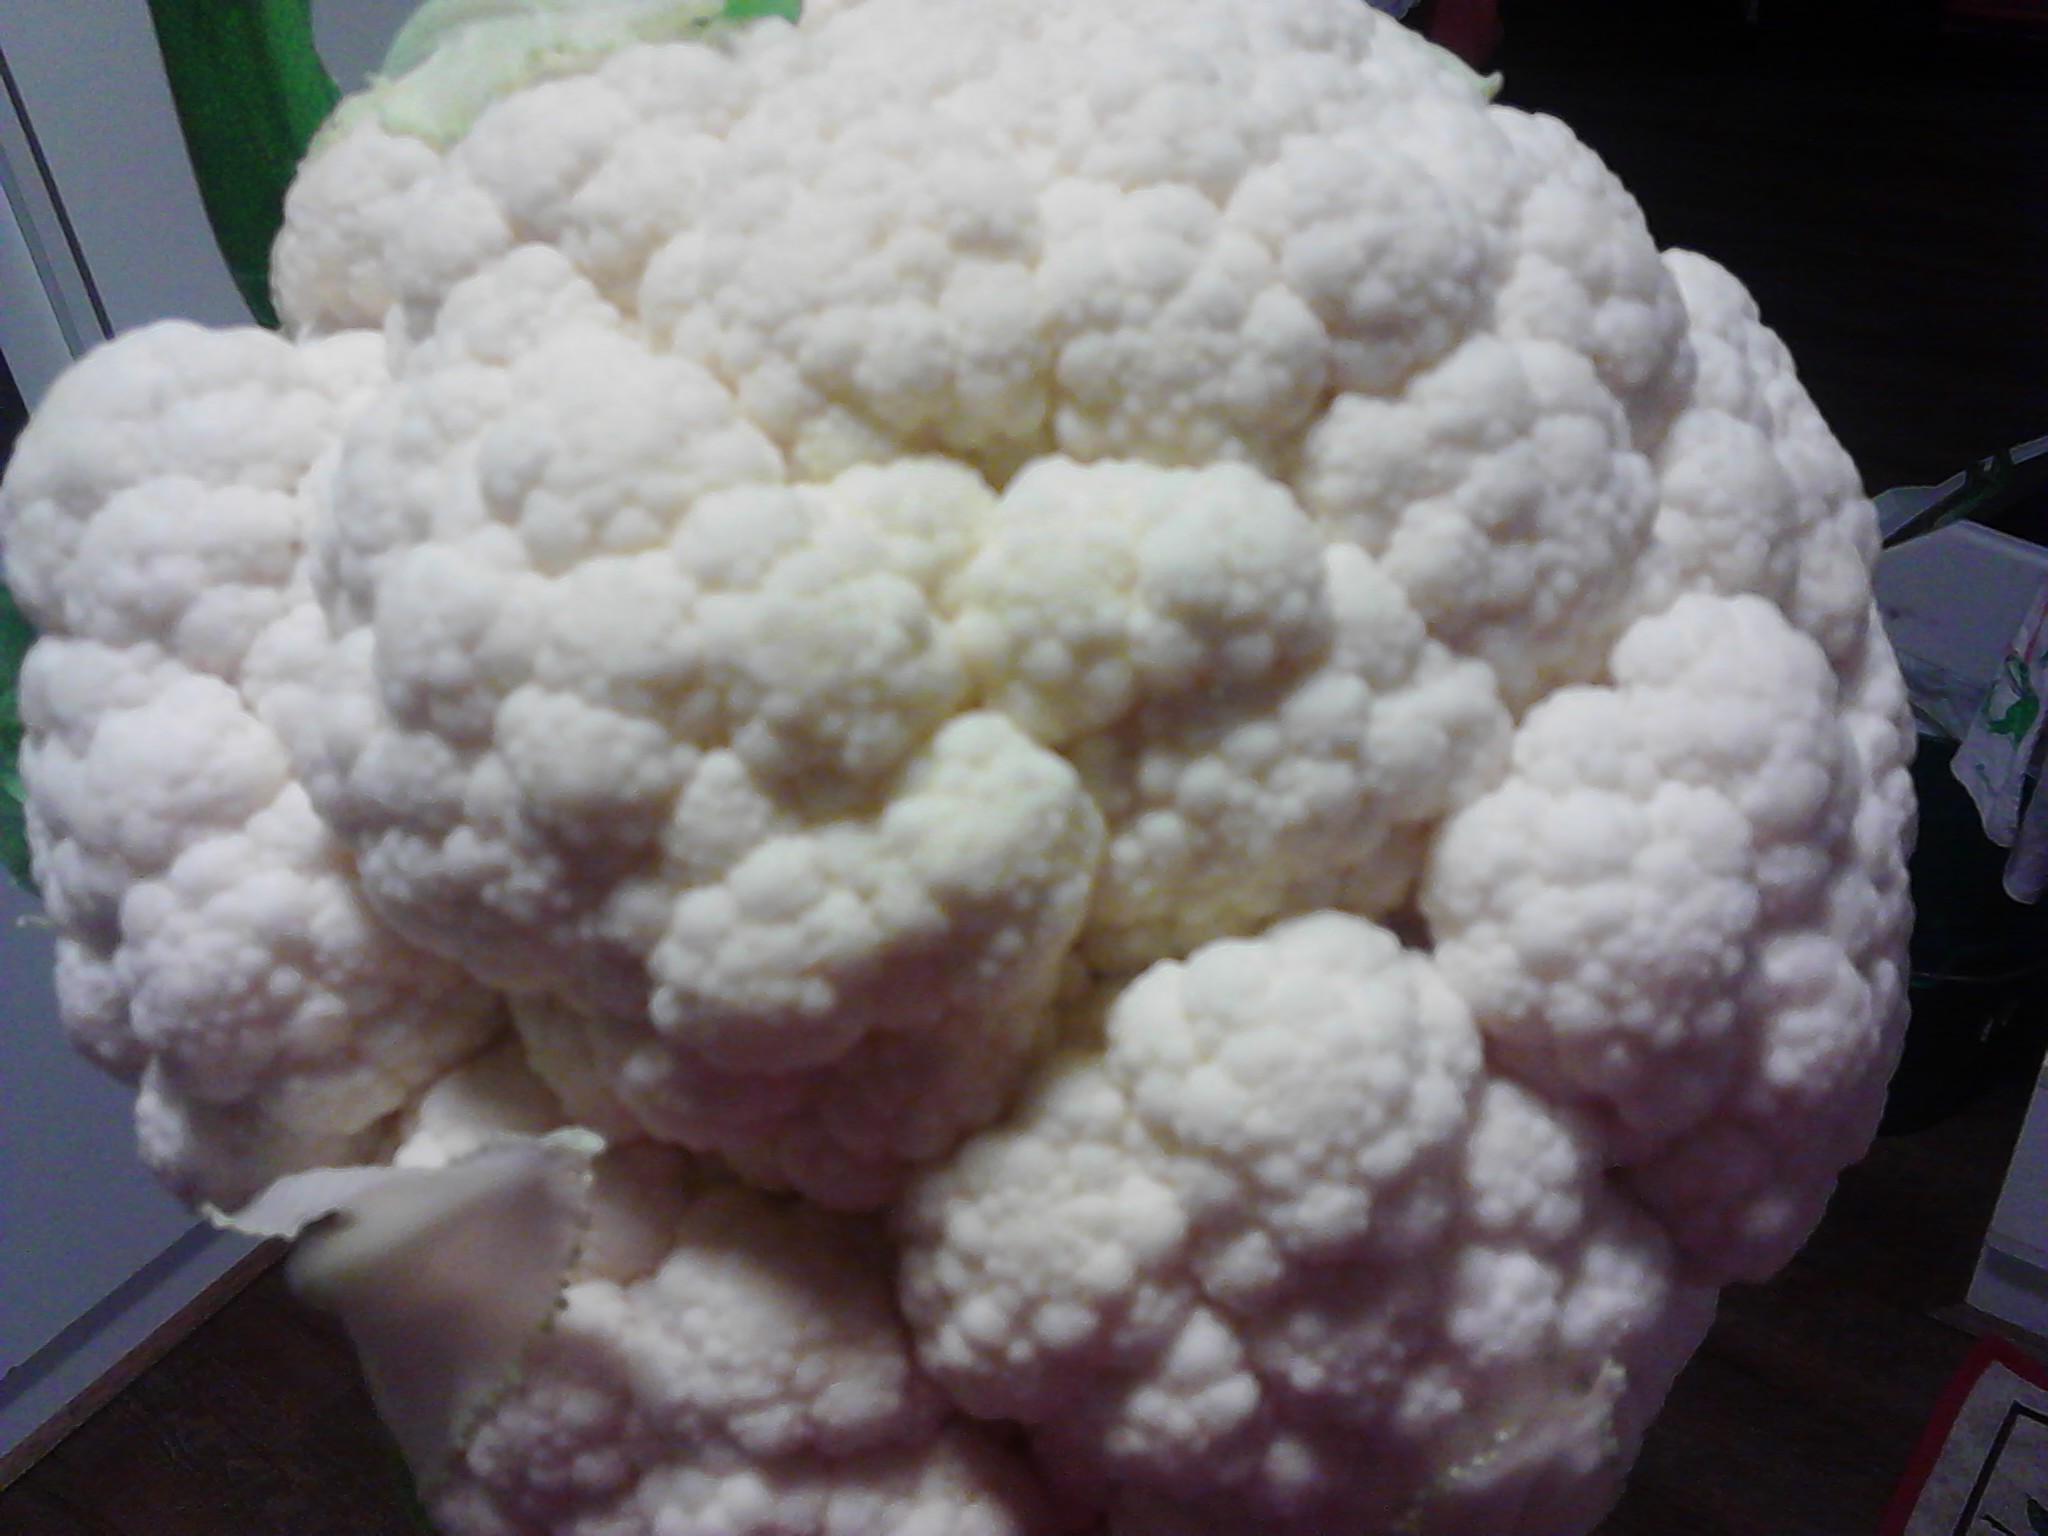
A budget friendly, nutritious and easy to prepare meal. I used a whole cauliflower for this recipe and was amazed at the plentiful quantity it made. Cauliflower rice is a great alternative to real rice, and you will be amazed at how similar it looks and tastes.
Enough to feed the whole family.
Ensure that you use fresh ingredients. You can use your favourite vegetables but l used mostly greens in this one such as bok choy, celery, broccoli, spring onion tops and snow peas, plus some carrot and bean sprouts.
A beautiful fresh cauliflower.
This is a dish that can be pre-prepared early in the day so that at dinner time it will take a very short time to cook. It is a matter of processing the cauliflower, washing and chopping all of the vegetables and dicing the chicken. This can all then be kept in separate bowls or containers in the fridge until required.
Preparation is the key! One whole cauliflower, 2 free range chicken breasts and your favourite vegetables.
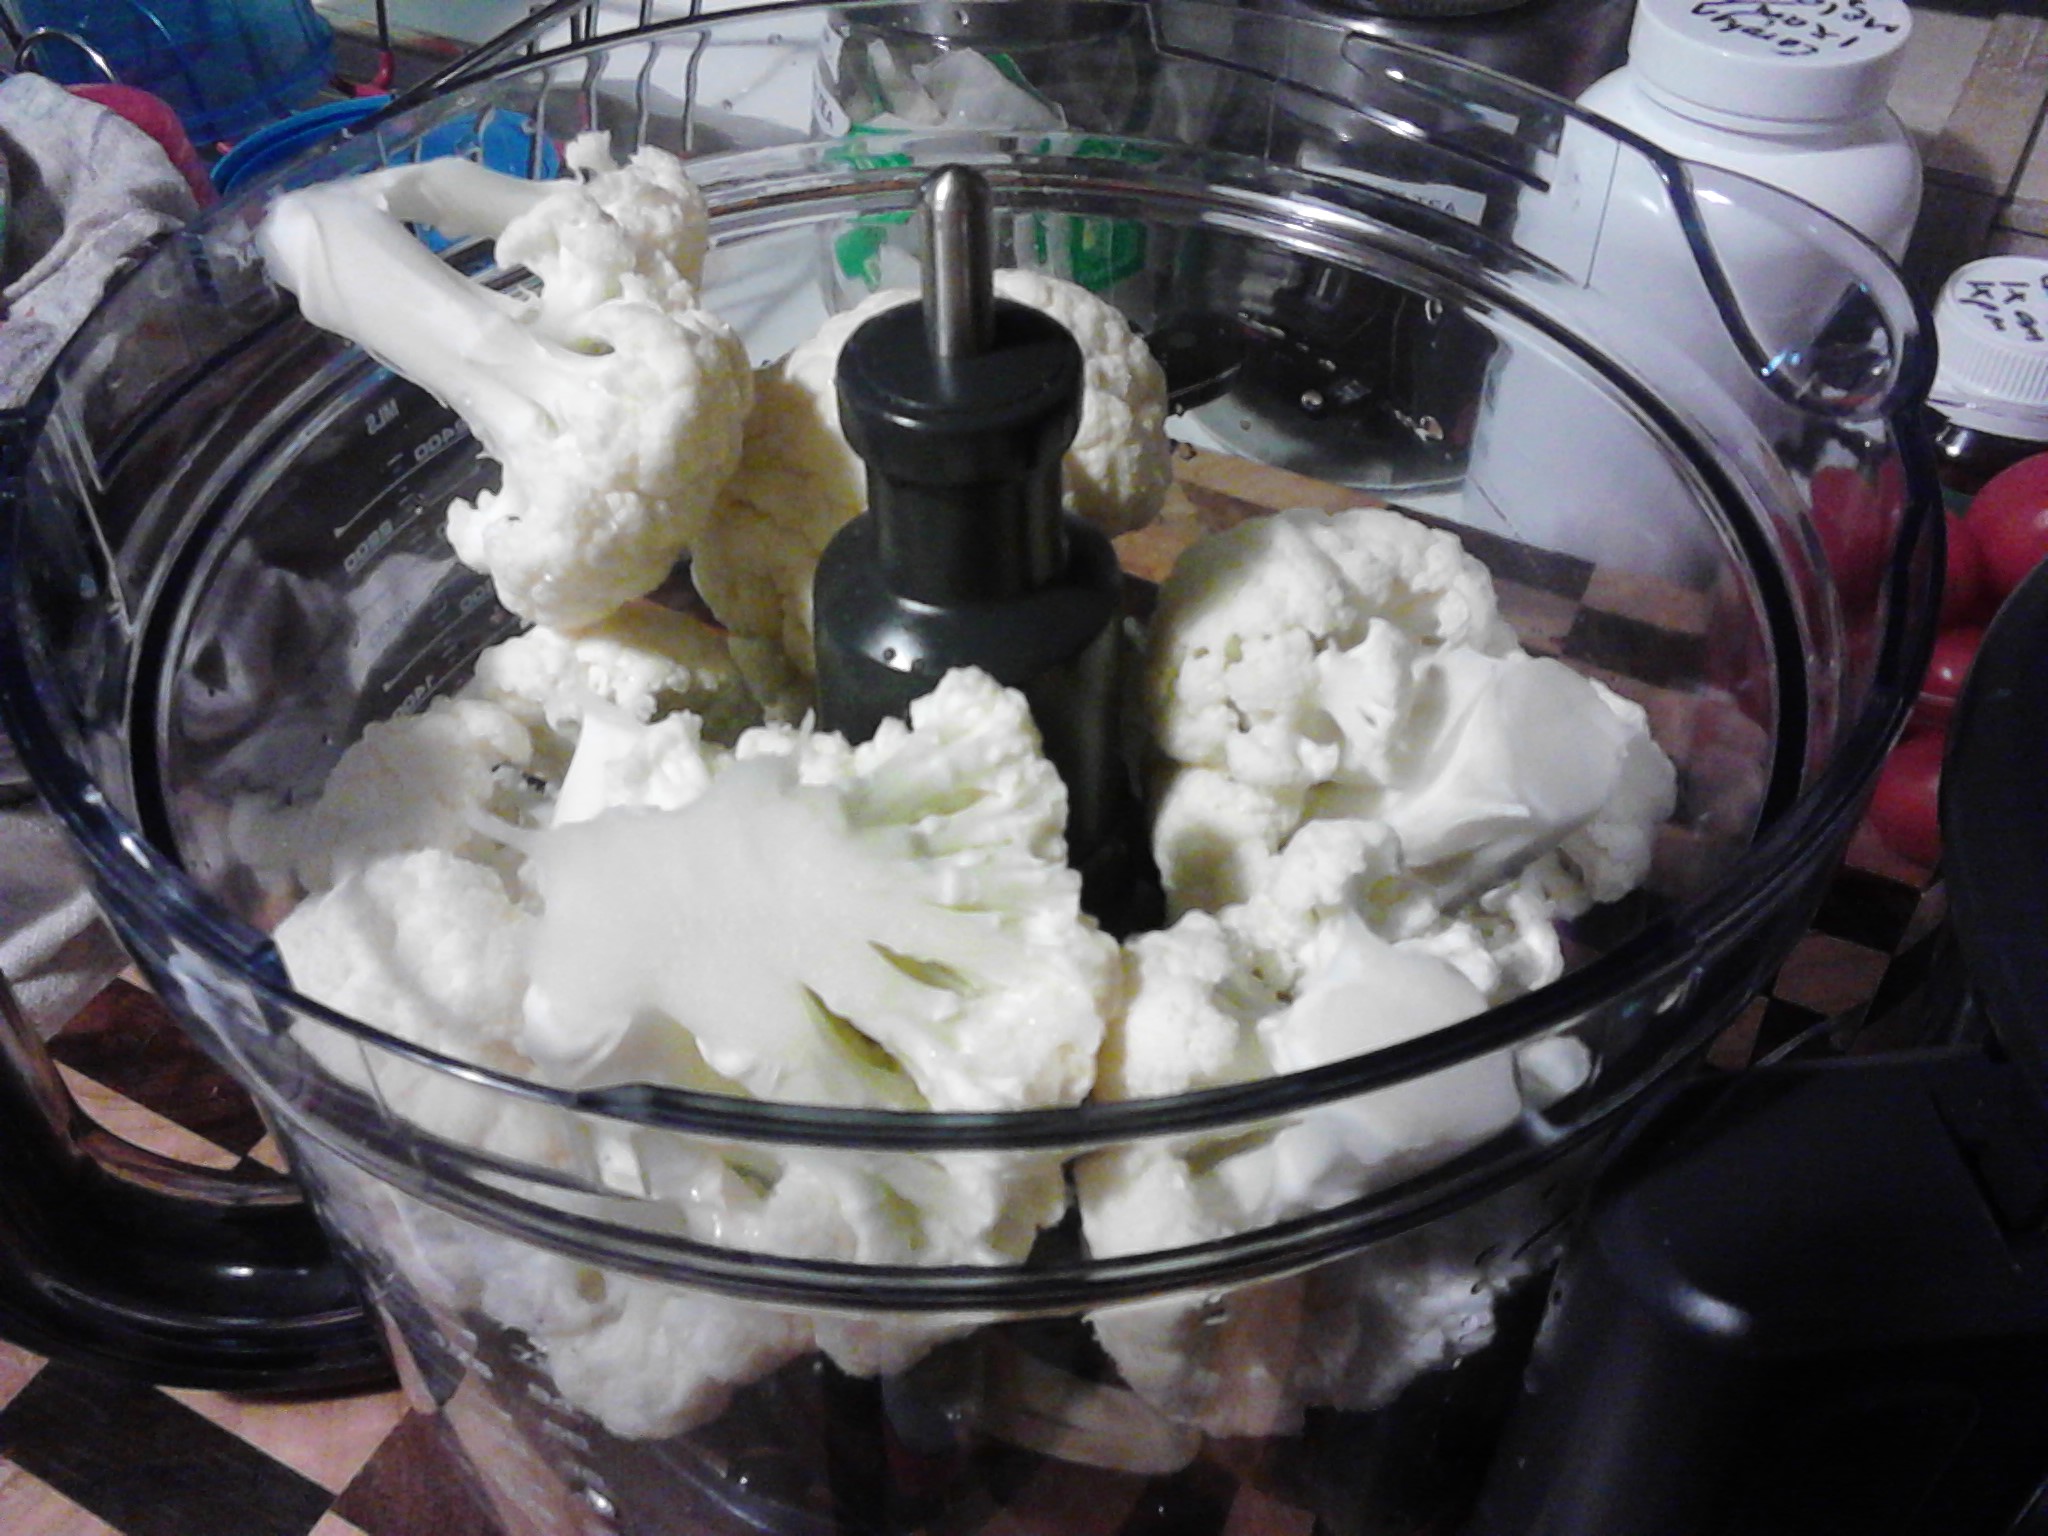
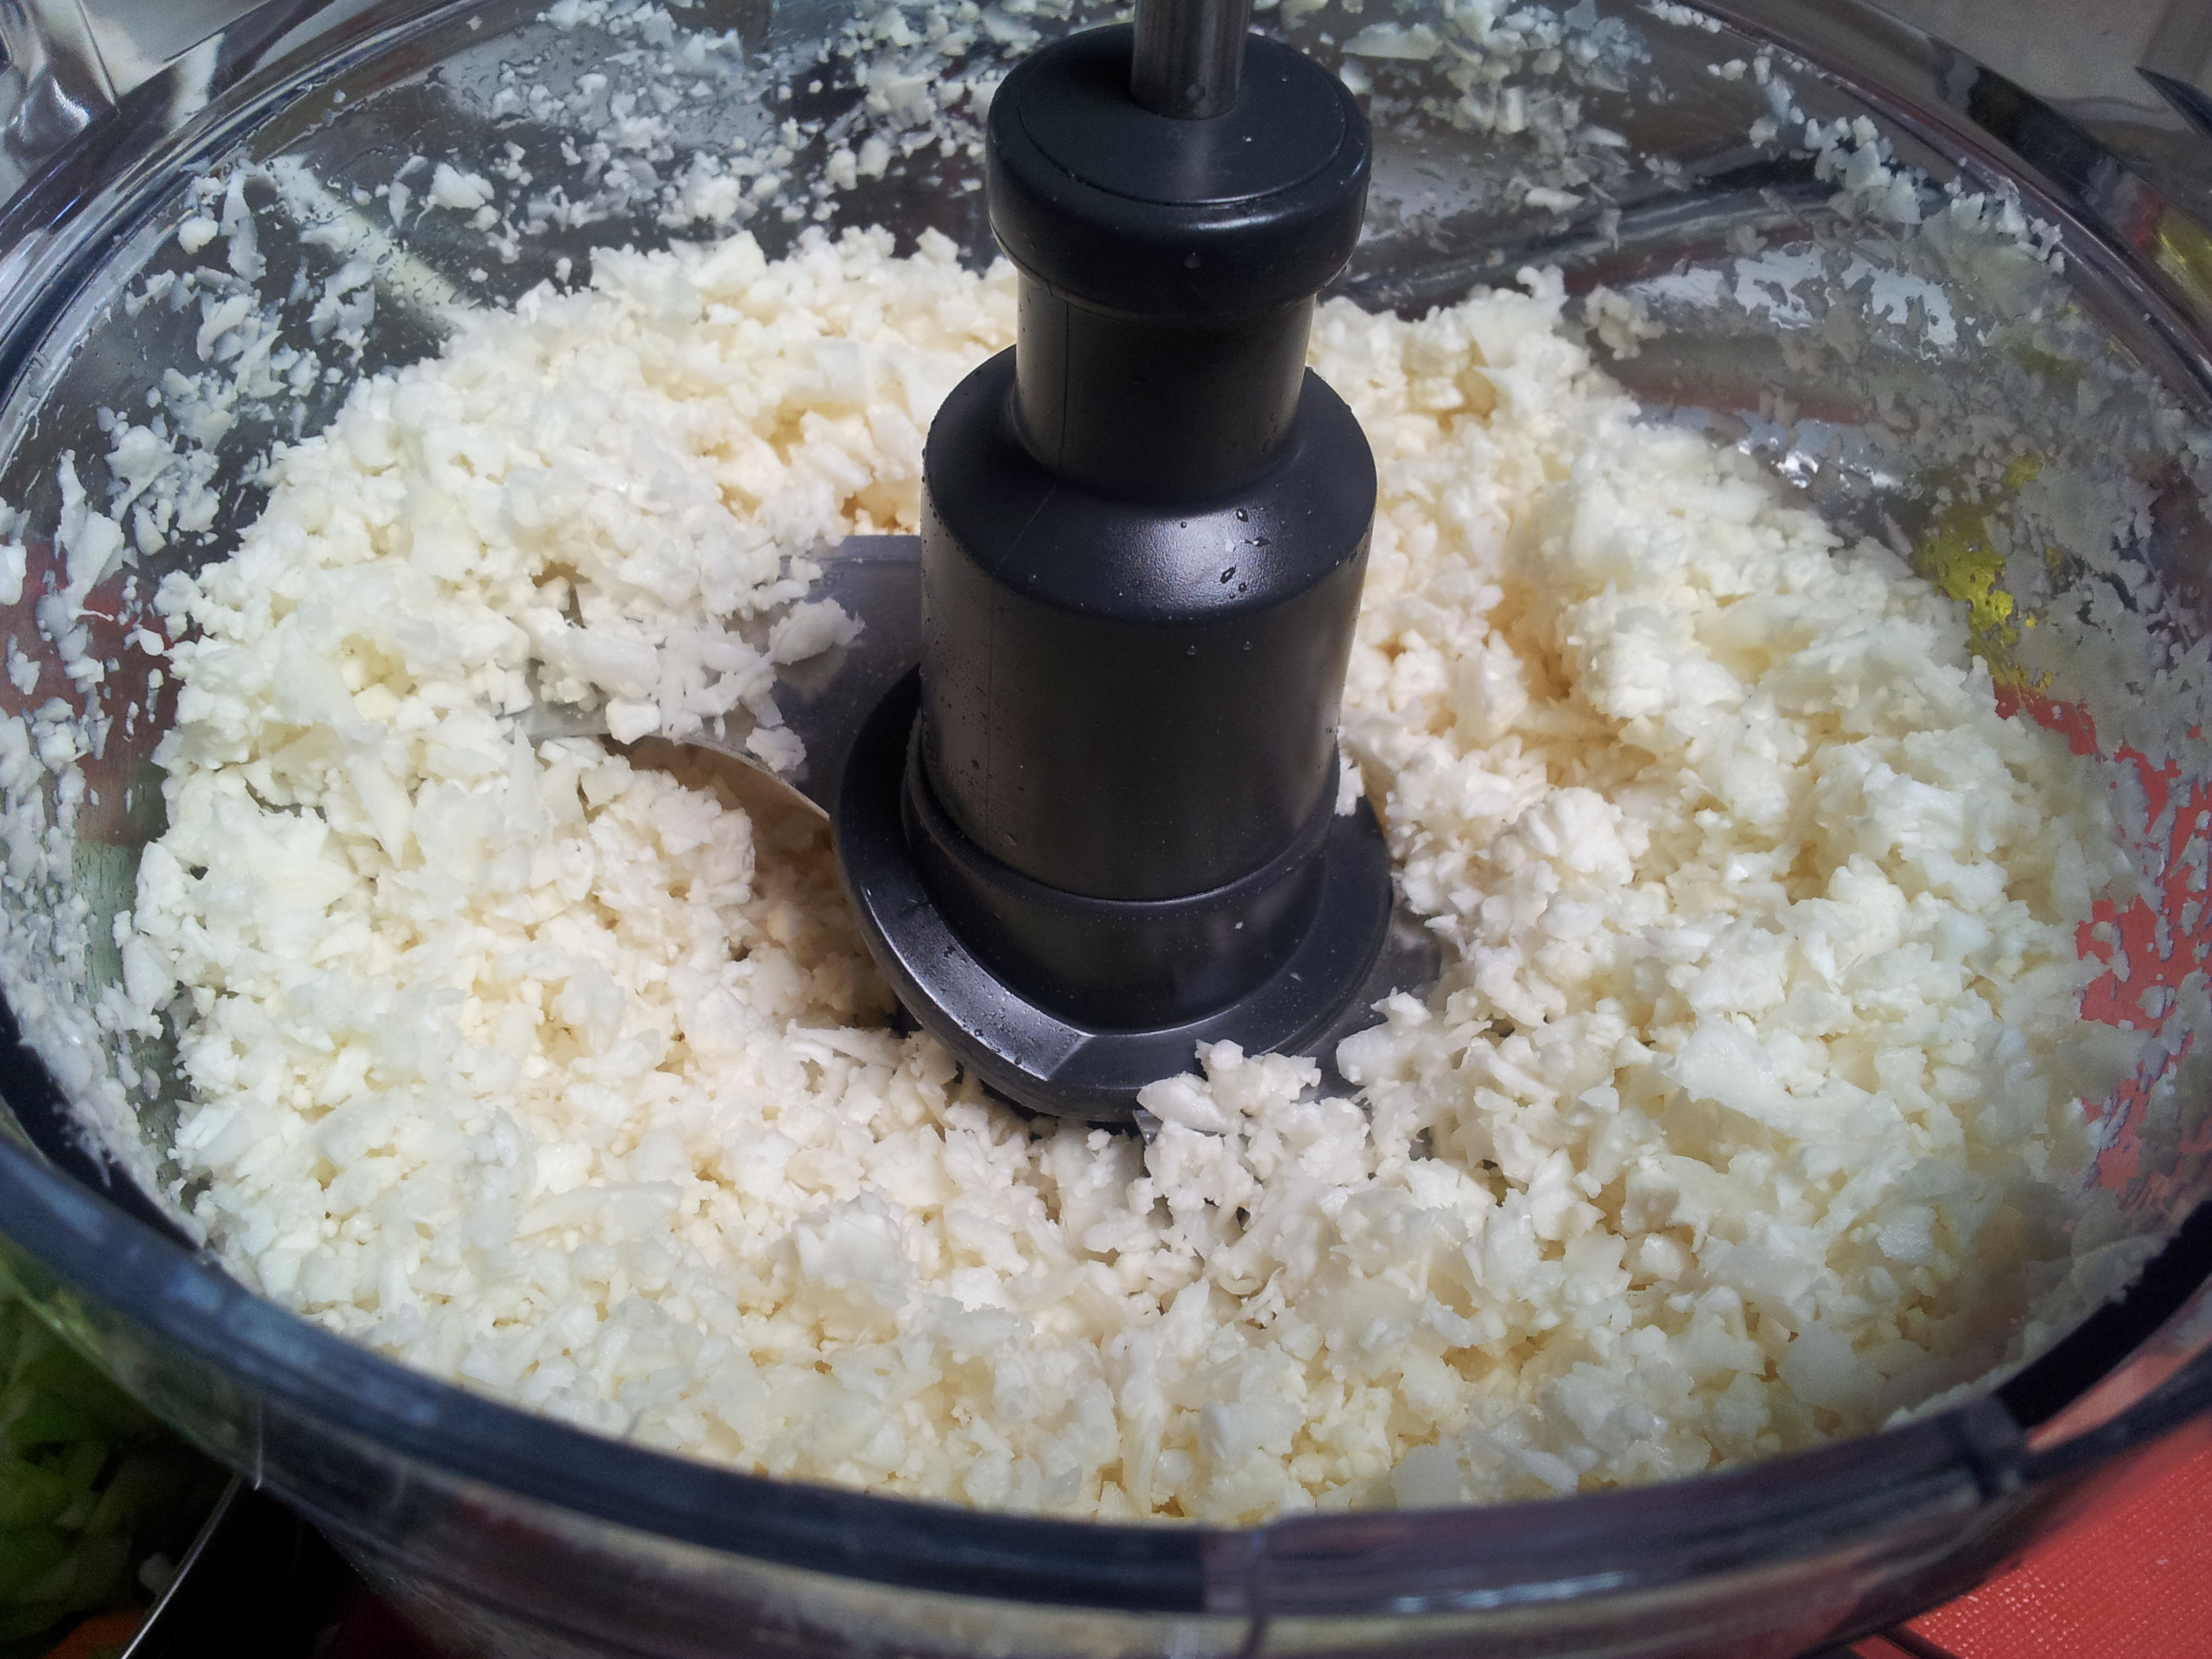
My favourite way to make cauliflower rice is to cut the fresh cauliflower into smallish pieces and then blend it in the food processor. This takes about 10 seconds to turn into cauliflower rice. You don’t want it in the food processor too long or it will be a pulp and wont cook nicely.
Wash the raw cauliflower and cut it into pieces that will fit into the food processor.Process the cauliflower until it resembles rice and is an even consistency.
Steps:
I used a largish fry pan which l pre-heated on a low temperature and added some olive oil. You know the pan is too hot if the oil is smoking. High heats will damage the oil so go gently with the heat.
Add the diced chicken to the pan and lightly brown. Next add the cauliflower rice and let it cook for a few minutes, followed by the vegetables and any spices you are using. I just used pink rock salt and ground black pepper, but l have in the past added fresh garlic, ginger and lots of spices such as tumeric, cumin, paprika and cinnamon. You can also add some sauces such as a fish sauce or Tamari, but l have been having food intolerance reactions to a lot of spices at present so kept this dish plain. The cauliflower rice often changes colour depending on the spices or vegetables you use and can look so stunning. Don’t over cook the vegetables or rice to retain the nutrients. I put mine on a nice large platter to serve and it looked wonderful.
You can take this to work the next day for lunch to have cold and use different meats, or just have it as a side dish. A very fresh and clean cauliflower is essential to the success of this dish and it is so light and healthy that it is a great meal to have at night when you don’t want to overload your digestive system.
If you have enjoyed this post please share with a friend. I am on Instagram at holistic_paleo and Twitter at Holistic Paleo@carolynlgray
I am reposting the recipe for this delightful cake as l have had so much wonderful feedback. This is a lovely moist cake which uses whole oranges to give it a beautiful flavour and texture. I don’t normally cook with stevia but l had some in the cupboard and thought it would add a nice sweetness to the cake and used it in conjunction with Rice Malt Syrup which worked well.
A moist and lovely cake-gluten free/dairy free
This recipe makes 12 cupcakes and 1 whole cake so it could be halved if desired. To make this cake all of the wet ingredients plus a few extras are placed in one bowl and the dry ones in another.
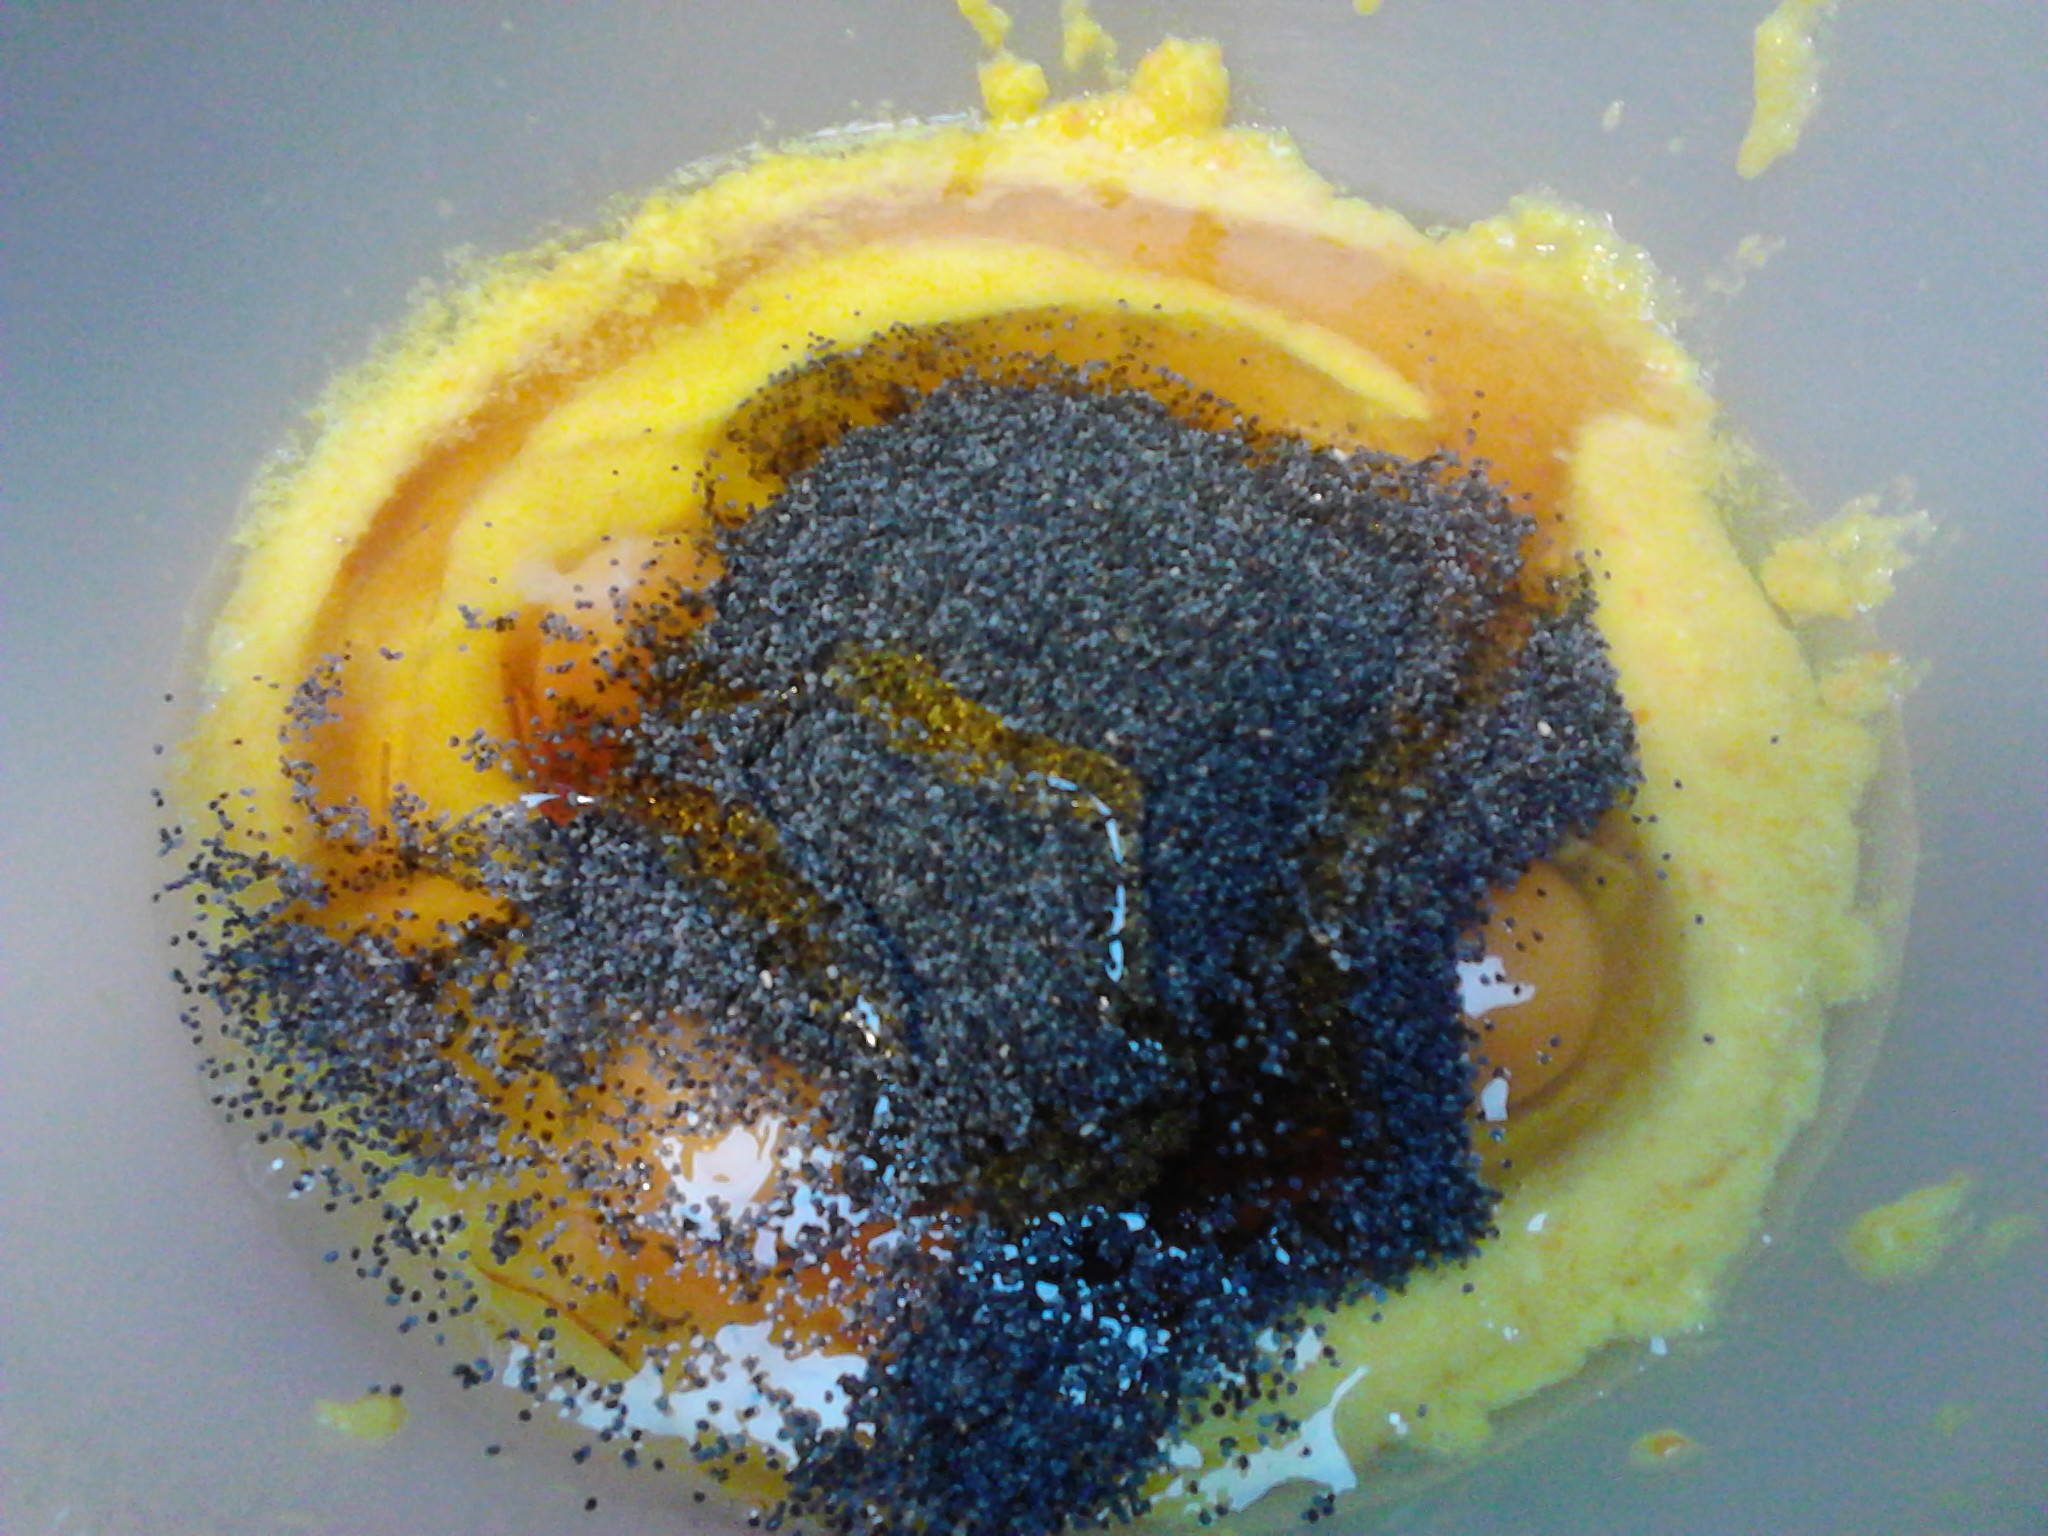
The wet ingredients plus the poppy seeds
Ingredients:
Place these ingredients into one bowl and mix together.
2 whole Navel oranges chopped and blended-skin left on (Navel oranges are so sweet. Just chop them into smallish pieces and place into the blender until a smooth consistency).
3/4 cup filtered water
4 free range eggs
1/2 cup stevia granules
1/2 cup organic coconut oil gently melted
1/3 cup poppy seeds (more or less depending on your preference)
1/3 cup rice malt syrup
1/2 teaspoon organic vanilla essence
In another bowl mix:
2 cups almond meal
1/2 cup coconut flour
1/2 teaspoon Bicarbonate Soda (Bob’s Red Mill)
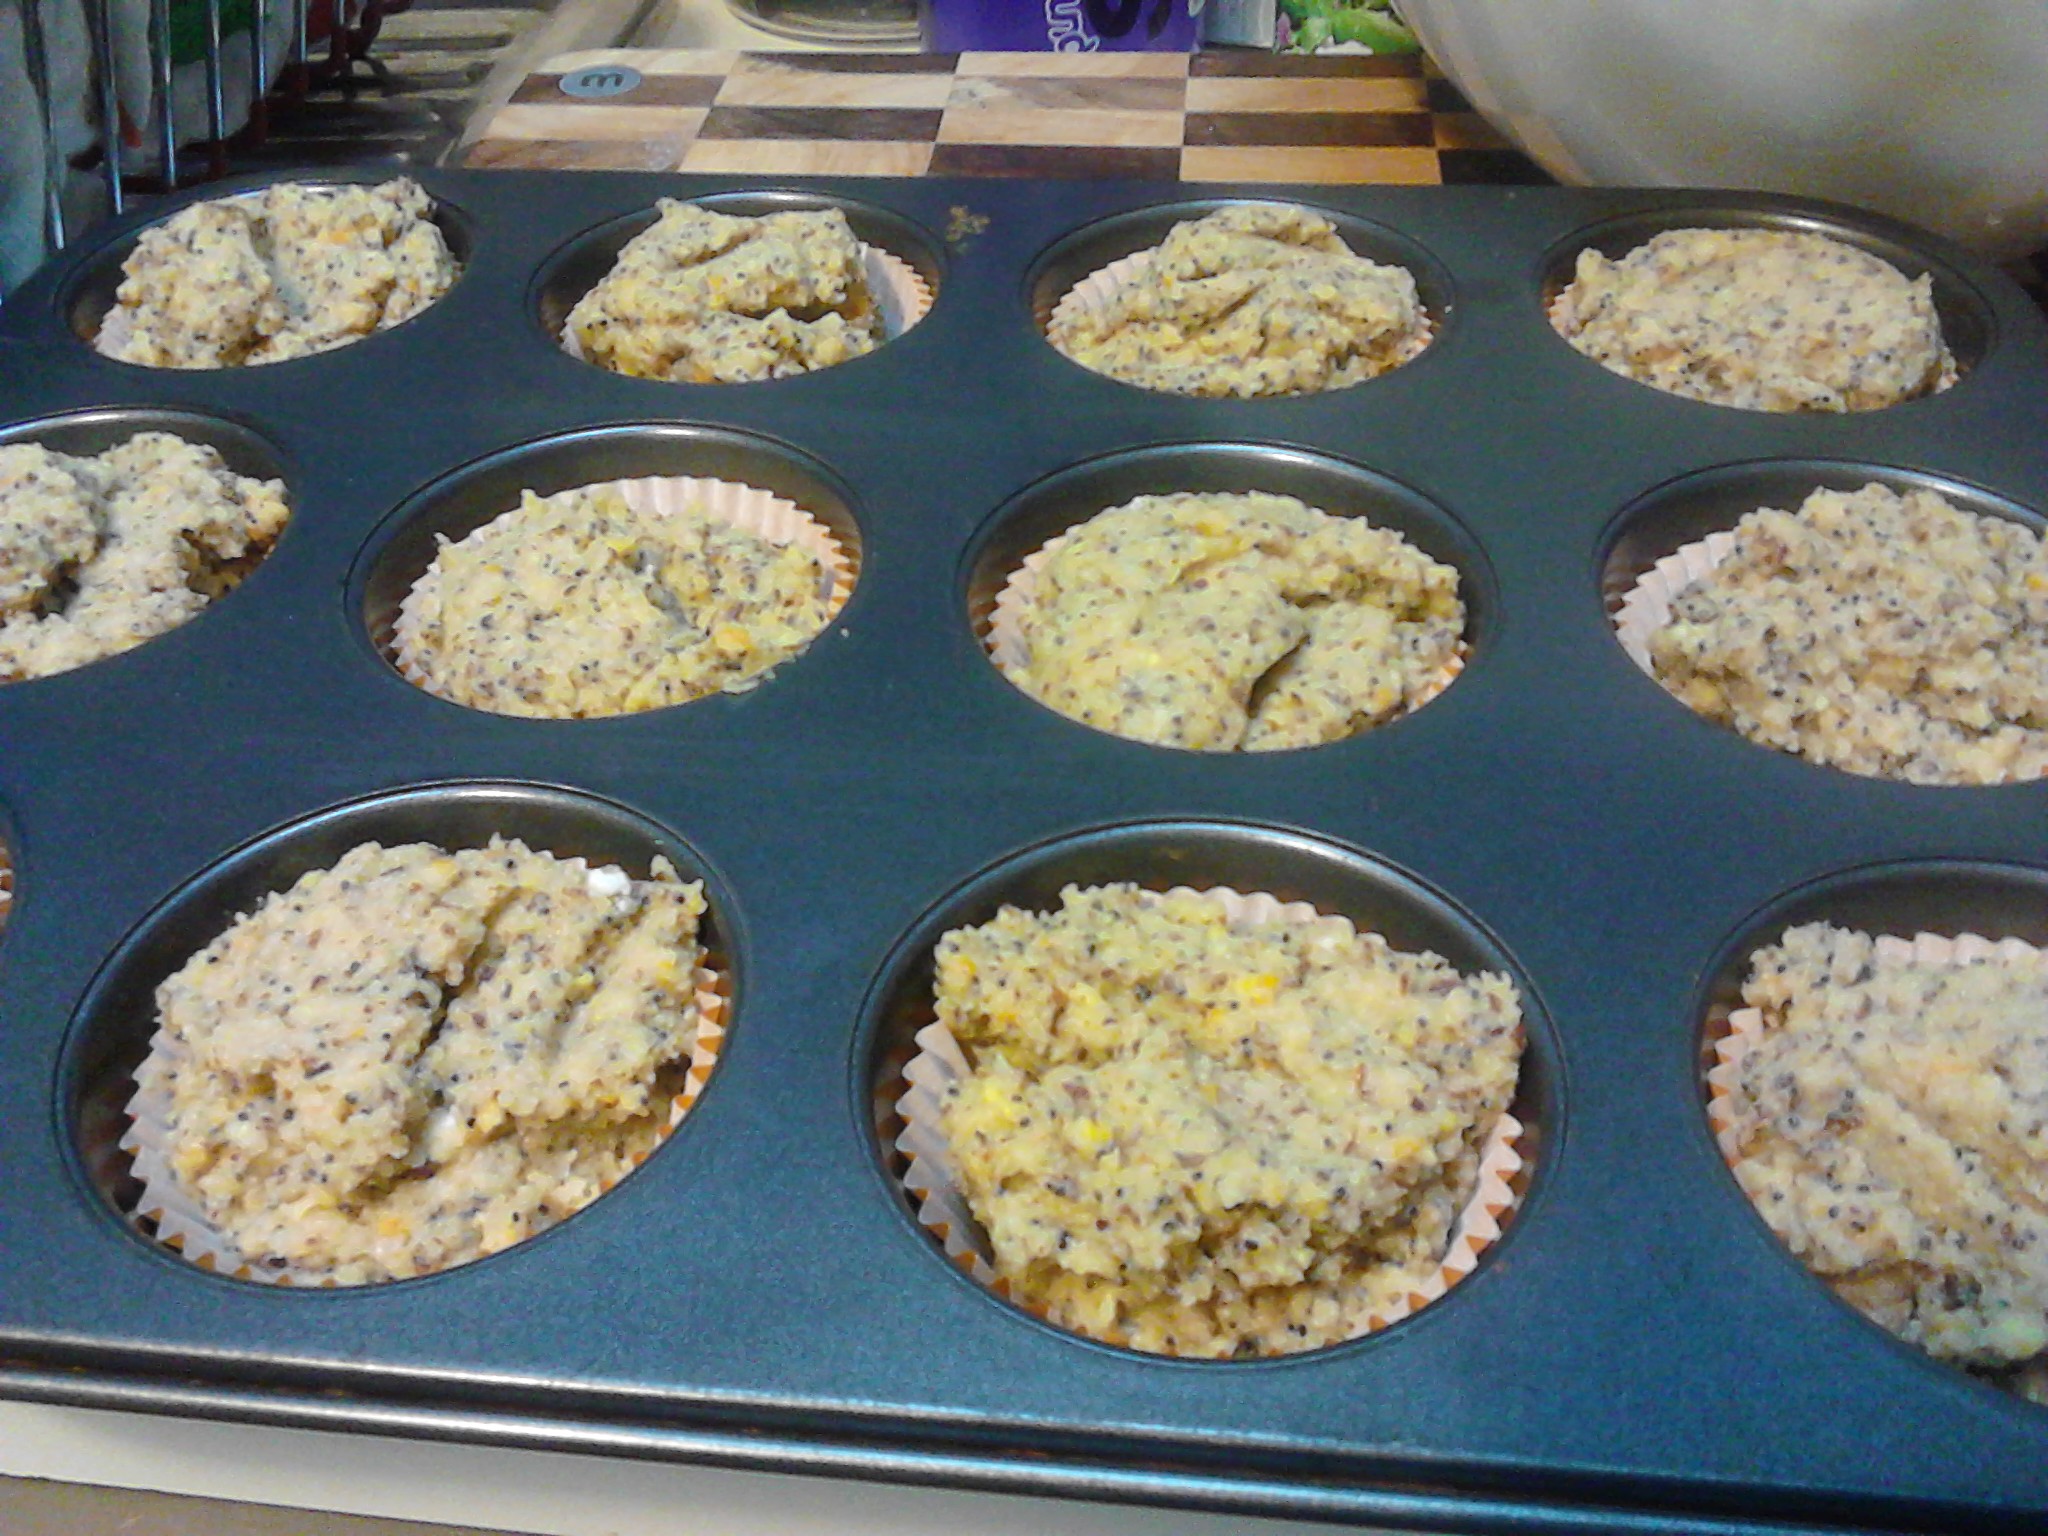
Add the dry ingredients to the wet and mix gently. If making cupcakes place spoonfuls into patty pans as below.
Ready for the oven!
If making a cake pour half the mix into a greased and lined cake tin. Bake both in a 180 degree celsius oven until firm to touch. The cake will take quite a lot longer than the cup cakes.
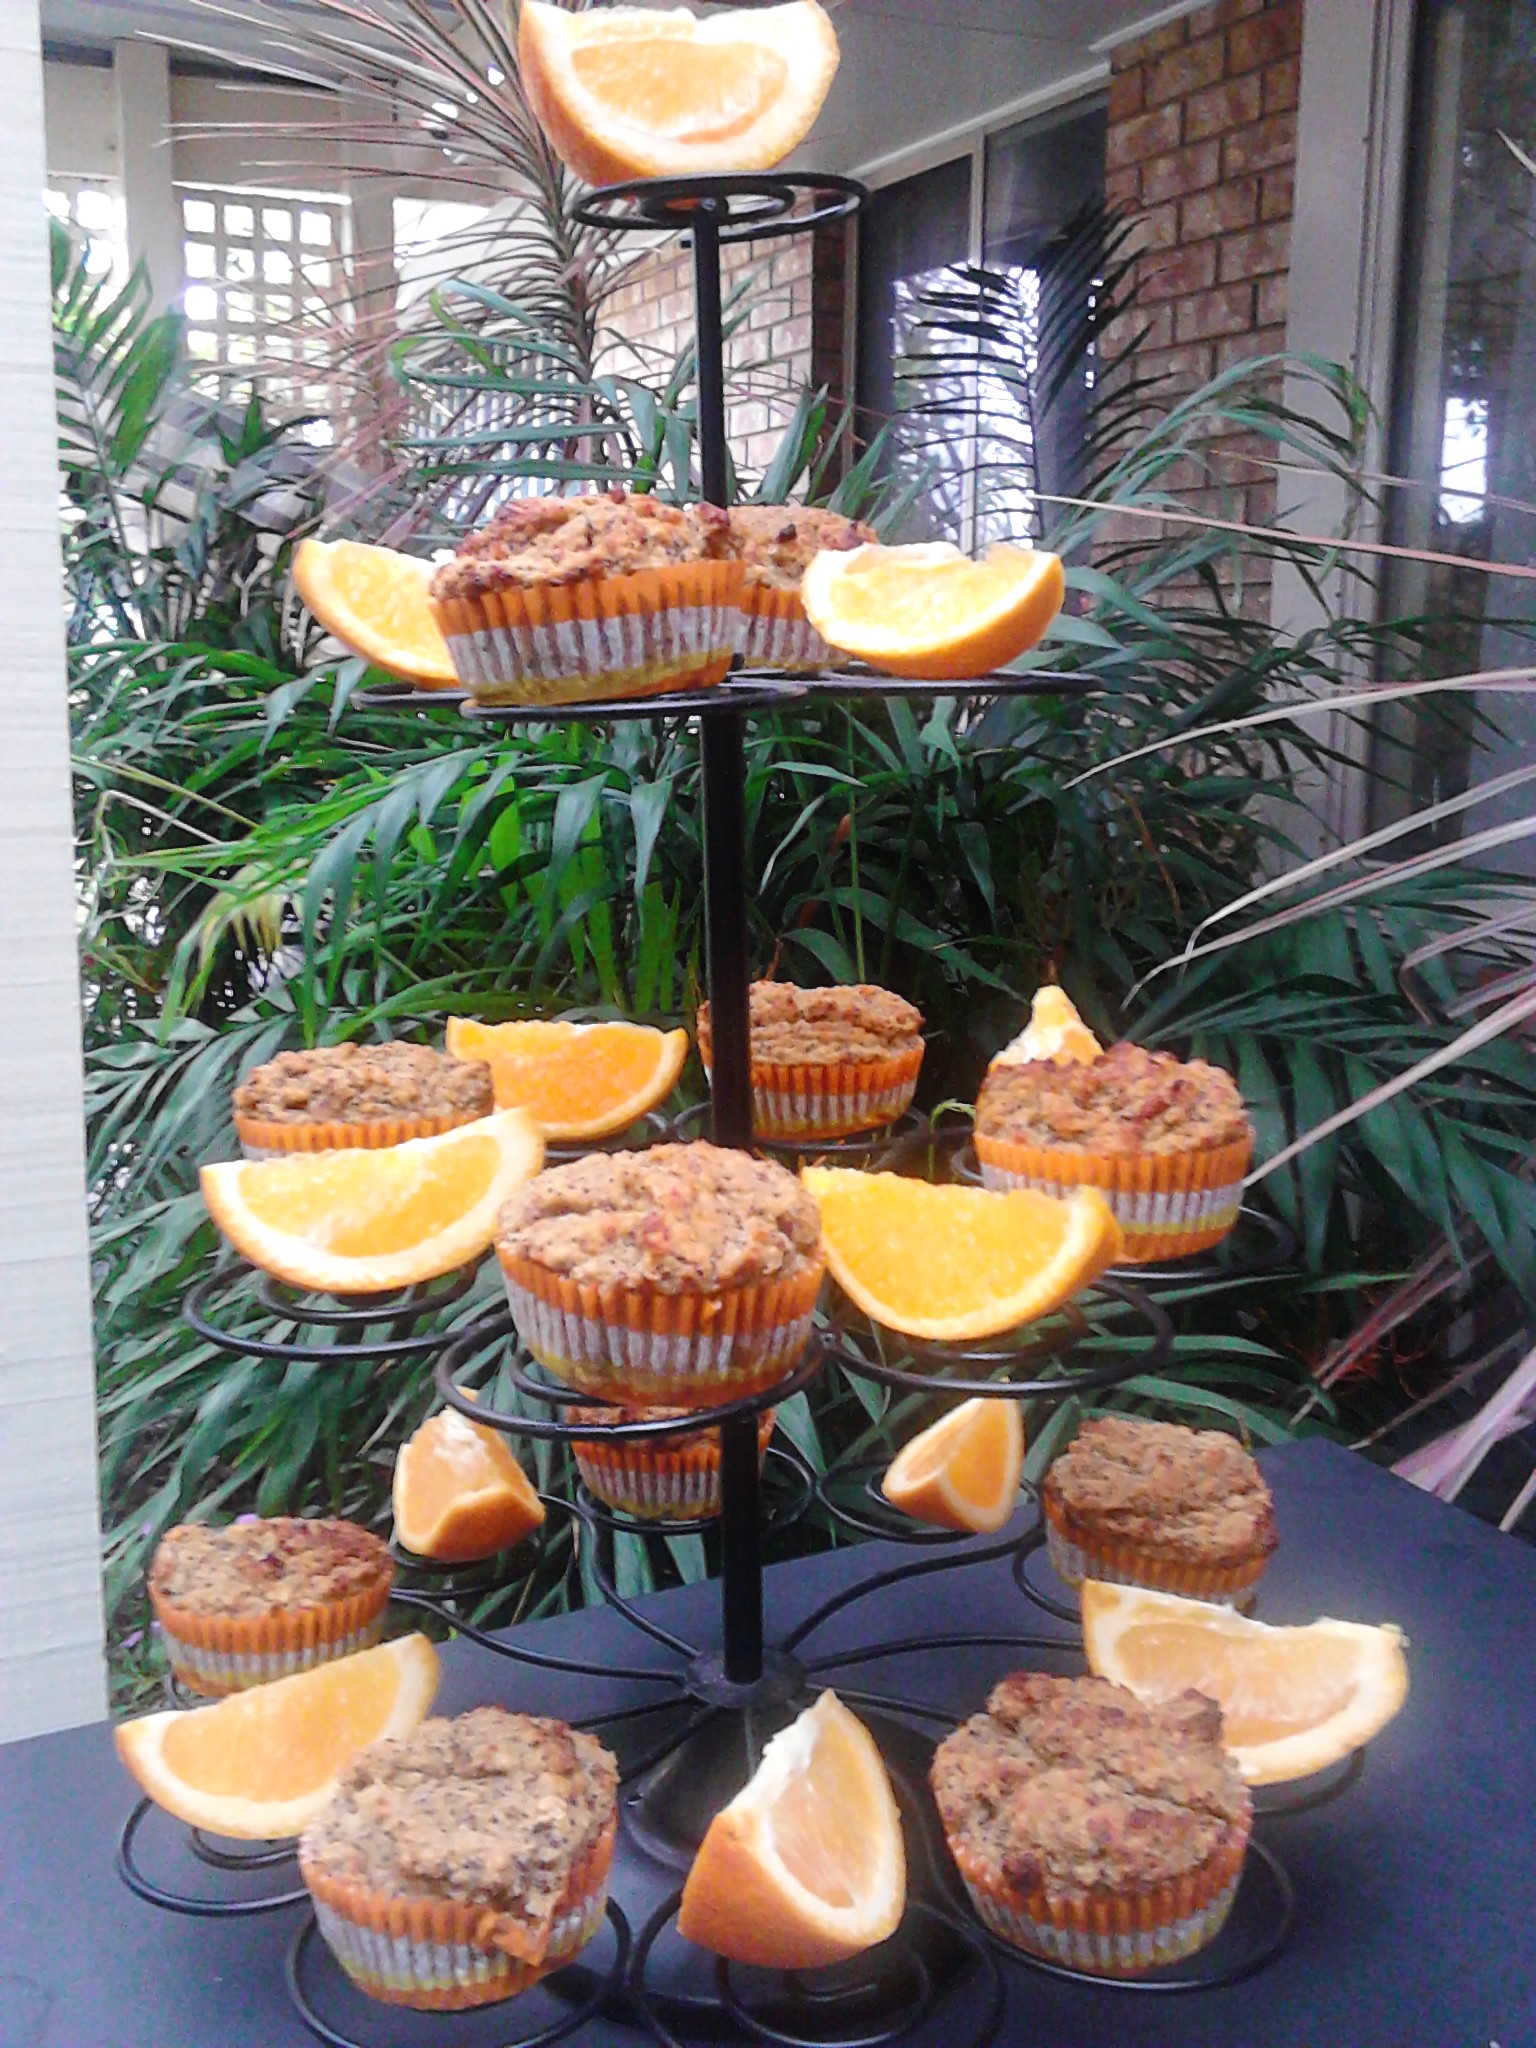
A cute cupcake display. Add some orange pieces to compliment the cupcakes.
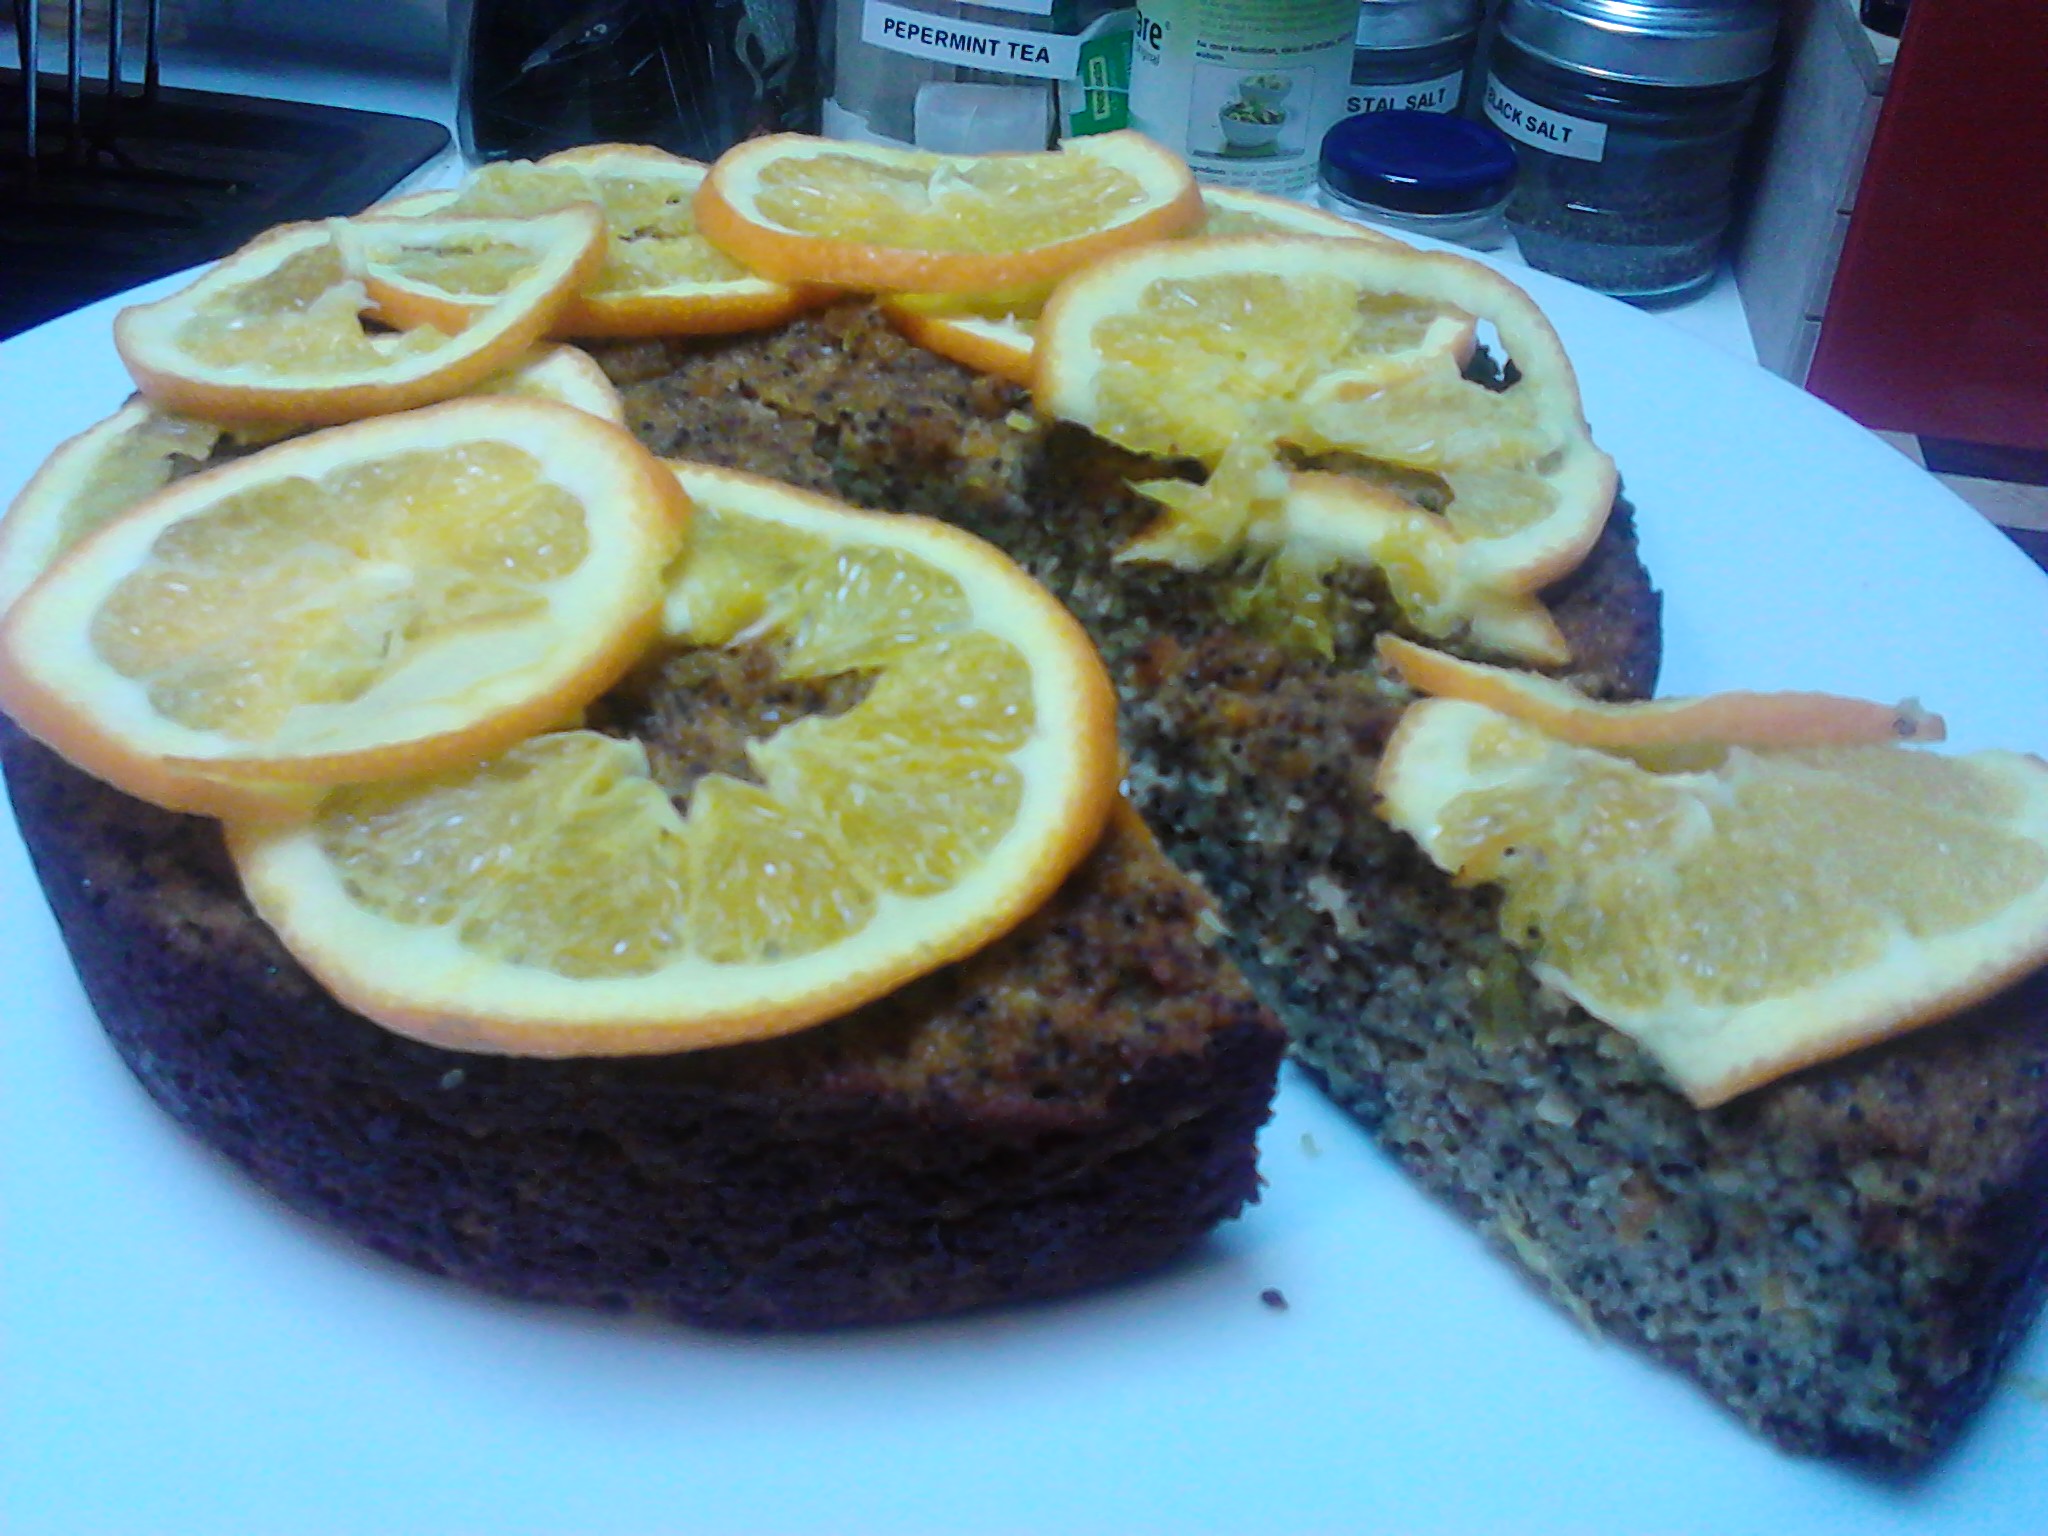
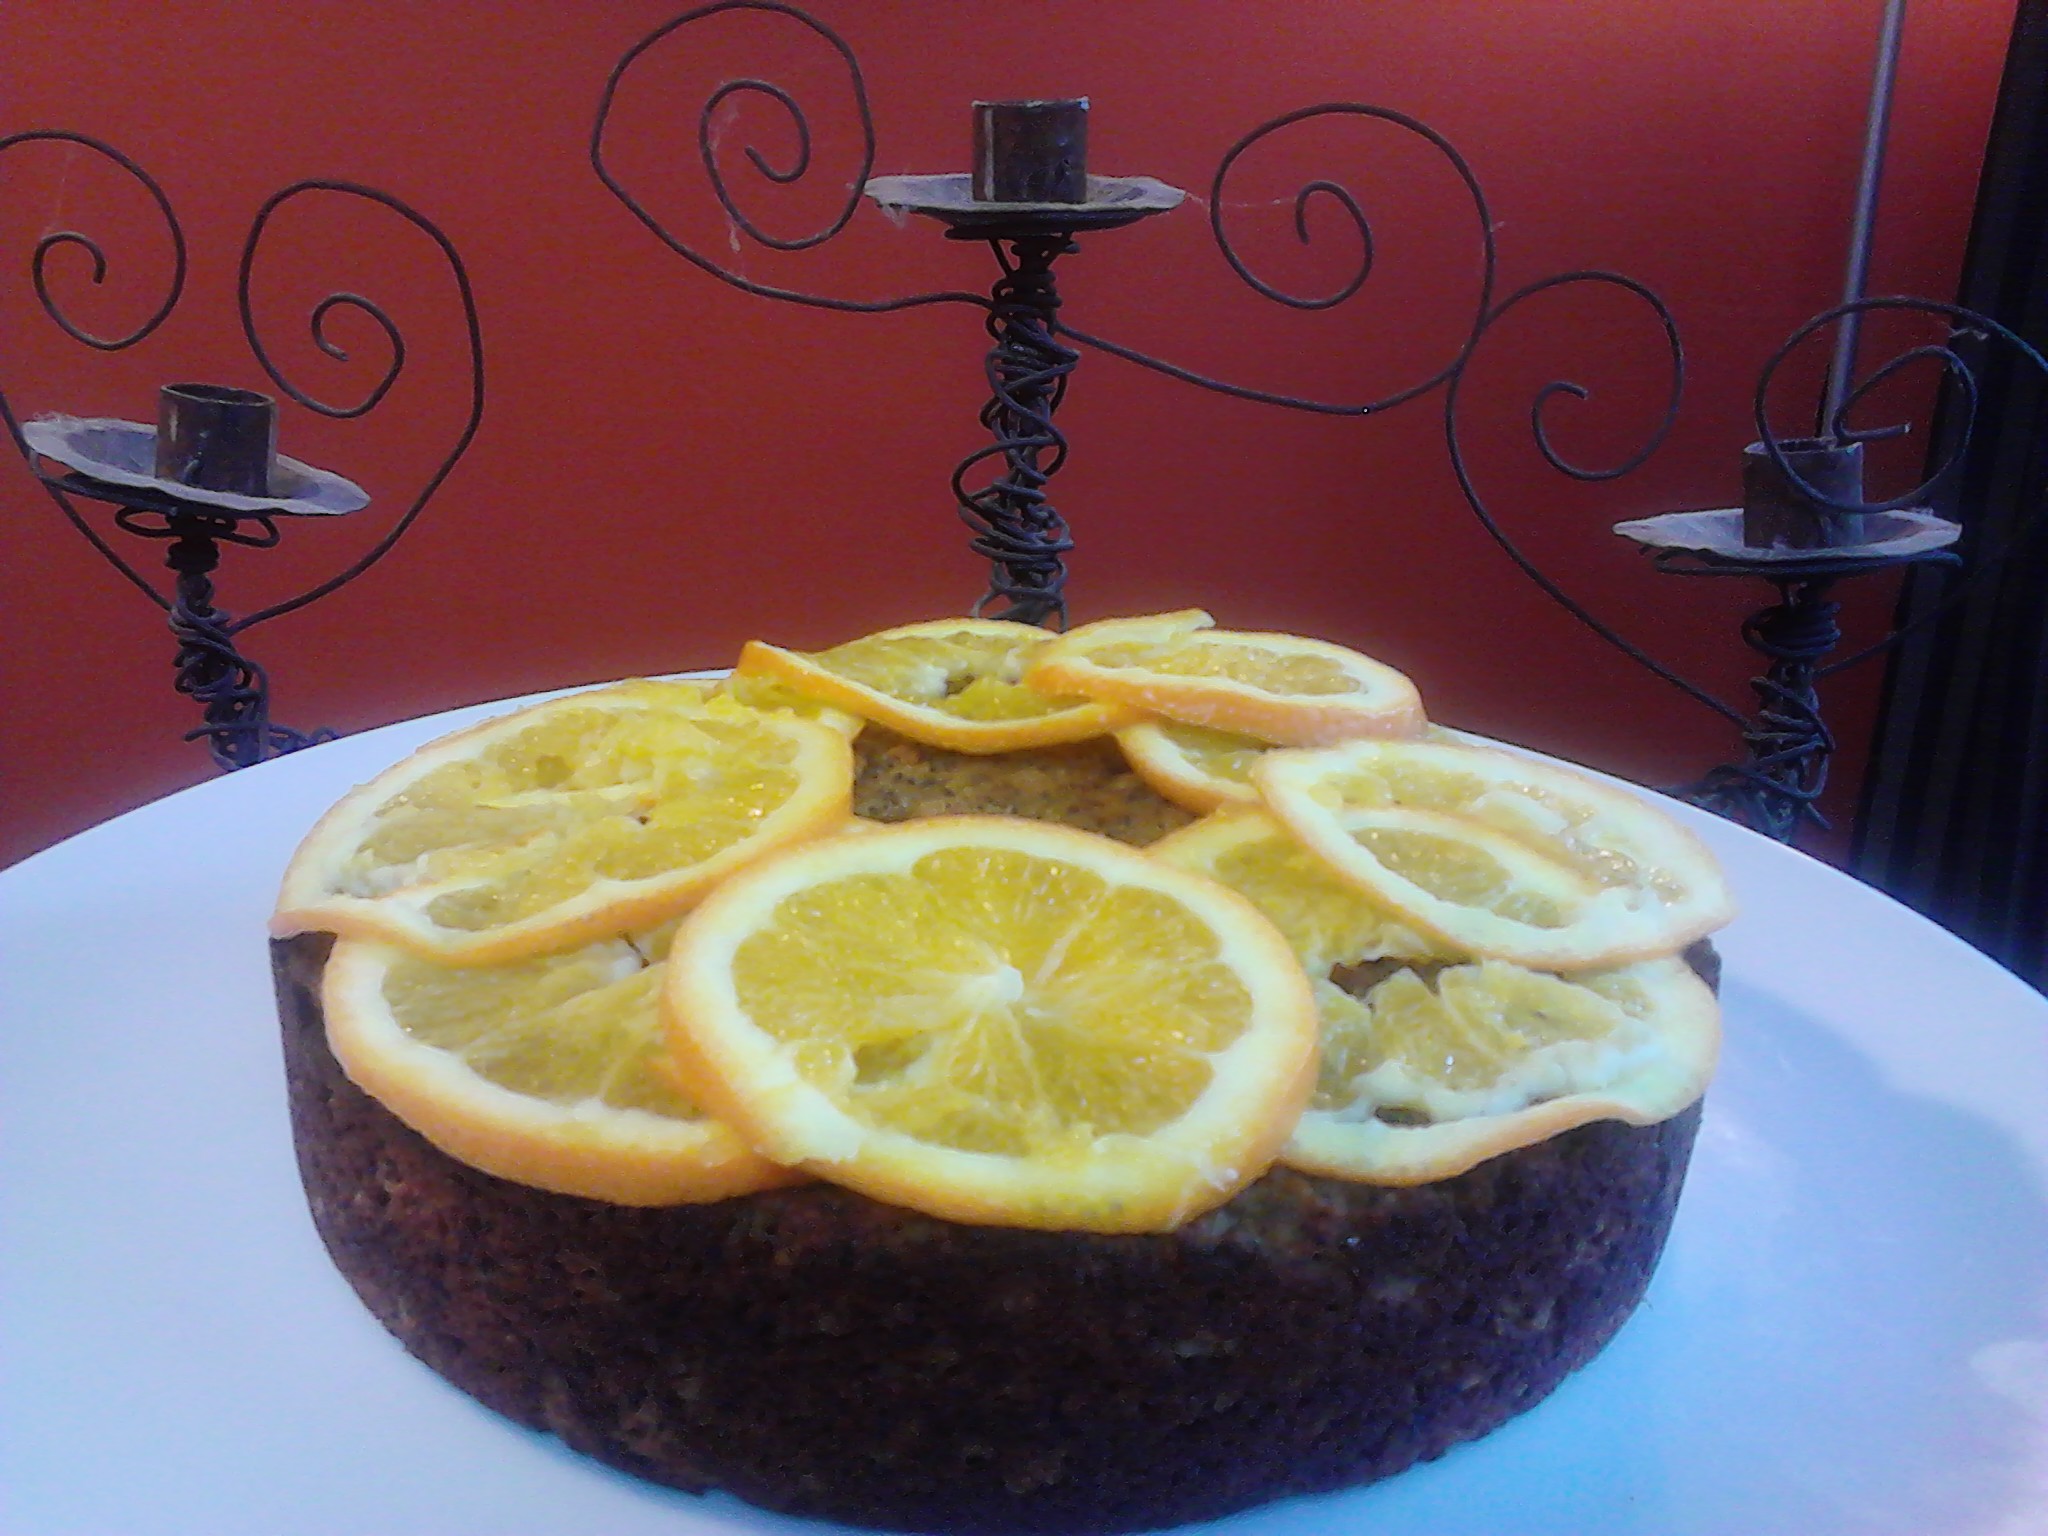
Let the cake cool in the tin for a few minutes and then place on a cake cooling rack. I drizzled the cake with some fresh orange juice and topped with sliced orange. I admit to having a cupcake and a piece of cake and my preference is for the cake as the extra juice and orange slice really added to the flavour.
Drizzle the cake with fresh orange juice and freshly sliced Navel orange.
This is a delightful cake and the flavour turned out really delicious and it is a wonderful treat for those of us living on restricted diets.
If you enjoyed this post please share with a friend. You can also follow me on Instagram: holistic_paleo, Facebook, Pinterest, Tumblr, Twitter or Flickr.
Mental and practical roadblocks people use to not have a green smoothie in their life.
It it scary to drink a green smoothie
I don’t want to drink vegetables, especially green ones
There are things in there l won’t like
I’ve never had a chia seed
I don’t have a blender
The ingredients are expensive
It will taste awful
I’d rather have a normal fruit smoothie
Do any of these sound familiar? They can all be overcome if you can think out side of your comfort zone. If you don’t have a blender they can be purchased very cheaply or you can borrow one, and if you grow your own green leafy vegetables that is another one crossed off the list.
Take the plunge and try a simple recipe for your first smoothie that is guaranteed to be delicious. You can even leave the chia seeds out.
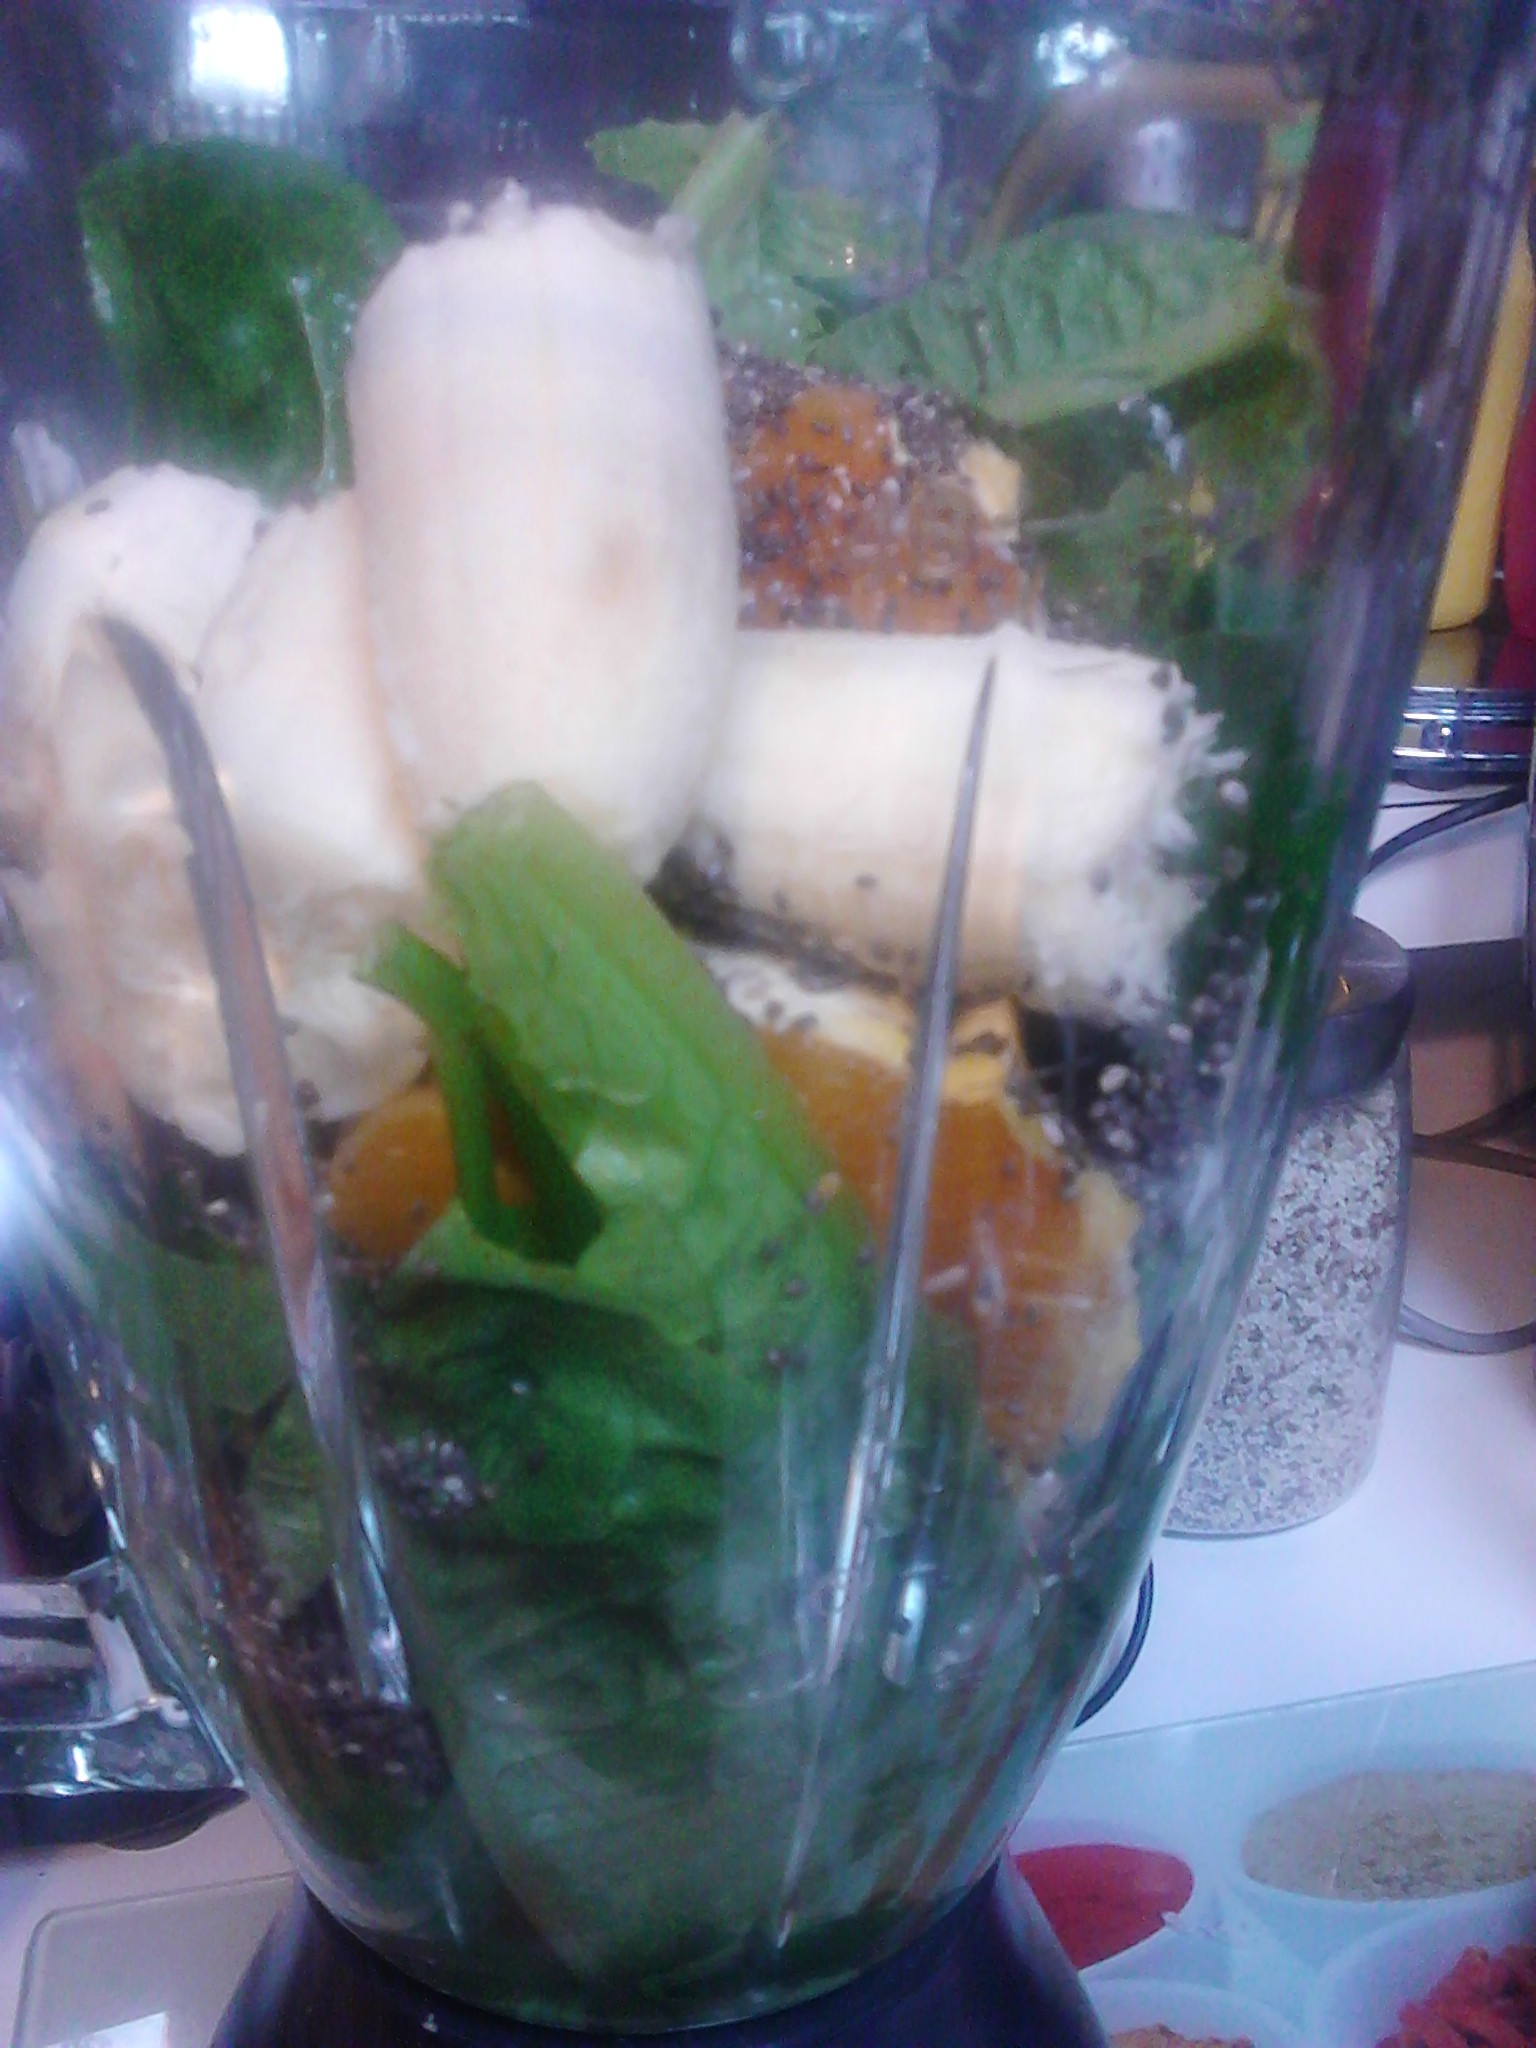
Cos lettuce (fill up half the blender with this, but make sure it is well washed), one small banana, one navel orange, 1 tablespoon chia seeds (optional), some fresh mint and enough plain coconut water to give a good consistency to drink or you can eat it with a spoon.
Just pile all of the ingredients into the blender and process. Pour it into a glass and enjoy!
An amazing colour with a wonderful sweet flavour.
A green smoothie is different to a green juice. A juice has most of the fibre removed and is much lighter to drink and digest. When l was very unwell last year l loved having a green juice as the nutrients were quickly and easily broken down and absorbed for use in the body, whereas a smoothie was too heavy for me and l just couldn’t digest them.
A green juice made with the Cold Pressed juicer.
Part of the joy of drinking a green smoothie is that it is green!
A green smoothie can quickly turn a not so nice colour if you add certain ingredients to it such as raspberries, blueberries or blackberries. It could go a brown colour and will taste great, but won’t look so appetising.
Choosing your ingredients:
1. Start by picking your choice of greens. You can have just the one such as cos lettuce, kale, spinach or silverbeet or a mixture. Cos lettuce is so sweet and lovely and l love the smaller green spinach leaves.
2. What liquid are you going to have in your juice? I would advise either plain coconut water or filtered water.
3. Choose the fruit you are going to add. This could be banana, apple, peach, apricot, pear, mango, pineapple, orange and mandarin as examples. Citrus is wonderful as it will help your body absorb the iron from the greens.
4. Add a few interesting things to your smoothie. Limes and lemon’s with the skin on will give the smoothie a kick, while fresh ginger and herbs such as parsley and mint will help to enhance the flavour.
5. Add additional nutrients such as chia seeds, green powders or nuts.
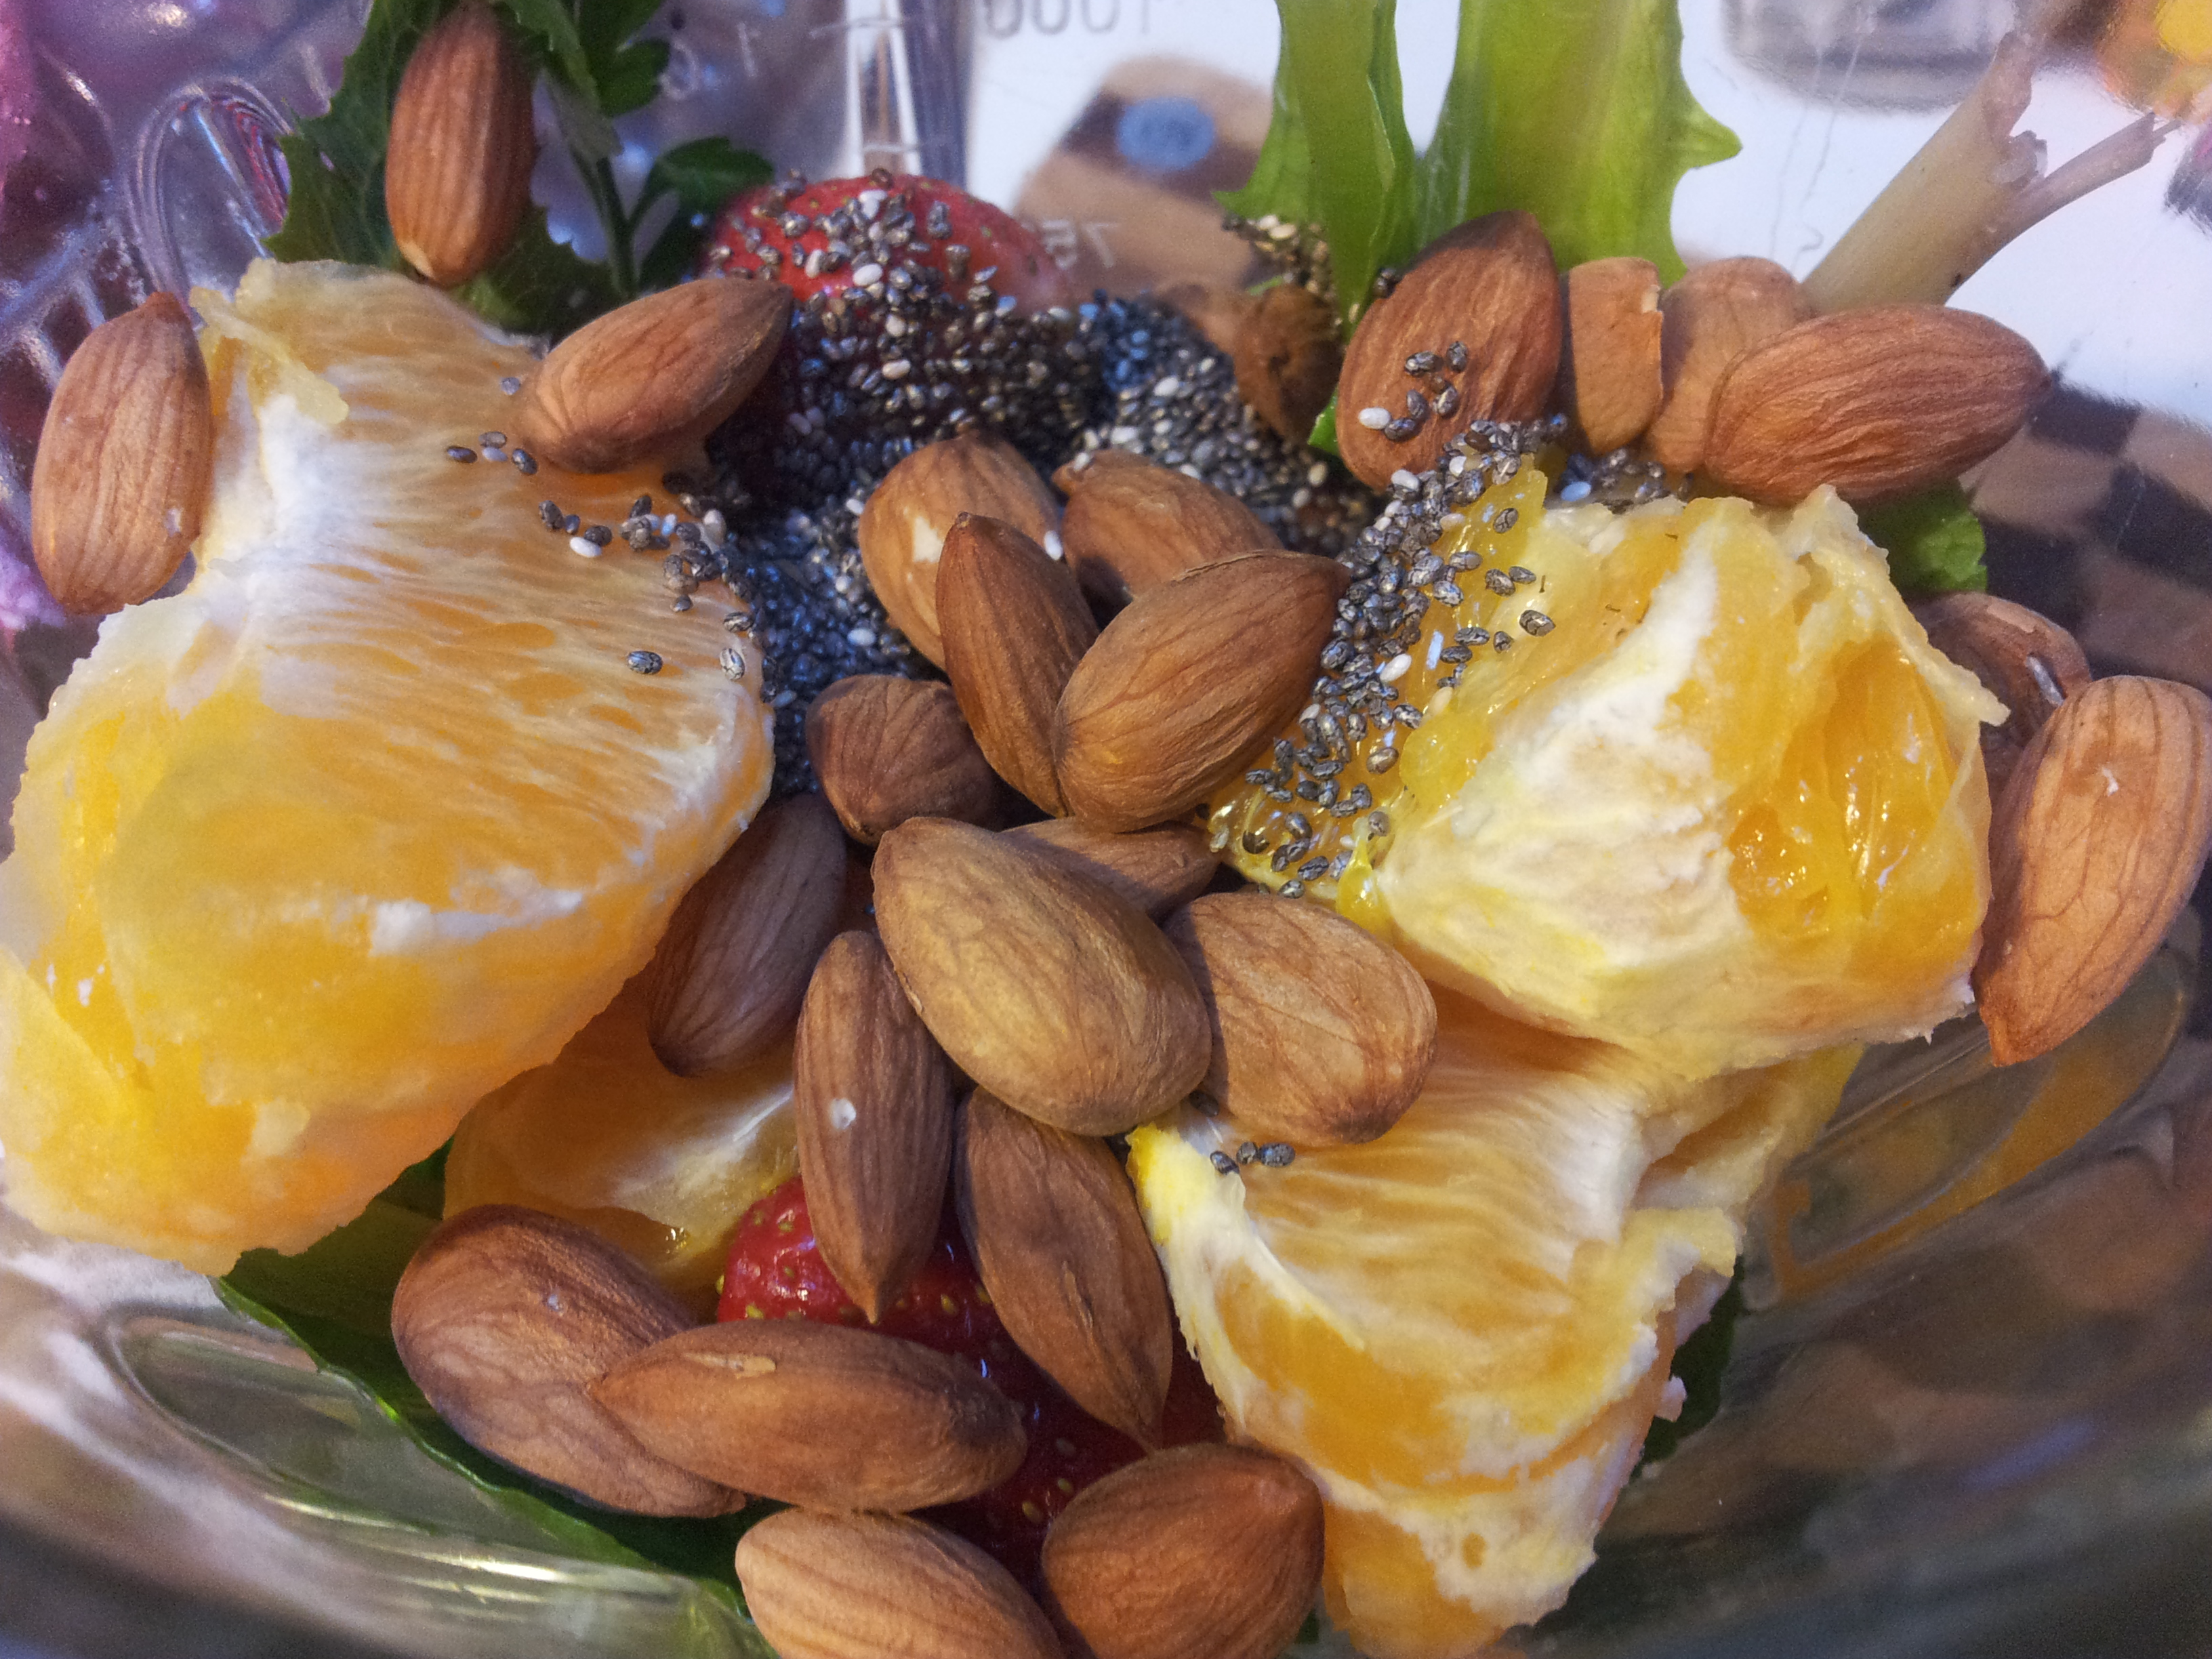
This smoothie has lots of greens, a few strawberries, chia seeds, activated almonds, orange and filtered water.This was such a filling smoothie and there are speckles of red through it from the strawberries.
A way to combine a green smoothie with a more colourful ingredients and still have it looking good is to have some fun putting it together as in the one below. Both the green and pink sections tasted wonderful, but when mixed together were a not so nice brown colour.
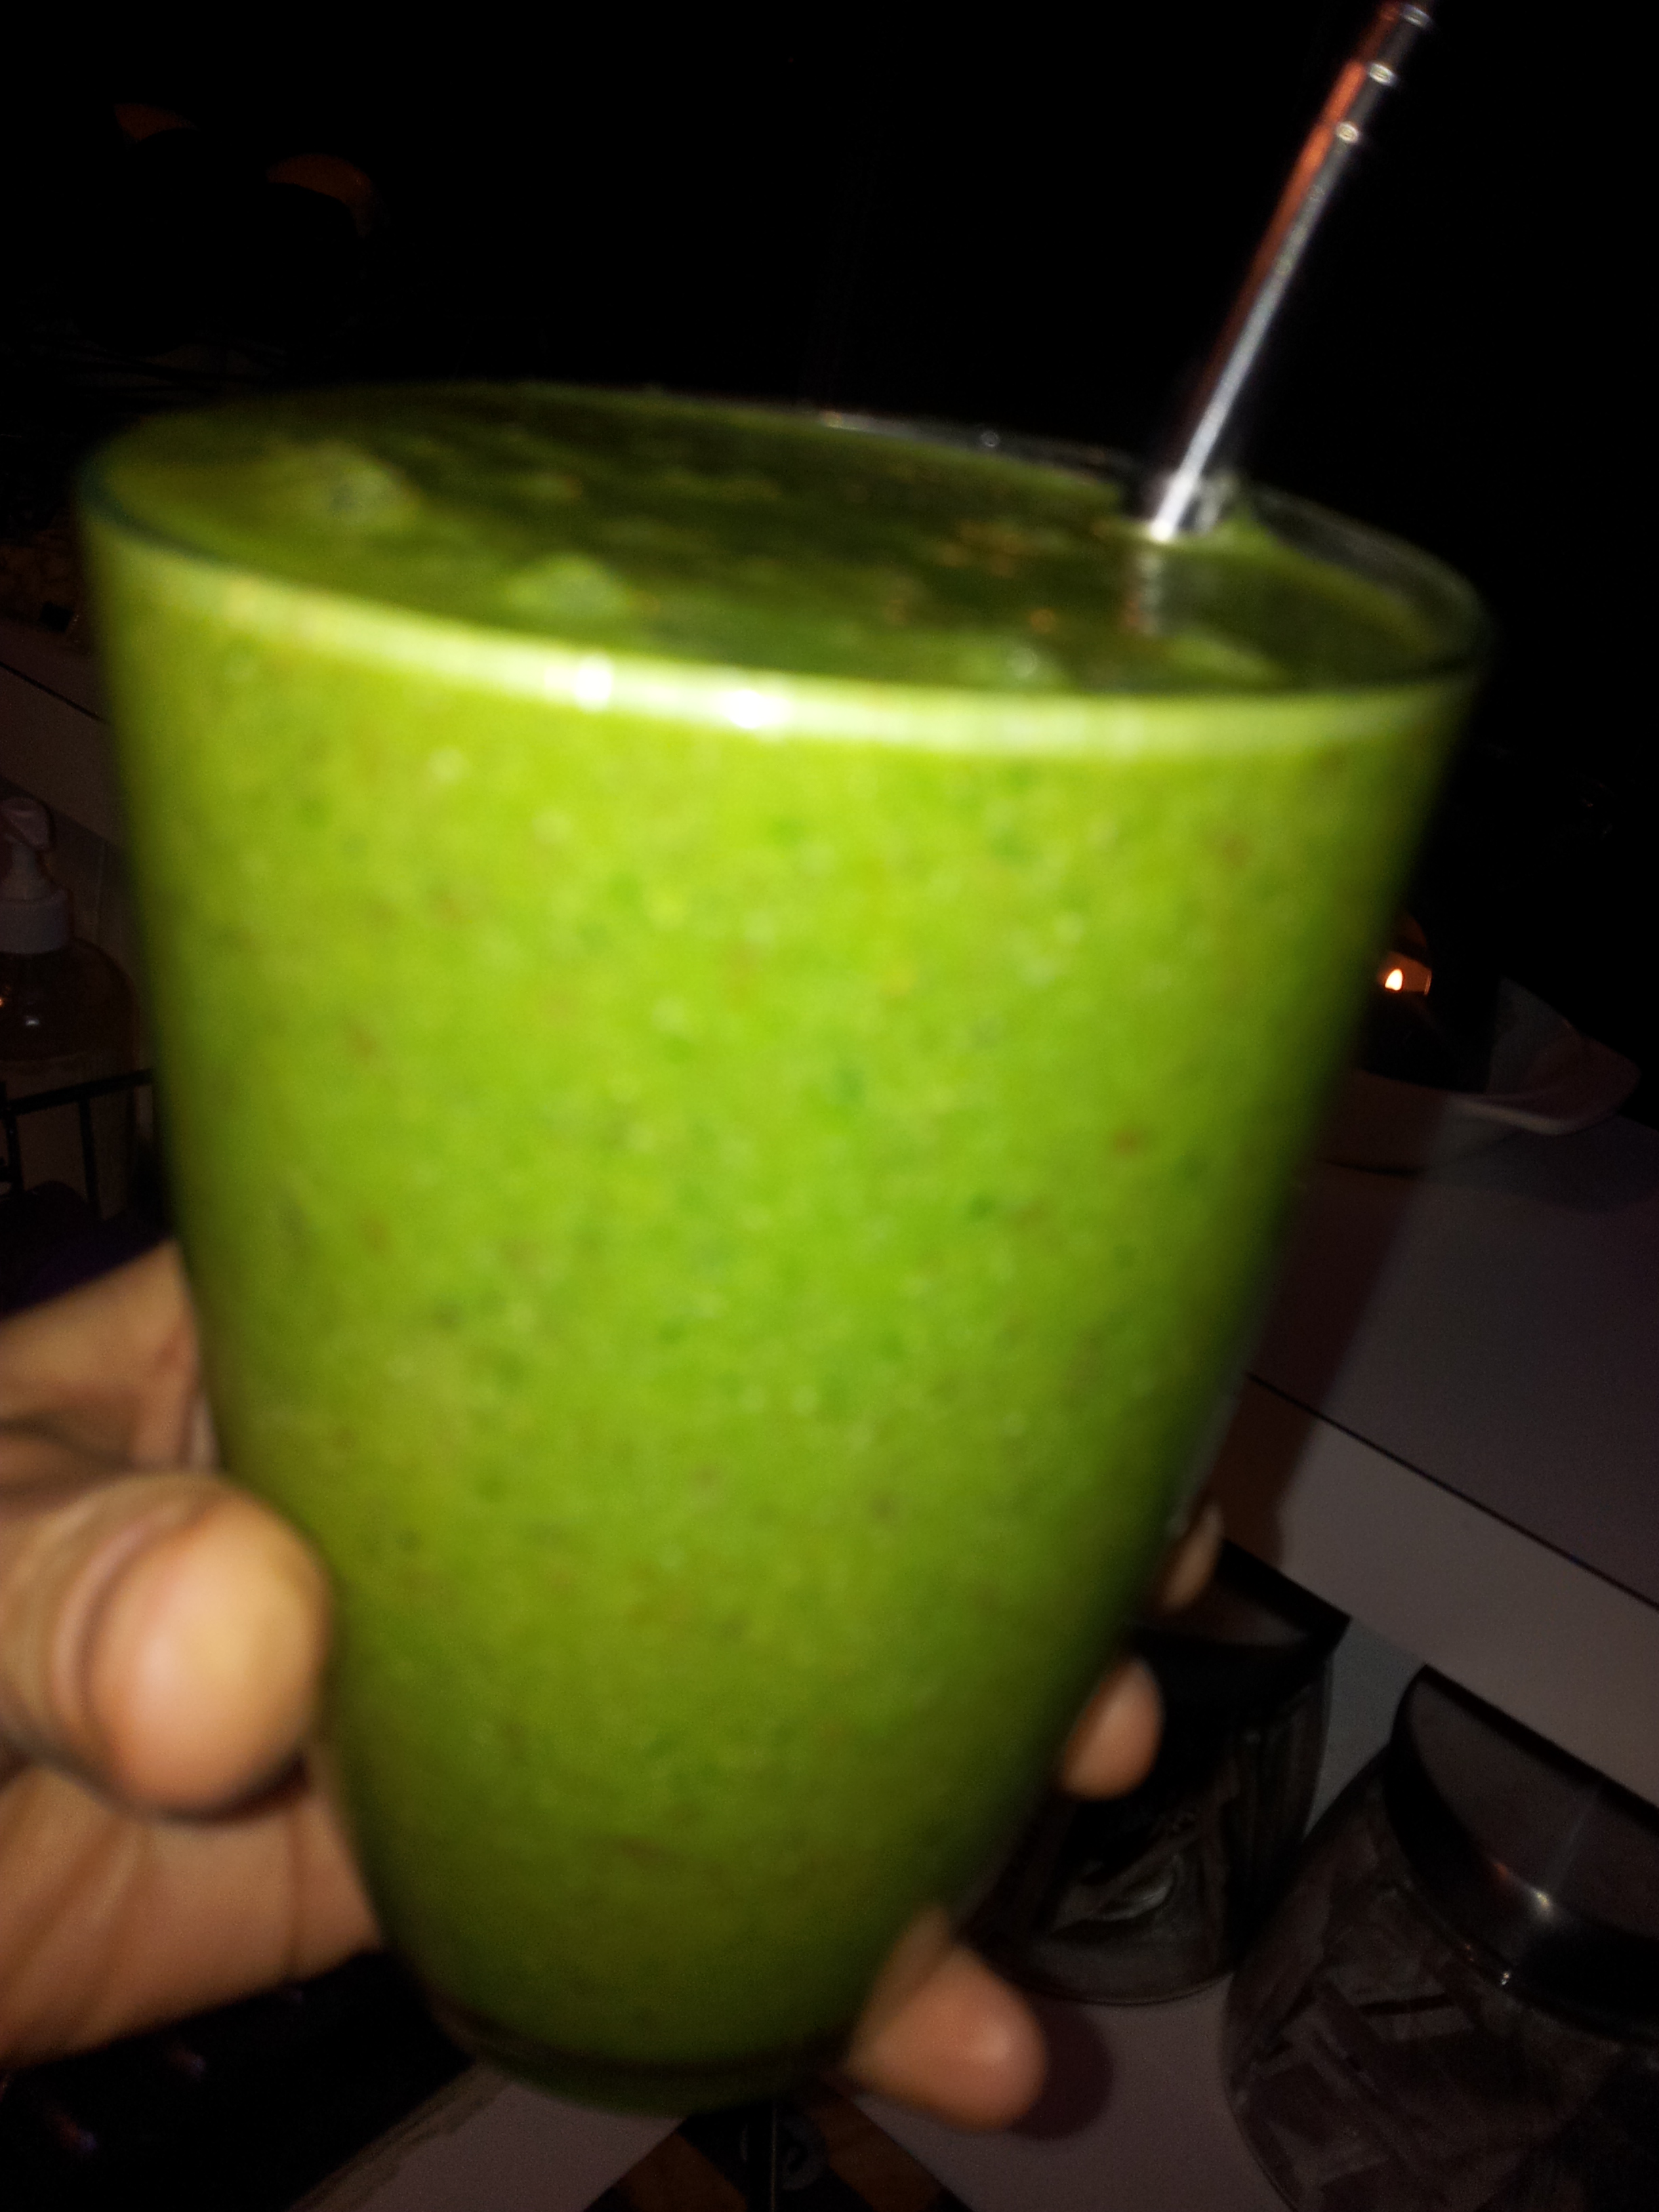
A green smoothie with a dash of colour!
The green section is cos lettuce, banana, green apple and coconut water. The pink layer is strawberries, blueberries, acai berry powder, chia seeds, banana and coconut water. I make the green part first and pour it into two glasses and wash the blender, then make the pink part. The decorative pointy bits l do with a stainless steel straw and it looks nice to drink!
A smoothie can easily be a meal if you add in good sources of protein such as chia seeds and nuts. I drink them slowly as it is a lot of liquid going into the stomach all at once and adding the nuts and chia seeds make it a bit heavier and thicker as well as slowing down the digestion of the sugars in the drink. Sometimes l have a handful of nuts with the smoothie if it has a lot of fruit in it and this balances out the snack.
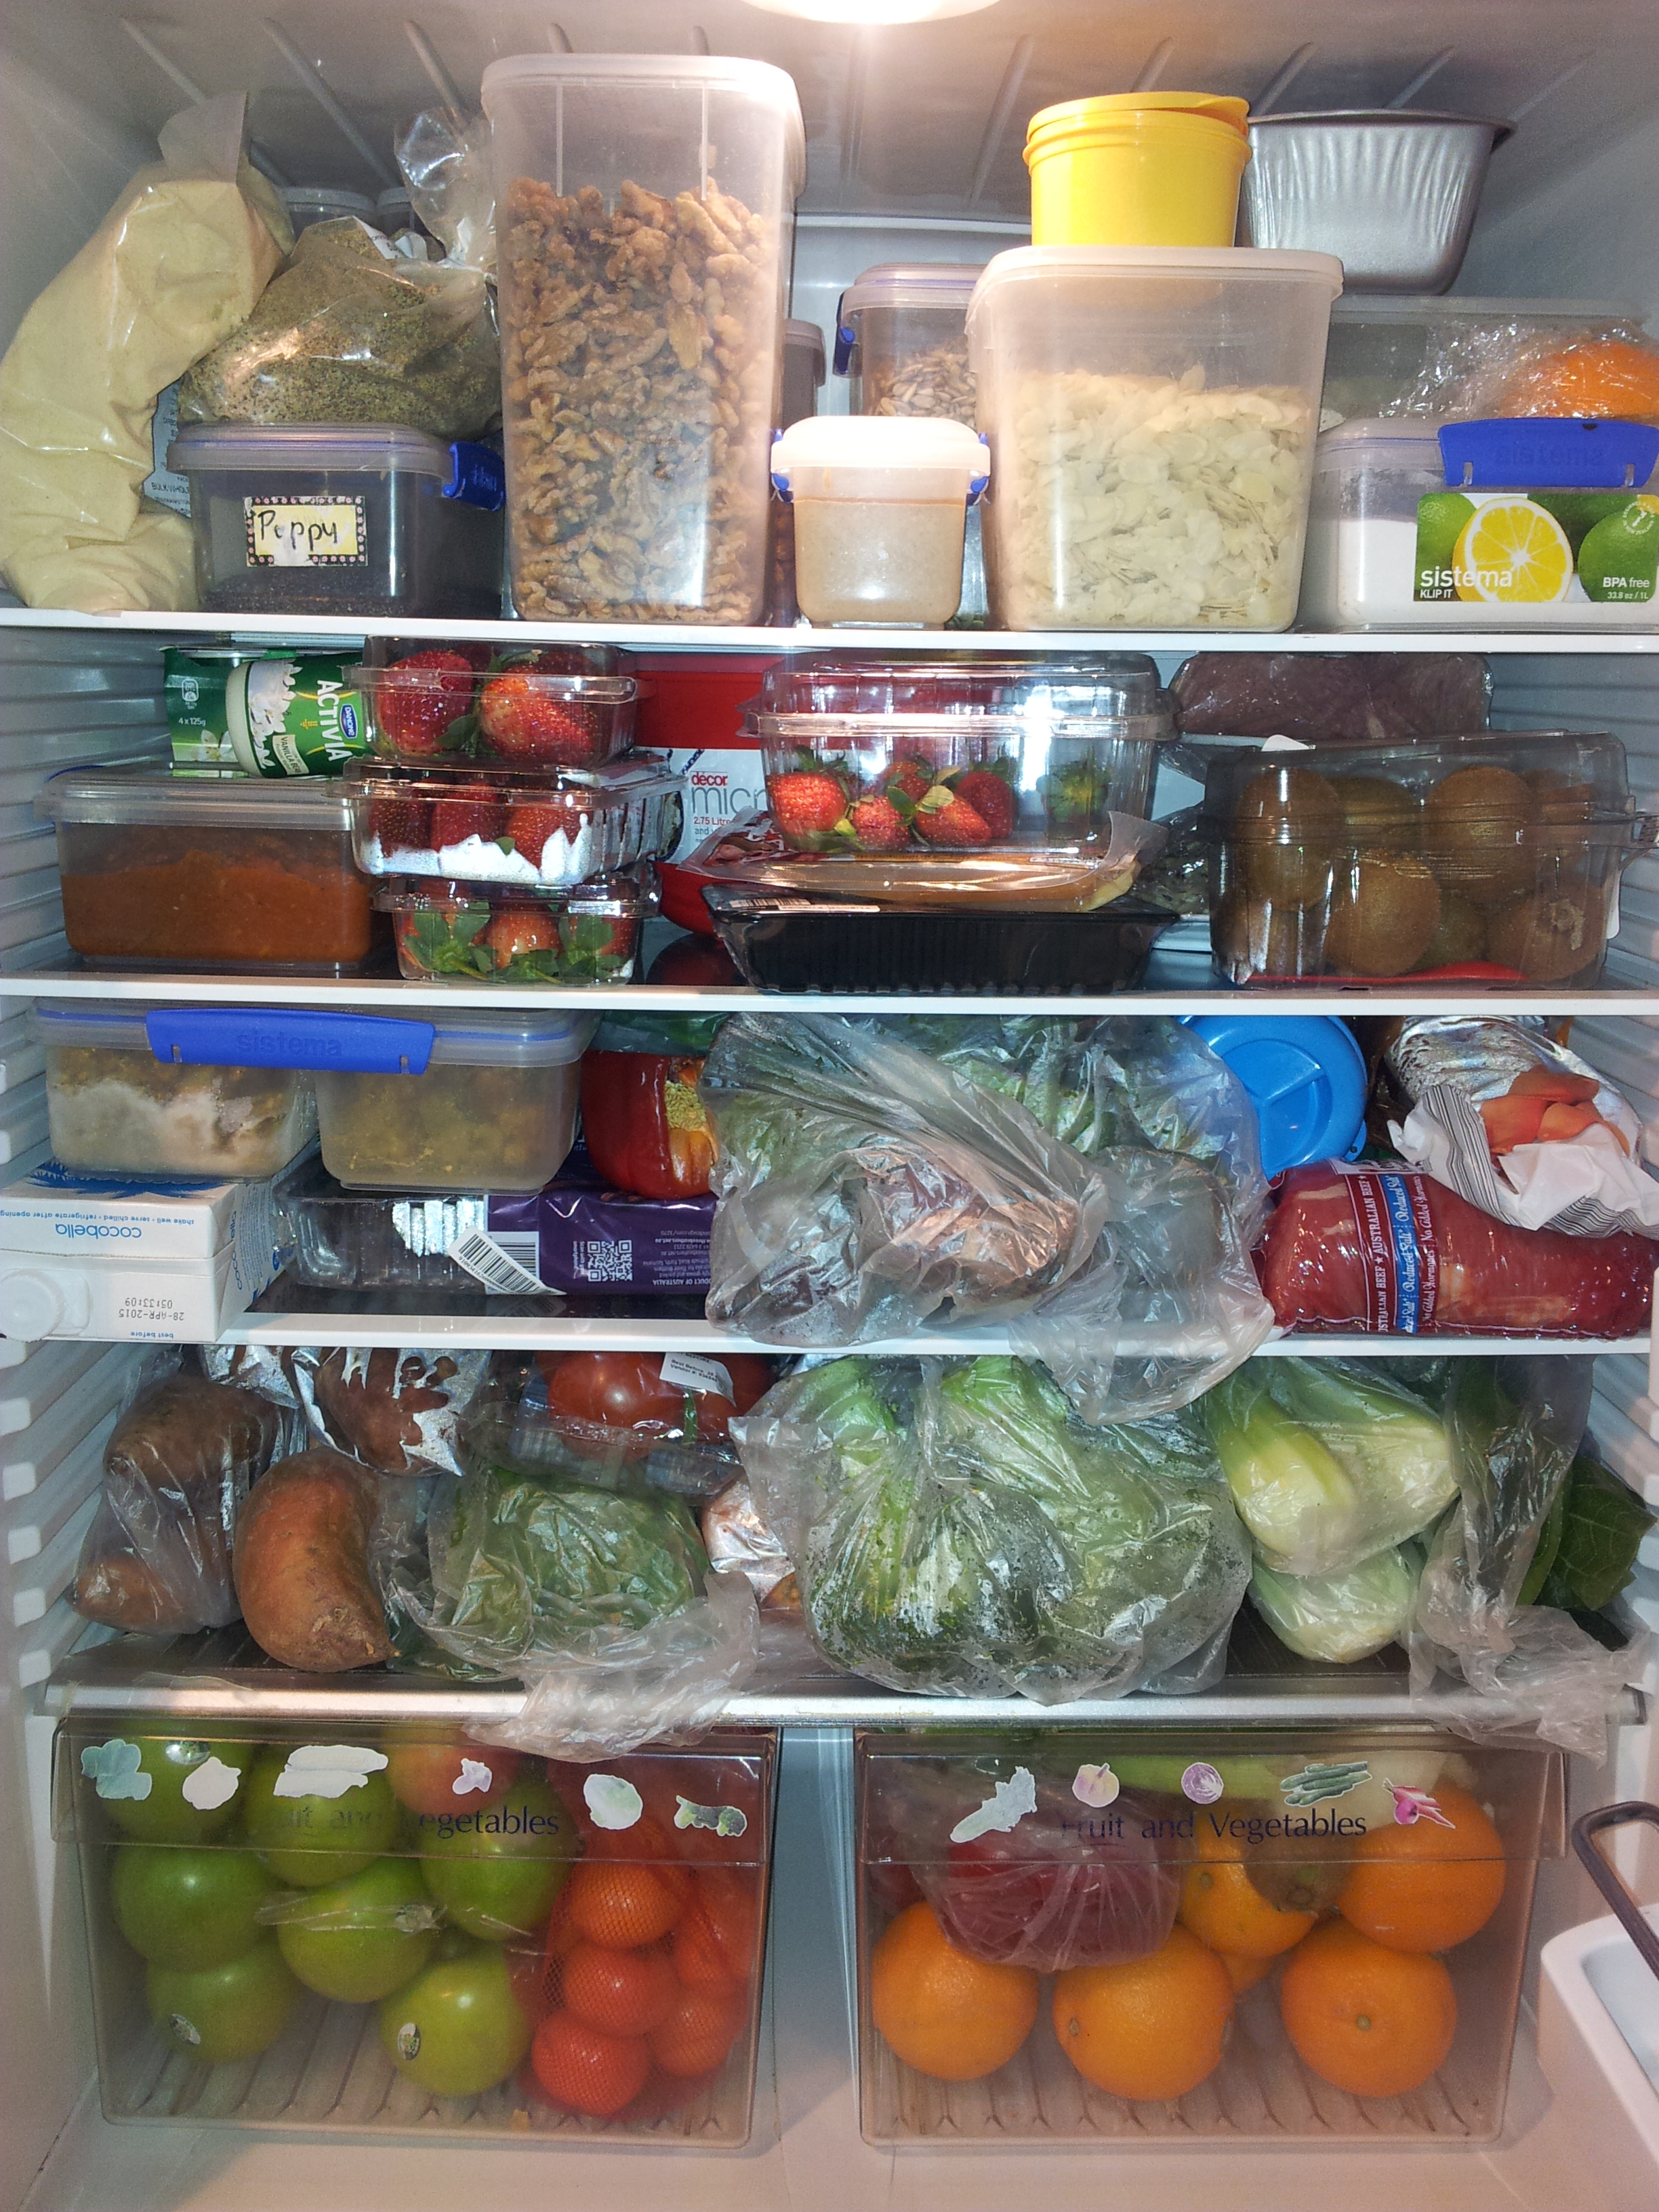
The best way to get started on your smoothie adventure is to fill up your fridge with lots of healthy fresh food. Here is a quick snapshot of my fridge as it looks most of the time.
I really need a bigger fridge!
If you have enjoyed this post please share it with a friend. You can keep up to date with my daily meals and wellness tips on Facebook: holistic wellness for life, Instagram at holistic_paleo as well as Twitter, Flickr, Tumblr and Pinterest.
I have never been a lover of apple crumble or of cooked apple in general but l do like to eat something sweet once in a while. I have seen a few apple and berry crumble dishes on Instagram recently and they have been sitting in the back of my mind as l have been contemplating how to make a healthy version that would appeal to me. I literally got my favourite ingredients out of the pantry and layered them on top of one another with a wonderful result. The whole family pounced on this dish as soon as it came out of the oven and the flavours mixed together beautifully.
Once you have peeled and sliced the apples this dish takes just a minute to put together.
Ingredients/Method: Everything organic if possible.
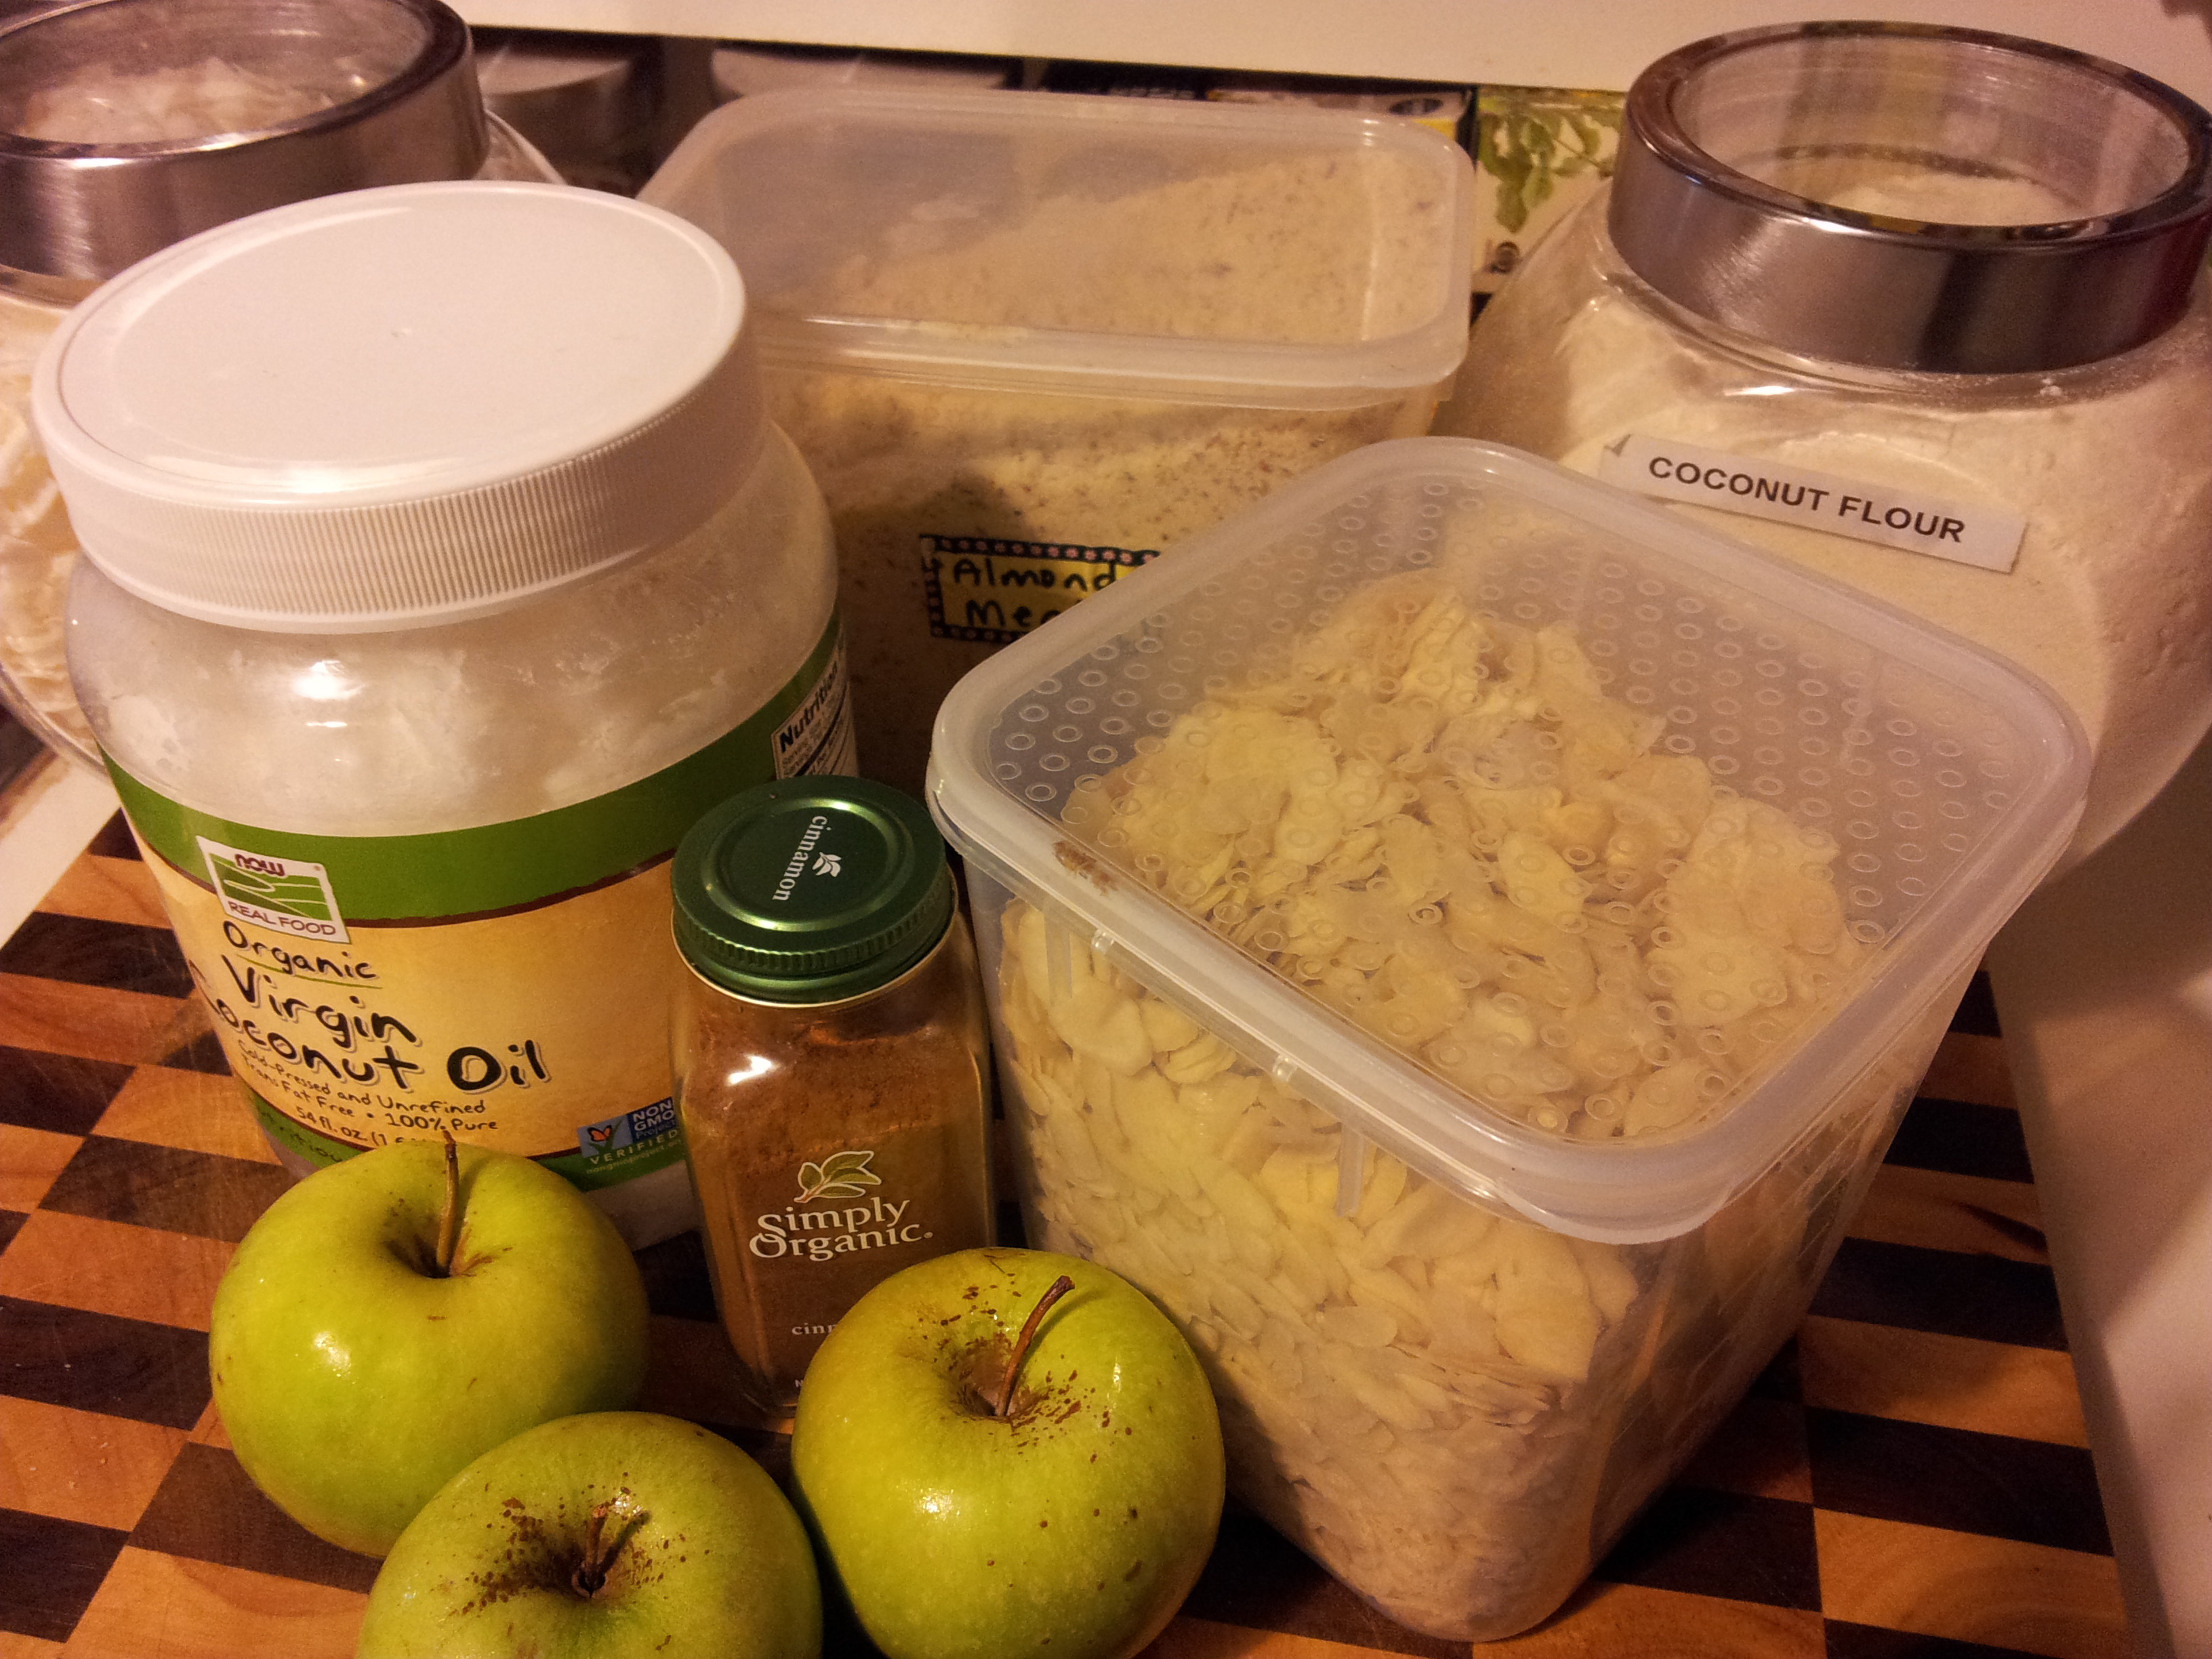
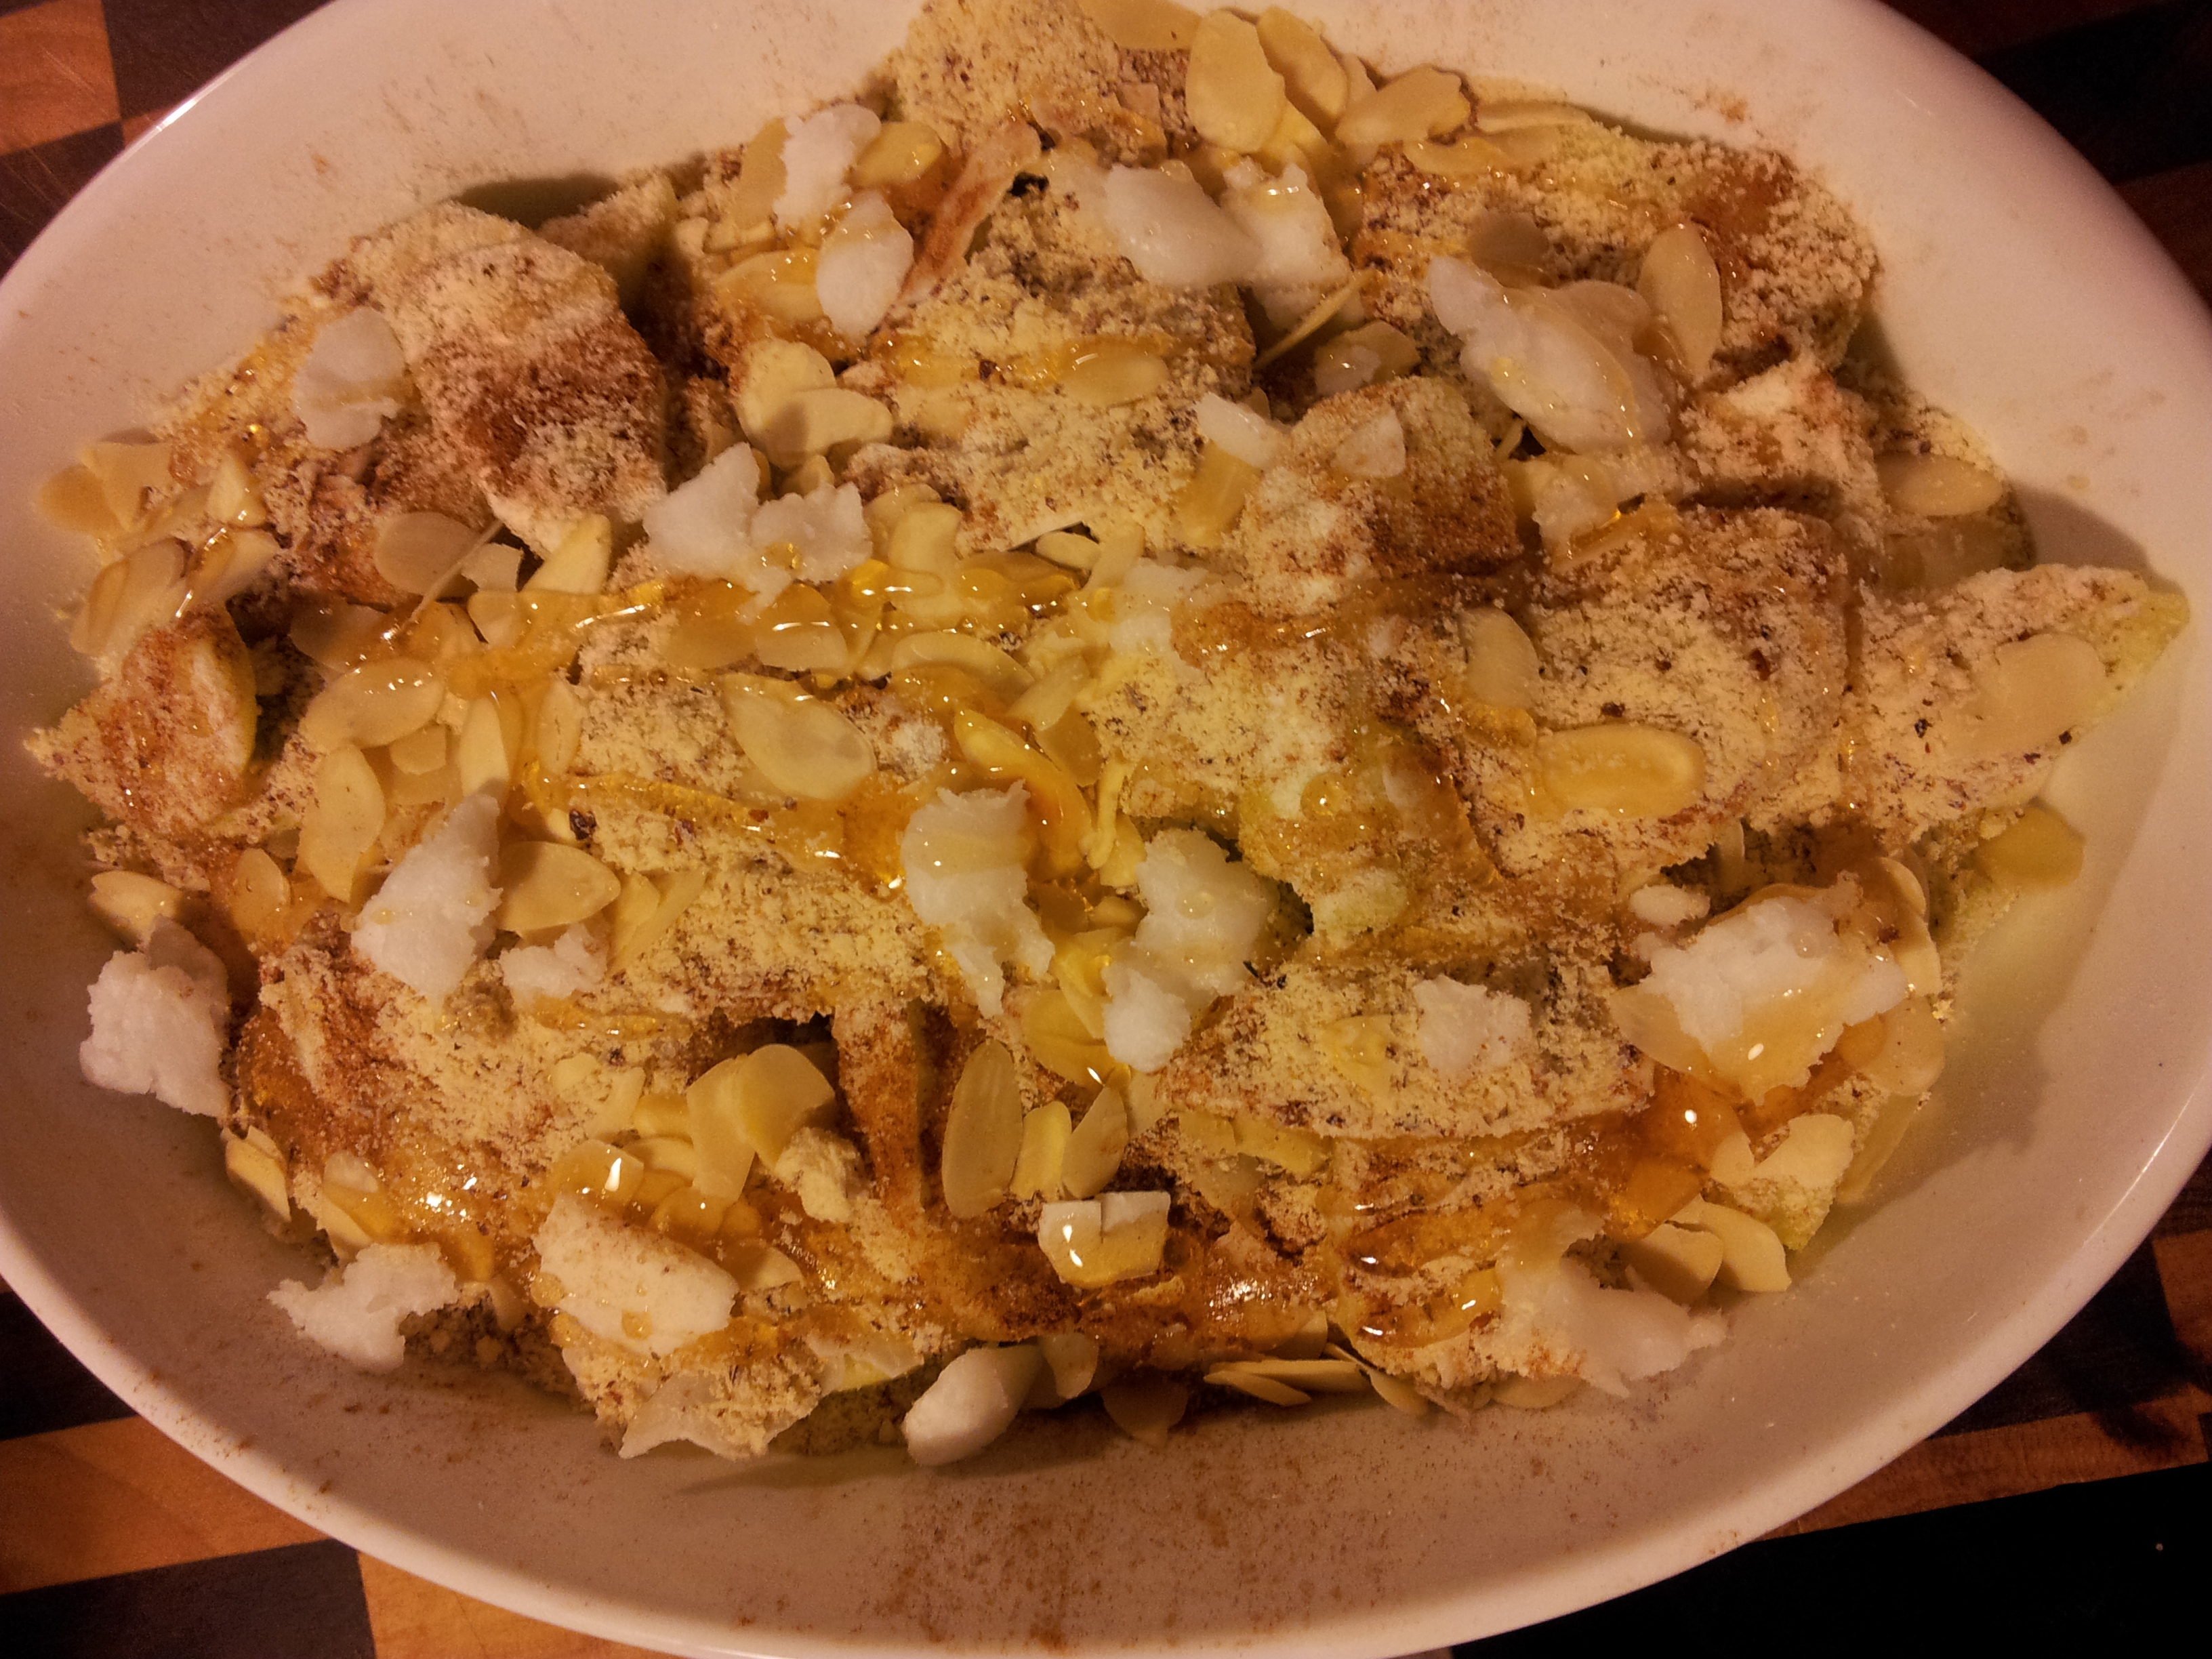
Apples- I used four small apples but if they are very large just two might do. It really depends on the size of the dish and your family. I peel the apples because of the horrible waxy coating but you could leave the skin on if they are from your own tree as an example. Core and slice the apples and place randomly in a baking dish. I used a smallish oval ceramic dish.
Coconut flour Sprinkle 1 tablespoon over the apples.
Coconut flakes- Add 1 generous tablespoon over the apples.
Cinnamon- I didn’t measure this as l just sprinkled a really generous layer over the whole dish.
Almond meal- Sprinkle 2 tablespoons over the apples (you could rub in the coconut oil here if you want)
Flaked almonds- I didn’t measure this either but just sprinkled a generous hand full over the dish. There really isn’t a limit as to how much you can put on as they go a lovely brown colour and add some crunch.
Coconut oil- I placed one generous teaspoon over the entire dish. I just put little bits all over the top and you can use more if you want an extra coconut flavour or you could rub it into the almond meal before you add it.
Honey- I used a raw organic honey and drizzled 1 generous teaspoon over the whole dish.
Ready for the oven. Just layer all the ingredients on top of each other.
Cooking instructions:
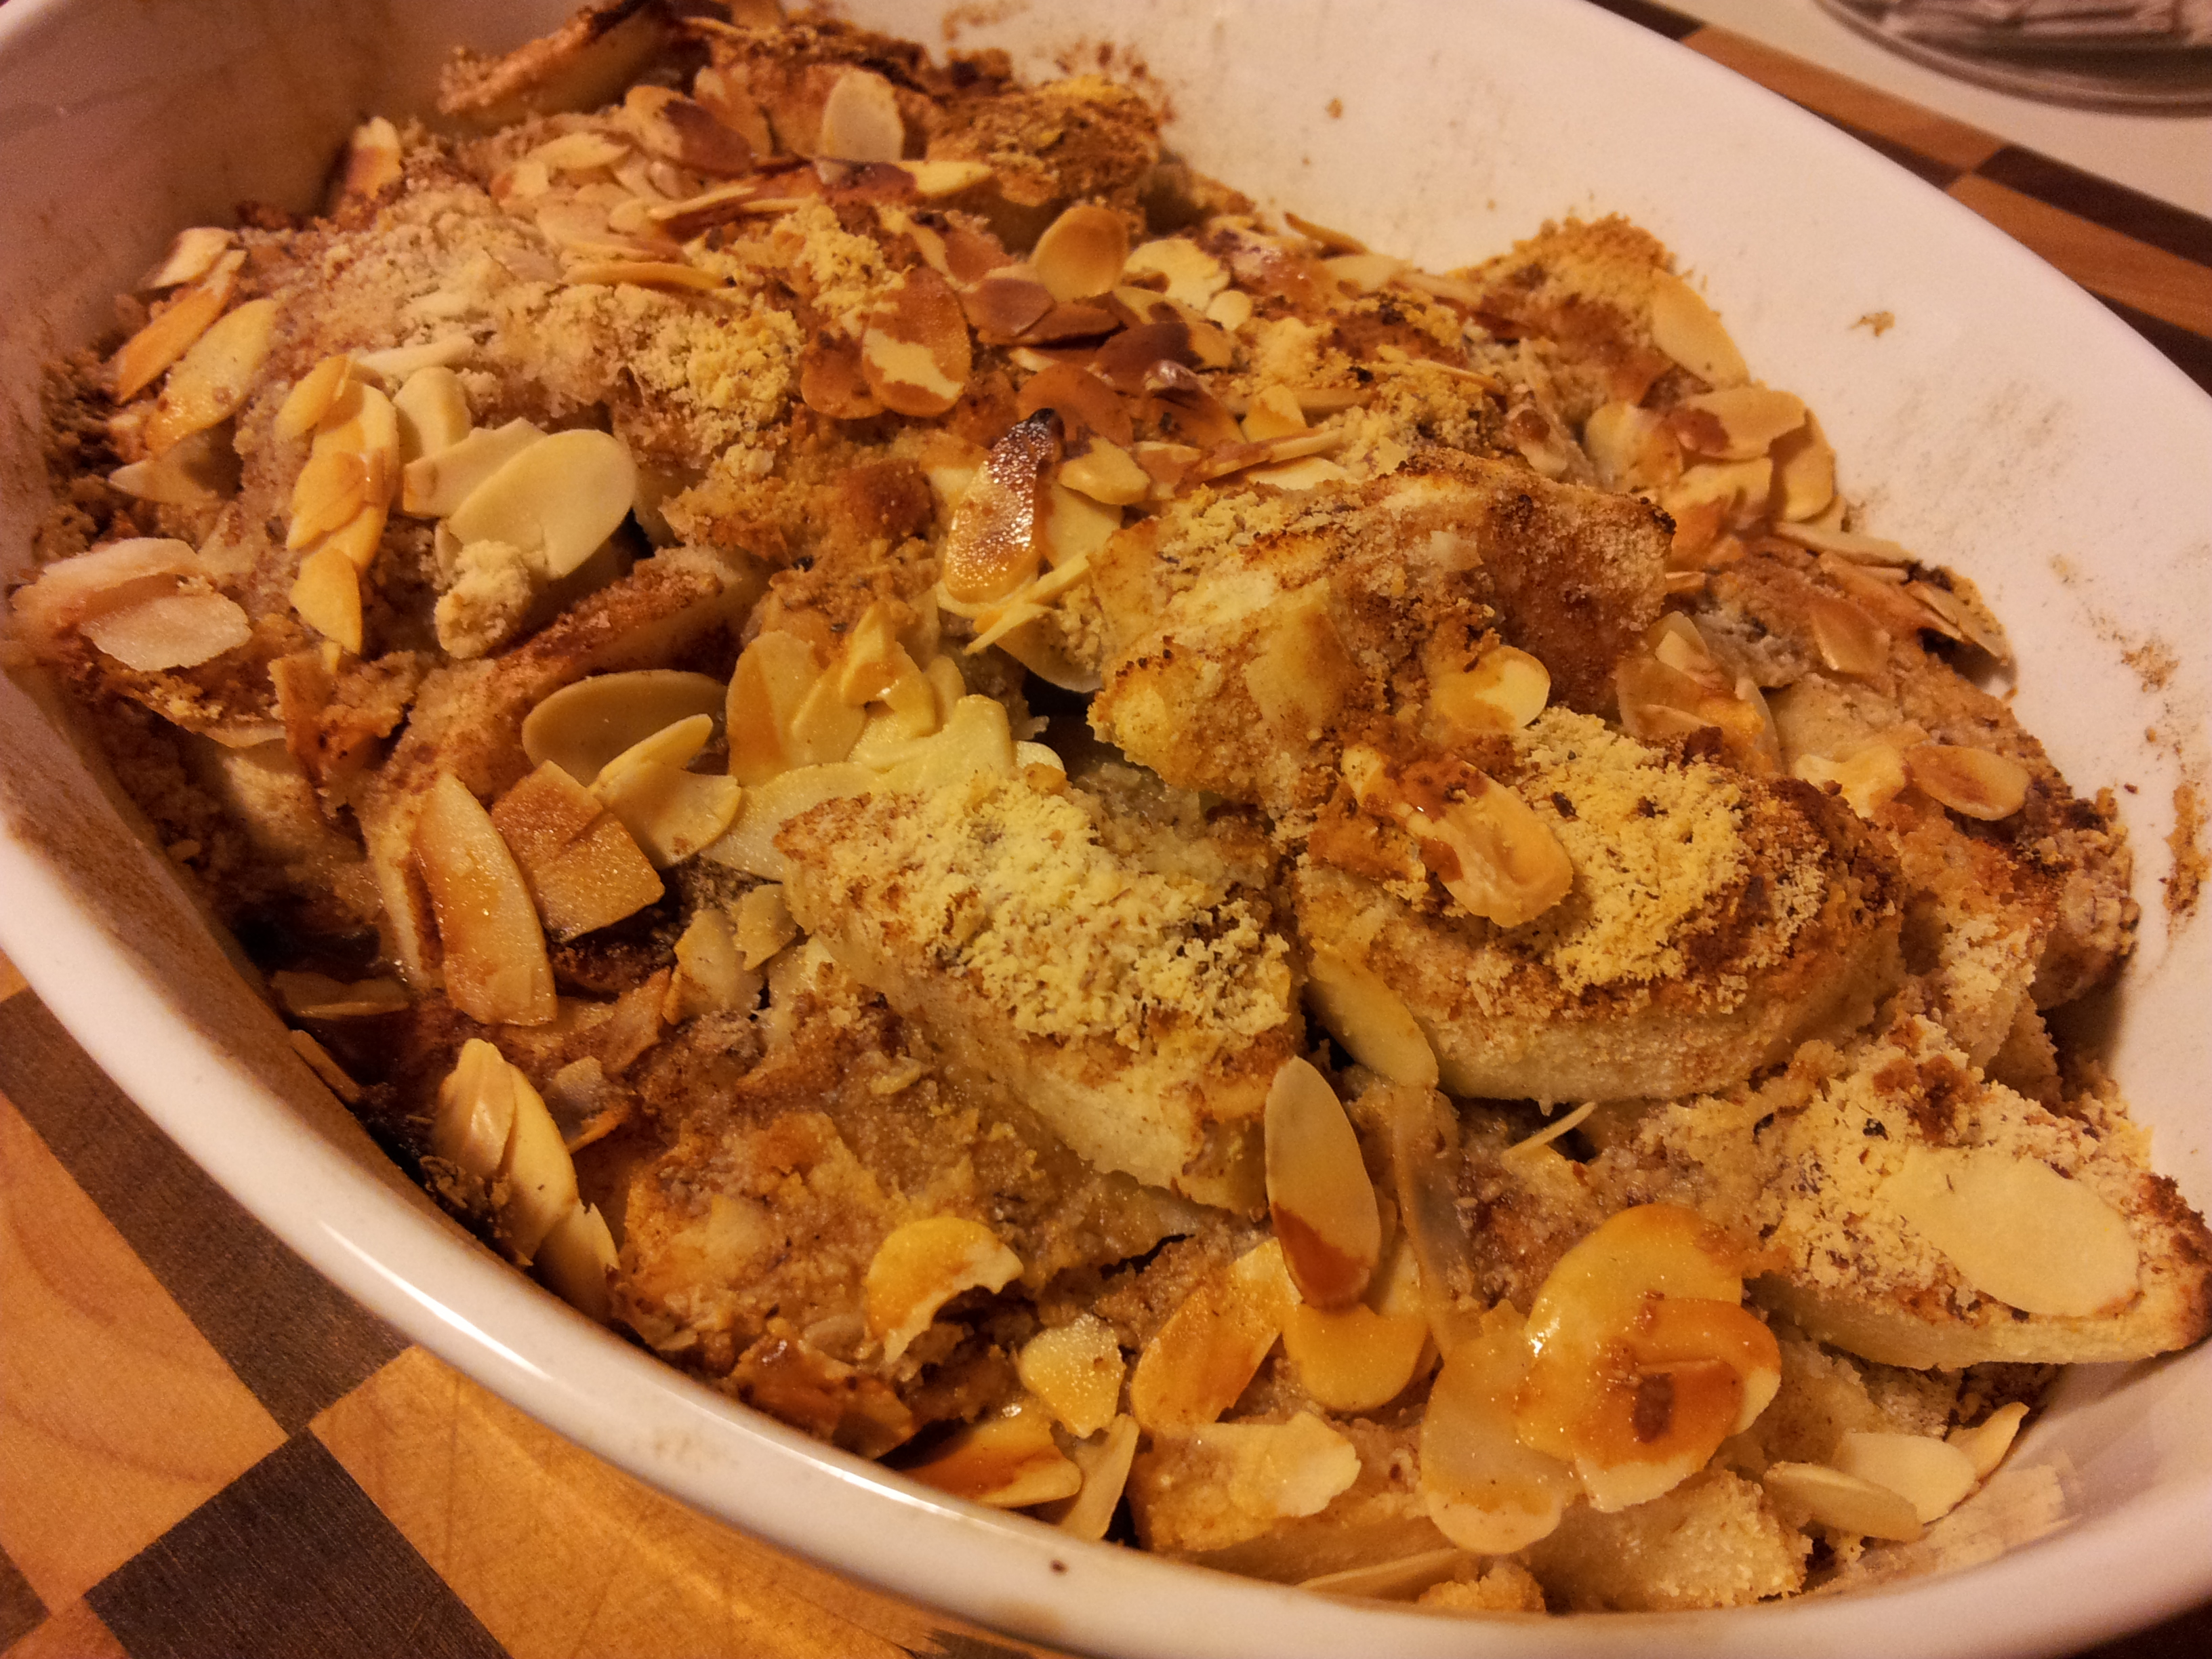
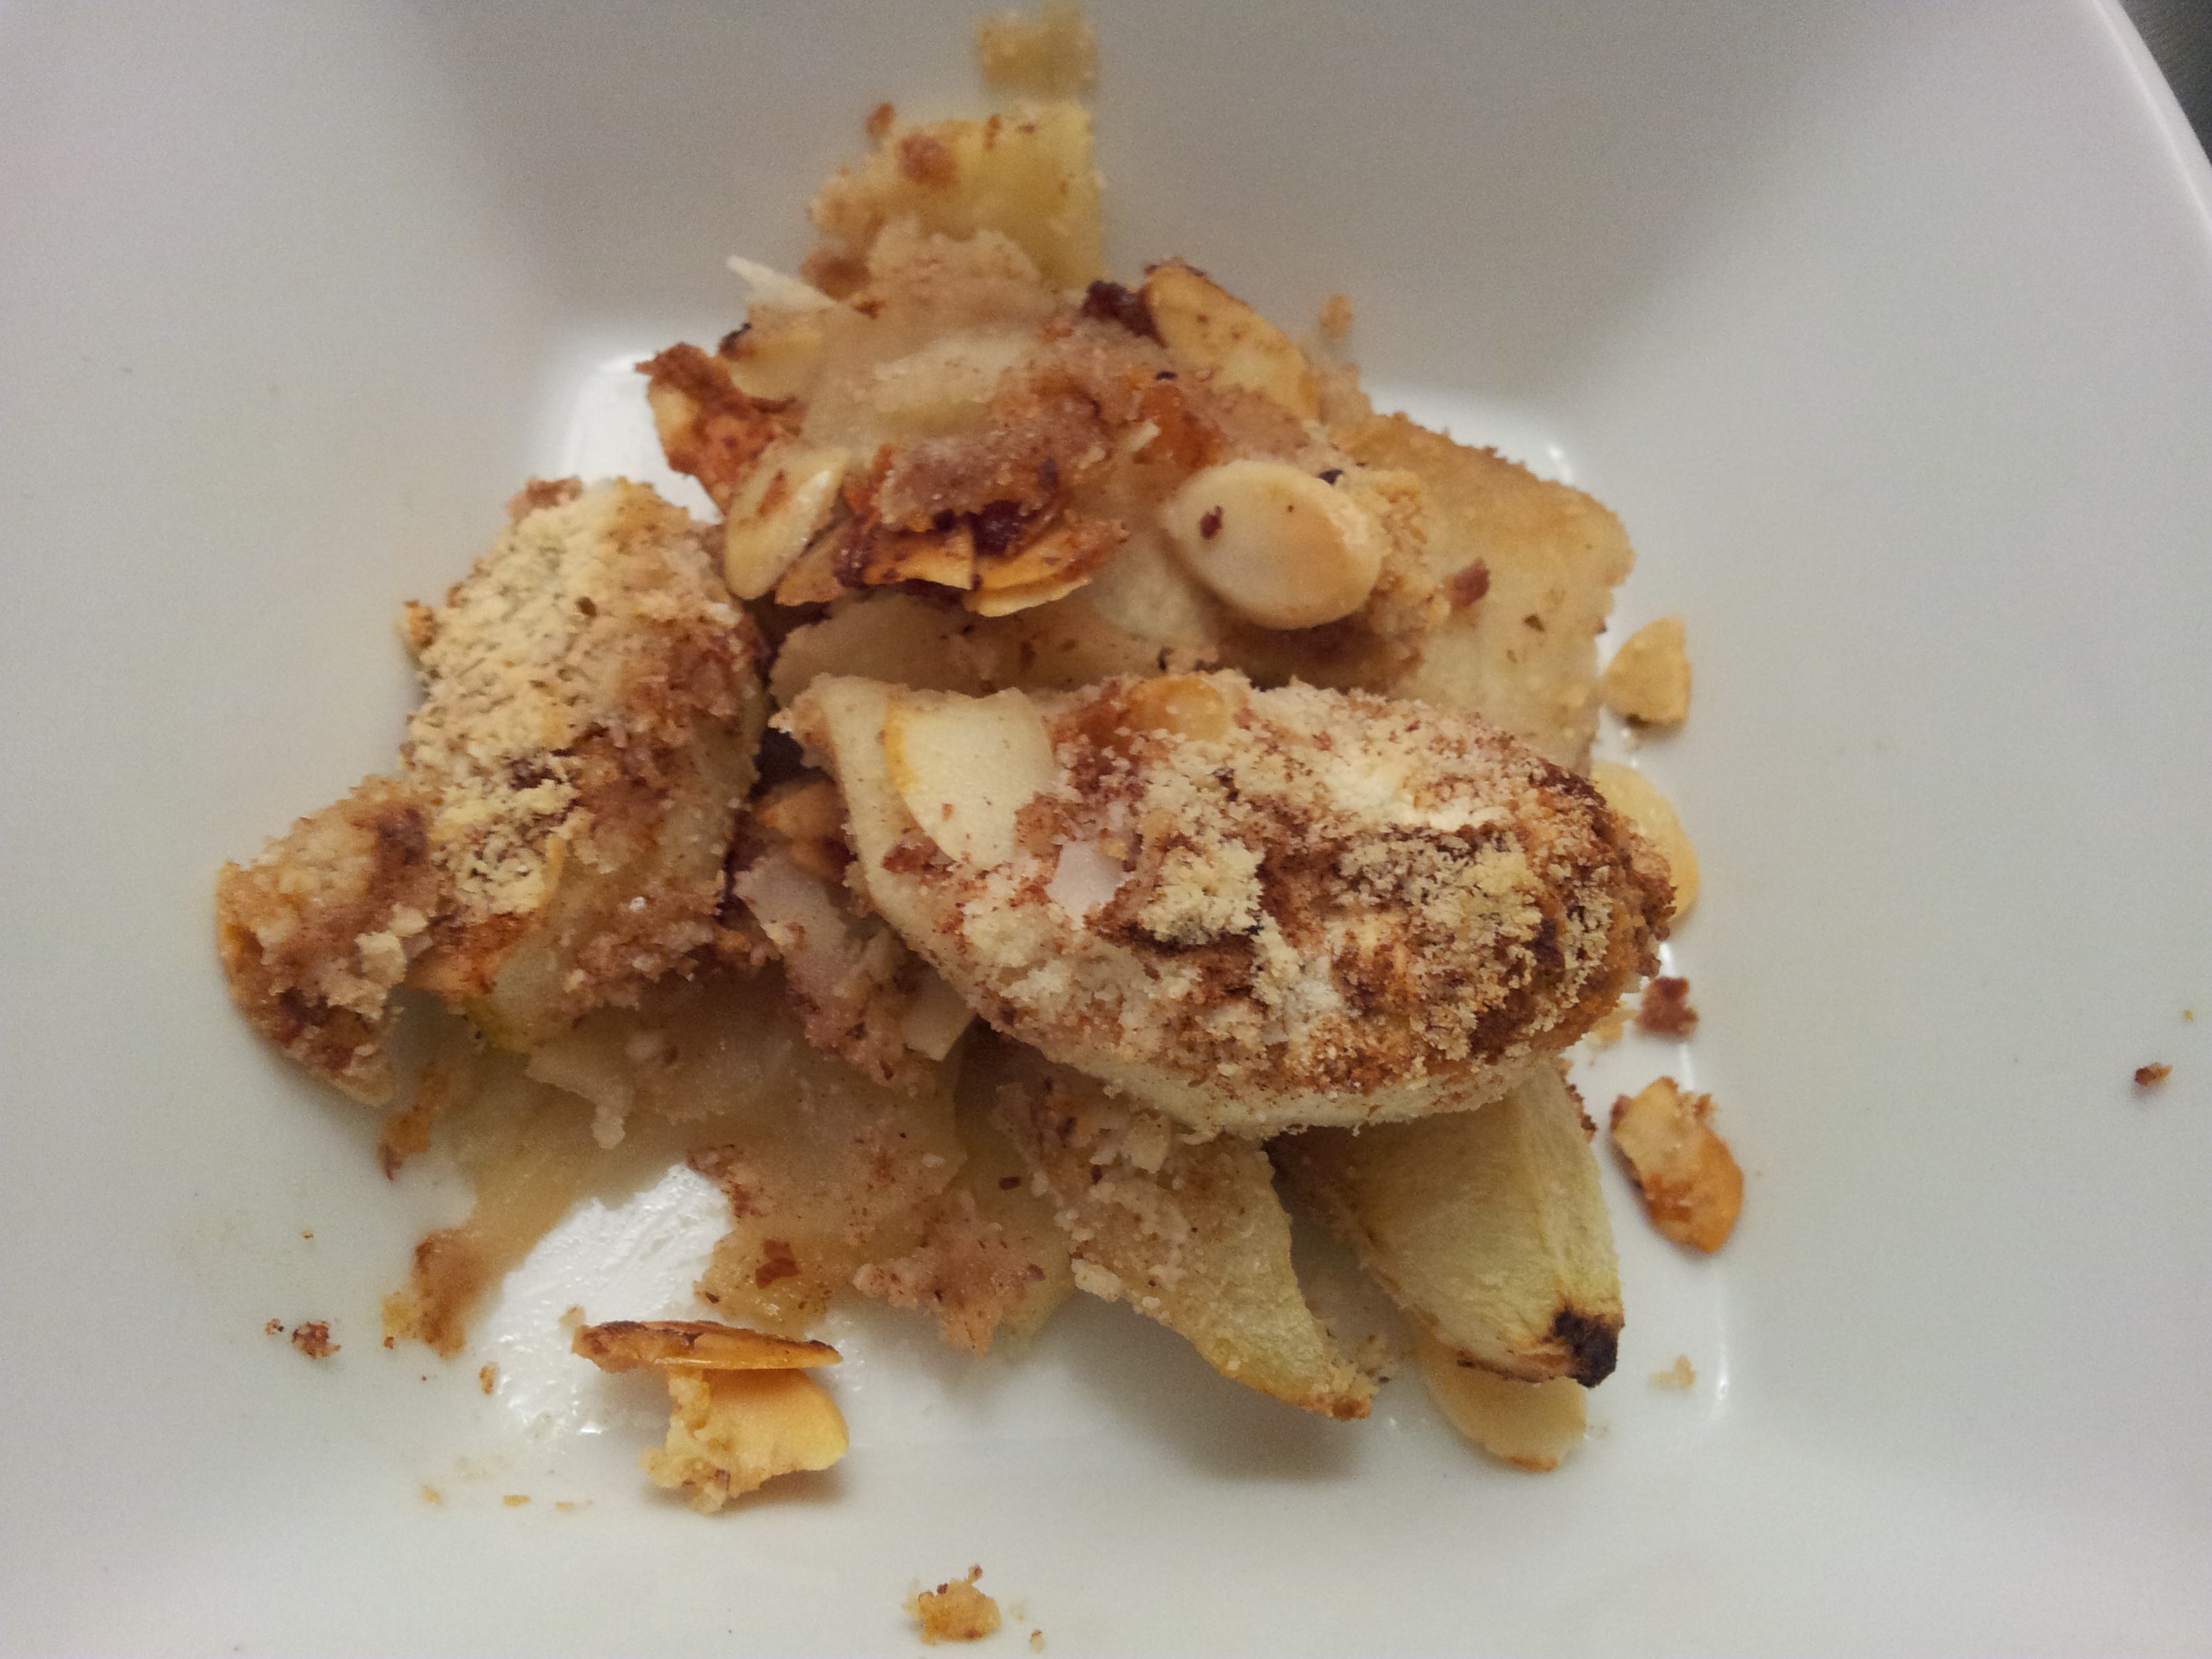
I covered the dish with aluminium foil and placed in a 180 degree pre-heated oven for about 20 minutes and then took the foil off and cooked it until the whole top was golden and looking delicious.
I had this plain but you could top it with a healthy ice-cream or fresh fruit.
The serving looks quite small in the photo but it is a sweet dish and l was completely satisfied after eating this. The recipe could easily be adapted by using different fruits such as peach or adding some berries to the apple.
If you have enjoyed this post please share with a friend. I am also on Instagram, Pinterest, Flickr, Tumblr and Twitter where l share my daily recipes and meals.
A delicious healthy snack bar that will add some sweetness to your day!
Eat them straight from the freezer or pack them into the lunch box.
Having healthy snacks on hand is vital if you are going to avoid making poor food choices. Being on a restricted diet is hard enough without feeling hungry or as though you are missing out. These bars are healthy, sweet, paleo, gluten, dairy and processed sugar free. They are filled with natural goodness and are a favourite snack of mine. The recipe is flexible and you can change them to suit your own preferences such as leaving out the nuts, using different seeds or changing some of the quantities. All of the ingredients l use are organic and the nuts and larger seeds are activated which means l have soaked them in filtered water and sea salt for a day, rinsed them well and then dehydrated. This process helps to remove the anti-nutrients and support good digestion.
Ingredients:
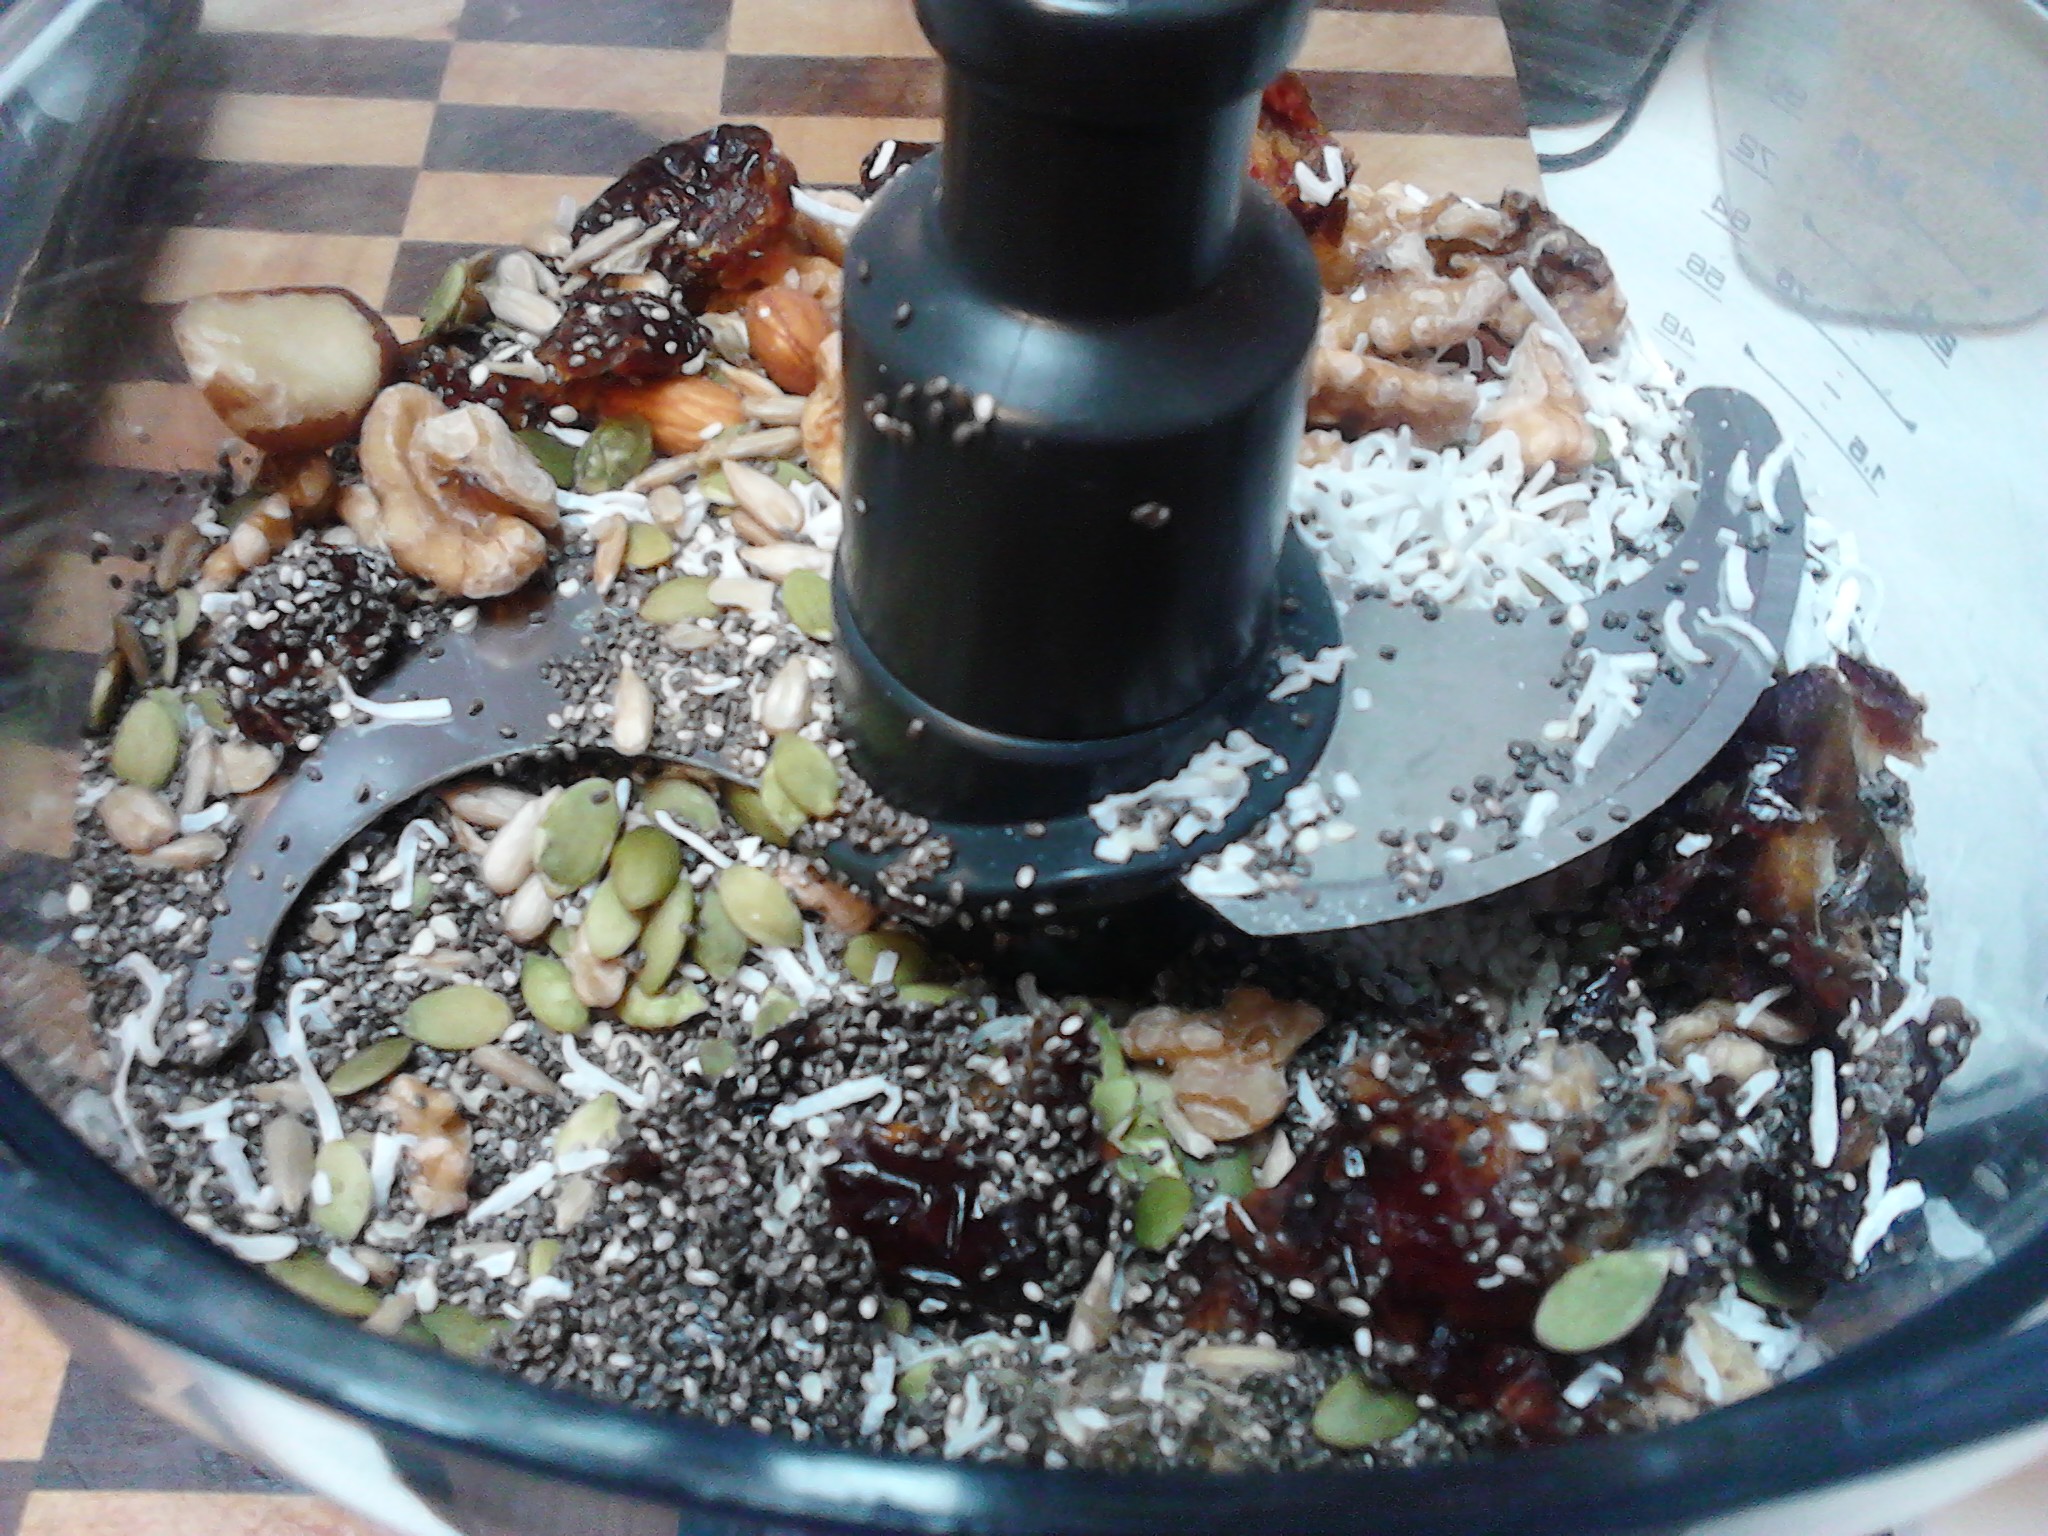
1 cup activated organic sunflower seeds
1 cup activated organic pumpkin seeds
1 cup organic sesame seeds
1 cup black chia seeds
1 cup activated mixed nuts (e.g almond, walnut, and brazil)
A generous 1/2 cup organic shredded coconut
8 Medjool Dates seeded and chopped (roughly chop just to make it easier for the food processor)
A good 1/2 cup raw organic honey (use organic or regular honey if that is what you have)
A good 1/2 cup organic coconut oil
These ingredients add a delicious flavour to the bars.
Place the nuts, seeds, shredded coconut and dates in the food processor and chop until roughly chopped. Gently warm the honey and coconut oil in a saucepan and pour into the food processor. Pulse until all there is a good consistency and all the nuts and seeds have been broken up.
Be careful of the very sharp blade.
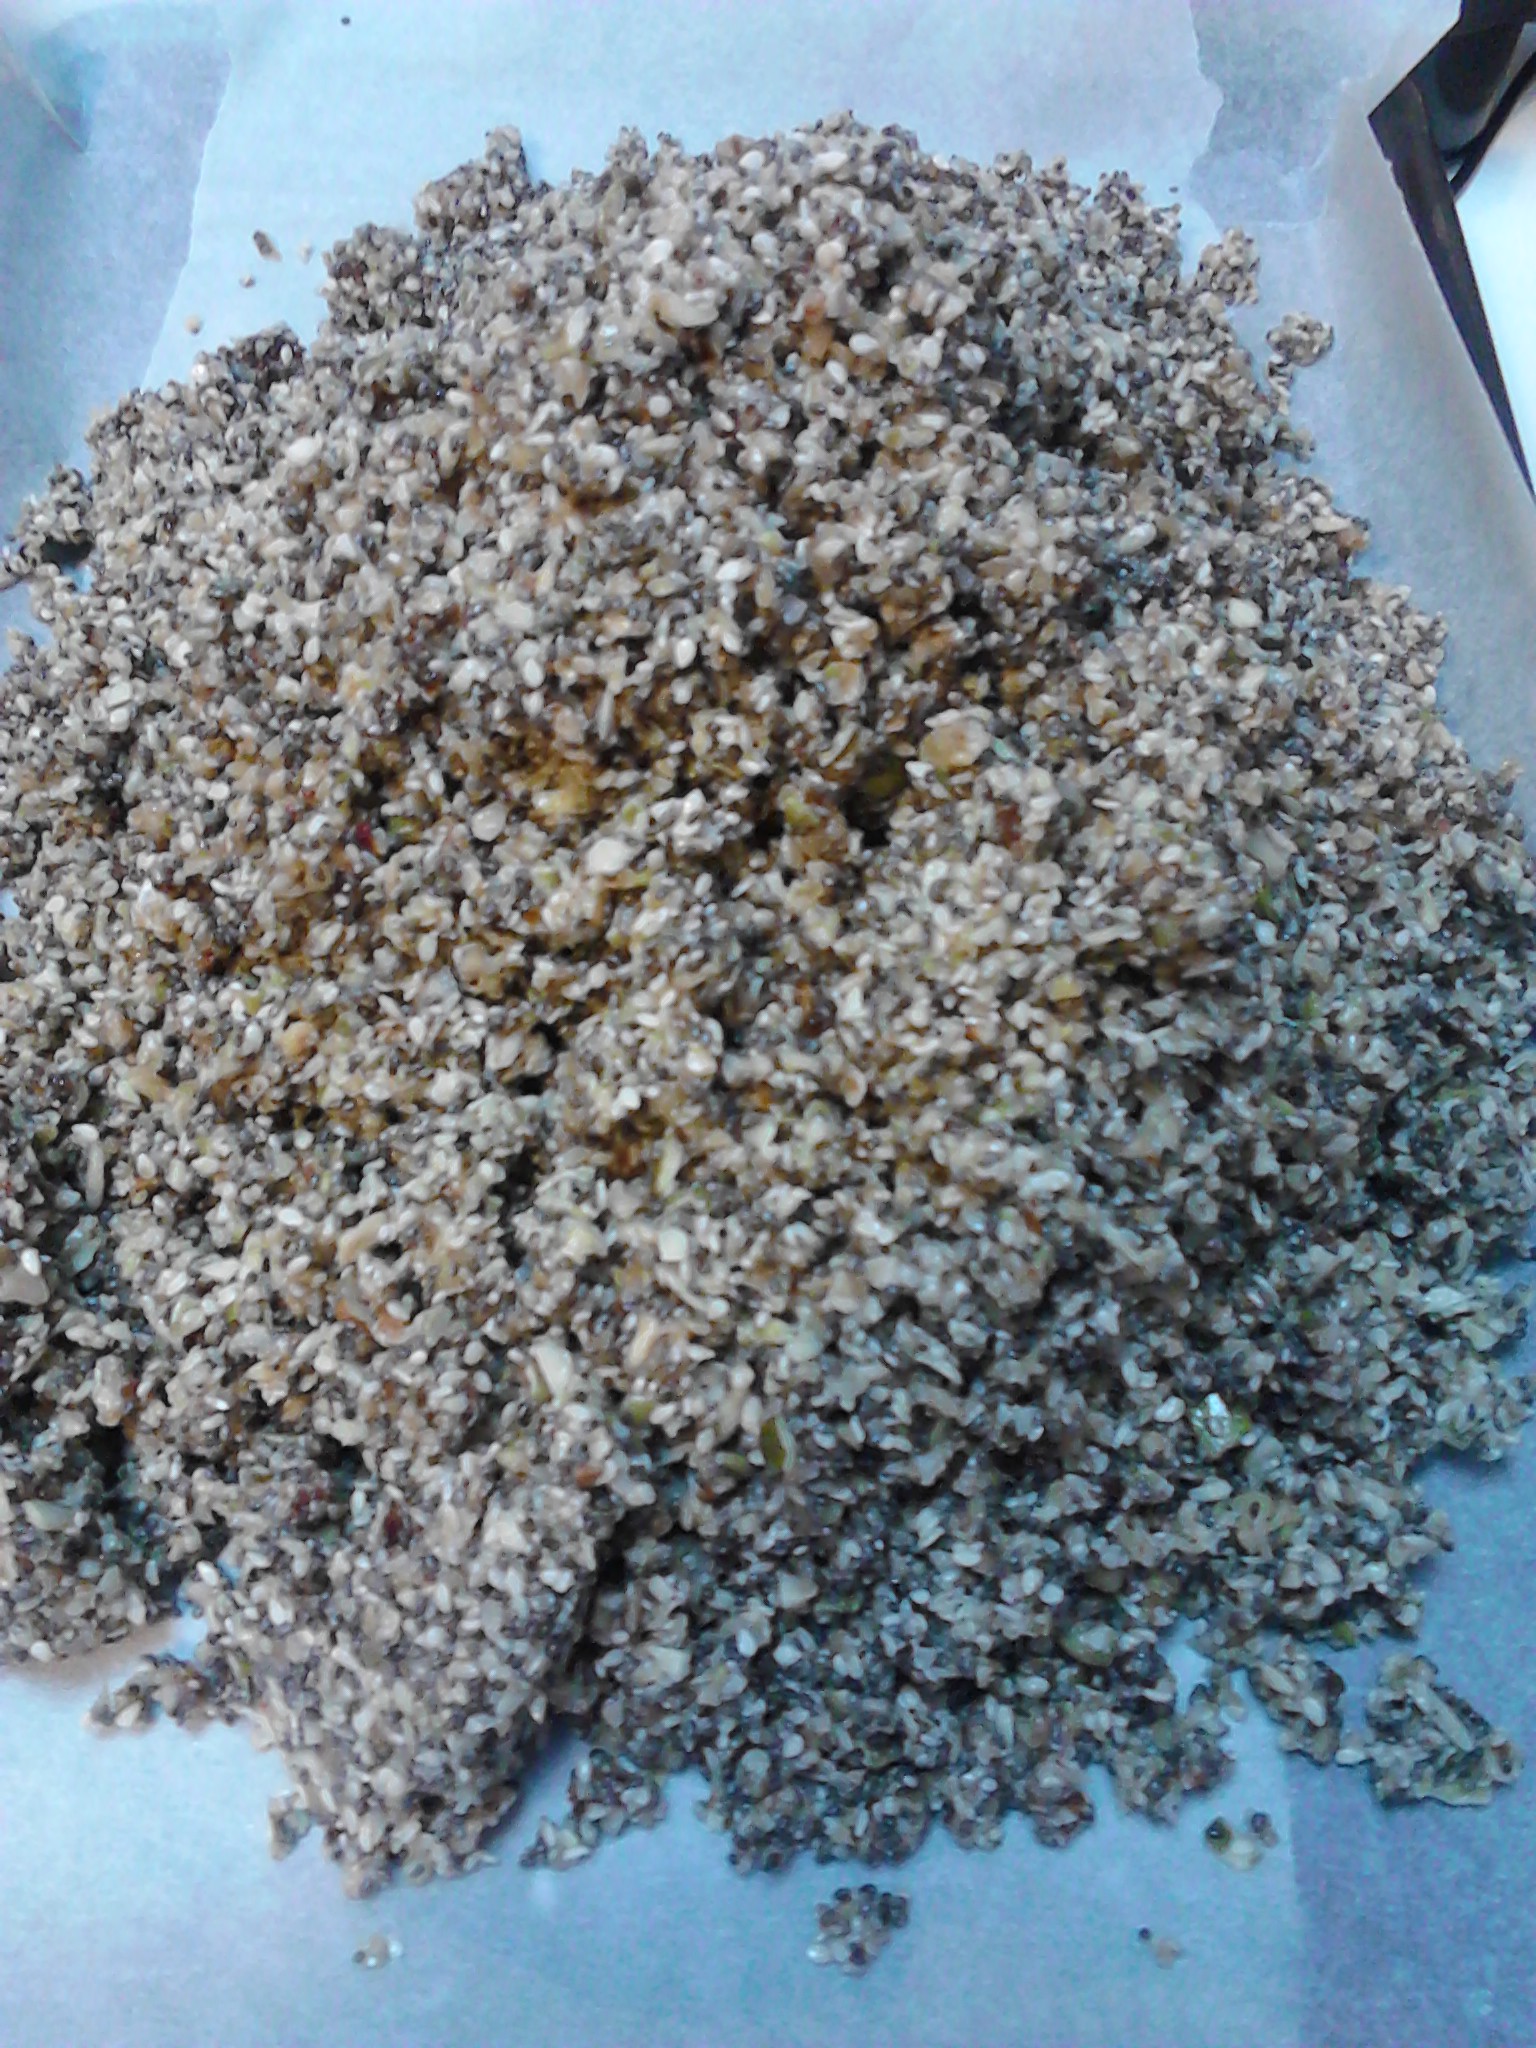
Have a tray ready which is lined with baking paper. Run your finger around the edge of the tray so there is a crease in the paper. Pour the ingredients onto a tray lined with baking paper. Now is a good time to have a taste test. The mix should be sweet and delicious.
The mix is ready to be flattened.
Use a spatula to flatten the mix and make sure it is quite even across the whole tray and give special attention to the corners.
Ready for the oven
I have tried a few different oven temperatures and times but basically you don’t want the oven too hot as you will burn the seeds and lose lots of nutrients, and you want to just cook it until the edges are going golden. I cooked mine today in a Fan Forced Convection Oven at 170 Degrees Celsius for 30 minutes. You will be able to check this after your first batch.
Remove the tray from the oven and let cool until cold. Another option is when it is slightly cool to place it in the freezer for an hour whilst still on the tray. This is what l do now as l don’t like to wait.
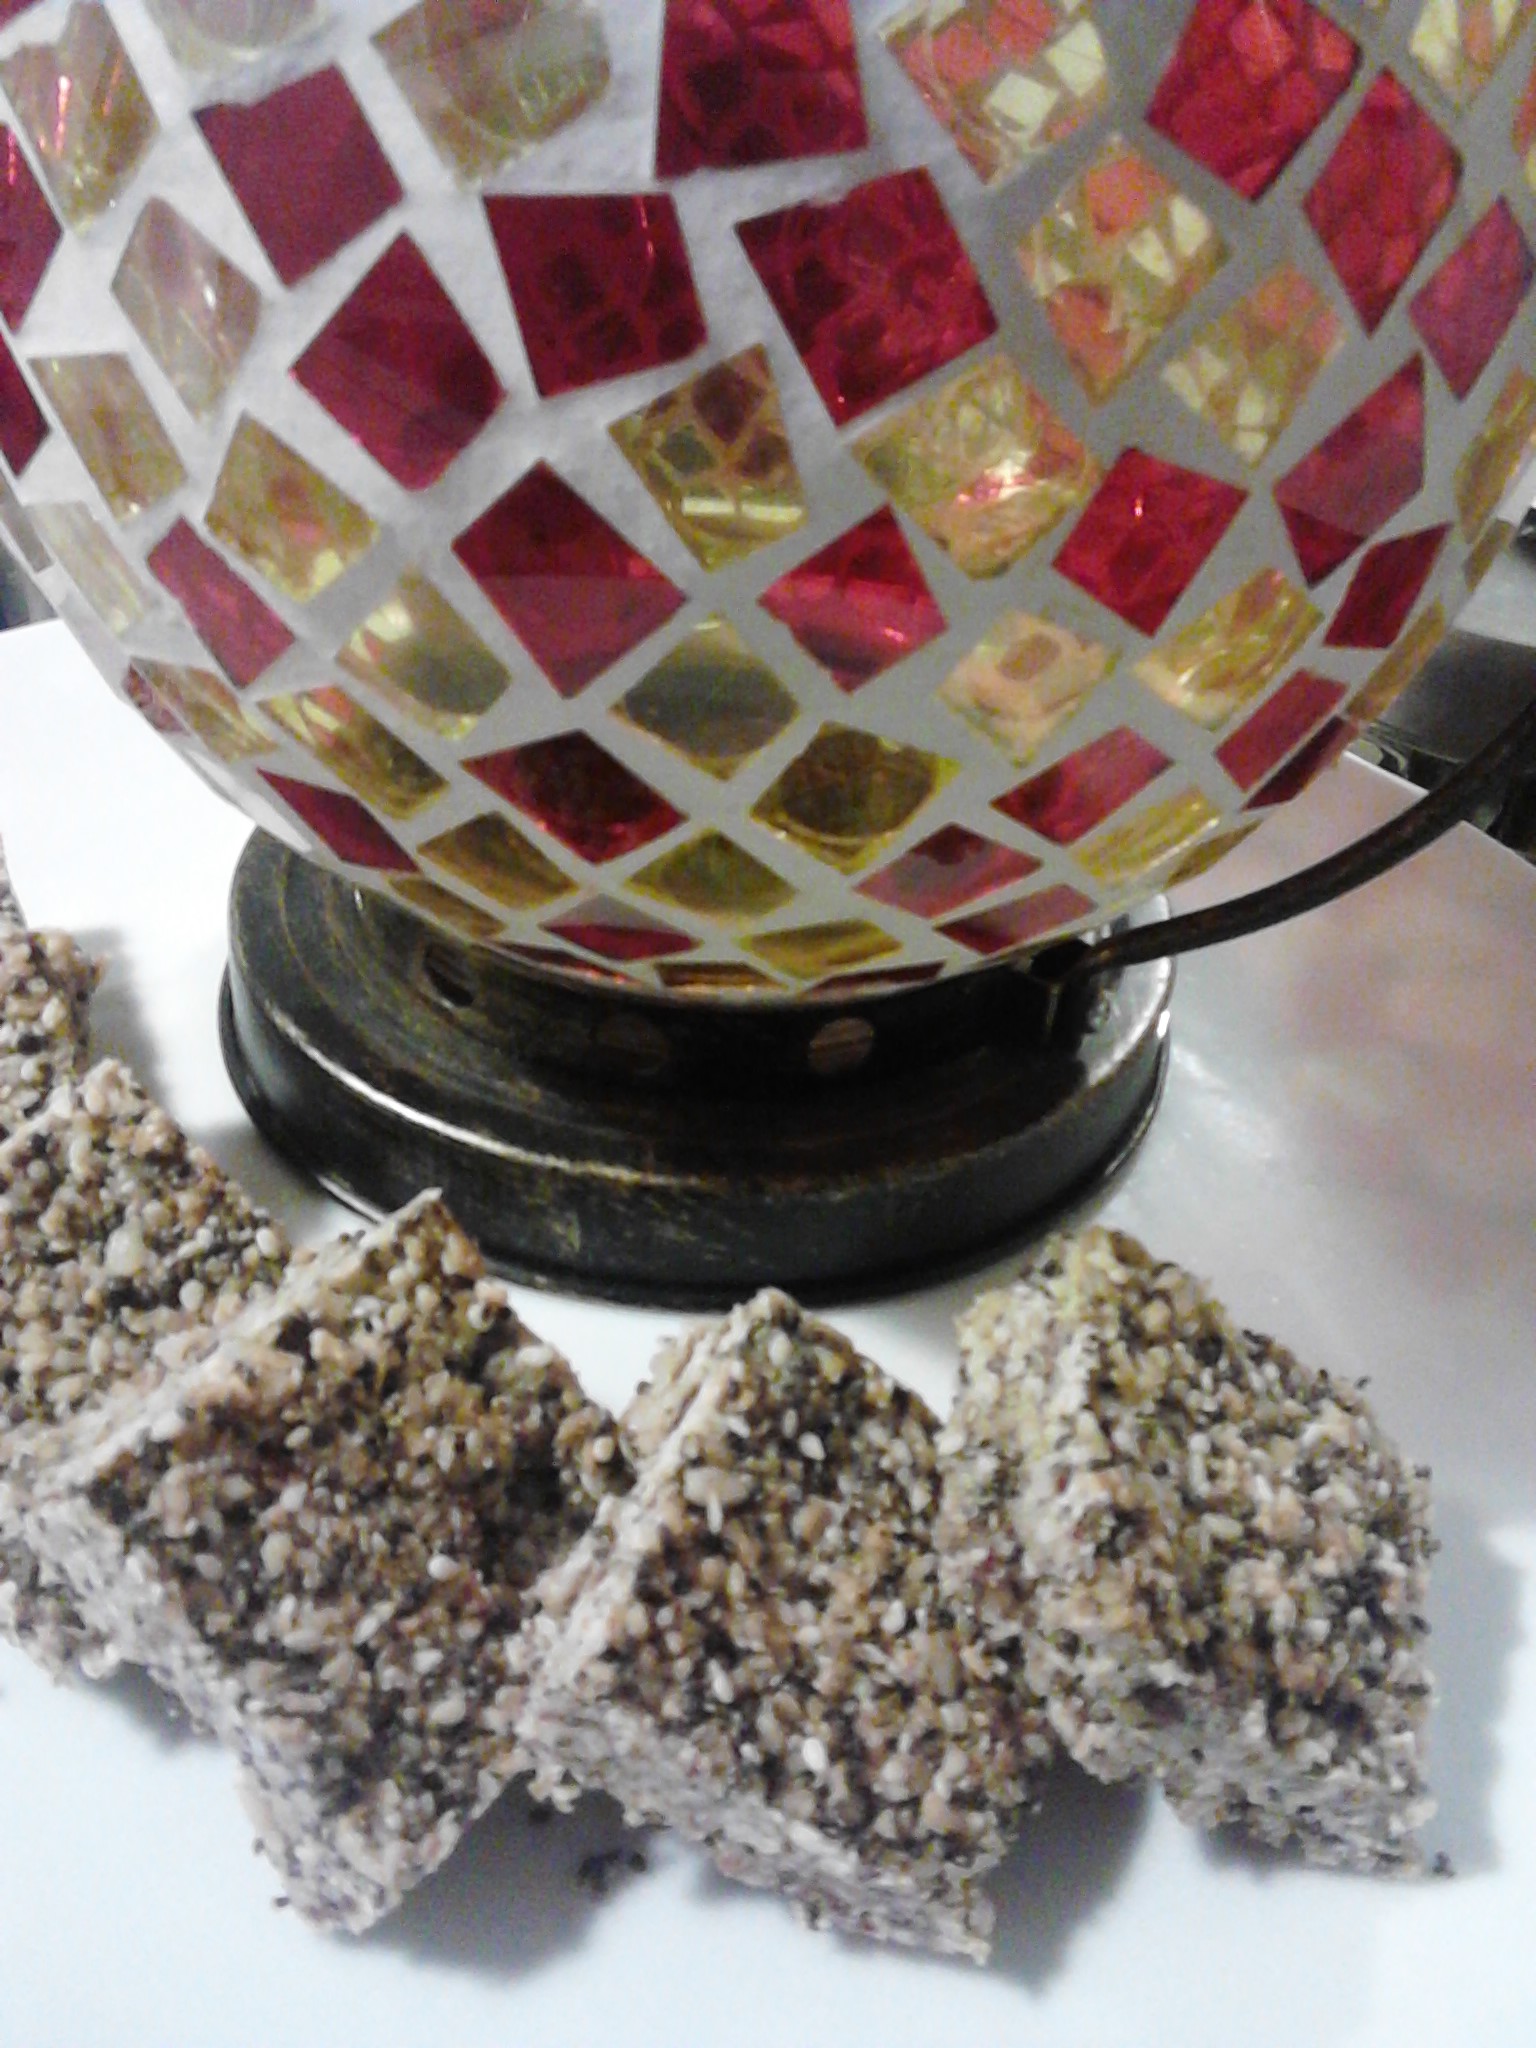
Remove from the freezer and cut.
Use the edges of the baking paper to carefully remove the bars as a whole from the tray and lay it on a flat bench. Cut the bars while still on the baking paper into whatever size suits you using a very sharp knife and wiping clean after cutting a row. Another option is to use a pizza cutter and it helps to give it or the knife a wipe after each row. I think it is better to have the bars quite small as then you have more of a choice over serving size.
Carefully lift each bar into the container for freezing unless you are going to eat them all fresh, but they are very nice eaten when they are just out of the freezer and such a handy snack to take to work or when you are out.
Store in an airtight container in the freezer
The best part of the whole cooking experience is eating the crumbs. Scrape them off the baking paper and into a bowl. Enjoy! You could dip something into these crumbs such as a banana or use them as a topping.
I love this part!
Something to be aware of when eating these bars is that the chia seeds can get stuck in your teeth. This is really a cosmetic issue, so it is best to do a quick tooth check after you have eaten them and you may need a tooth pick to remove them as they can be a bit stubborn.
If you have enjoyed this post please share with a friend. You can follow me on Instagram, Facebook, Twitter, Flickr, Pinterest and Tumblr.
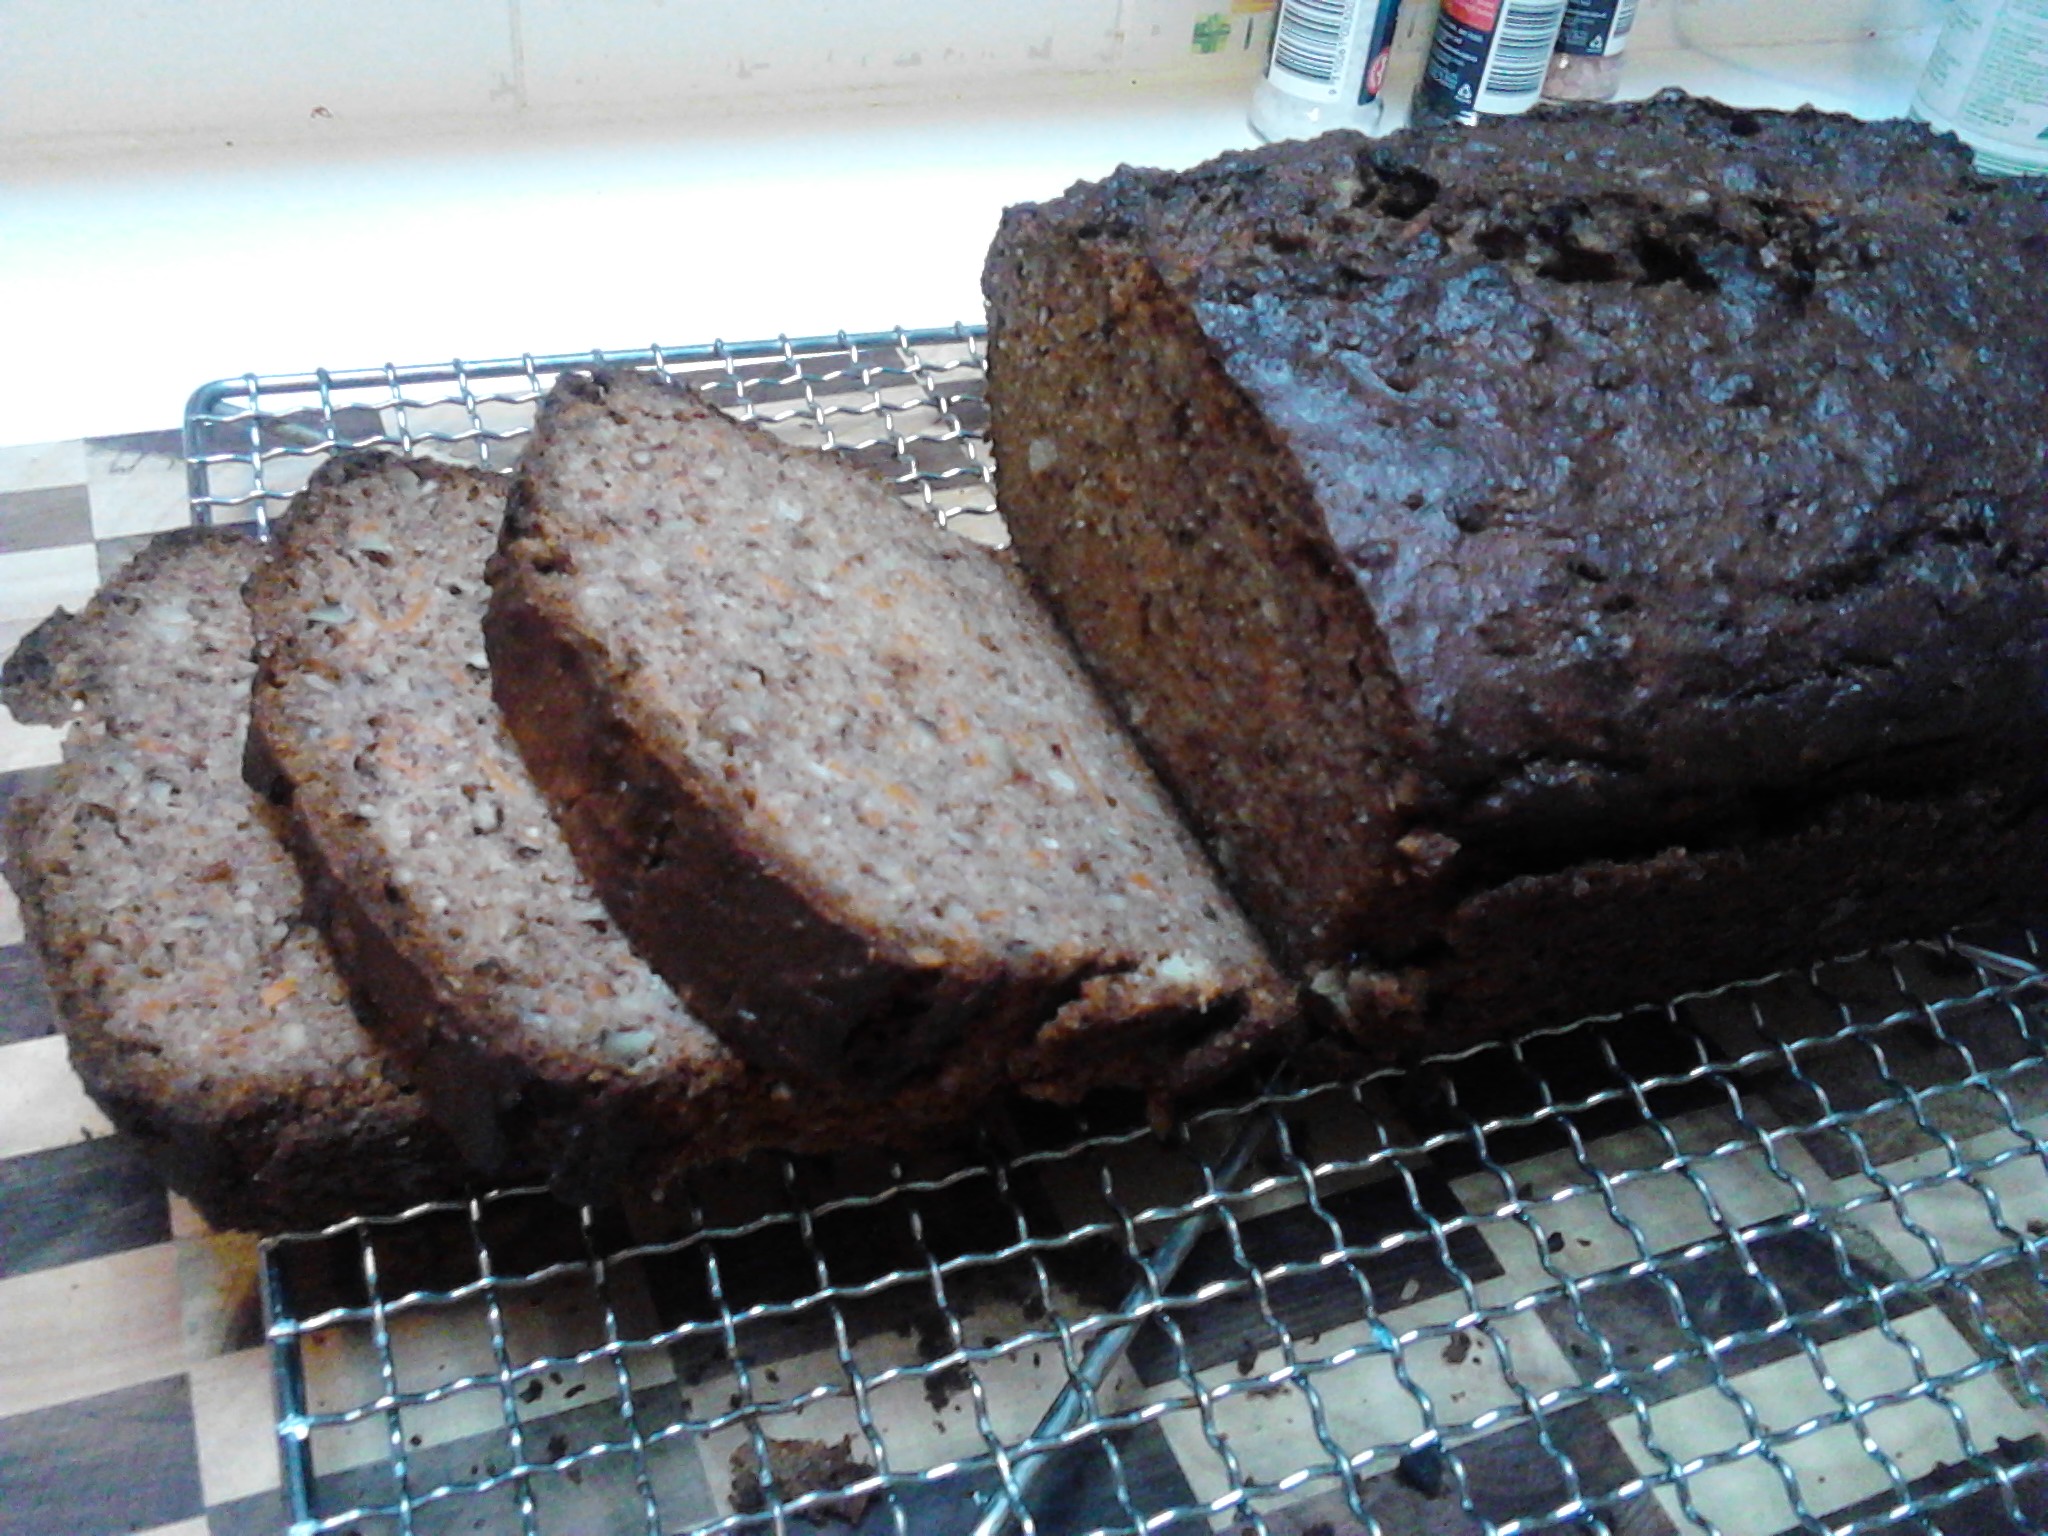
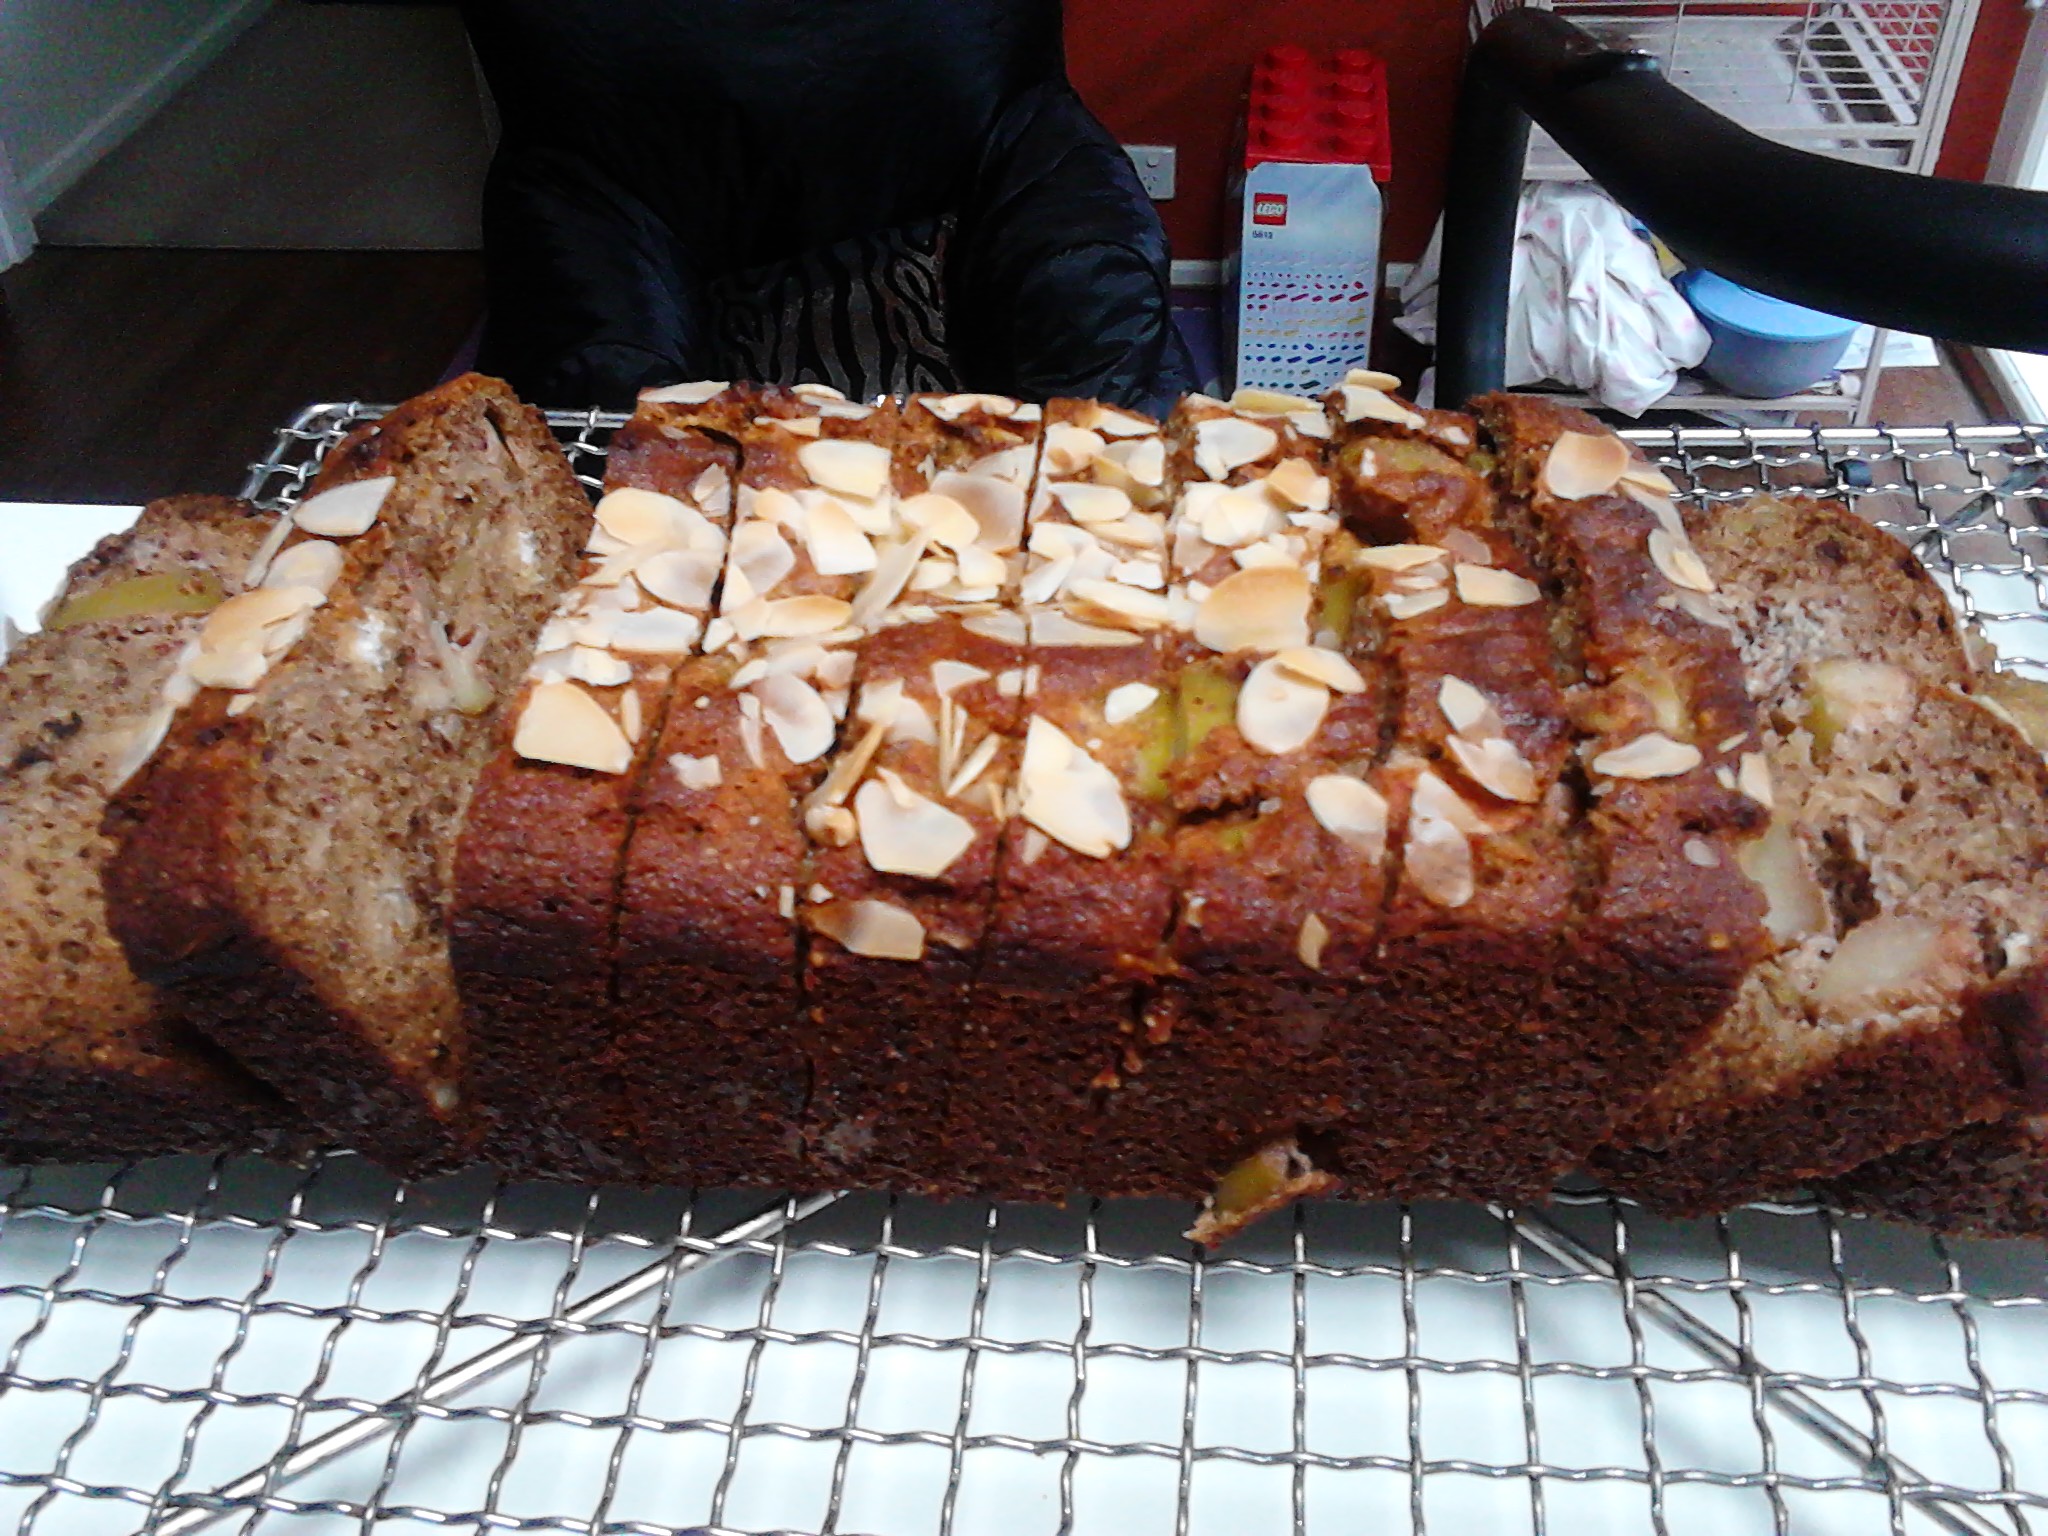
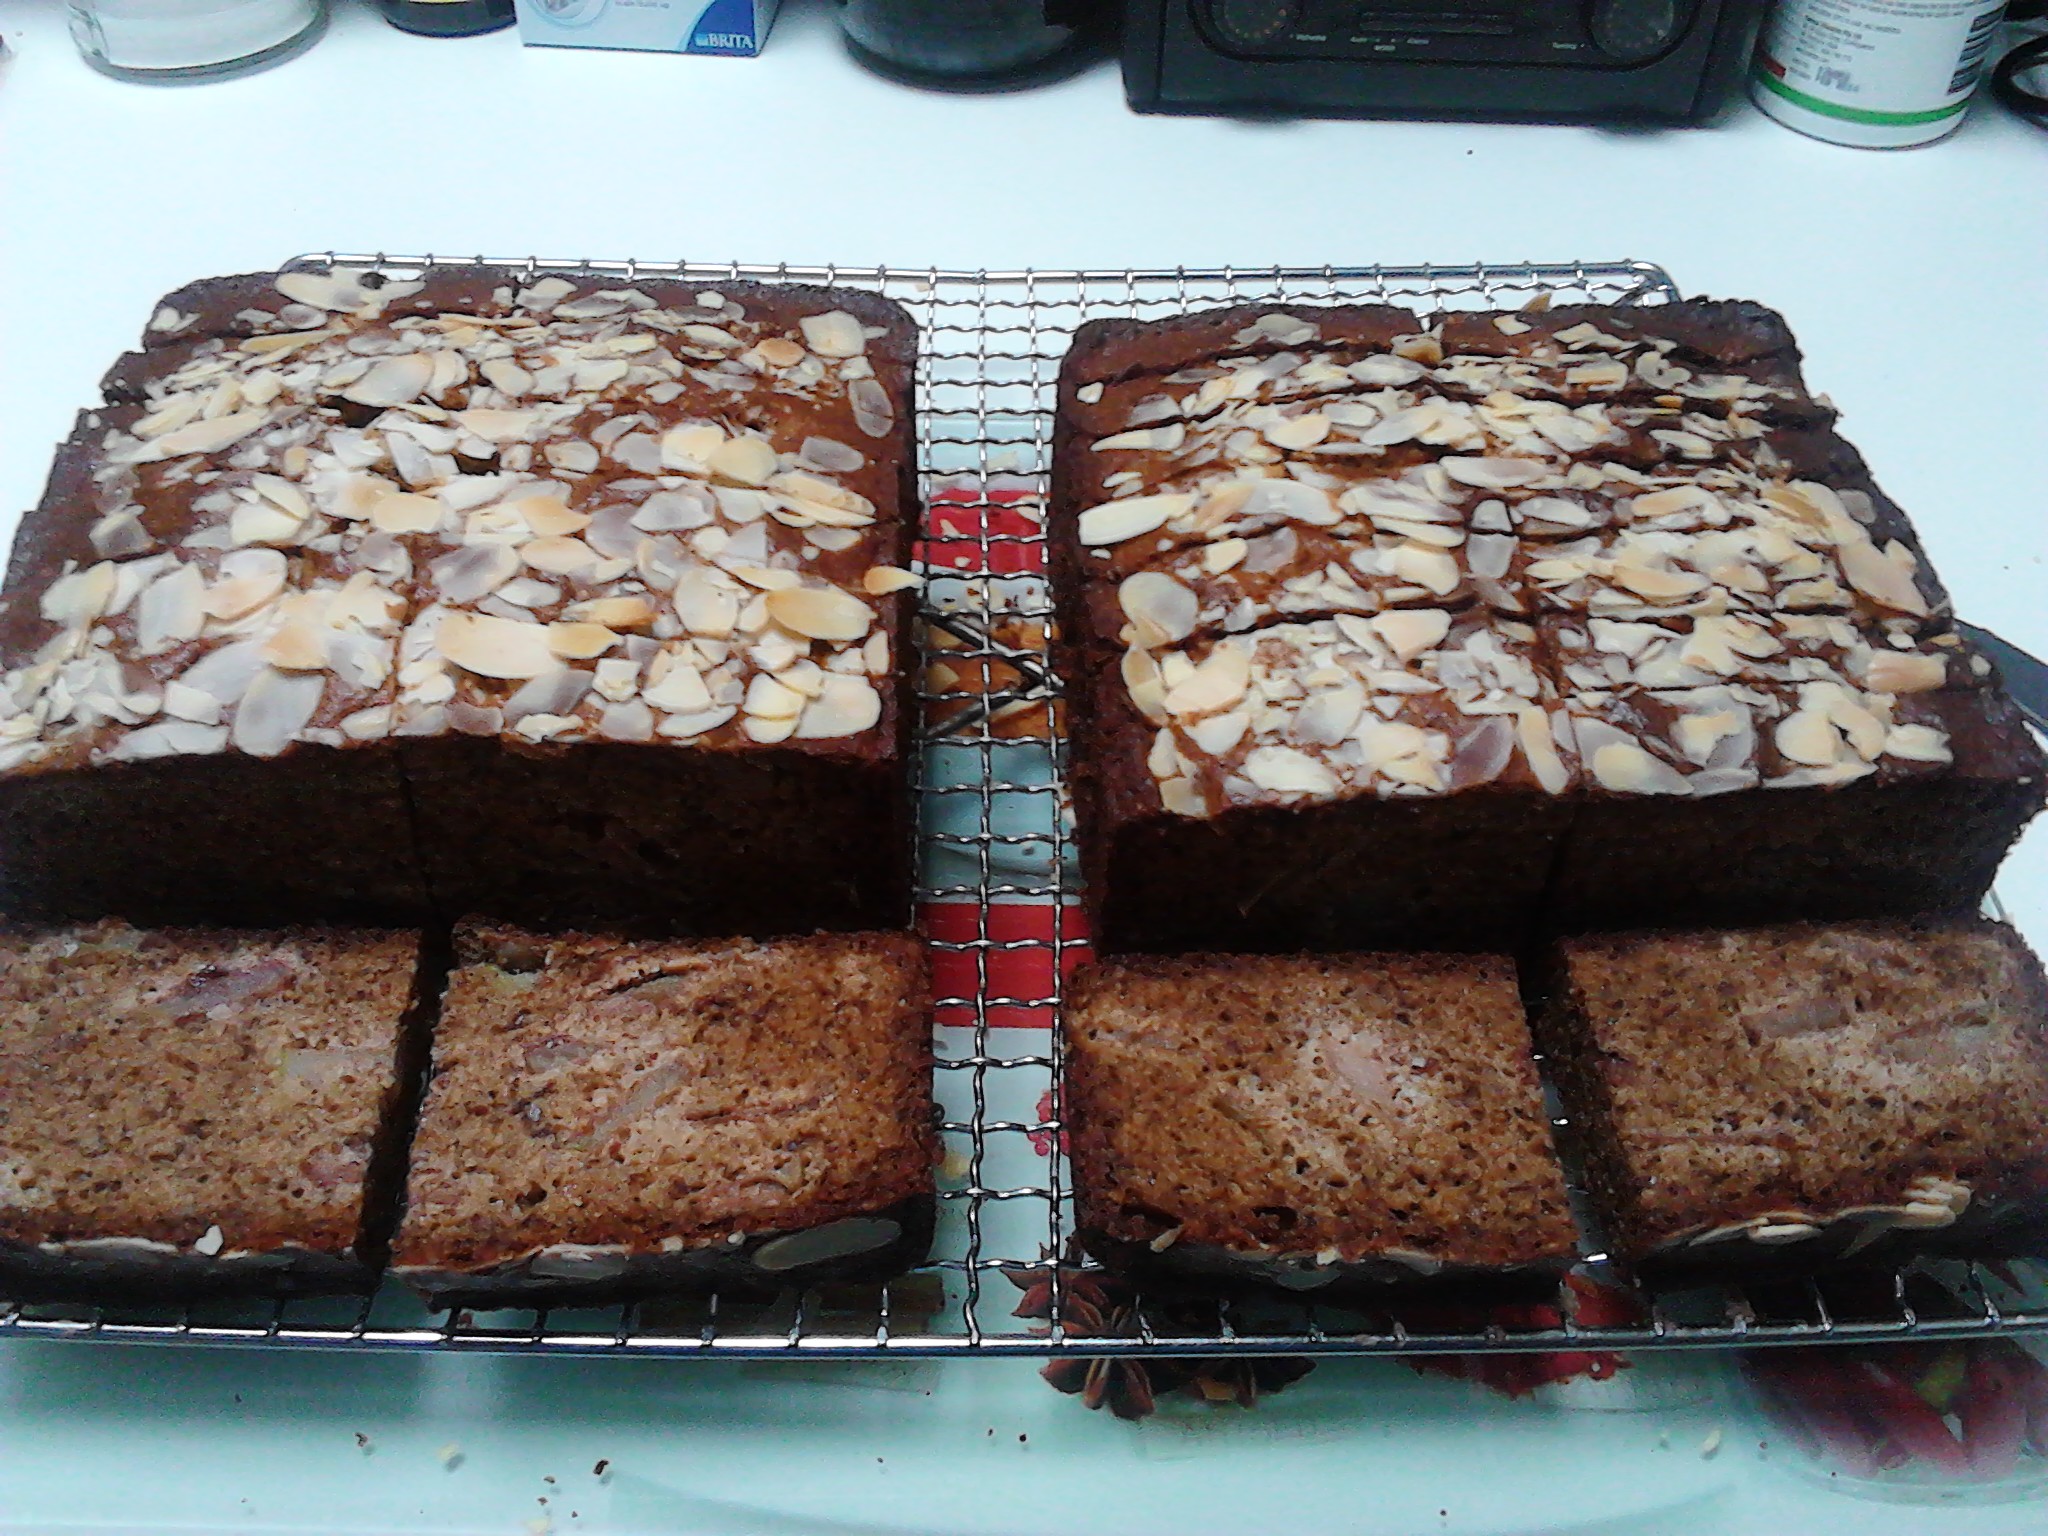
Since l have adopted the Paleo diet this cake has become one of my favourite snacks, being gluten, dairy and processed sugar free.The mix of coconut, cinnamon and apple is really enticing and satisfying. The picture below shows that this cake is very versatile and you can make one cake or easily double the recipe so that one or two can go into the freezer.
Such a delicious gluten and dairy free cake.I made a double recipe and used square tins.A doubled the recipe and made 3 smaller cakes.
A change in thinking:
Most cakes eaten in my life before adopting the Paleo diet had as ingredients butter/margarine, wheat flour, milk and white sugar. Thinking about ways to make a cake that tasted good not using those ingredients has been a challenge but also exciting. This recipe is so flexible and there are other variation on the website such as sweet potato/walnut, banana/coconut, beetroot/pumpkin and banana/coconut/lemon/poppy seed. All of these cakes are so nice and have the same basic ingredients with just a switch in the spice and fruit/vegetable added.
Ingredients:
2 green apples (diced finely or coursely, skin on/off)
2 cups almond meal
1/4 cup organic coconut flour (no need to sift, just squash the lumps))
6 free range eggs (600g or 5 eggs for 700g)
1/4 cup organic coconut oil
1/4 cup raw organic honey
1 teaspoon organic cinnamon
1 teaspoon bicarbonate soda (Bob’s Red Mill Aluminium free ).
Method:
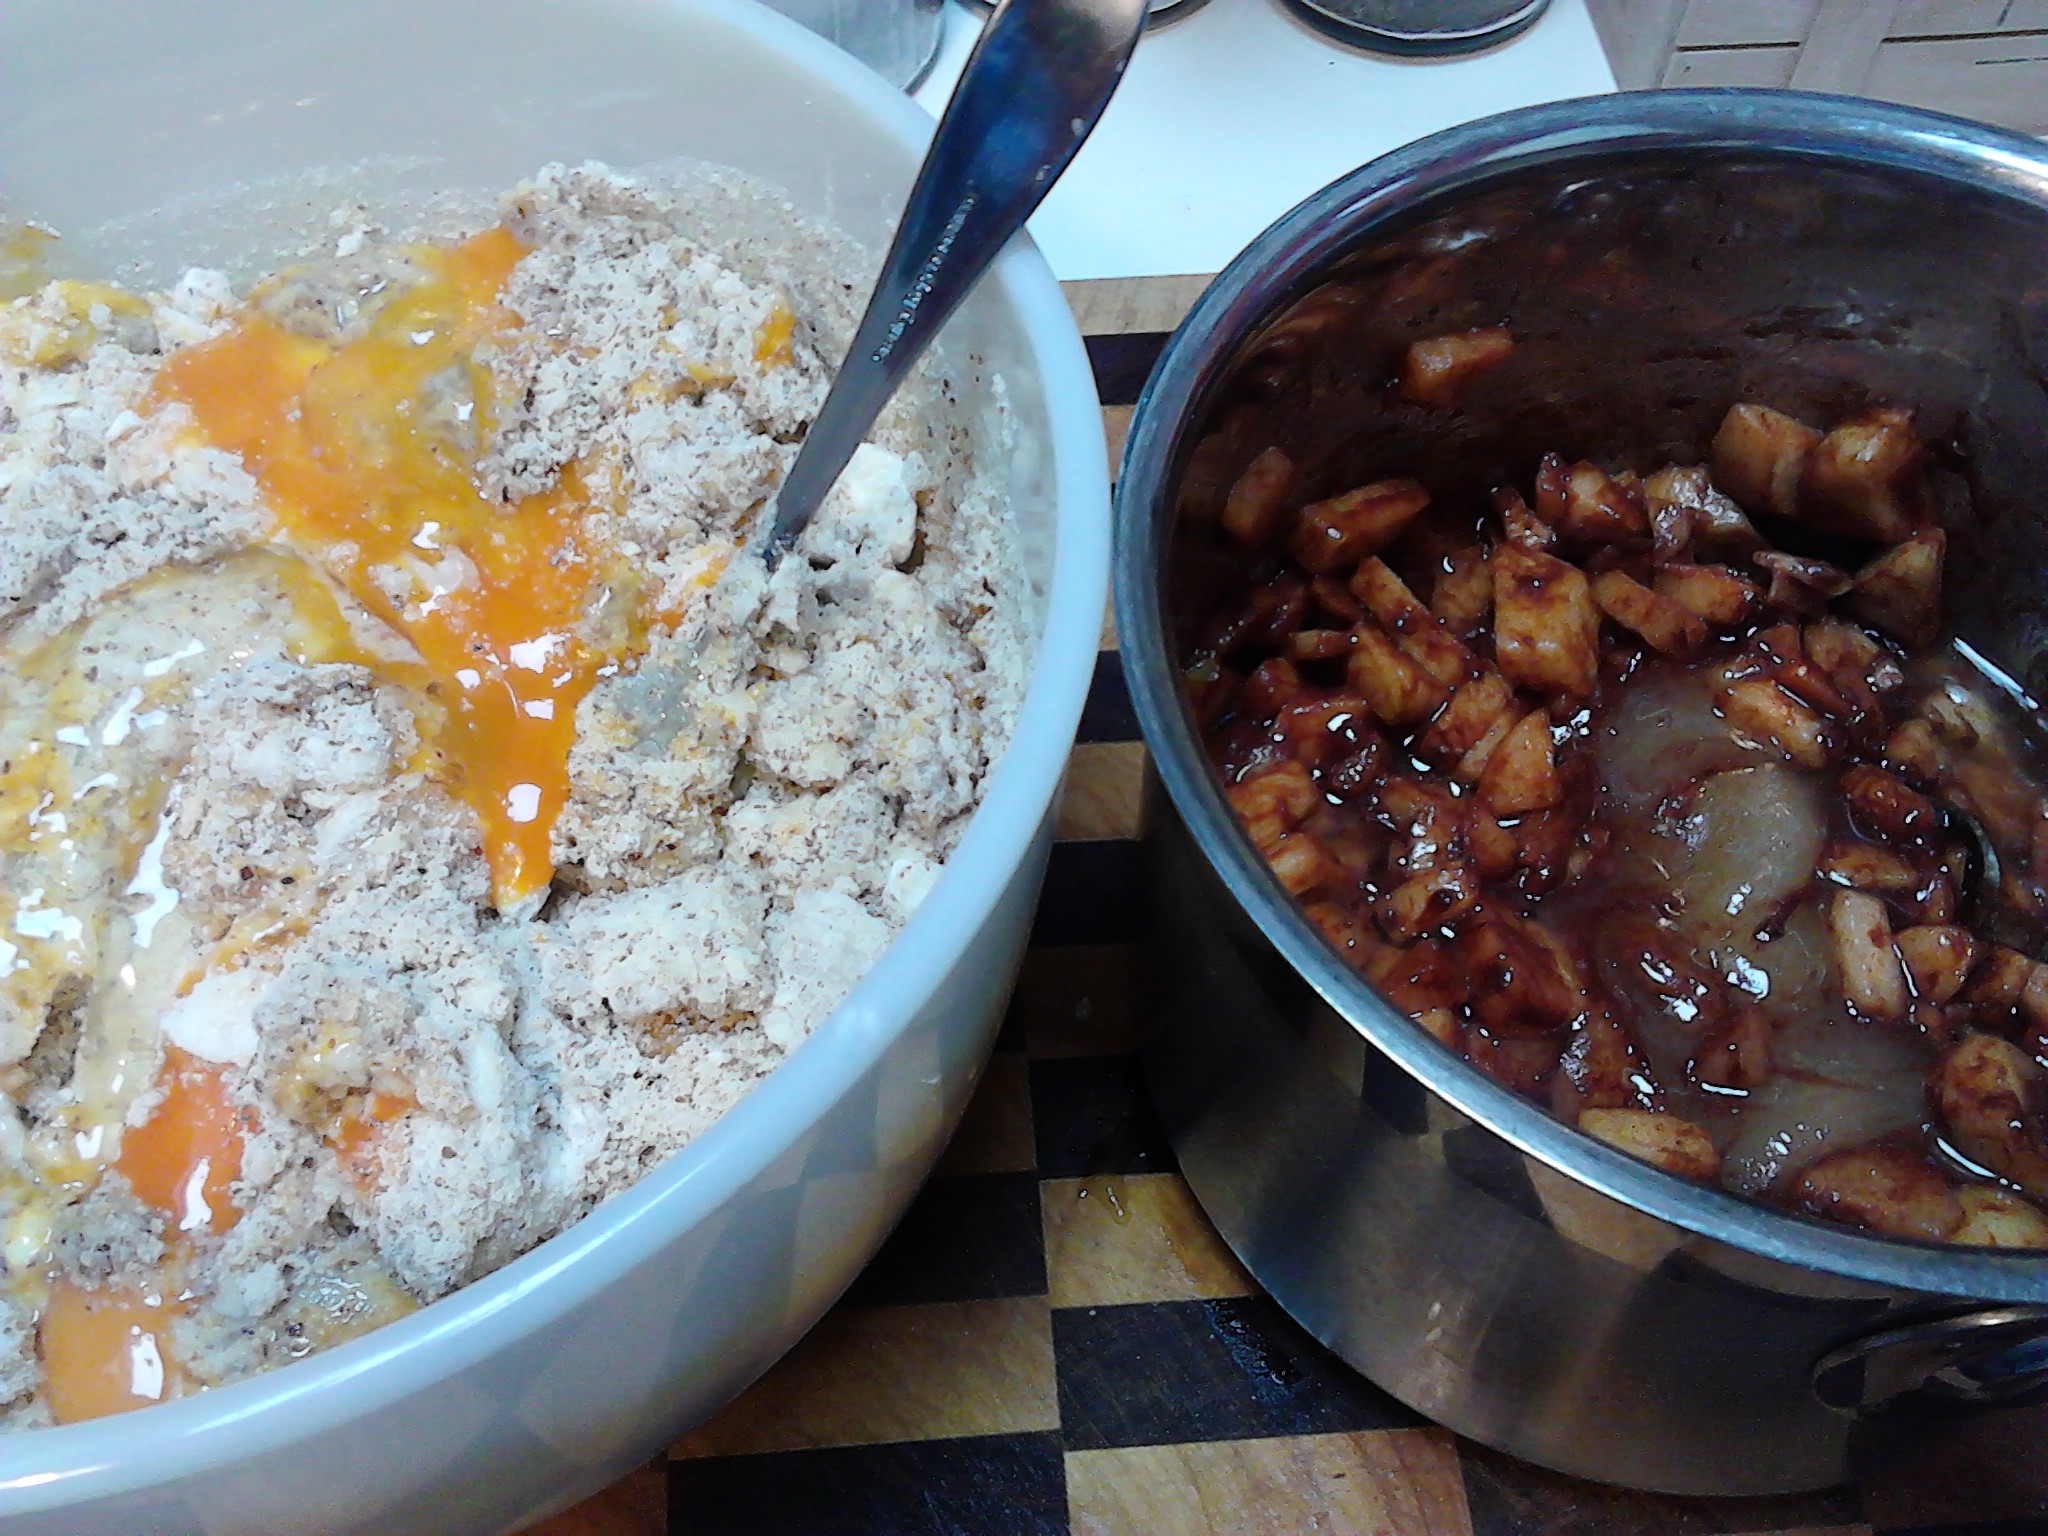
Both sets of ingredients just before mixing them together.
Chop up the apples into small pieces and it is personal preference as to how finely you dice the apples. It is your choice as to whether you leave the skin on or not. The skin will add additional fibre and nutrients, but often there is a wax on the skin which you don’t want to eat. Place the apple in a saucepan with the organic coconut oil and cinnamon and bring to a gentle boil then simmer until the apples are soft. The smell in your kitchen will be amazing. If your honey is solid because the weather is cold you can also add it into the saucepan to melt.
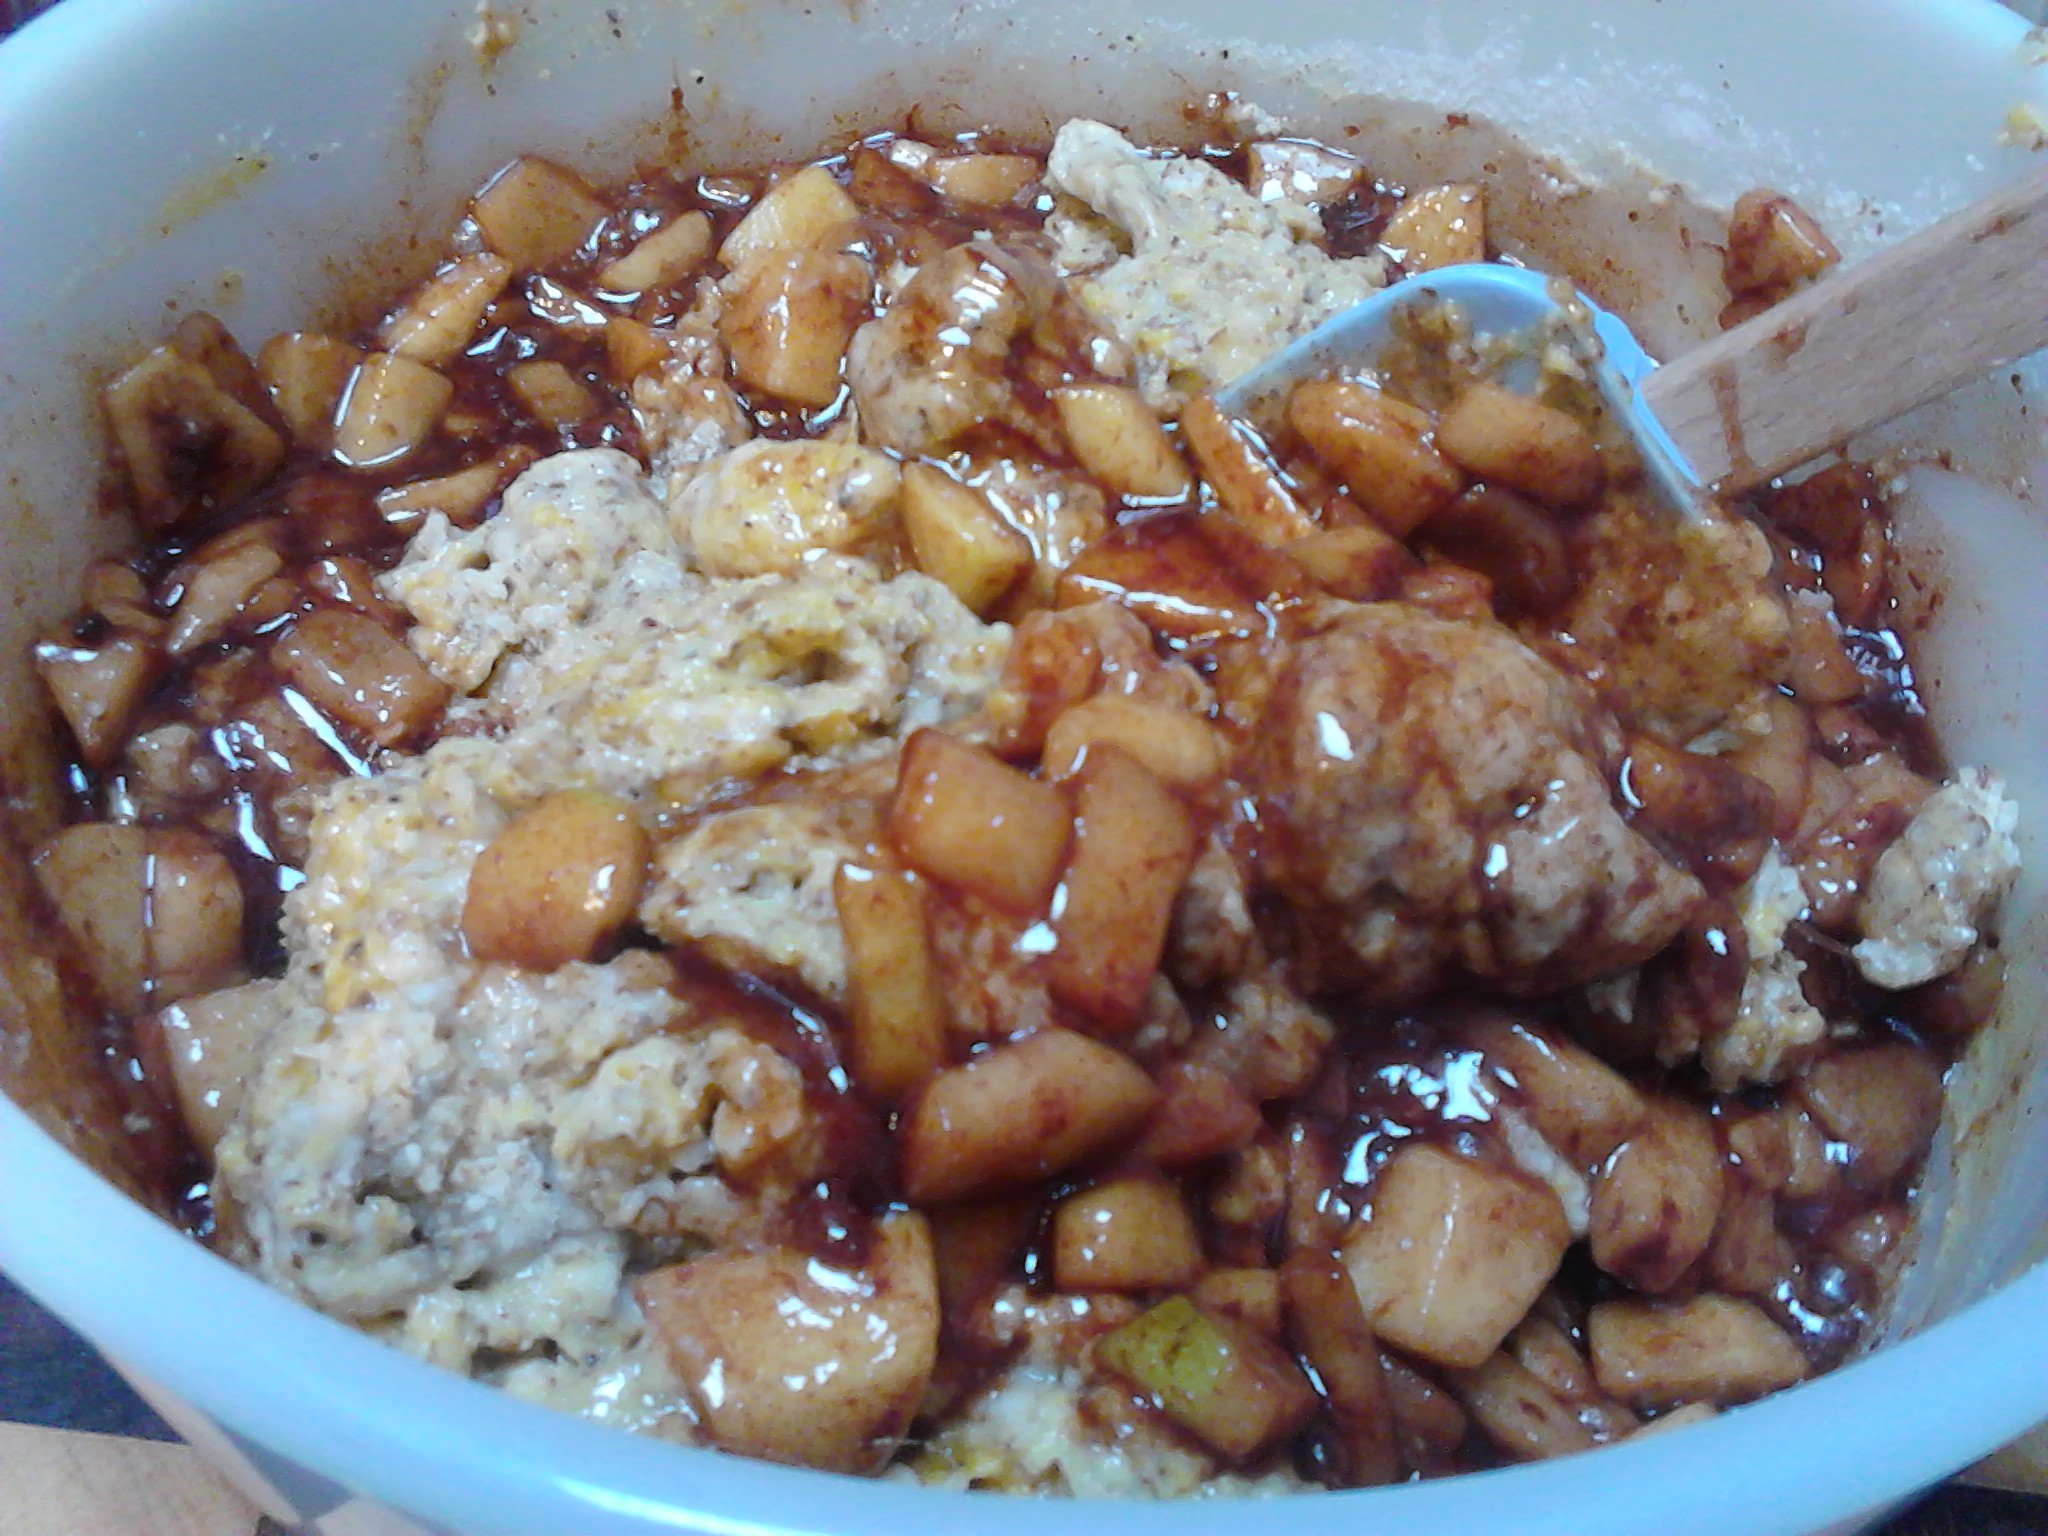
While the saucepan mix is cooling add all of the other ingredients into a bowl, then add the contents of the saucepan to the bowl and mix together gently.
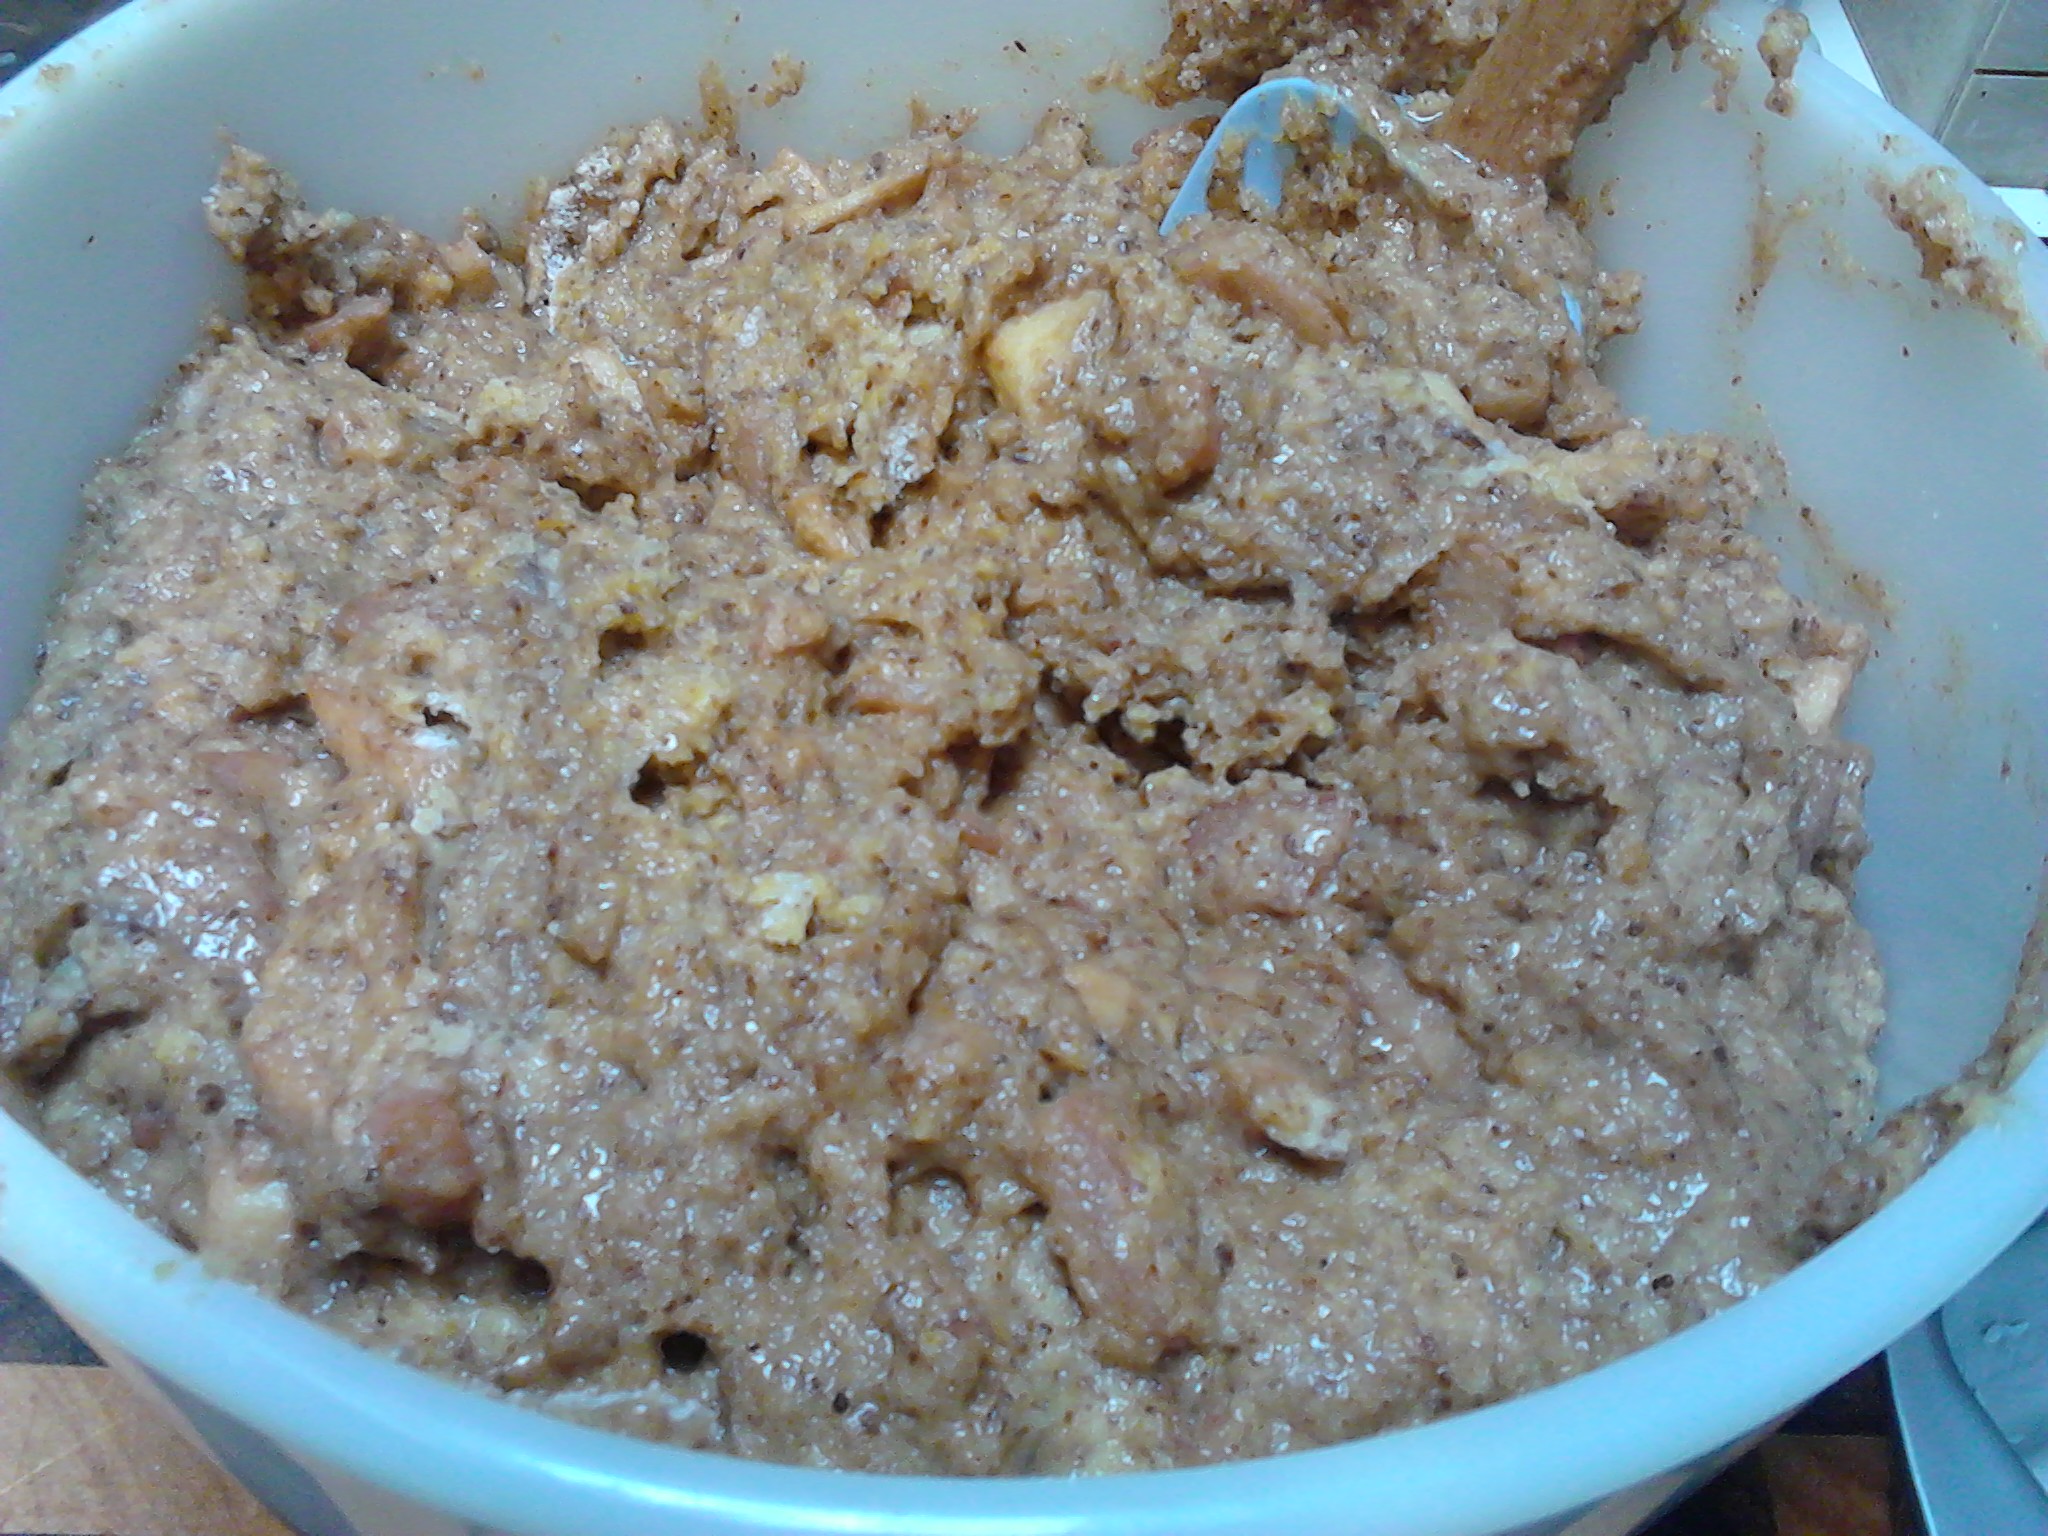
Everything in the one bowl.The mixture after a good stir with a spatula.
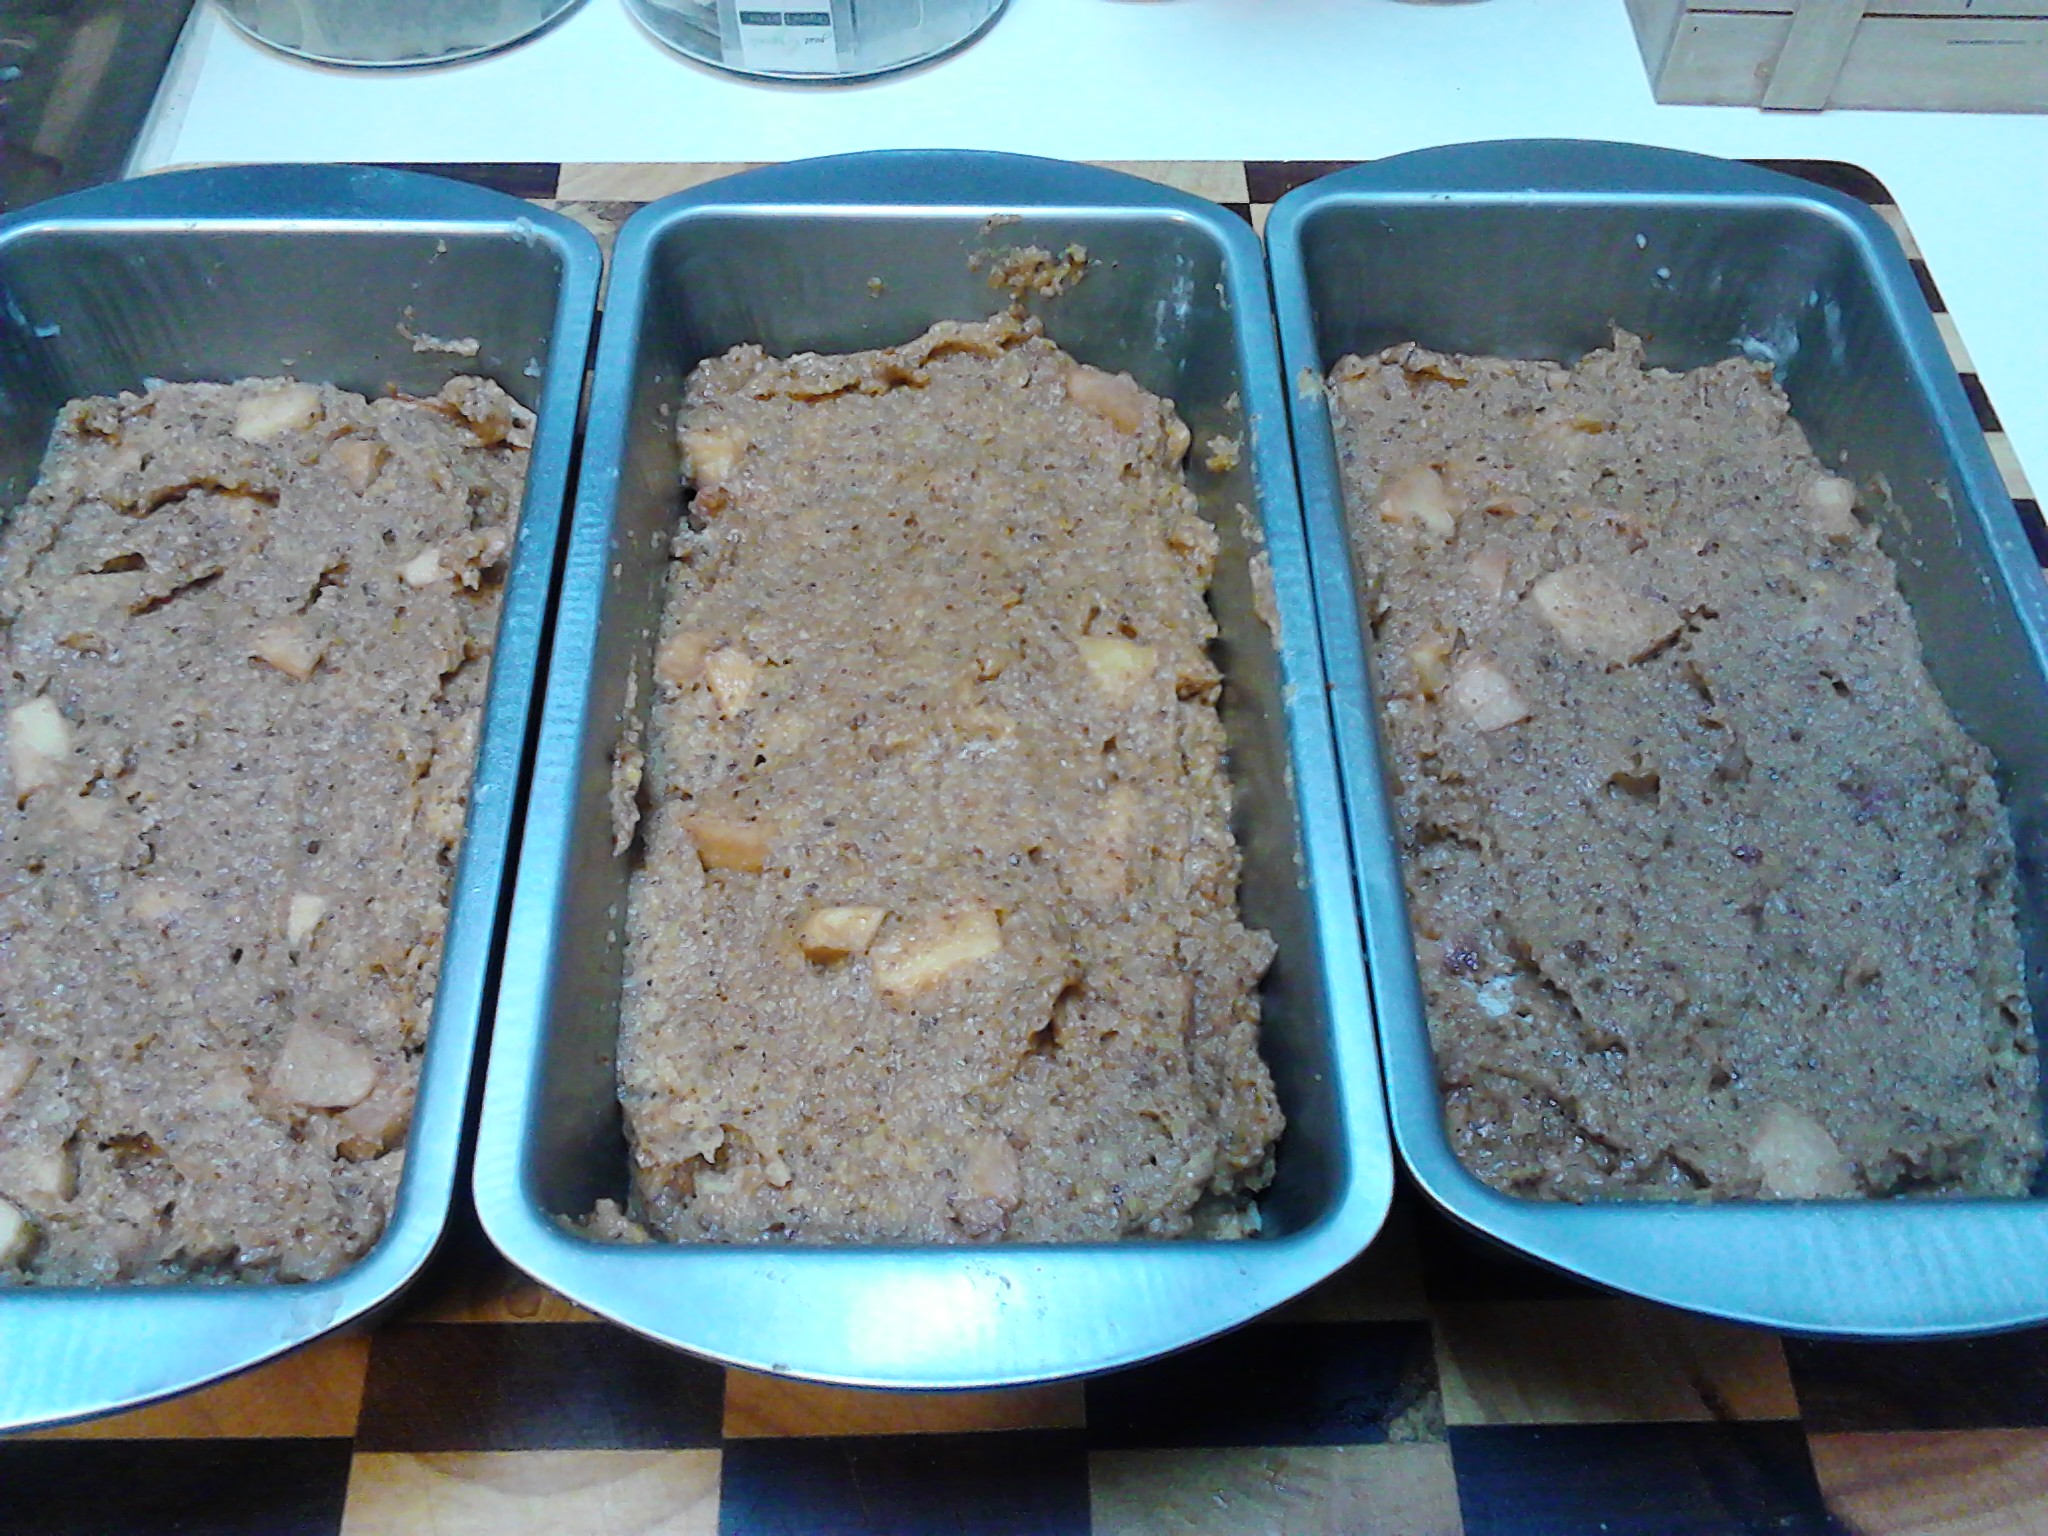
Place mixture in a greased and lined loaf tin or tins depending on whether you doubled the recipe. Sometimes l add flaked almonds to the top of the cake and this is a nice touch. Bake in a 180 degree celsius oven for approximately 40 minutes or until the middle of the cake is firm.
I grease my tins with coconut oil and line with baking paper.I used three smaller tins with double the recipe here. Smooth the top of the mixture with the spatula before placing in the pre-heated oven.
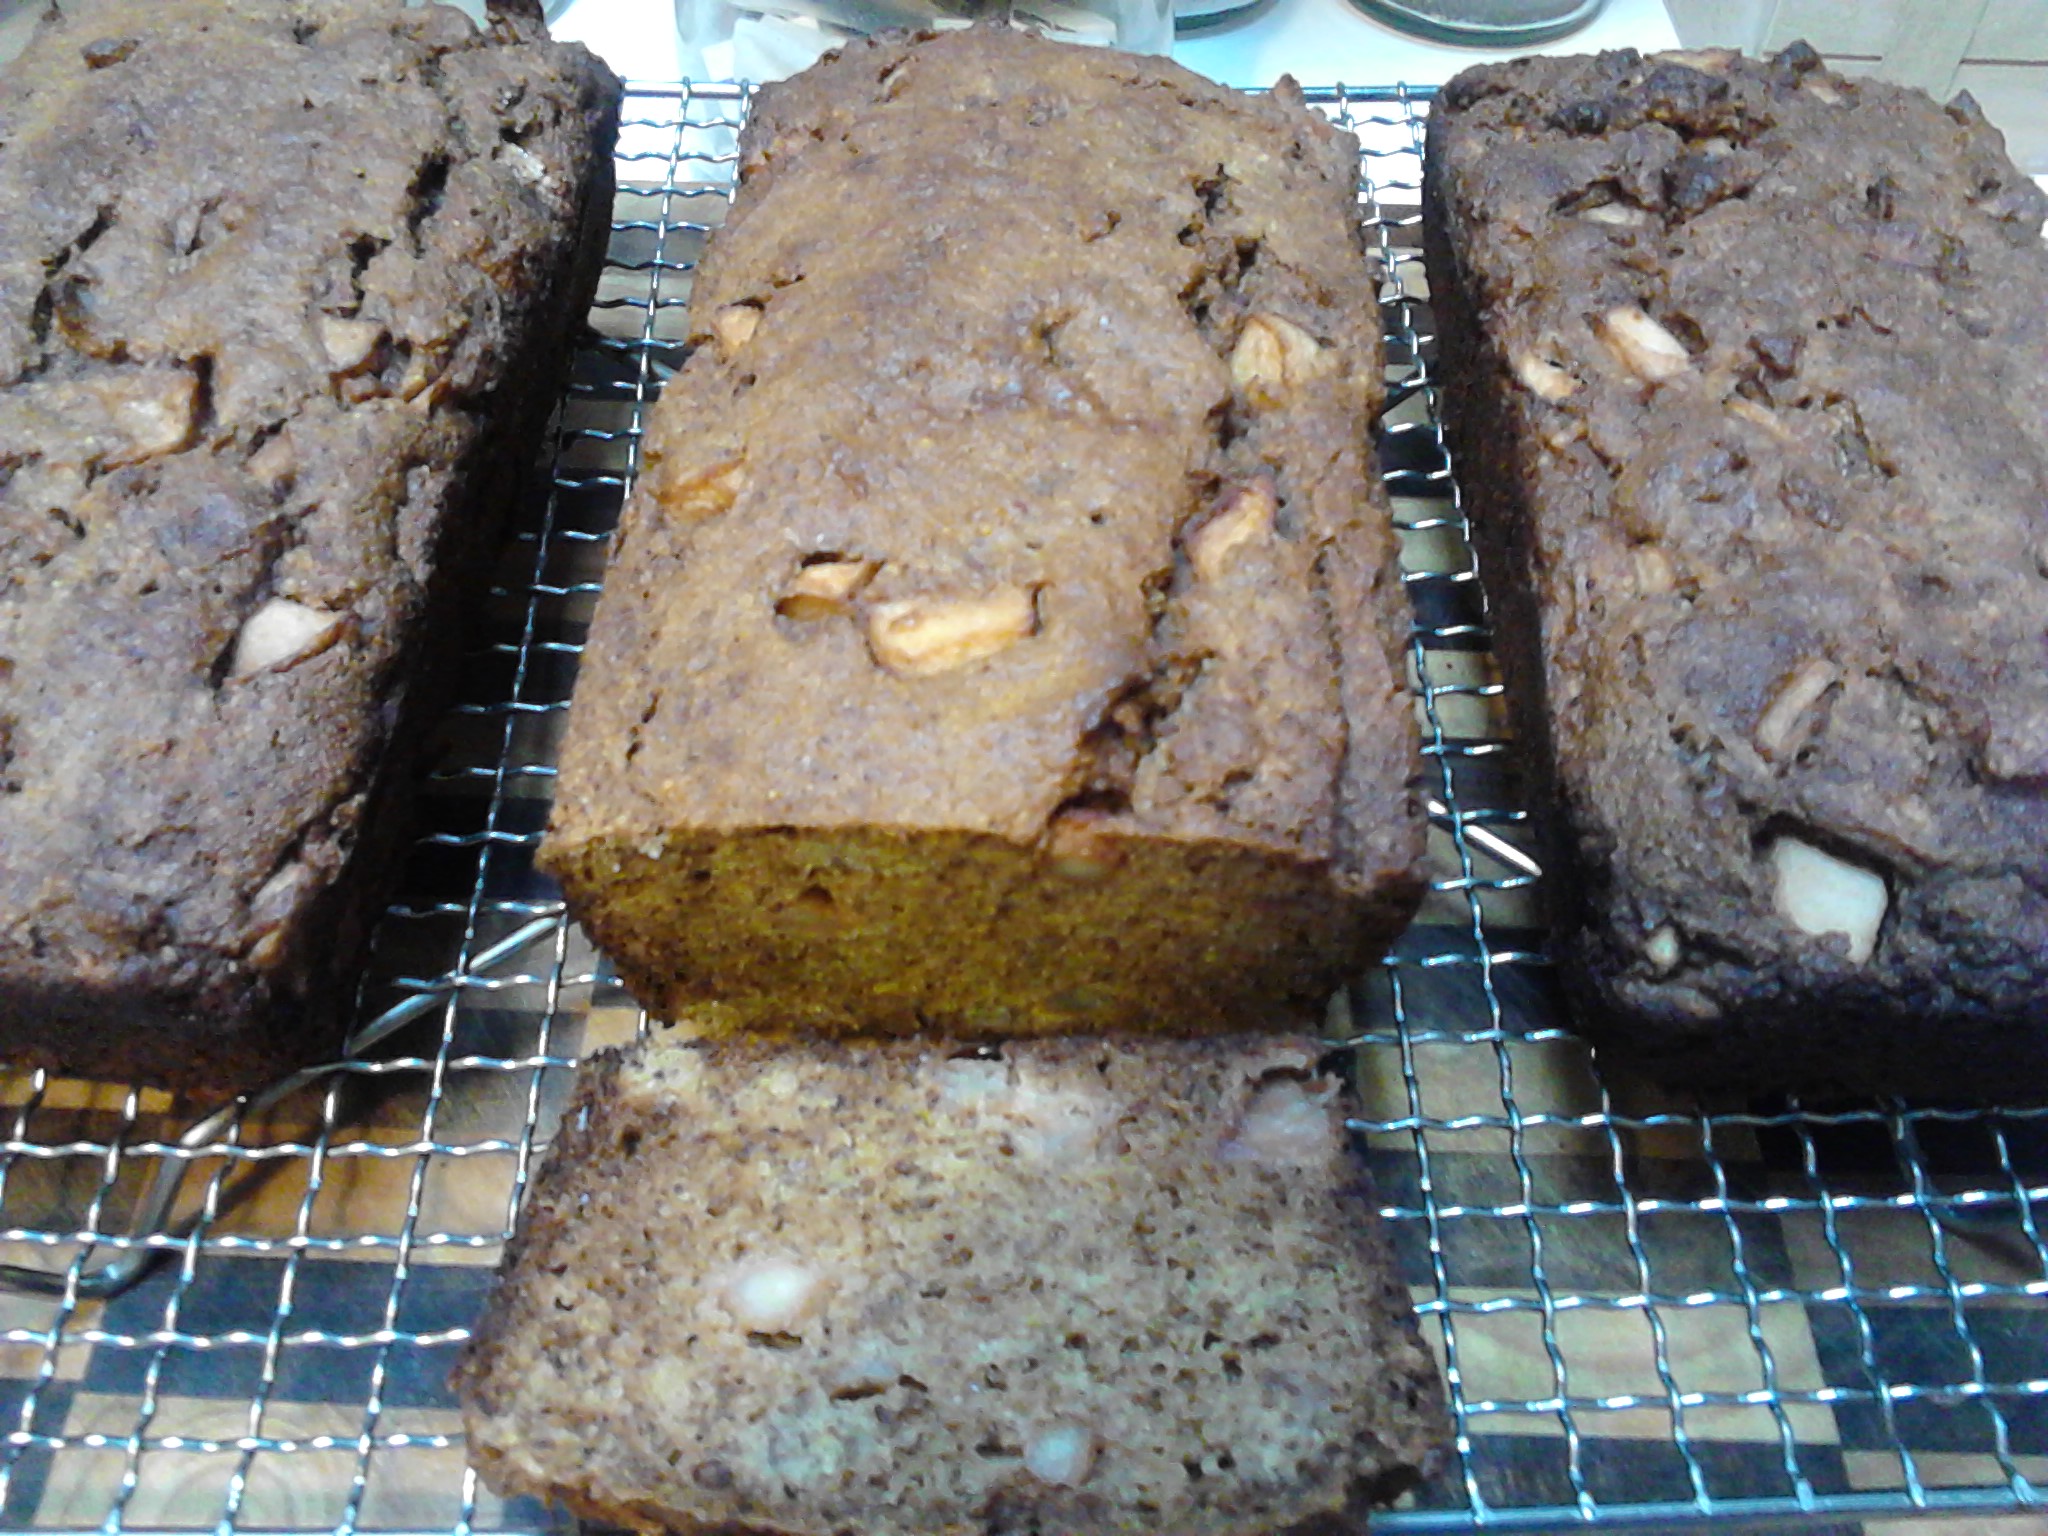
You will know when the cakes are almost done as your house will be smelling amazing. Remove the cakes from the oven and cut around the edges with a knife to gently separate from the tin. Gently turn onto a cooling rack, remove the baking paper and flip over to cool. This is a good time to have a piece as it is so delicious when warm. I use a serrated knife to cut the cake and this works better than a regular sharp knife.
The piece on the end is always the most popular as it is extra crunchy.
Hint:
When cool, l slice this cake into single portions, wrap in glad wrap and freeze. When l am working and pack a lunch l just pop a piece into my lunchbox. Now my husband has realised how delicious it is l make double batches every few weeks to keep up the supply.
What a delightful cake!
If you have enjoyed this recipe please share it with a friend. Please also follow me on Instagram at holistic_paleo.
Live & eat mindfully. Gluten & dairy free recipes.